
Simple & Easy Crochet Puff Flower Pattern for Handmade Accents
Handy idea for instant upgrade, the Free Crochet Puff Flower Pattern gives every piece a trendy, textured look everyone will love.
Finding the perfect little detail to make your crochet projects truly stand out can be a challenge, but the puff flower offers a delightful solution. This charming flower uses the puff stitch to create soft, raised petals that add texture and dimension to any creation. Beginning with a neat magic ring, the pattern combines simple single crochet and puff stitches to build a flower that is both beautiful and beginner-friendly. Whether you want to decorate a scarf, hat, or bag, these puff flowers bring a lovely handmade touch that brightens up your accessories and gifts.
Grateful for Furry Yarn
A big thank you to Furry Yarn for their clear and supportive tutorial that makes learning this pattern easier than ever. Their step-by-step explanations and encouraging style help beginners gain confidence while crocheting. The Furry Yarn channel is a wonderful place that inspires creativity and makes crocheting fun and approachable for everyone.
Unique Crochet Puff Flower Free Pattern Whimsical Home Decor
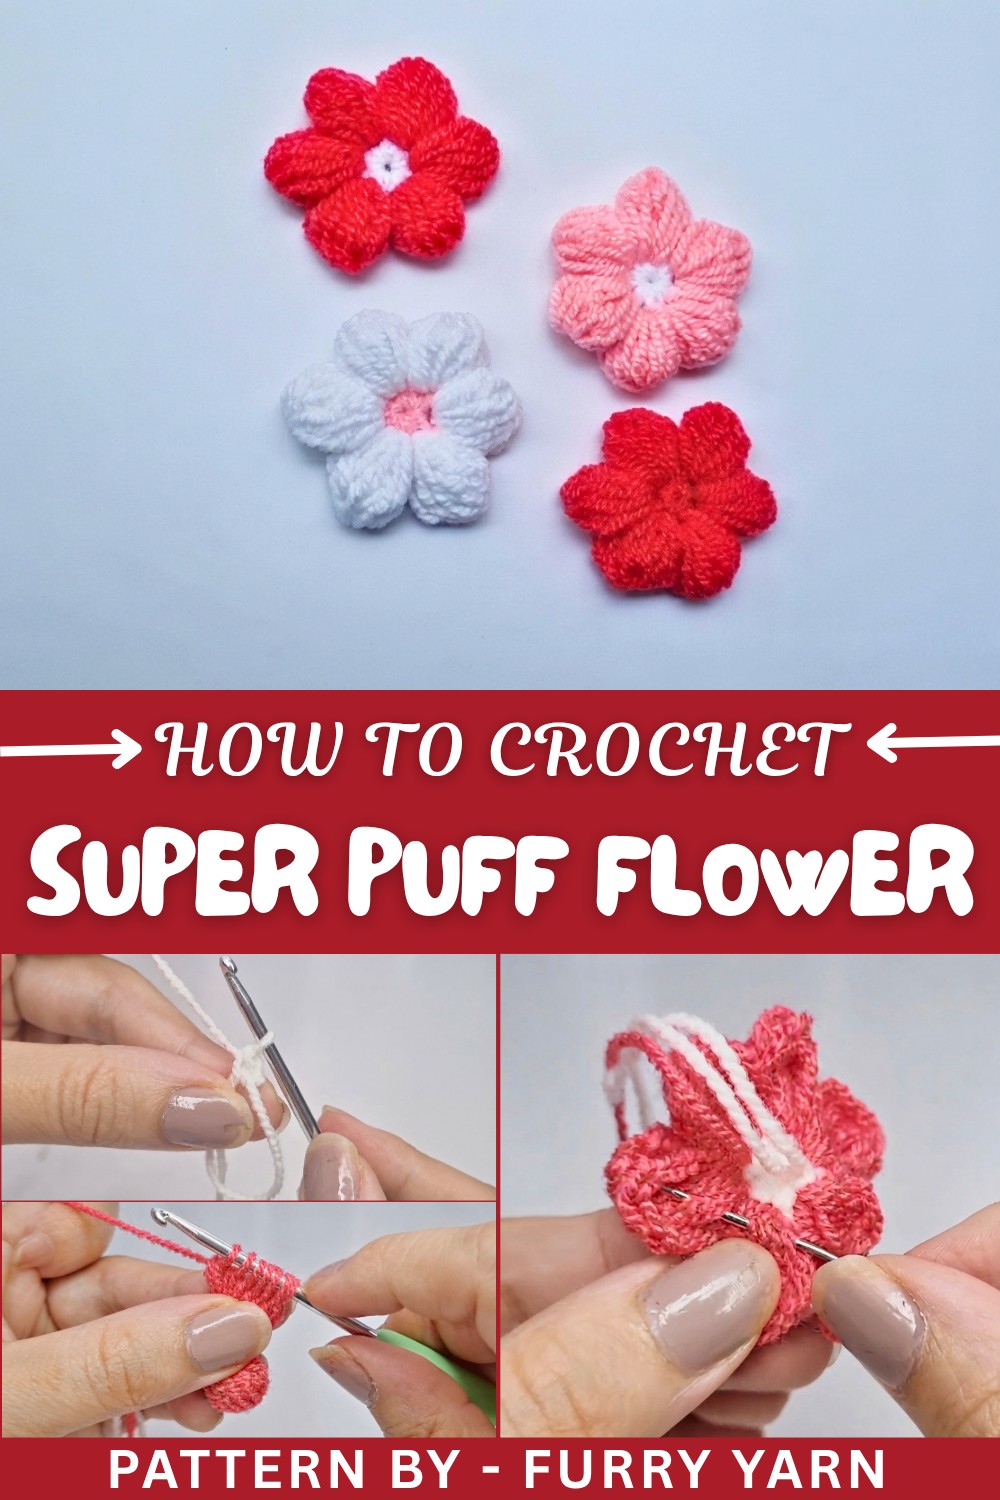
Expanding Your Craft with Puff Flowers
Once comfortable with this pattern, you can get creative by making a cluster of puff flowers for vibrant home décor or unique accessories. These flowers work great as appliques on blankets, cushions, and clothing too. Playing with colors and sizes allows you to customize your handmade pieces for any season or special occasion, turning simple stitches into eye-catching works of art.
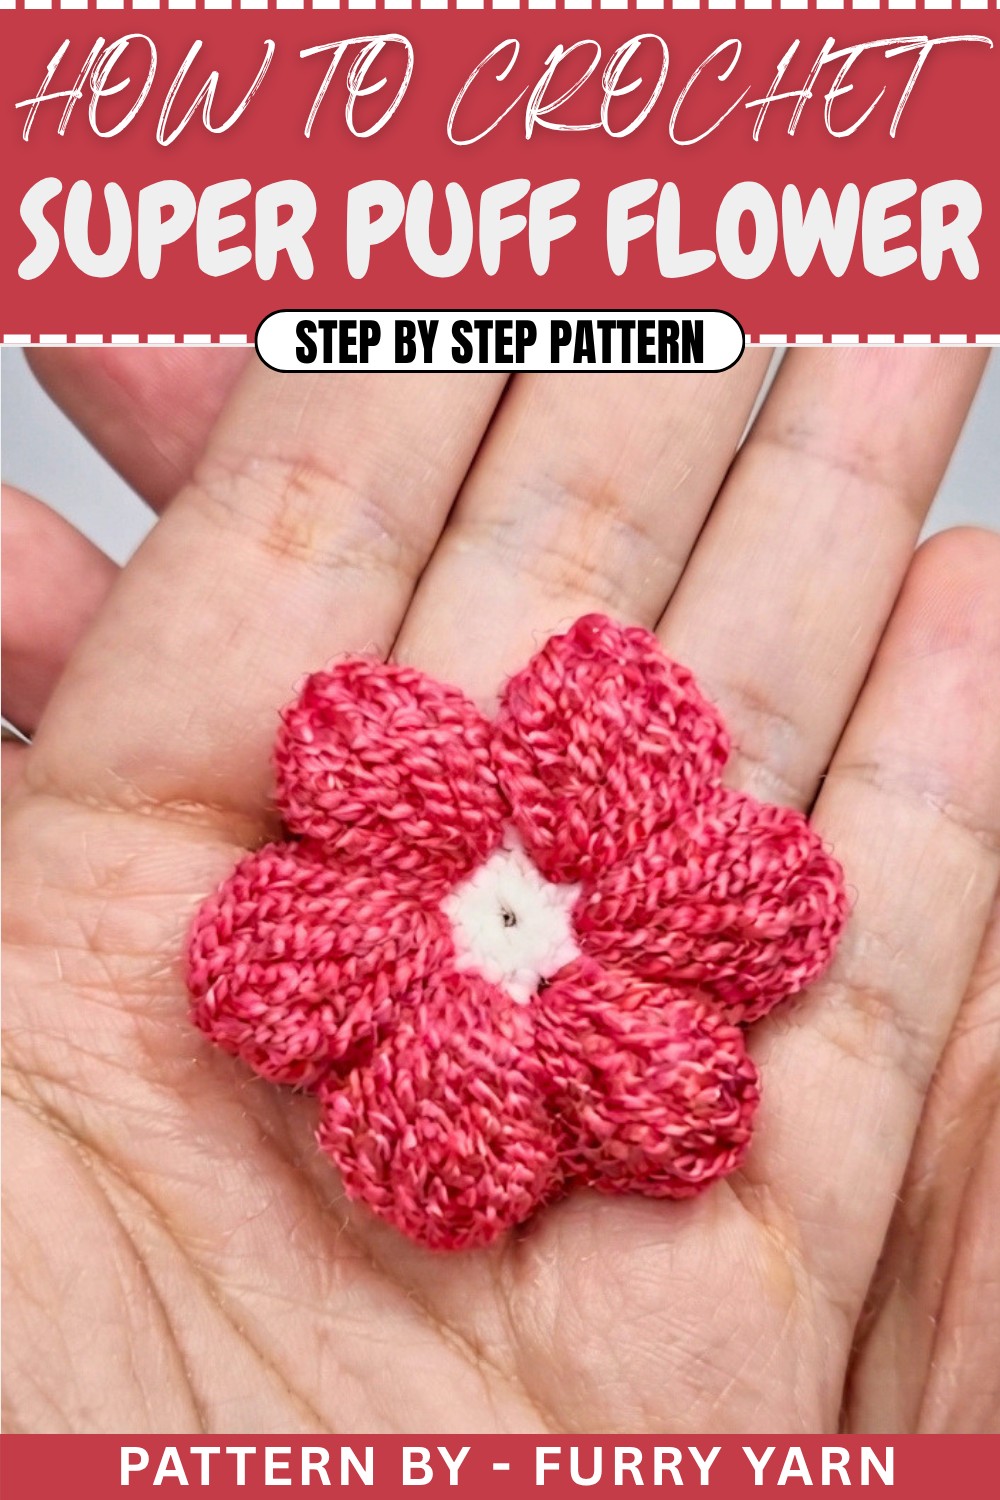
Crochet Pattern: Puff Flower
Uses of This Pattern
Crochet puff flowers are small, versatile, and eye-catching embellishments. They can be used in a variety of creative ways, such as attaching to bags, hairbands, or scarves, or as motifs in larger projects like blankets, cushions, and wall hangings. Their texture and voluminous design provide a unique visual appeal perfect for DIY crafts and gifts.
Skill Level & Terminology
- Skill Level: Beginner to Intermediate. This is a great pattern for practicing the puff stitch and working in rounds.
- Terminology: This pattern uses US crochet terms.
Materials & Tools
- Yarn: Medium-weight yarn (category 4) in two contrasting colors.
- Crochet Hook: 3 mm crochet hook. Choose a hook size that suits your yarn for a firm shape.
- Scissors: For cutting yarn neatly.
- Tapestry Needle: For weaving in yarn ends.
Gauge
Gauge is not critical for this project, as puff flowers are non-size-limited embellishments. Feel free to experiment with tension or yarn thickness to adjust the size.
Abbreviations List
Below is a helpful list of abbreviations used in this pattern:
- ch: Chain
- sc: Single Crochet
- st: Stitch
- sl st: Slip Stitch
- yo: Yarn Over
- puff st: Puff Stitch
Special Stitch Instructions
Magic Ring:
- Form a loop with your yarn, leaving a long tail. Insert the hook into the center of the loop, yo, pull through. Secure by chaining one stitch. Work into the adjustable ring, which can be cinched closed for a neat, circular foundation.
Puff Stitch:
- A puff stitch is formed by gathering loops into one cluster for added texture.
- Yo, insert your hook into the stitch, yo, pull up a loop (pulling loops tall for puff effect). Repeat this six times.
- You'll have seven loops on your hook. Yo, pull through all loops to complete the stitch.
Finished Size
The puff flower measures approximately 3–3.5 inches in diameter, depending on yarn weight and hook size.
What You'll Learn from This Pattern
This pattern is an excellent opportunity to learn:
- Magic Ring Method, which is foundational in circular crochet motifs.
- Puff Stitches, which create textured and dimensional designs.
- Working in Rounds, often used for floral or circular shapes.
- Changing Colors, allowing you to seamlessly introduce new yarn for dimension and detail.
Puff Flower Crochet Pattern
Part 1: Creating the Base Round
- Magic Ring Foundation:
- Form a magic ring: Wrap the yarn around your fingers, insert the hook into the loop, yo, pull through, and secure with ch 1.
- Round 1:
- Work 6 sc into the magic ring:
- Insert hook into the ring, yo, pull up a loop, yo, pull through two loops.
- Pull the yarn tail to cinch the ring closed tightly.
- Work 6 sc into the magic ring:
- Join the Round:
- Insert your hook into the first sc, yo and pull through both loops to make a sl st.
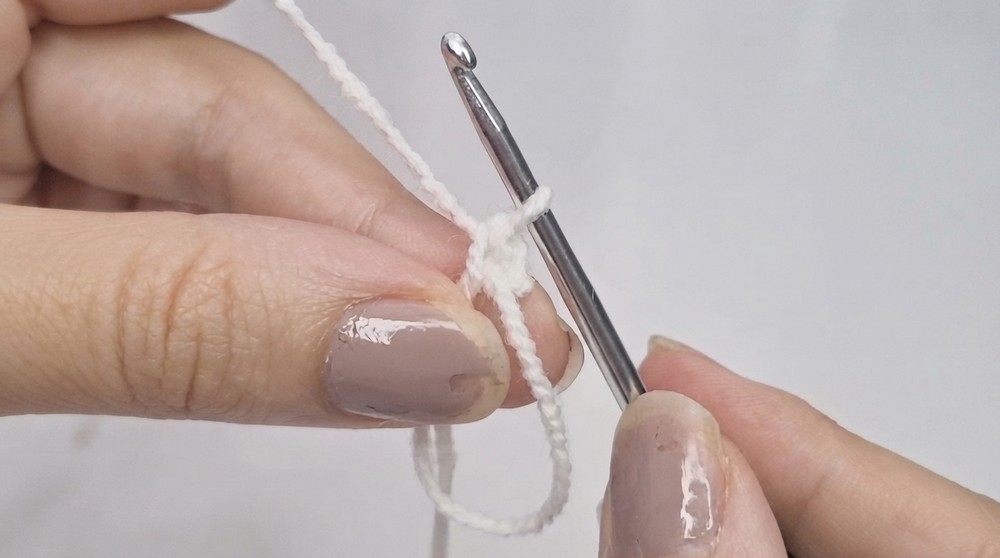
For beginners: If the magic ring is difficult, you can start with a chain loop (e.g., chain 4, join to create a circle). Work your stitches into this loop instead.
Part 2: Changing the Yarn Color and Starting the Petals
- Attach New Yarn Color:
- Insert your hook into any stitch from Round 1. Add the second yarn color by pulling it through (yo, pull through), and secure it with ch 3.
- Begin the Puff Stitch:
- In the same stitch where you joined the new yarn:
- Yo, insert your hook, yo, pull up a loop. Repeat this six times.
- By the end, you’ll have seven loops on your hook.
- Yo and pull through all seven loops.
- In the same stitch where you joined the new yarn:
- Secure the Puff Stitch:
- Ch 3, then make a sl st into the next stitch from the base round.
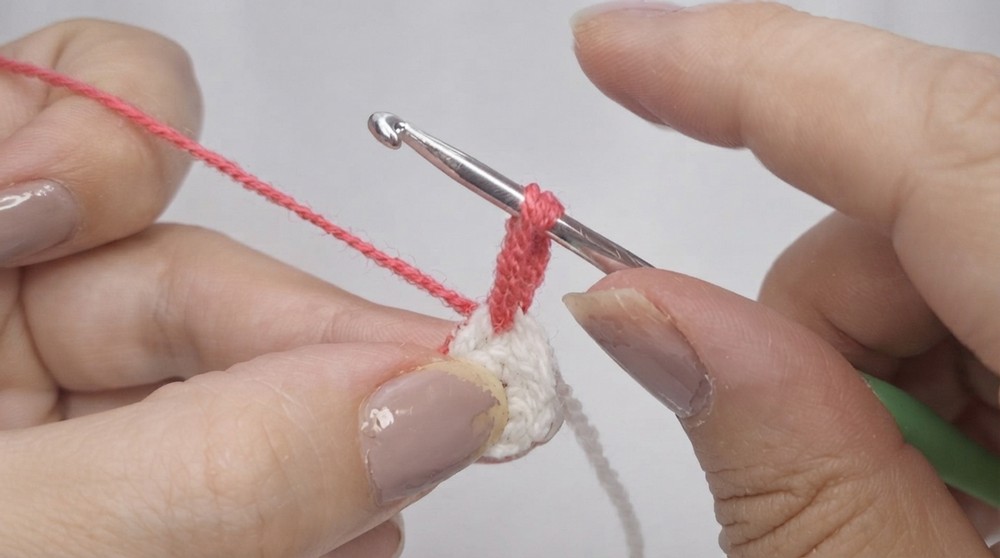
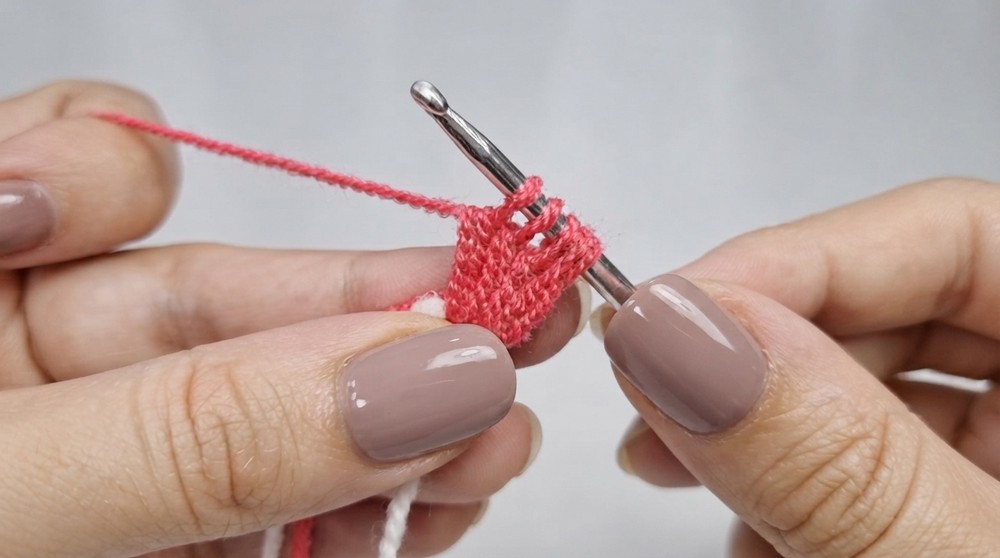
At this point, the first petal of the puff flower is complete, and you can shape it slightly with your fingers to make the puff fuller if needed.
Part 3: Creating More Petals
- Repeat Puff Stitch for All Petals:
- Ch 3, move to the next stitch, and start the puff stitch sequence:
- Yo, insert your hook into the stitch, yo, pull up a loop. Repeat until you have seven loops.
- Yo, pull through all seven loops.
- Ch 3, then make a sl st into the next stitch to secure the petal.
- Ch 3, move to the next stitch, and start the puff stitch sequence:
- Complete the Sequence:
- Work the puff stitch sequence in all six stitches from the base round.
- Join the Round:
- Insert your hook back into the first stitch where you began the round, make a sl st, and secure the yarn.
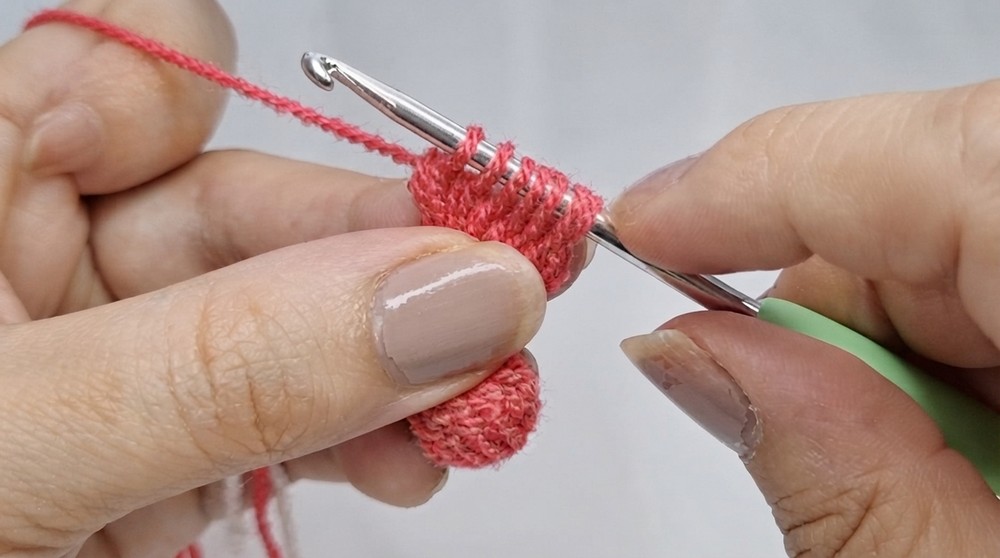
At this point, you should have six evenly spaced puff petals forming the shape of your flower.
Part 4: Finishing Touches
- Shape the Flower:
- Flatten and adjust the petals with your fingers for a fuller shape.
- Fasten Off:
- Ch 1, cut the yarn using scissors, and tie the end securely.
- Weave Loose Ends:
- Turn the flower over, and use a tapestry needle to weave the loose yarn ends into the back of the stitches for a neat finish.
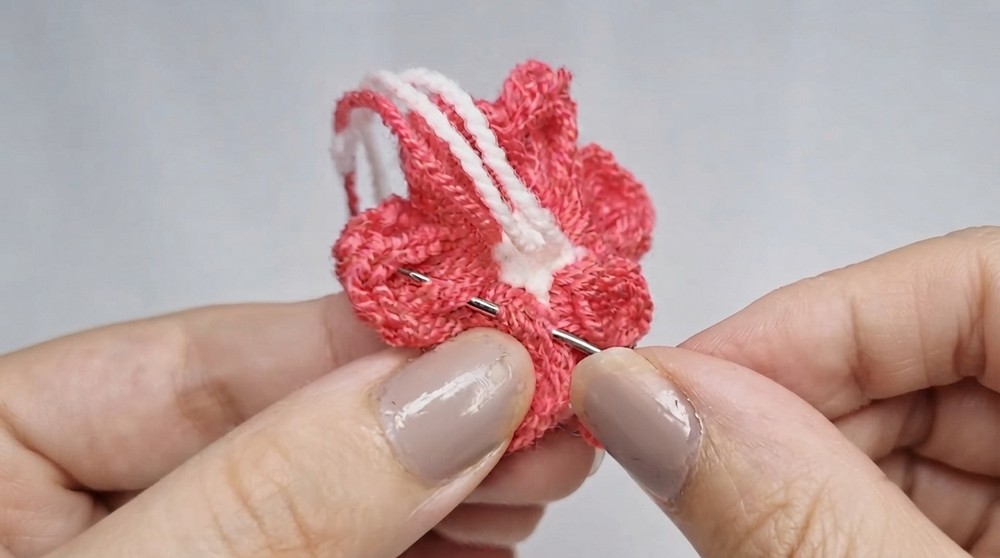
Assembly & Finishing
If you’re attaching this puff flower to another project (such as a bag or scarf), carefully sew the back of the flower to the chosen surface using a matching yarn and a tapestry needle. If you’re using it as a standalone applique, block it to ensure it lies flat.
Why I Love This Pattern
This puff flower pattern is a fun and relaxing way to master circular crochet, puff stitches, and color changes. It produces satisfying results quickly, and its versatility means you can incorporate it into various projects. The texture of the petals gives the finished piece a professional and decorative look.
Potential Difficulties & Solutions
1. Difficulty with the Magic Ring:
Beginners may find it hard to close the magic ring neatly. As an alternative, create a chain loop (e.g., chain 4 and join into a circle) instead of the magic ring for your base stitches.
2. Puff Stitch Troubles:
If your puff stitches don’t look full, ensure you’re pulling the loops up tall while making each “yarn over and pull through” for the puff stitch. Tight tension can make this tricky, so relax your grip slightly.
3. Uneven Petals:
If petals appear uneven, ensure you’re spacing them correctly by working one puff stitch per stitch and counting each loop carefully during the puff stitch sequence.
Final Thoughts
This crochet puff flower pattern combines simplicity with elegance, making it ideal for beginners wanting to try textured stitches or experienced crocheters looking for a quick decorative project. The flowers are perfect for breathing life into other items or as standalone embellishments.