
How to Easily Crochet Floral Drawstring Pouch Pattern in No Time
Enjoy the Free Crochet Floral Drawstring Pouch Pattern, making organization easy and adding a pretty touch to your everyday accessories.
Crocheting a handmade pouch full of floral charm is such a rewarding experience. This project uses soft yarn and familiar crochet stitches like double crochet, half double crochet, and cluster stitches to create a delicate yet functional drawstring bag. Beginning with a magic ring, you’ll work in rounds to shape the pouch and add beautiful flower and leaf details with simple, repetitive stitch patterns that are easy to follow, even if you’re just starting out.
Guidance for Crocheting a Floral Drawstring Pouch Pattern for All Levels
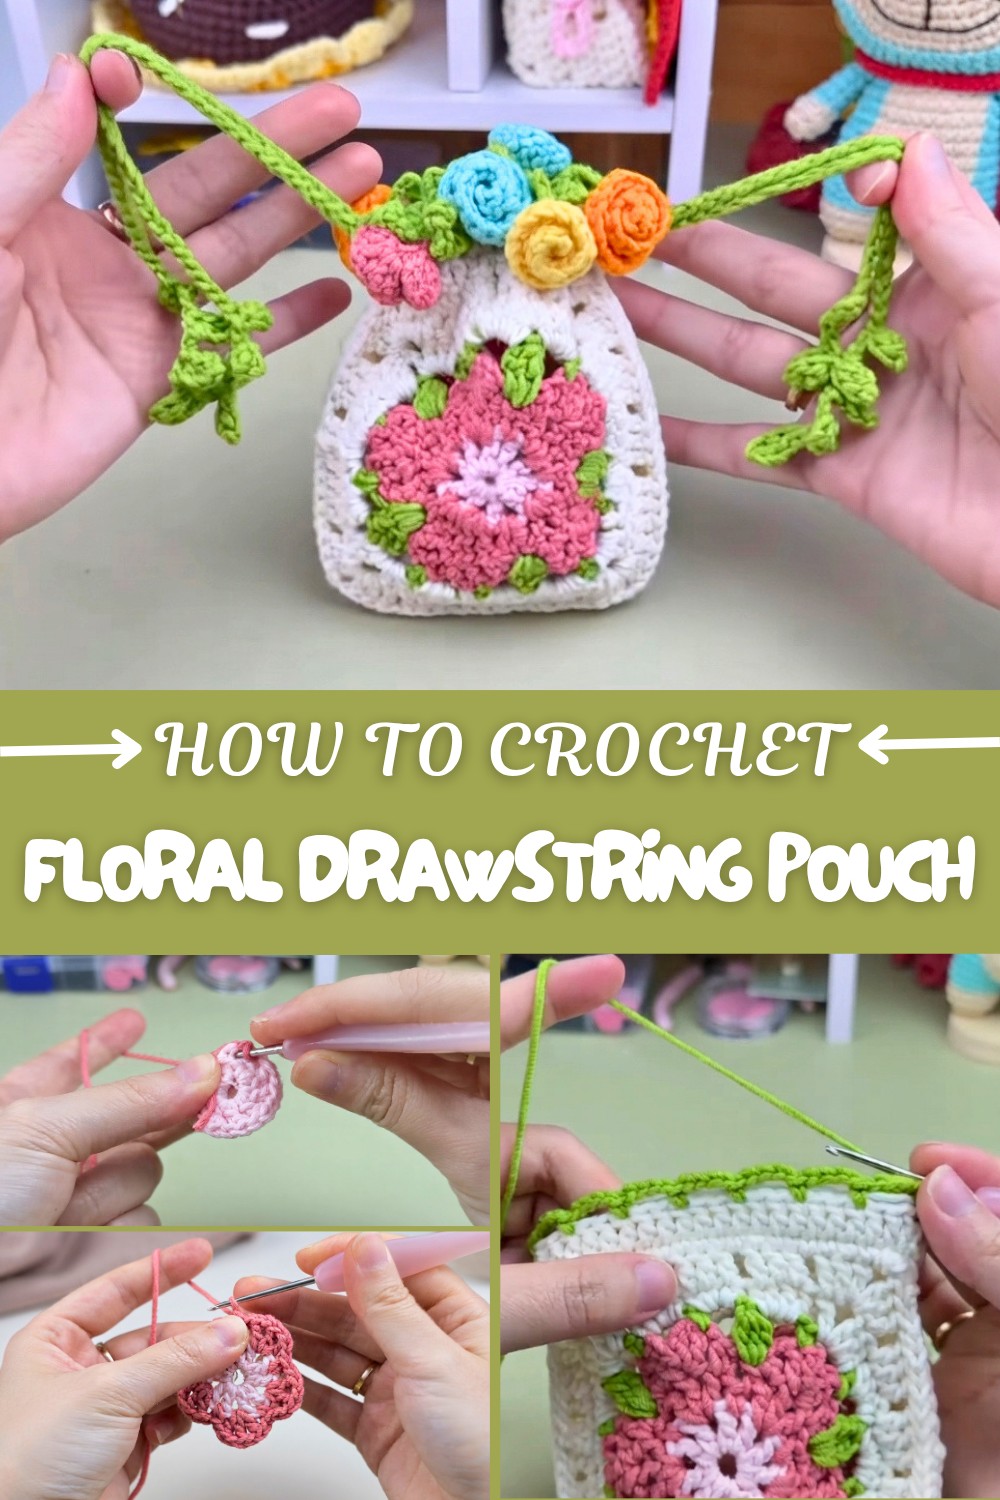
The pattern’s mix of textures and colors brings a fresh, nature-inspired feel to the pouch. Its practical drawstring closure makes it ideal for holding small essentials like lip balm, earbuds, or makeup items. Plus, crocheting these flowers and leaves not only enhances the pouch’s beauty but also helps develop your skills in joining pieces together and working with chain spaces. Learning this pattern means focusing on key techniques such as cluster stitches, slip stitching to join, and alternating chains to create openwork, which are great for building your crochet confidence. These skills form the foundation for many other delightful crochet projects.
With the techniques practiced here, you can easily branch out to make other charming creations. Think about crocheting pretty coasters, light shawls, or decorative appliques to personalize your bags, hats, or blankets. This project opens up exciting possibilities to explore your creativity while mastering stitches that bring both function and beauty to your handmade items.
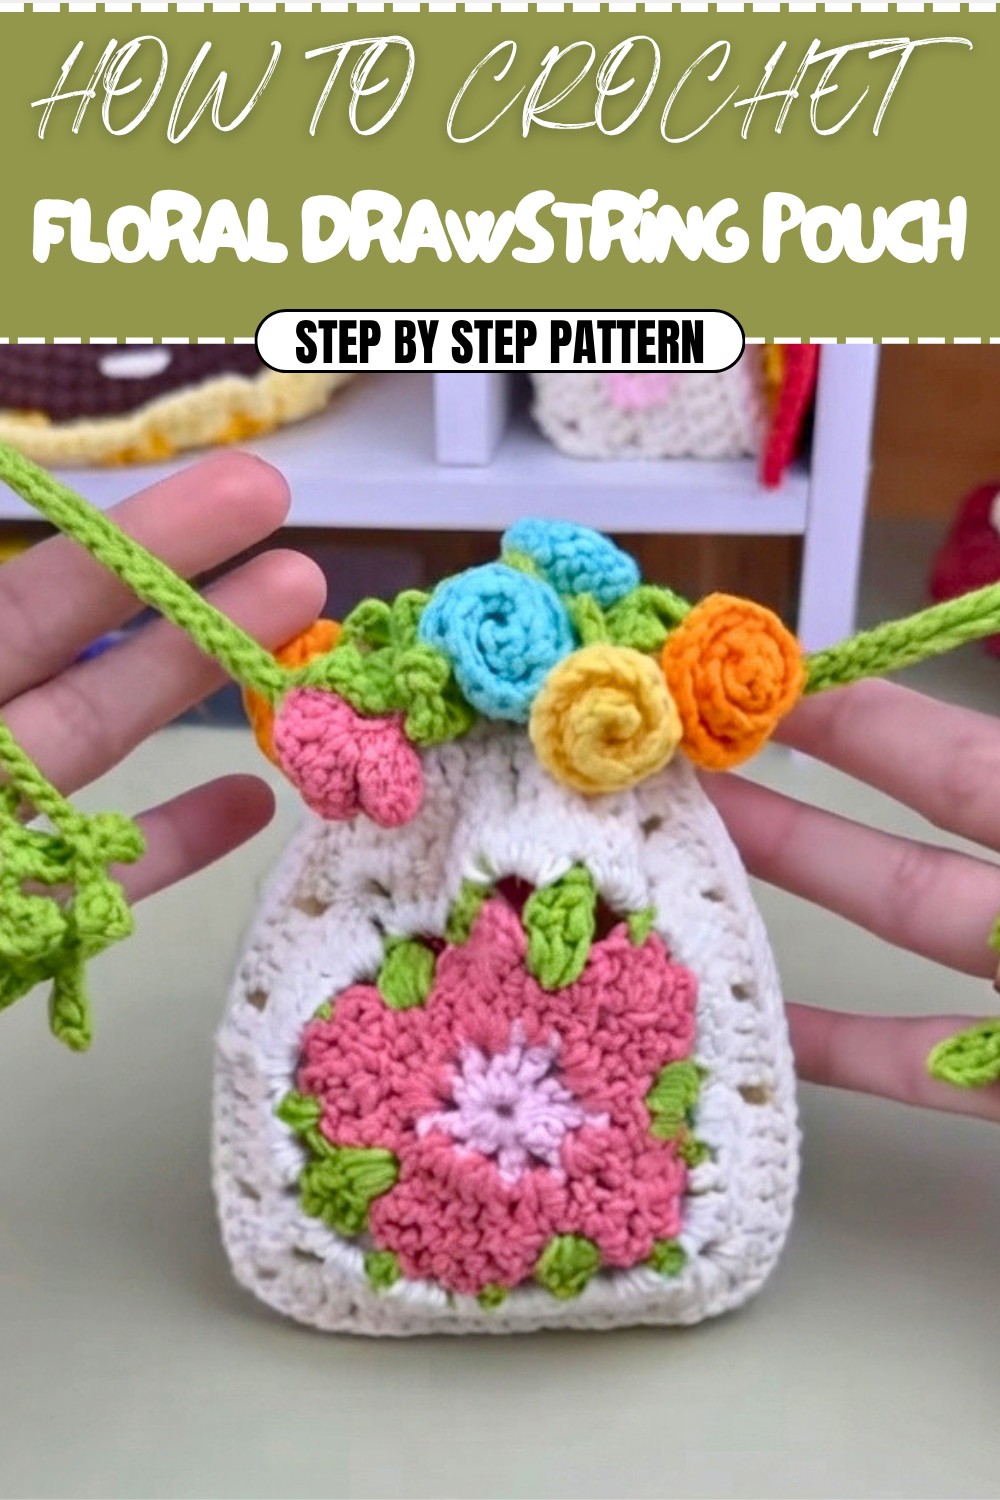
Drawstring Flower Bag Crochet Pattern
A classy and versatile accessory, the Drawstring Flower Bag is perfect for storing essentials like makeup or small gadgets! This step-by-step crochet pattern guides you through crocheting a charming, floral-themed bag with practical drawstring functionality. Whether you’re an advanced crochet artist or just diving into the world of stitching, this project combines beauty and utility.
What You’ll Learn From This Pattern
Upon completing this project, you'll enhance the following skills:
- Cluster stitch mastery: Form decorative stitches for an intricate look.
- Bag assembly: Combine panels effectively for structured designs.
- Adding decorative elements: Experiment with floral motifs and drawstring accents.
Skill Level & Terminology
Skill Level:
Intermediate - Utilizes basic stitches such as single crochet (sc), double crochet (dc), slip stitch (sl st), chain (ch), as well as decorative elements and clusters for flair.
Crochet Terminology:
This pattern uses US terminology.
Materials & Tools
- Yarn:
– Cotton yarn in 3 preferred colors: Base color, a slightly darker shade, white, and green.
– Medium-weight yarn works best for structure. - Hook:
– Crochet hook size 3.0 mm or one suitable for your yarn. - Other Tools:
– Stitch markers.
– Tapestry needle (for weaving ends).
– Scissors.
Gauge
Not essential, as this bag design shapes itself through stitch counts. However, consistent tension ensures uniform results. Aim for tight, even stitches for the base and flowers.
Abbreviations List
Here's a quick reference for stitches used:
- ch: chain
- sl st: slip stitch
- sc: single crochet
- dc: double crochet
- hdc: half double crochet
- cluster: two or more stitches grouped together
- rep: repeat
Special Stitch Instructions
Magic Ring:
To make a tightly closed center, wrap the yarn into a loop, insert hook, pull through a loop, and work the necessary stitches into the ring.
Double Crochet Cluster:
Yarn over, insert hook into designated stitch, pull through a loop, yarn over and pull through two loops. Repeat this step twice more. Yarn over and pull through all remaining loops to form one cluster.
Finished Size
Super compact with a diameter of approximately 6 inches and a height of 7–8 inches, perfect for holding small items like cosmetics, AirPods, or jewelry.
The Pattern Itself
Below is the step-by-step guide to crochet the flower bag, broken into manageable parts.
Part 1: Base Circle
Instructions
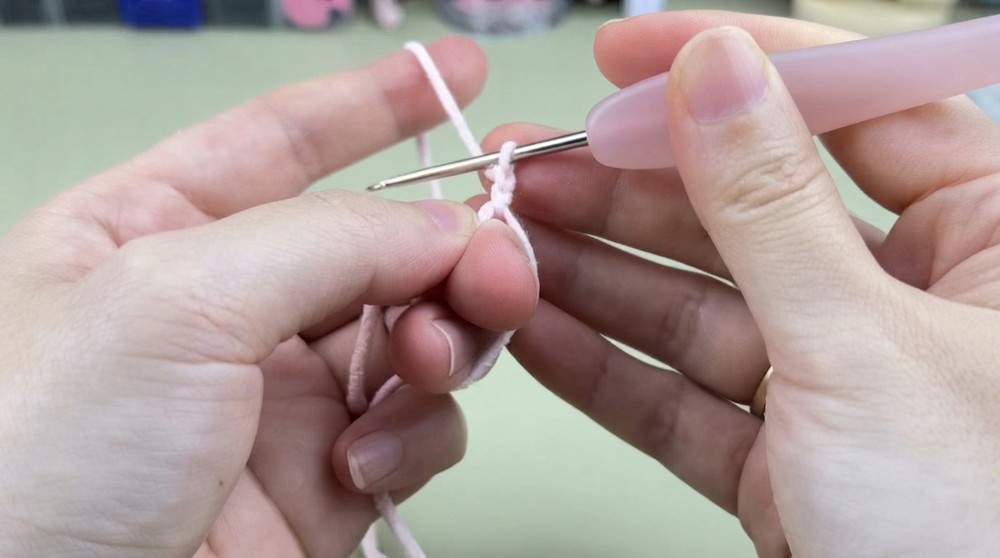
- Magic Ring:
- Create a magic ring. Ch 3 to count as the first dc.
- Place a stitch marker in the third chain.
- Round 1:
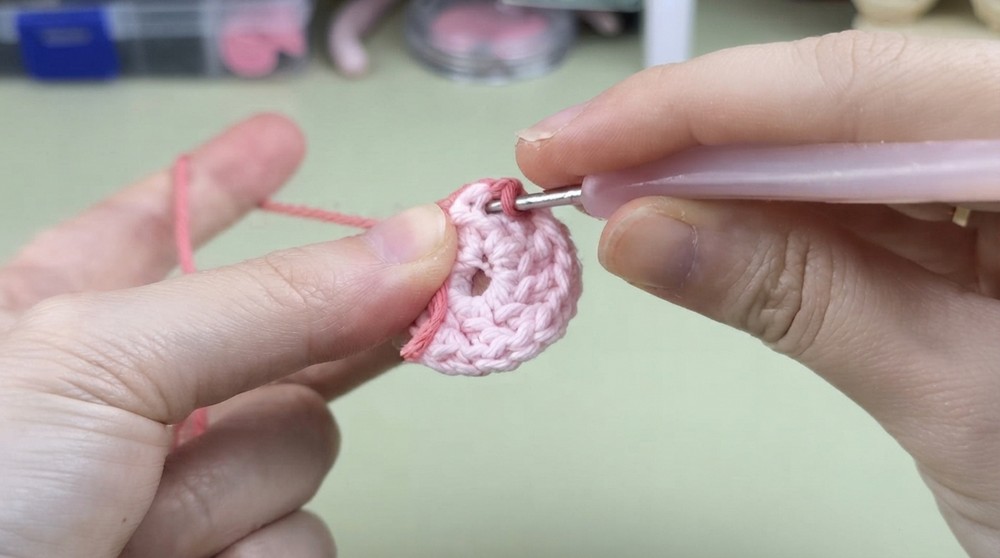
- Work 1 dc, 1 ch into the magic ring 9 times. Pull the ring tight and sl st into the marked stitch.
- Switch Colors:
- Cut the yarn and attach a new color (slightly darker shade) into the chain space. Ch 1 in the new color.
- Round 2:
- In the new chain space, work 1 sc, 1 ch.
- In the next chain space, work 1 dc, 1 ch. Repeat this sequence for the round. Sl st into the first stitch and ch 1.
Simplified Notes:
This circular base forms the foundation of the bag. Switch yarn colors as noted, and focus on maintaining even stitches. It’s all about building symmetry for the bag's shape.
Part 2: Flower Clusters
Instructions
- Round 3:
- Start in the top of the first dc. Work hdc, ch 1, and mark this stitch.
- Create a Floral Cluster:
- In the second dc, work 1 dc, ch 3, sl st into the same stitch. Ch 3 again and make another dc into the same stitch.
- Transition:
- Work hdc, sc in the next dc.
- Repeat Clusters:
- Continue around the circle with alternating floral clusters and single crochets in the next stitches.
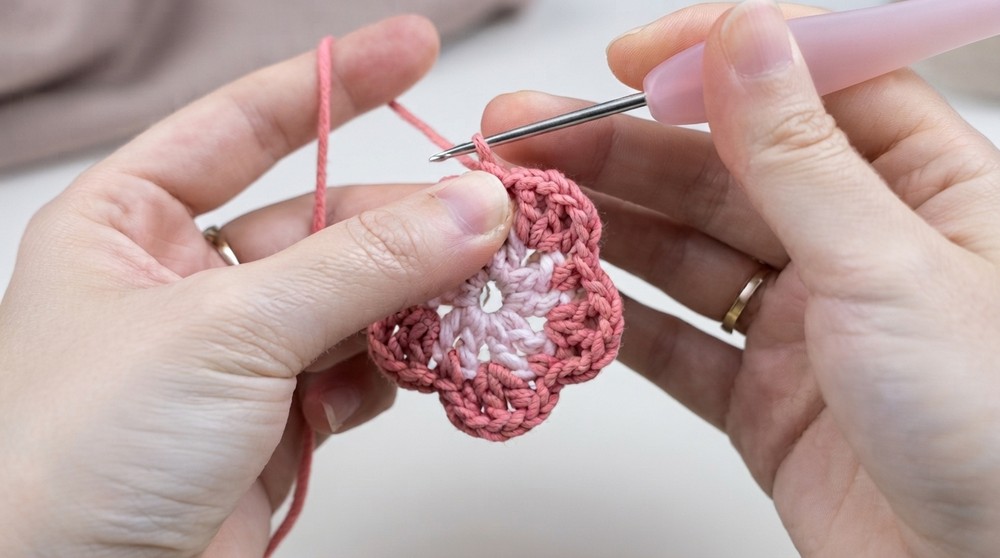
Simplified Notes:
These clusters create the charming floral effect of the bag. Take time at each stitch to form petals that add depth.
Part 3: Structural Detailing
Instructions
- Round 4 (Green Yarn):
- In the space between two sc, yarn over with green. Ch 3, then work a 2-dc cluster stitch. Form clusters by carefully pulling through loops as described above.
- Ch 3, then *sc into the base of the next dc. Rep for the round.
- Round 5 (Trim):
- Switch to white yarn and pull it through the space between two sc.
- Ch 1, then work 2 sc, 1 hdc into the space. In the next space, work hdc, 2 dc.
- Continue adding stitches into spaces for consistent texture.
Simplified Notes:
Using green yarn creates leaf-like accents, while the white trim provides an edge to the floral effect.
Part 4: Assembly
Instructions
- Bag Body (Second Piece):
- Crochet another identical flower panel. Ensure both pieces match in size and detail.
- Joining Panels:
- Line up the panels symmetrically. Join 3 sides using sl st, leaving the top open.
- Top Edge:
- Finish the top edge by adding 2 sc into corners and sc evenly across all remaining stitches.
Simplified Notes:
Stitch the panels neatly for a seamless look. Focus on clean alignment for perfect assembly.
Part 5: Drawstring
Instructions
- Leaf Motif (Green Yarn):
- Start with ch 4. Work sc, hdc into consecutive stitches, then sl st to finish.
- Continue adding more leaves with ch 6 and repeating the same motif.
- Cord:
- Chain 70-80 stitches for the length of your drawstring. Weave the cord through the bag's edge.
- Finish:
- Crochet additional leaves onto the cord for decoration, if desired.
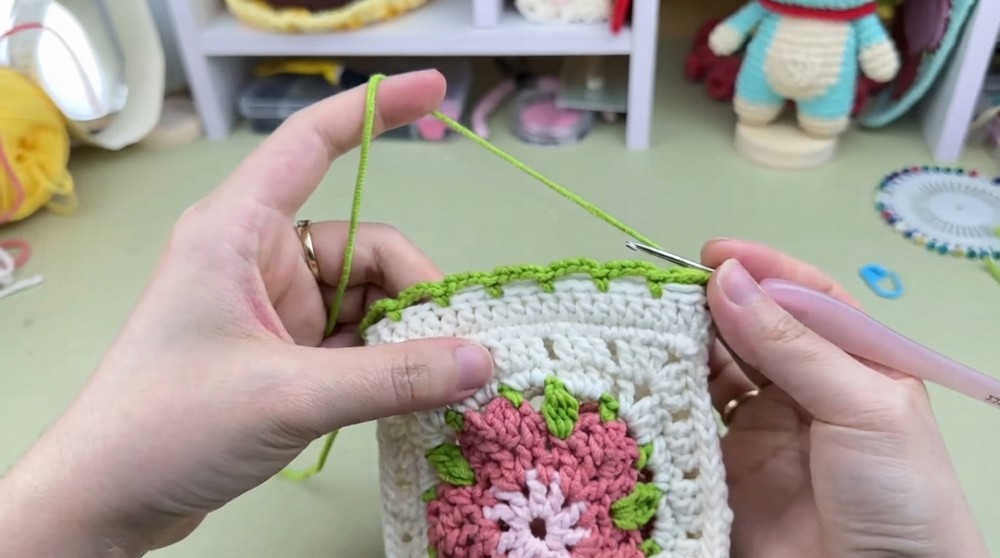
Simplified Notes:
The drawstring adds functionality and aesthetic appeal to the bag. Ensure it’s evenly threaded for easy use.
Assembly & Finishing
- Once the drawstring is complete, secure loose ends with a tapestry needle.
- Weave in all spare yarn ends to make the bag tidy and polished.
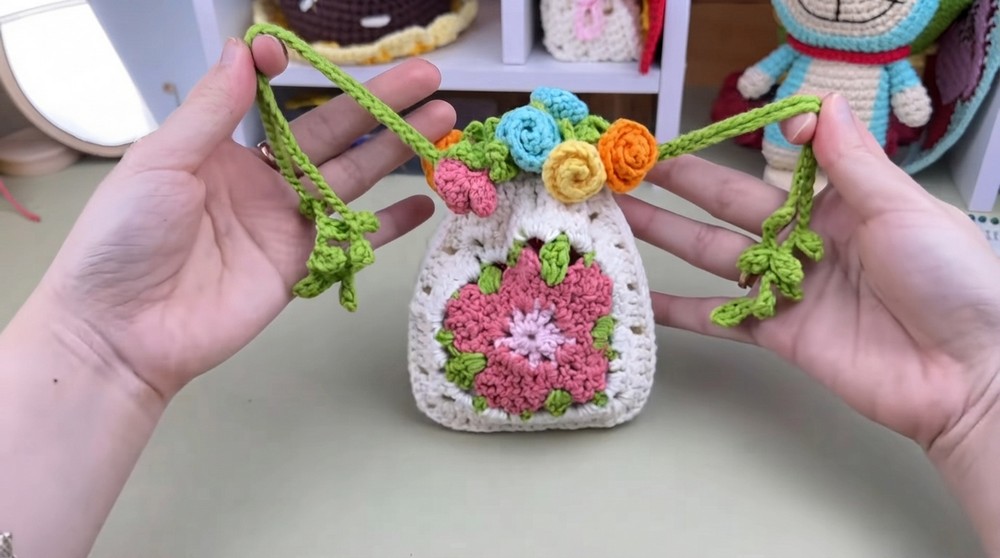
Why You'll Love This Pattern
This drawstring flower bag combines beauty and function with its stylish design and practical storage space. The floral accents are a joy to crochet and look stunning in any color combination. Whether for yourself or as a handcrafted gift, this project is guaranteed to bring smiles.