
How to Crochet Plush Hello Kitty Cat Pattern for Lovely Moments
Spruce up your space with the Free Crochet Plush Hello Kitty Cat Pattern and crochet a kawaii favorite in cozy, squishy style.
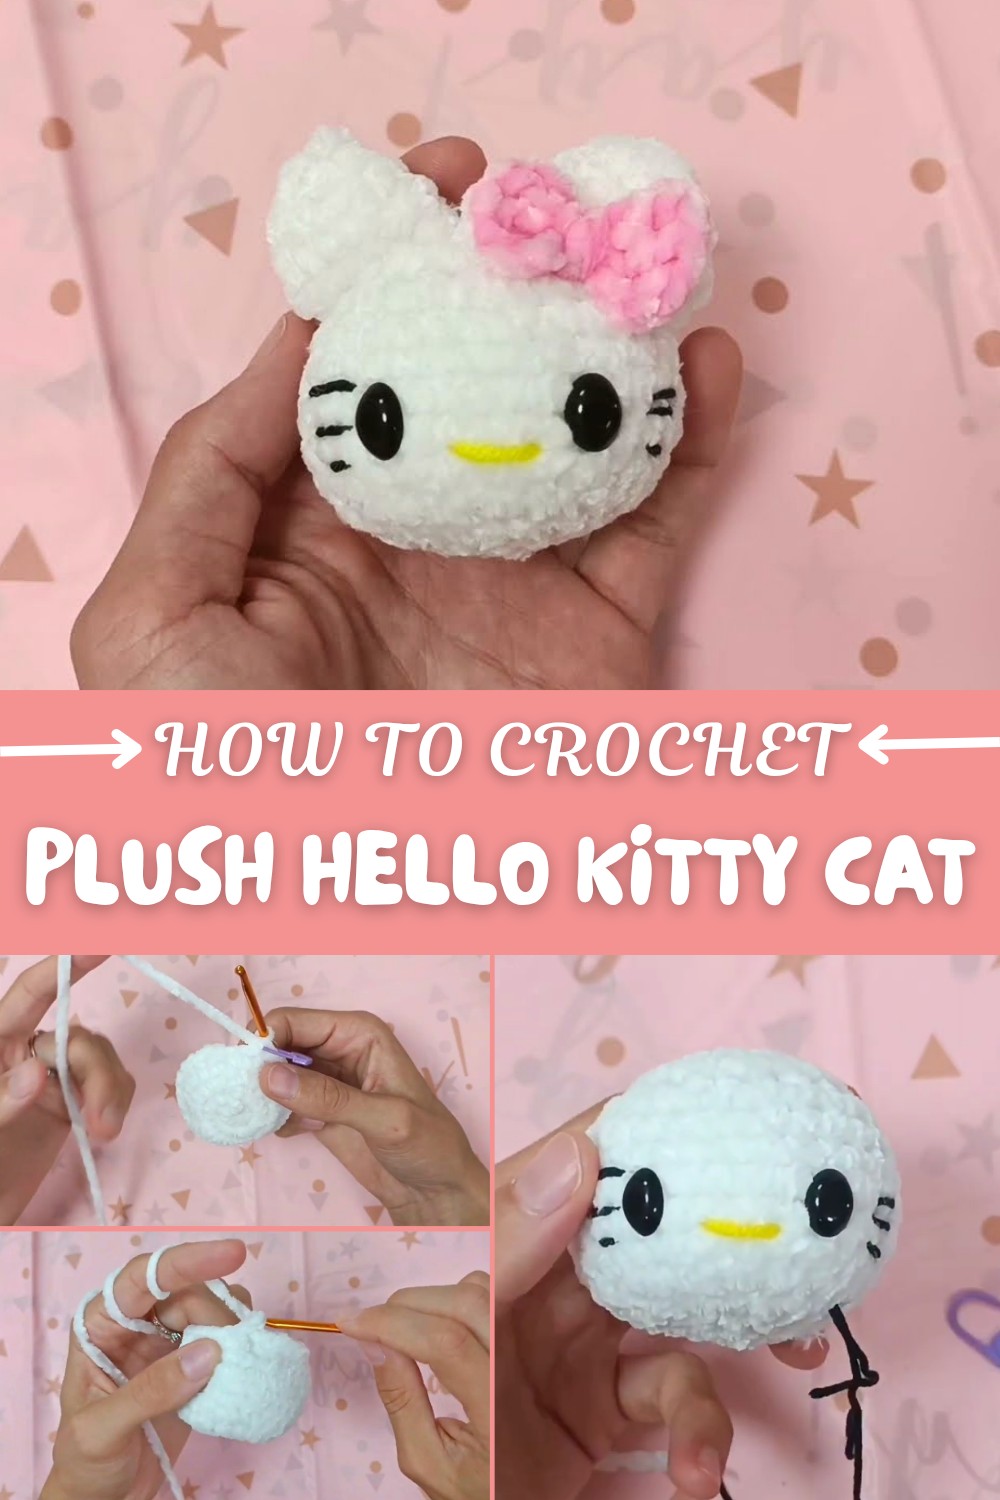
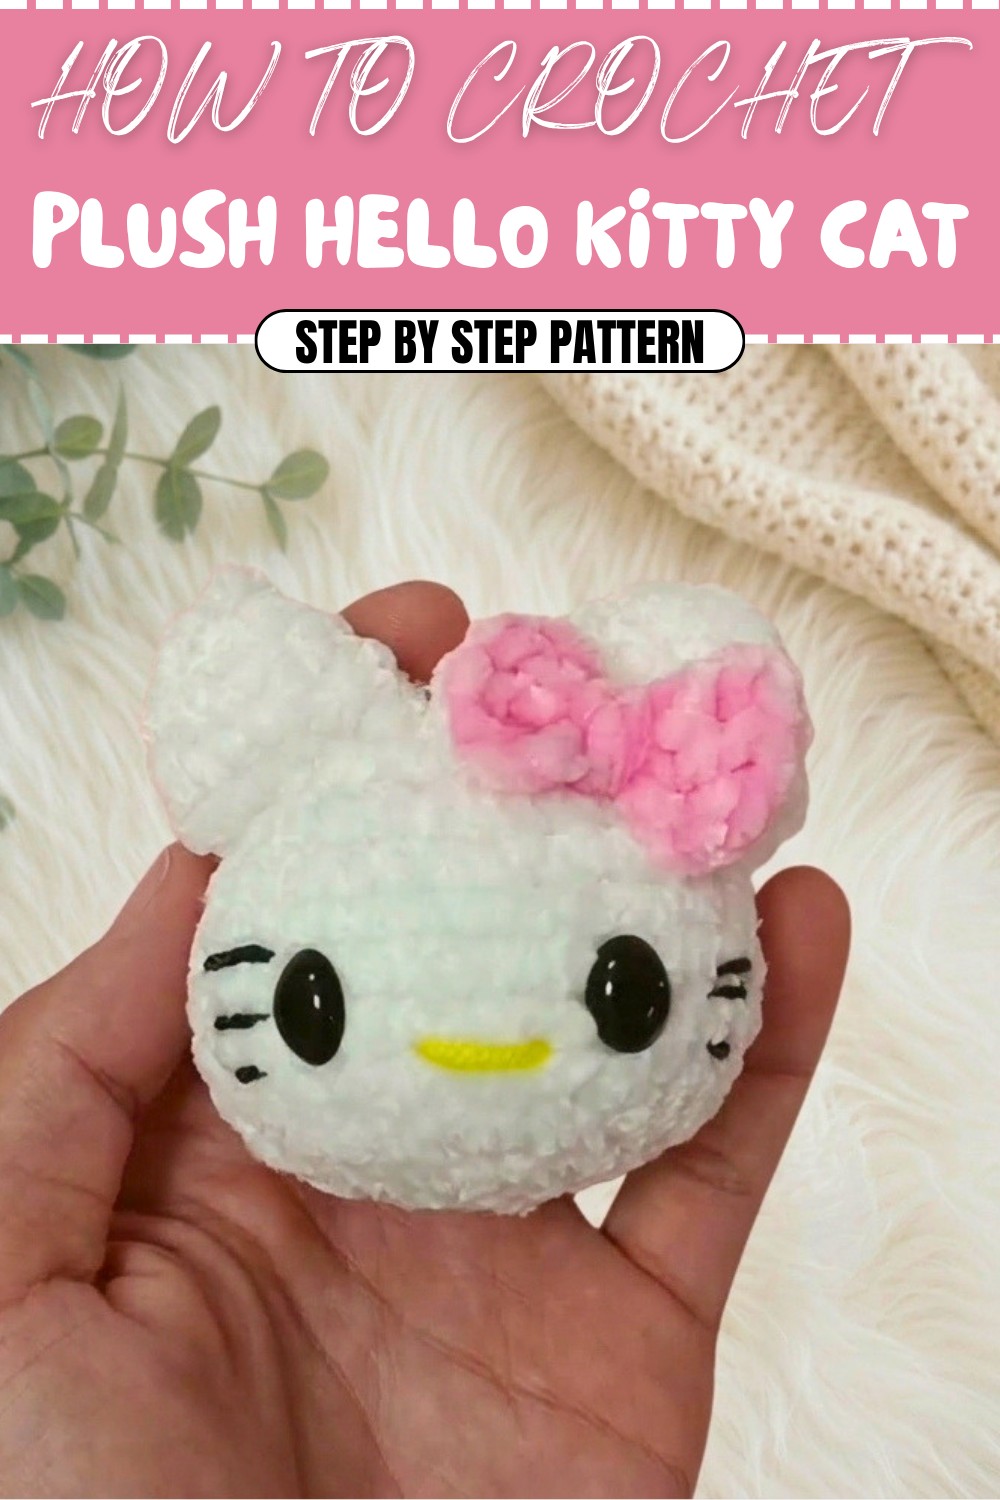
Close your eyes and imagine the joy in creating a timeless character that brings smiles wherever it goes. Now, a crochet plush Hello Kitty cat, handmade with love, softness, and every detail meticulously added stitch by stitch. The beauty of this pattern lies in its simplicity and adaptability. Its delicate white head contrasts perfectly with the charm of a soft pink bow and adorable whiskers stitched in black. The vibrant yellow nose adds just the right pop of color, making it instantly recognizable and full of personality. Whether you’re crocheting for yourself or gifting to a friend, this plush is bound to be adored.
Learn this Crochet Plush Hello Kitty Cat Pattern for Charming Creations
What makes this pattern special is the combination of basic and innovative crochet techniques: magic circles, invisible decreases, and seamless slip stitches combine to create a smooth, rounded shape ready to showcase your unique style. Plus, when working with plush yarns like Dolphin Baby, the finished Hello Kitty becomes irresistibly soft—perfect for cuddles and décor alike. This pattern isn’t just about creating Hello Kitty; it’s a gateway to personalizing countless characters and designs, from playful animals to festive decorations.
Other Possibilities From This Pattern
Let your imagination flow! With the skills learned here, you can crochet:
- Custom plush animals, from bears and bunnies to seasonal designs.
- Mini plush keychains or ornaments for personal accessories.
- Larger amigurumi toys by scaling the pattern with bulky yarn.
- Decorative pillows or nursery accents by altering the design just slightly.
Why You’ll Fall In Love With This Pattern:
- Beginner-friendly yet versatile for more advanced crocheters.
- A timeless design you can recreate in any size or color palette.
- Endless possibilities for customization, gifting, or playful stitching sessions!
Hello Kitty Crochet Head Pattern
This tutorial will guide you through crocheting a beginner-friendly Hello Kitty head with a bow. The project uses basic crochet techniques, making it suitable for beginners. This adorable piece can be customized with your own color preferences for the bow and works well as a keychain, toy, or accessory!
Skill Level & Terminology
- Skill Level: Beginner
- Terminology: This pattern uses US crochet terminology.
Materials & Tools
- Yarn:
- White (Dolphin Baby or other plush yarn) – For the head and ears
- Pink – For the bow
- Black and Yellow (cotton yarn) – For the face details
- Hook Size: 4.0 mm crochet hook
- Other Tools:
- Scissors
- Tapestry needle
- Stitch marker
- Filling fiber (such as polyfill)
- 2 safety eyes (noses can also be used as eyes)
Gauge
Gauge is not critical for this project but for reference: when crocheting in single crochet with the yarn and hook specified, the stitches should be tight enough so the filling is not visible. Adjust your hook size to achieve the proper tension if needed.
Abbreviations List
- ch – Chain
- sc – Single Crochet
- sl st – Slip Stitch
- inc – Increase (2 sc in the same stitch)
- dec – Decrease (2 sc worked together)
- st – Stitch
- magic ring – Adjustable loop to start work in the round
Special Stitch Instructions
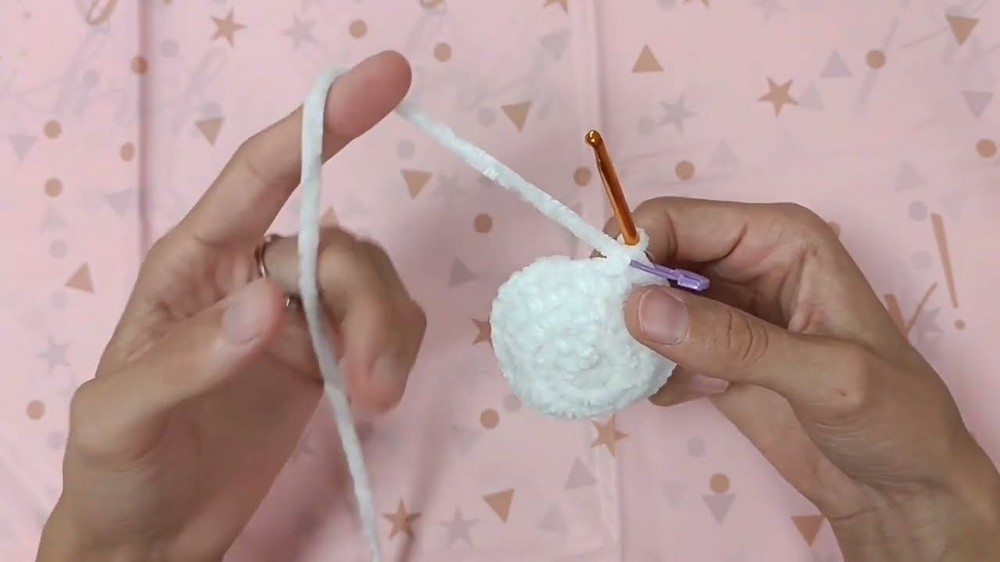
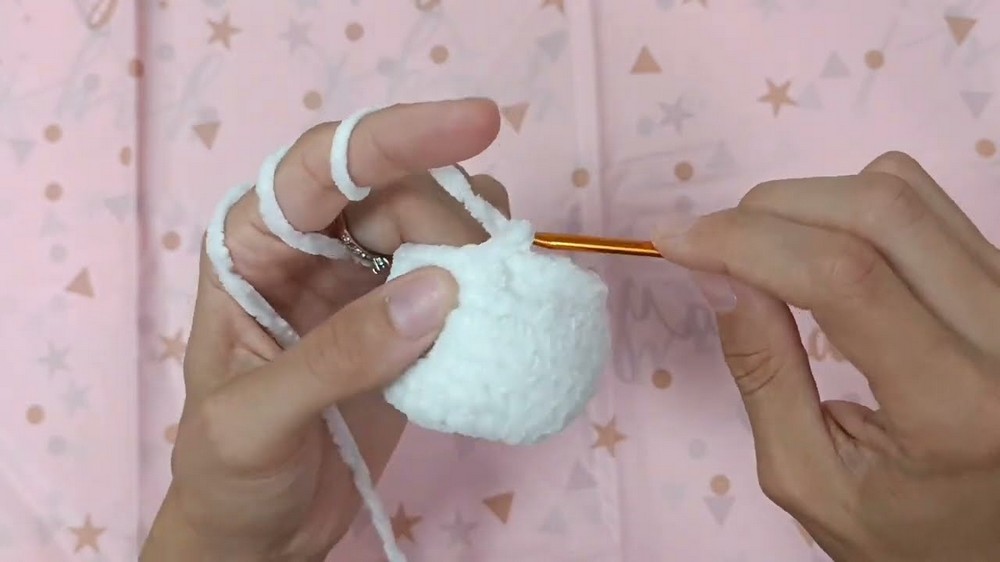
Magic Ring:
A magic ring (also called a magic circle) creates a tightly closed starting round.
- Loop the yarn around your fingers to form a circle.
- Insert the hook through the loop, yarn over, and pull up a loop.
- Chain one to secure the ring, then work the required stitches into the circle.
- Tighten the circle by pulling the tail of the yarn firmly.
Finished Size
With the materials specified, the finished Hello Kitty head will measure approximately 3–4 inches in diameter, depending on your tension.
The Crochet Pattern
Follow these step-by-step instructions to create your Hello Kitty head, ears, and bow.
Head (Rounds 1–12):
Round 1:
- Start with a magic ring.
- Work 8 sc into the magic ring.
- Tighten the loop and join with a sl st.
(8 stitches total)
(This forms the base of the head.)
Round 2:
- Work 2 sc into each st (inc) around.
(16 stitches total)
(The head is widened to a circular shape.)
Round 3:
- Work 1 sc in the first st, 2 sc in the next st (inc). Repeat (sc, inc) around.
(24 stitches total)
(The circle grows gradually by alternating single crochets and increases.)
Round 4:
- Work 1 sc in each of the first 2 sts, 2 sc in the next st (inc). Repeat (sc, sc, inc) around.
(32 stitches total)
Rounds 5–9 (No Increases):
- Work 1 sc in each st around for 5 rounds.
(32 stitches total per round)
(These rounds create the body of the Hello Kitty head.)
Round 10:
- Work 1 sc in each of the first 2 sts, dec in the next st. Repeat (sc, sc, dec) around.
(24 stitches total)
(This round starts tapering the bottom of the head.)
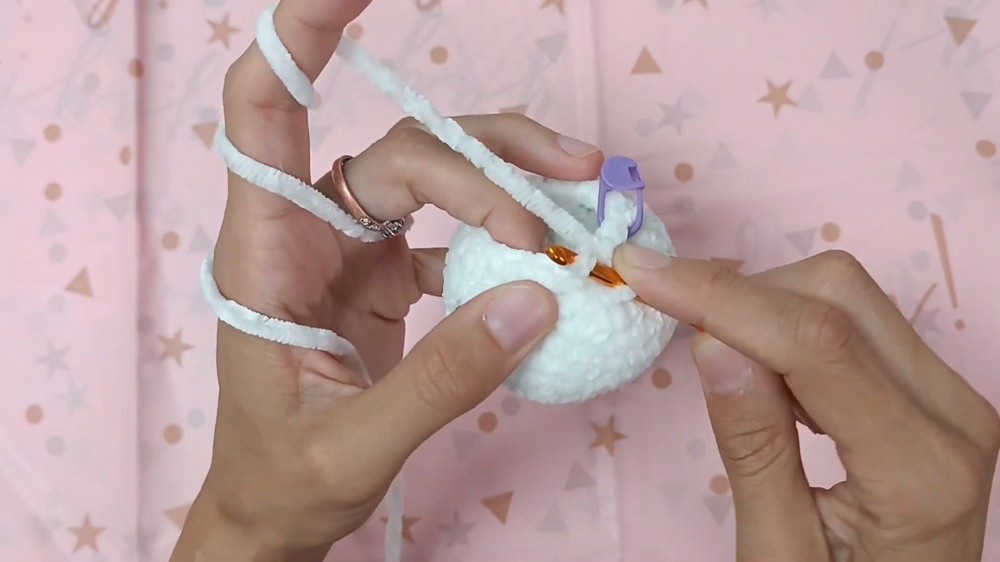
Insert Safety Eyes:
- Place the safety eyes between Rounds 7 and 8, 5 stitches apart.
- Attach the back of the safety eyes securely.
(The eyes give the character its signature look.)
Round 11:
- Work 1 sc in the first st, dec in the next st. Repeat (sc, dec) around.
(16 stitches total)
Round 12:
- Work dec around (8 decreases).
(8 stitches total)
(Tighten the base to form the bottom of the head.)
Finish the Head:
- Stuff the head firmly with filling fiber.
- Use a tapestry needle to weave through the front loops of the final 8 stitches, pull tight to close the hole, and fasten off. Hide any loose ends inside the head.
(The head is now complete!)
Ears (Make 2):
Round 1:
- With white yarn, create a magic ring. Work 6 sc into the ring. Join with a sl st.
(6 stitches total)
Round 2:
- Work 1 sc in the first st, 2 sc in the next st (inc). Repeat (sc, inc) around.
(9 stitches total)
Round 3:
- Work 1 sc in each of the first 2 sts, 2 sc in the next st (inc). Repeat (sc, sc, inc) around.
(12 stitches total)
Round 4:
- Work 1 sc in each st around.
(This ensures the ears maintain their shape.)
Finish the Ears:
Fasten off, leaving a long tail for sewing. Attach the ears symmetrically to the top of the head. Ensure they are aligned evenly.
Bow:
Step 1:
- Create a magic ring.
- Ch 3, then work 3 dc into the magic ring.
Step 2:
- Ch 3, then sl st into the magic ring.
Step 3:
- Repeat Ch 3, 3 dc, Ch 3, sl st into the magic ring to create the second half of the bow.
Finish the Bow:
- Tighten the magic ring and wrap the tail of the yarn around the center of the bow several times. This defines the middle portion of the bow.
- Fasten off and leave a long tail for sewing. Attach the bow to one side of the head near an ear.
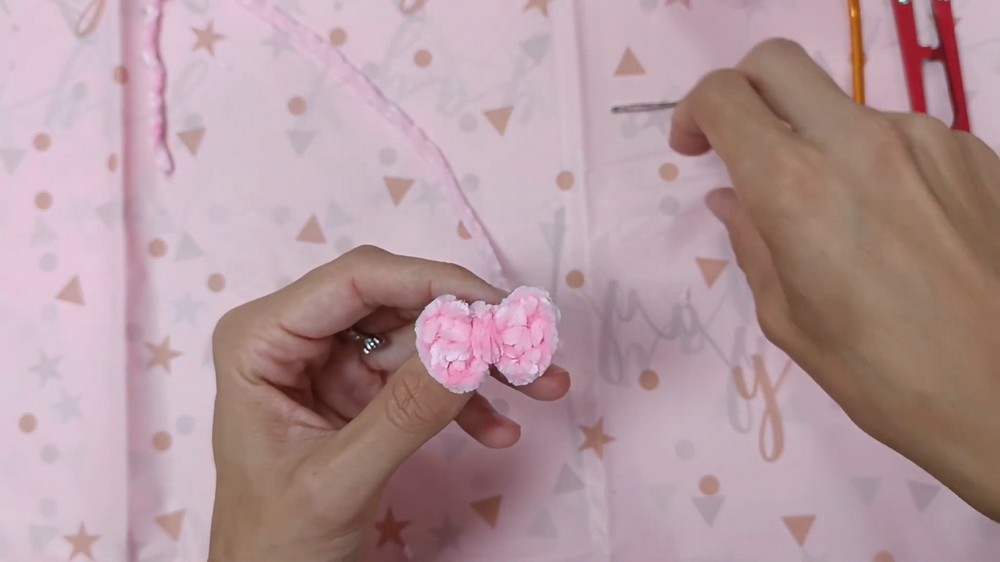
(The bow adds a classic Hello Kitty accent.)
Face Embroidery:
Nose (Yellow):
- Thread a needle with yellow yarn.
- Stitch a small oval shape between the eyes.
(This will be the iconic Hello Kitty nose.)
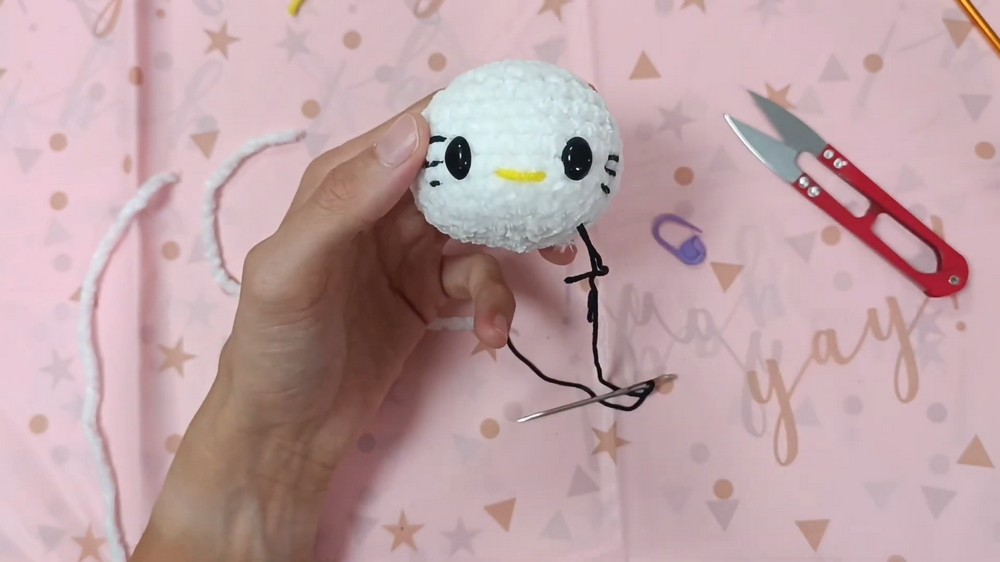
Whiskers (Black):
- Thread a needle with black yarn or thread.
- Stitch two whiskers on each side of the face, angling them slightly outward.
(The facial details bring the character to life.)
Assembly & Finishing:
- Securely sew the ears and bow in place.
- Confirm that all loose ends are tucked neatly inside the crochet piece.
- Adjust the facial embroidery as needed to ensure alignment.
- Optional: Turn the Hello Kitty head into a keychain by adding a loop to the top or leave it as a standalone toy.
About the Pattern:
This pattern introduces single crochet, increases, decreases, and magic ring techniques. It's a simple project for beginners, with the option to customize colors or add further embellishments like blush or glitter yarn.
What You’ll Learn
- Crochet distinct shapes using magic circles and single crochet rounds.
- Add professional touches like invisible decreases for seamless transitions.
- Assemble details that make your project unique, like bows, facial embroidery, and adding safety eyes.
By the end, you’ll have a plush that feels professionally handmade—and skills that open doors to endless crochet creativity.