
Free Crochet Jellyfish Lantern Pattern that Feels Like Sea Magic
Follow this easy crochet pattern to create a jellyfish lantern with tentacles and lights, perfect for festival decor or as a unique handmade gift.
The idea of turning soft yarn into a glowing jellyfish lantern is as delightful as it sounds. It’s both charming and practical, featuring playful tentacles and a blinking light that can brighten any celebration or cozy nook. With a few easy to learn crochet stitches, this pattern guides you through making something special that’s sure to impress. Using colorful yarn and a crochet hook, you’ll bring this cheerful sea creature to life, and the addition of a light makes it perfect for holidays like the Mid Autumn Festival or for decorating a child’s room.
Free Crochet Jellyfish Lantern Pattern with a Splash of Color
Through this project, you’ll learn foundational crochet techniques such as working in rounds, building shapes with increases, and adding textured details with back loop stitches. These techniques form the base for shaping the jellyfish’s body and adding its distinctive tentacles. You’ll also use chain stitches and single crochets, which are easy even for beginners, to make long, curled tentacles that mimic the graceful movement of a jellyfish. Attaching the blinking light is an exciting finishing step, transforming the piece into a unique lantern.
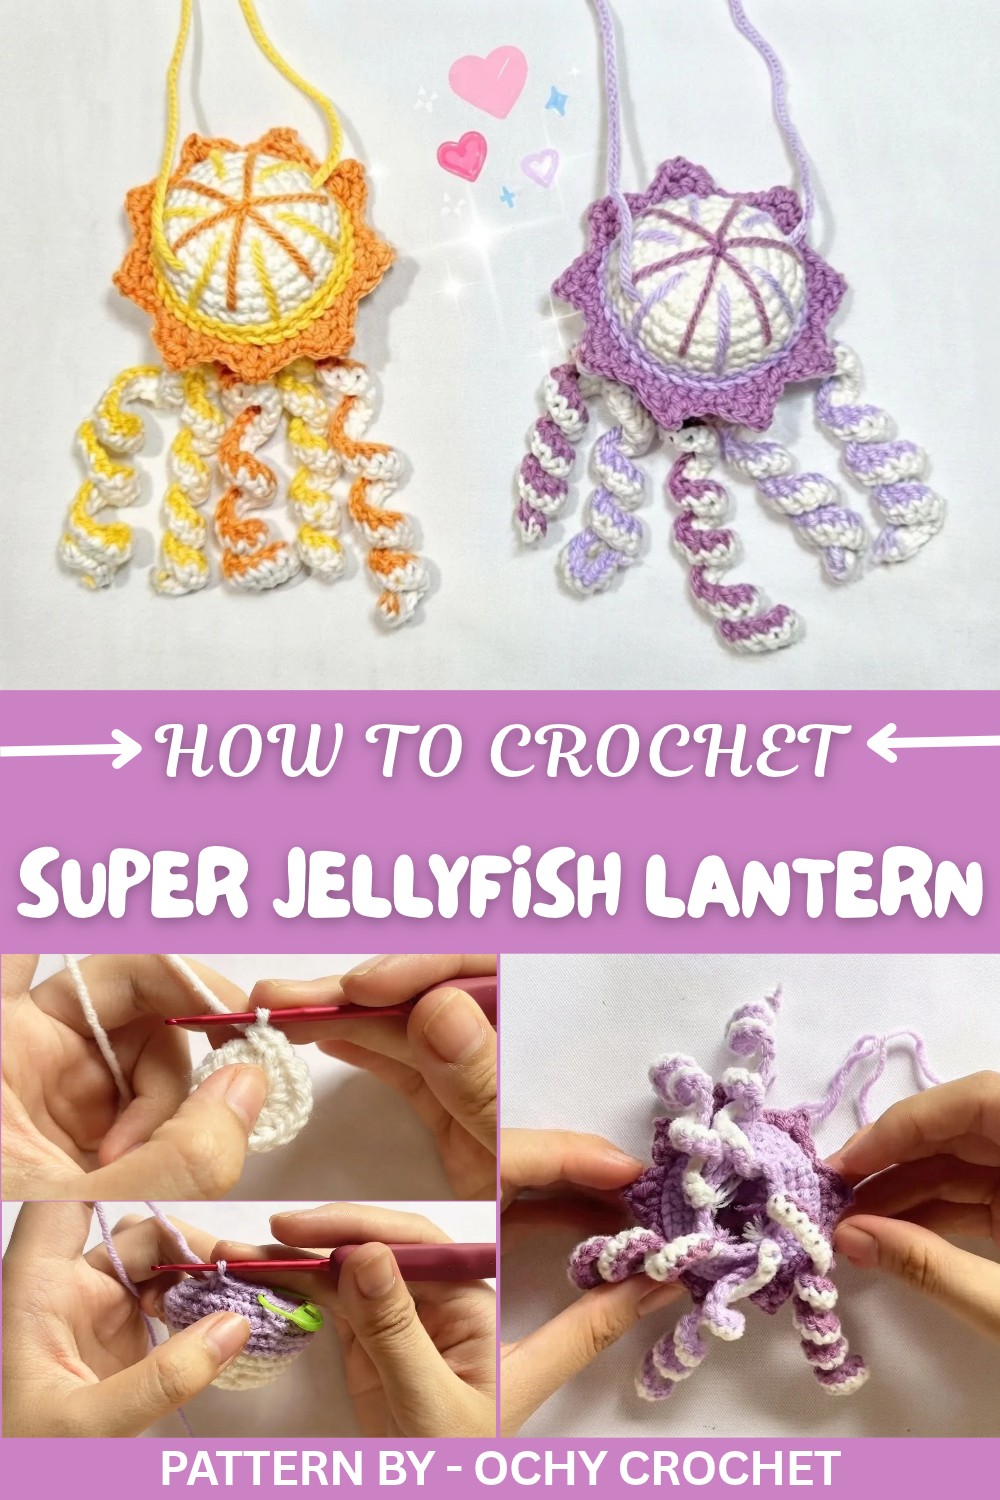
Featured By Ochy Crochet
This pattern is a wonderful starting point for making other items using its techniques. You can crochet fun keychain charms, colorful hanging ornaments, or even playful spirals for other marine creatures like octopuses or starfish. The stitches used in this project are versatile, allowing you to bring unique ideas to life once you’ve gained confidence. With just some yarn, time, and patience, you’ll be able to create cheerful decorations and gifts for your loved ones.
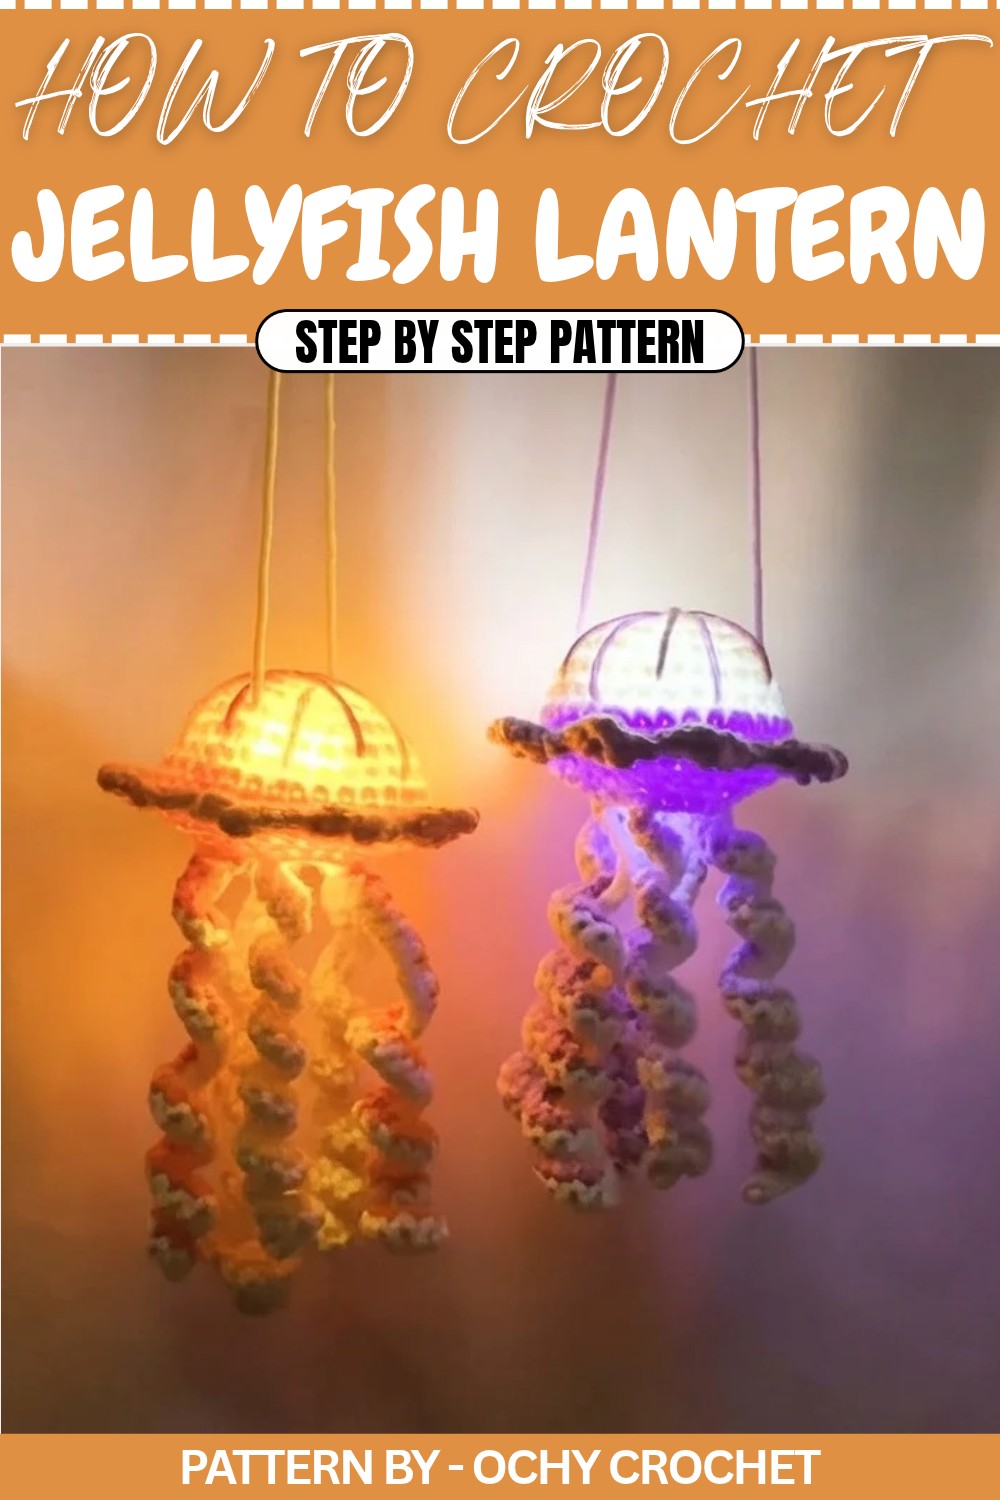
Crochet Jellyfish Lantern Pattern
Quick Overview of Pattern
- This pattern creates a glowing jellyfish lantern that doubles as festive decor.
- Features a body, tentacles, and a hollow back to add blinking LED lights.
- The removable LED light inside the jellyfish allows brightness adjustments.
- Customize the jellyfish with personal touches, like color changes or extra tentacles.
Notes
- Work in rounds when crafting the jellyfish body.
- Use tight stitches when making the tentacles to ensure they curl properly.
- Keep track of rows with a stitch marker, especially during increases and decreases to ensure accuracy.
Skill Level
Intermediate – This pattern involves several variations of basic stitches, increases, decreases, and assembly techniques.
Materials
- Yarn: Cotton yarn in white, light purple, and dark purple.
- Crochet Hook: 2.0 mm.
- Tools: Stitch marker, scissors, yarn needle, and glue gun for assembly.
- LED blinking light (approximately 1m wire length).
Measurements / Sizing
- Finished lantern size: Approximately 10–15 cm tall, depending on yarn tension.
Gauge
Gauge is not critical for this project; however, keep stitches tight to prevent stretching and maintain the lantern shape for the LED light insert.
Stitch Abbreviations
- MR: Magic Ring
- sc: Single Crochet
- ch: Chain
- sl st: Slip Stitch
- hdc: Half Double Crochet
- dc: Double Crochet
- tr: Treble Crochet
- incr: Increase (2 sc in the same stitch)
- dec: Decrease
Special Stitches
- Magic Ring (MR): Wrap the yarn around your finger, insert the hook into the ring, yarn over, and pull through, creating an adjustable circle. Crochet into the loop to form your base stitches.
- Decrease (dec): Insert hook into the front loop of two consecutive stitches, yarn over, pull through both loops, yarn over, and pull through the remaining loops on the hook.
Body Construction
Round by Round Instructions
- Round 1 (R1):
- Create a magic ring (MR). Work 6 sc into the MR. (Total: 6 stitches)
- Round 2 (R2):
- Work 6 inc (2 sc into each stitch). (Total: 12 stitches)
- Round 3 (R3):
- Repeat the sequence 1 sc, 1 inc six times. (Total: 18 stitches)
- Round 4 (R4):
- Follow the sequence 1 sc, 1 inc, 1 sc, repeating six times. (Total: 24 stitches)
- Round 5 (R5):
- Work the sequence 3 sc, 1 inc six times around. (Total: 30 stitches)
- Rounds 6–7 (R6–R7):
- Work 1 sc into each stitch around. (Total: 30 stitches per round)
- Prepare to switch yarn color at the end of Round 7.
- Round 8 (R8):
- Switch to light purple yarn.
- Work the sequence 2 sc, 1 inc, 2 sc, repeating six times. (Total: 36 stitches)
- Round 9 (R9):
- Work 36 sc all the way around. (Total: 36 stitches)
- Round 10 (R10):
- Work 36 sc into the back loops only (BLO). (Total: 36 stitches)
- Round 11 (R11):
- Use front loop only (FLO) for decreases in this round.
- Repeat the sequence 2 sc, 1 dec, 2 sc six times. (Total: 30 stitches)
- Round 12 (R12):
- Follow the sequence 3 sc, 1 dec six times. (Total: 24 stitches)
- Round 13 (R13):
- Work the sequence 1 sc, 1 dec, 1 sc, repeating six times. (Total: 18 stitches)
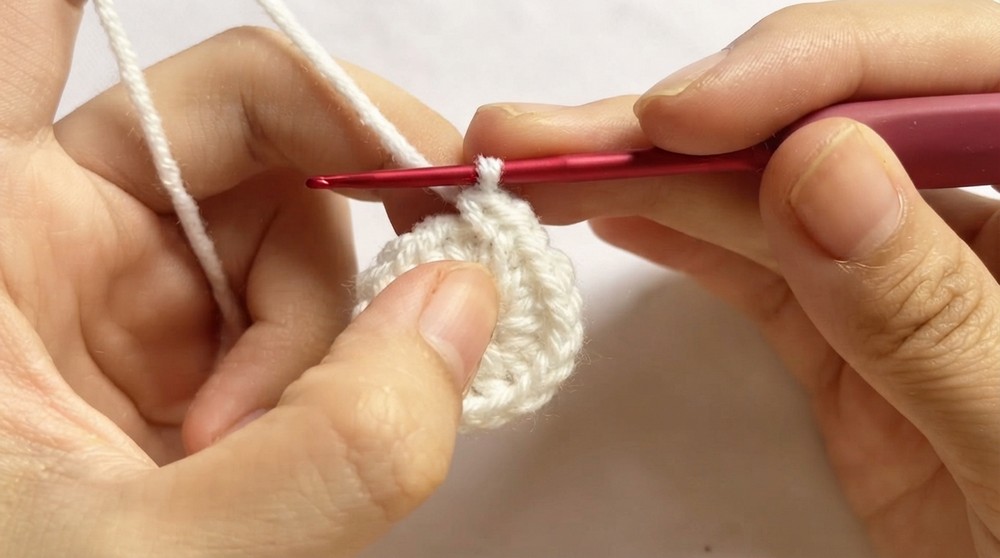
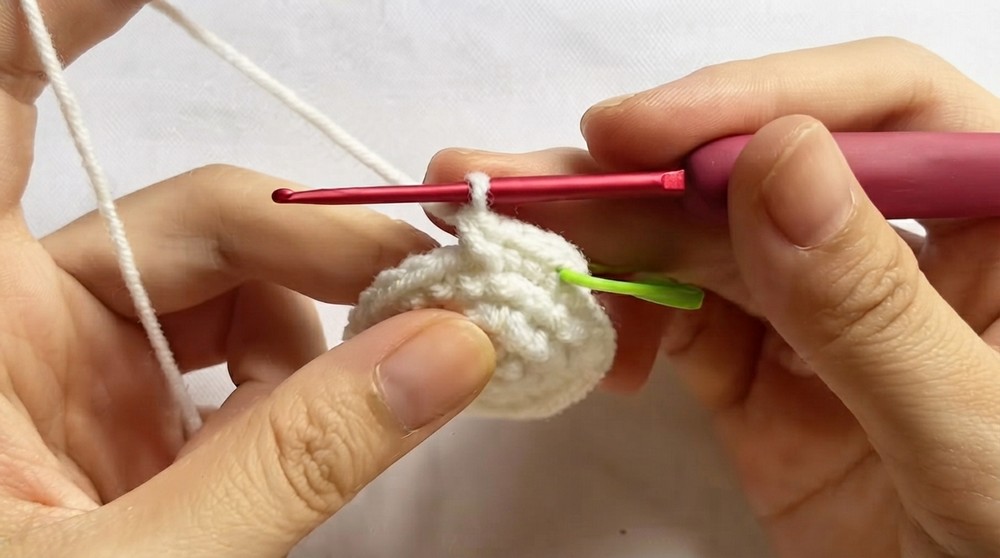

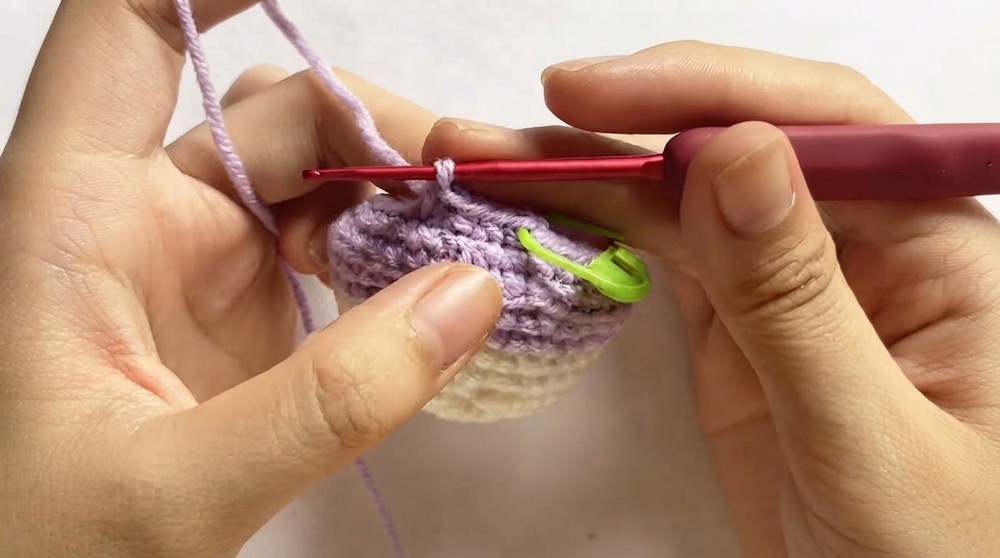
Decorative Edge (on Round 10 Front Loops)
Using dark purple yarn, create a decorative edge on Round 10 Front Loops (FLO):
- Insert your yarn into the first front loop and work:
- 1 sc
- 1 hdc
- CH 2, then sl st into the first chain
- 1 hdc
- 1 sc, then sl st into the next stitch.
- Repeat this sequence a total of 9 times around the row.
- This creates a textured, scalloped edge that adds flair to your jellyfish lantern.

Tentacle Construction
Making the Tentacles
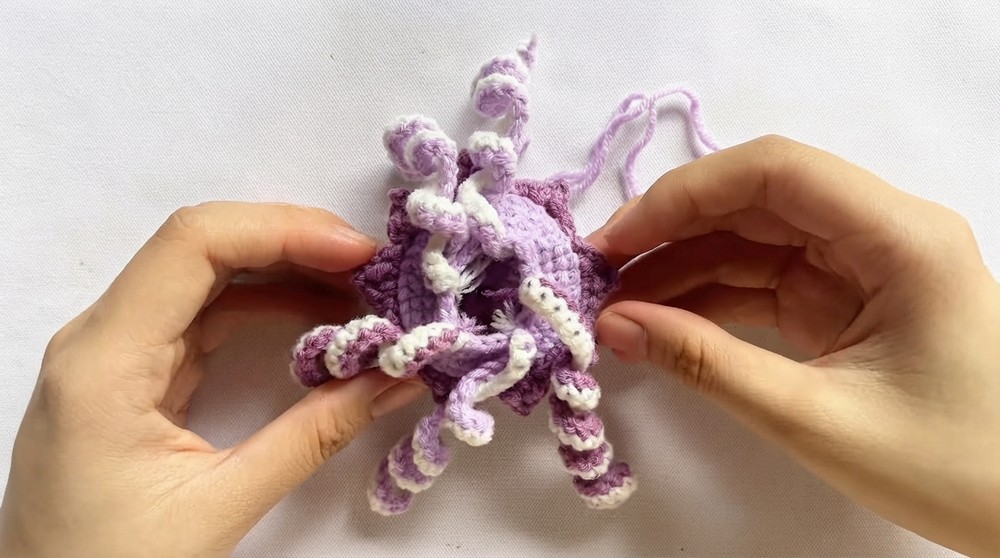
- Chain 45 with your yarn for each tentacle.
- Starting in the second chain from the hook, work 44 sc all the way down the chain.
- Tight tension is essential to make the tentacles curl naturally.
- Fasten off and leave enough tail for sewing later.
- Repeat this step to create 5 tentacles in total.
Assembly
Attaching the Tentacles to the Body
- Turn the jellyfish body upside down.
- Using a sewing needle, attach the tentacles evenly around the base of the jellyfish body.
-
- Ensure they are spaced equally to create balance in the design.

Adding Decorative Features
- Use dark purple yarn to embroider facial features, such as eyes and a small smile.
- These details make the jellyfish charming and playful.
LED Light Setup
- Insert the battery operated fairy light into the hollow back of the jellyfish body.
- Arrange the light wire neatly inside the shape.
- Adjust the brightness and blinking settings to suit your preference.
- Make sure the light remains removable so you can adjust or change it easily.
Final Touch: Hanging Loop
- Attach a string to the top of the jellyfish lantern using a sewing needle or glue.
- Ensure the string is sturdy enough to hang.
- Test the lantern by holding it up and checking that the tentacles and light stay balanced.
Conclusion and Ending Words
Congratulations, You've completed your beautiful Crochet Jellyfish Lantern. This unique lantern is perfect for the Mid Autumn Festival or as fun decor for any occasion. Customize it further by adding more tentacles, experimenting with different yarn colors, or even using glittering thread for extra sparkle. Let your creativity shine bright.