
Easy Crochet Pumpkin Coaster Pattern You Need for Autumn Vibes
Spruce up autumn gatherings effortlessly using our Free Crochet Pumpkin Coaster Pattern for a trendy, handmade touch.
There’s a simple joy in adding a handmade touch to your home, and this pumpkin coaster brings warmth and charm to any table setting. With its bright autumn colors and round, textured shape, it’s perfect for protecting your surfaces from hot drinks while adding a festive vibe. The pattern mainly uses double crochet stitches, magic ring technique, and increases, which helps beginners easily follow along and build their skills while making a useful and attractive piece.
Learn to Crochet Pumpkin Coaster Pattern for Free in Just One Evening

The coaster begins by working 16 double crochets into a magic ring, creating a tight, circular base. From there, rows with increases of double crochets help the shape gently expand to the right size. Slip stitches keep the edges neat, while half double crochets add a bit of texture and dimension that mimics the look of a real pumpkin. The final touch is a simple stem, crocheted separately and sewn or tied on to complete the pumpkin look. The colors and stitch choices come together beautifully to create a cozy accessory for fall or Halloween decorating.
Other Crafts Inspired by This Pattern
This versatile pattern can easily be adapted to make other seasonal or decorative items. Try creating mini pumpkin ornaments, pot holders, or even festive appliqués for kitchen towels and bags. By changing yarn colors or size, you can transform this simple pattern into a variety of charming handmade gifts and home décor pieces perfect for any season.
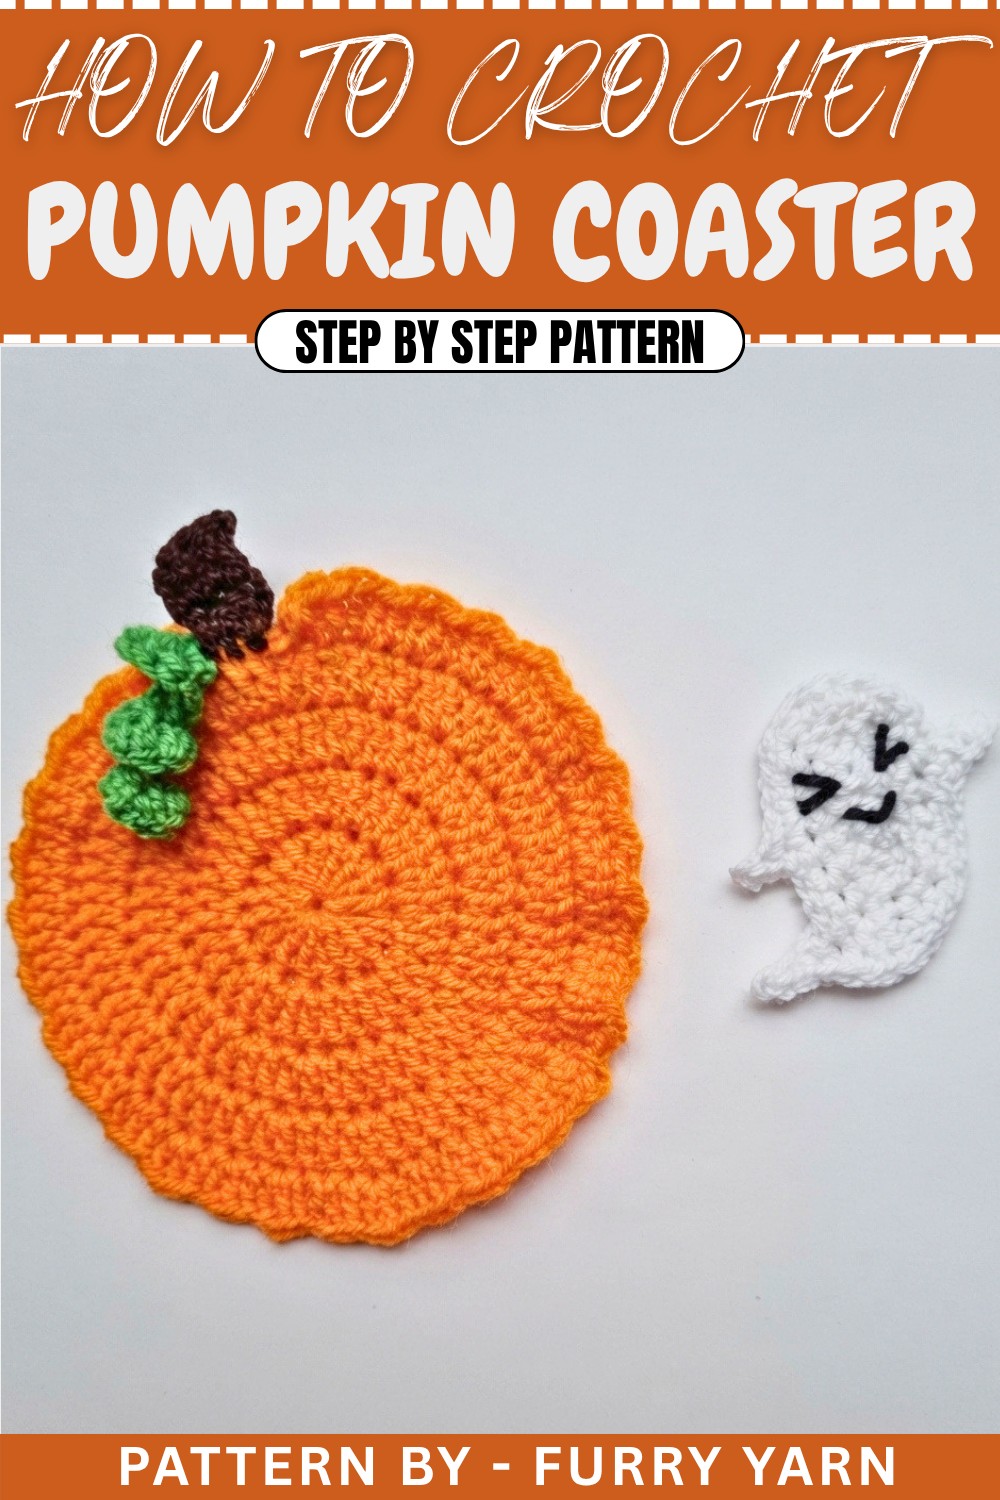
Crochet Pattern: Pumpkin Coaster
This pumpkin-shaped crochet coaster is perfect for autumn decor or as a handmade gift for Halloween and Thanksgiving celebrations. The pattern is beginner-friendly, yet offers enough variety to keep things interesting for those looking to practice and refine their skills. In this pattern, you’ll learn how to crochet in rounds, increase and work post stitches to give the coaster texture and character.
Skill Level & Terminology
- Skill Level: Beginner-Intermediate
- Terminology: US crochet terms are used in this pattern.
Materials & Tools
- Yarn: Worsted (Medium/Category 4) weight yarn. Suggested colors:
- Pumpkin color (orange or your desired shade)
- Brown yarn (stem)
- Green yarn (vine decoration)
- Crochet Hook: 4.00 mm (US size G/6) or as needed for gauge.
- Tapestry Needle: For joining and weaving ends.
- Scissors
Gauge
Gauge is not critical for this project, but as a reference: 16 double crochets and 8 rows = 4 x 4 inches using the given hook size.
Abbreviations
Here's a quick reference for the abbreviations used in this pattern:
- ch: Chain
- sc: Single Crochet
- dc: Double Crochet
- hdc: Half Double Crochet
- sl st: Slip Stitch
- yo: Yarn Over
Special Stitch Instructions
Magic Ring
Wrap yarn around your fingers to create a loop. Insert hook, yarn over, and pull the yarn through the loop to create a secure circle to work in the round.
Increase (Inc)
Work multiple stitches into the single stitch from the previous row, depending on the pattern. For example, “2 dc into one stitch” is an increase.
Half Double Crochet (hdc)
Yo, insert hook into next stitch, yo, pull up a loop (3 loops on your hook). Yo again and pull through all three loops.
Finished Size
The finished Pumpkin Coaster measures approximately 5 inches in diameter, excluding the stem and vine.
The Pattern
Step 1: Create the Pumpkin Base
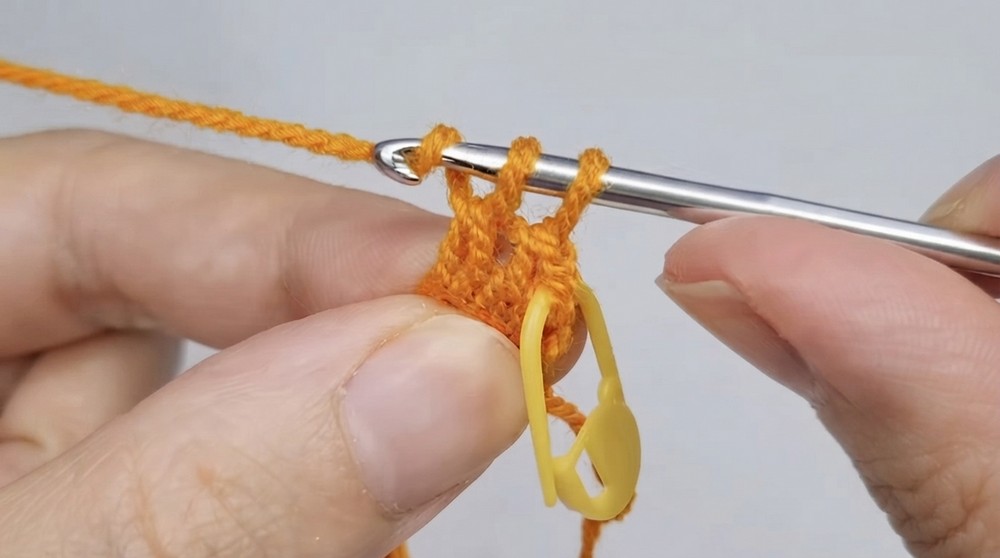
- Begin by making a magic ring:
- Wrap yarn around fingers, insert hook, yo, and pull yarn through to create a secured loop.
- Chain 2, then work 16 double crochets (dc) into the magic ring. Mark the first stitch of the round for ease.
- Pull the tail tightly to close the ring. Complete the round by slip stitching into the first dc.
Understanding This Section
If the Magic Ring seems difficult to master, you can begin with a chain 4 ring instead and work in that loop. This creates the circular base of the coaster.
Step 2: Increase the Pumpkin Base
- Chain 2, then work 2 dc into every stitch around (this creates an increase in every stitch). You should have 32 dc at the end of this round.
- Slip stitch into the first dc to close the round.
Understanding This Section
Increases create a wider circular base for your coaster. Record your stitch counts per row to ensure the correct shape forms.
Step 3: Work the Subsequent Rows (More Increases)
- Row 1 (Increase):
- Ch 2, work 2 dc in the first stitch, and 1 dc into the next stitch. (repeat this pattern across the row).
- Close the round with a sl st.
- Row 2 (Varying Pattern):
- Ch 2, work 2 dc in the first stitch, 1 dc in the second stitch, and 1 dc in the third stitch. (repeat across the row).
- Close the round with a sl st.
Understanding This Section
This section combines increases and standard stitches to create a flat circular shape resembling the body of the pumpkin. Use stitch markers to track your progress if needed.
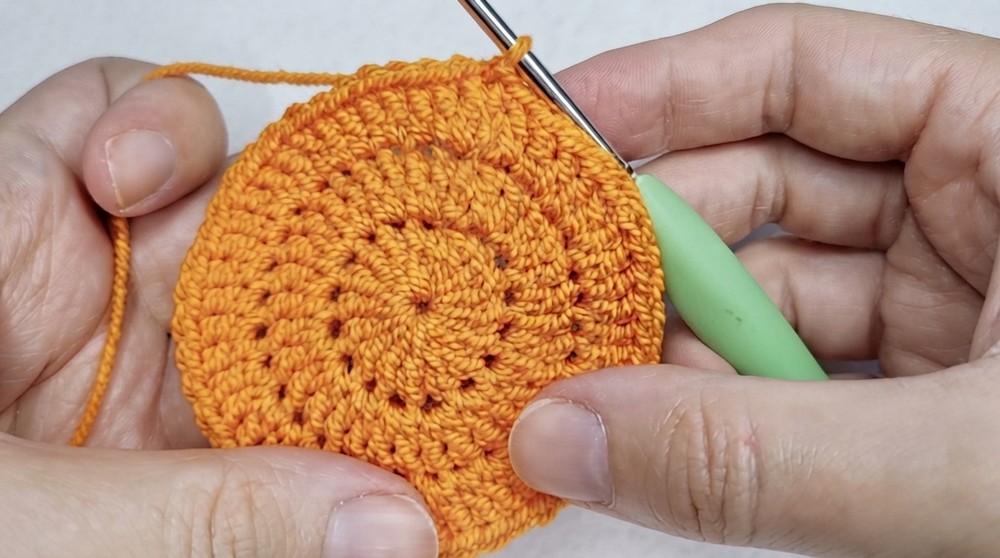
Step 4: Final Pumpkin Shape (Half Double Crochet)
- Ch 2, work 1 hdc into the same stitch.
- In the next stitch, work 2 dc into the same stitch to form an increase.
- Continue alternating: 1 hdc, then 2 dc into the next stitch across the row.
- Leave the last 3 stitches unworked. Chain 1, fasten off, and weave in ends with your needle.

Understanding This Section
This final step gives the pumpkin its signature shape by incorporating alternating stitches (hdc and dc) and leaving a few stitches unworked. The curve adds to the realistic look.
Step 5: Create the Stem (Brown Yarn)
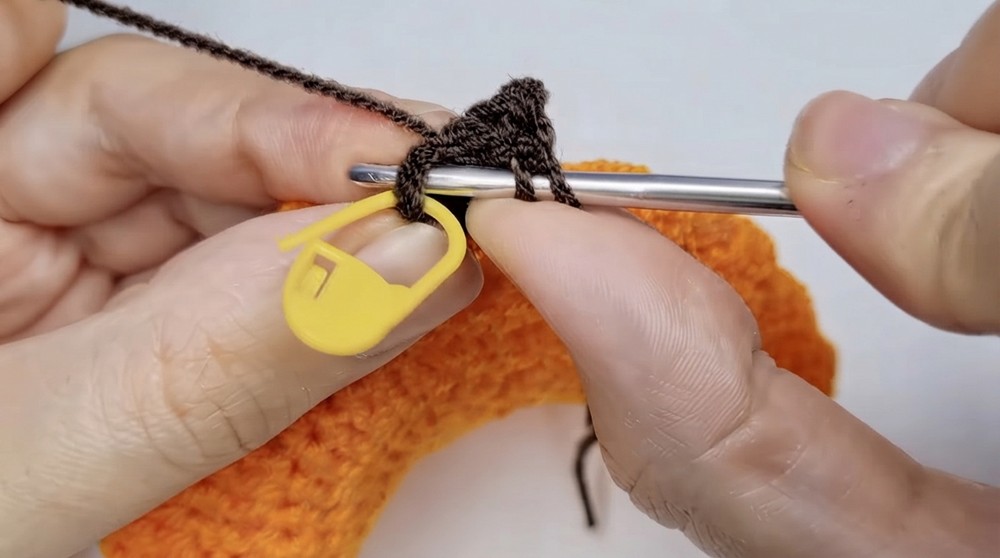
- Attach the brown yarn to the top center of the pumpkin base.
- Ch 2, and work 1 dc into the same stitch.
- Work 1 dc into each of the next two stitches.
- Ch 2, turn your work. Work 1 dc into each stitch across. Repeat for 3 rows.
- Chain 1, fasten off, and weave in loose ends.
Understanding This Section
The stem is a small rectangle that adds a cute 3D detail to the pumpkin.
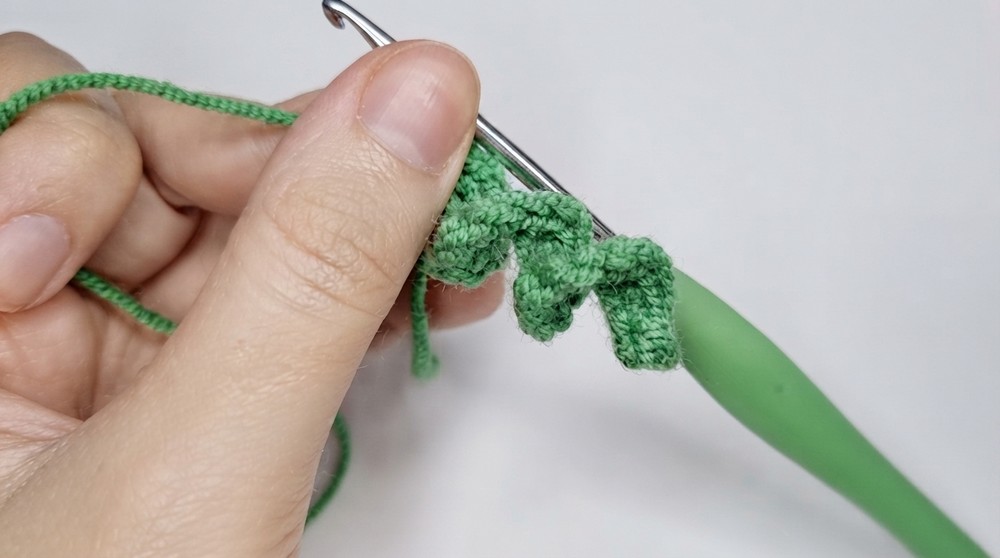
Step 6: Create the Vine (Green Yarn)
- Make a slip knot with green yarn.
- Chain 15, skip the first chain, and start from the second ch.
- Work 2 sc into the same stitch, then continue to work 2 sc into each chain across.
- The chain will begin to curl naturally, forming a curly vine. Chain 1, cut the yarn, and secure it.
Understanding This Section
This step creates the curly vine, which naturally curls when 2 single crochets are worked into each chain. It’s a fun and whimsical addition to the pumpkin coaster.
Assembly & Finishing
- Attach the stem:
- Use a tapestry needle to securely sew the stem to the top center of the pumpkin with brown yarn.
- Attach the vine:
- Use green yarn and sew the curly vine alongside the brown stem.
- Finish up:
- Tie off all loose ends and use a tapestry needle to weave them securely into the back of the work. Trim any excess yarn.
For Beginners: Always pull and tie knots tightly when assembling your coaster, especially for the curly vine. You can use fabric glue instead of sewing if you find it easier.
What You'll Learn
- Magic Ring Technique: Begin a circular project without a hole at the center.
- Increasing in Double Crochet: Create a flat circular base by learning how to strategically add stitches.
- Half Double Crochet Stitches: Integrate texture and shape into your design.
- Assembly Skills: Learn how to create and attach decorative elements like stems and curls.
Why You'll Love This Pattern:
The pumpkin coaster is charming, festive, and relatively quick to complete. It makes a wonderful handmade gift or table decoration for fall gatherings. You'll love the satisfaction when your pumpkin truly takes shape with all its decorative details.
Troubleshooting Common Issues
Problem 1: Circular Base is Not Flat
If your base begins to curl or ruffle, your tension may be inconsistent, or you may have miscounted stitches. Double-check your stitch counts for each row and adjust your tension for a smoother round.
Problem 2: Vine Decoration Doesn’t Curl Properly
If your green yarn won’t curl naturally, ensure you’re working two single crochets into each chain. Also, use a slightly smaller hook for tighter curls.
Problem 3: Loose Ends or Unsecured Pieces
Use a good-quality tapestry needle to securely weave in ends, and tie knots several times before trimming to avoid fraying.
Closing Thoughts
This pattern introduces essential crochet techniques like the magic ring, stitch increases, and basic assembly. It’s perfect as a festive decoration or quick handmade gift for the holiday season. The step-by-step instructions ensure that even beginners can follow along with ease. Adjust the size and yarn colors to bring your creative twist to the project.