
Cute Crochet Little FIsh Earrings Pattern for Seaside Style
Brighten your jewelry box while escaping ordinary with a Free Crochet Little Fish Earrings Pattern for bold, quirky appeal.
Sometimes finding a simple and charming accessory that fits any outfit can feel like a challenge. That’s why I loved making these tiny crochet fish earrings. They are lightweight, adorable, and quick to create. Using basic stitches like double crochet, slip stitches, and magic rings, this pattern shapes a sweet little fish with soft curves and textured layers. The open stitches give a delicate, airy feel, while the embroidered eyes add a touch of personality, making these earrings a playful and unique addition to your collection.
More Fun Ideas from This Pattern
This little fish pattern is not limited to earrings. You can crochet a group of them to make a decorative mobile, perfect for a nursery or kid’s room. They also make great appliques to adorn bags, hats, or even clothing. If you scale up the size, these fish can become cheerful coasters or playful wall art for a beach-themed room. This pattern offers plenty of opportunities to get creative and add handmade charm to your projects.
Learn this Crochet Little Fish Earrings Pattern for Underwater Charm
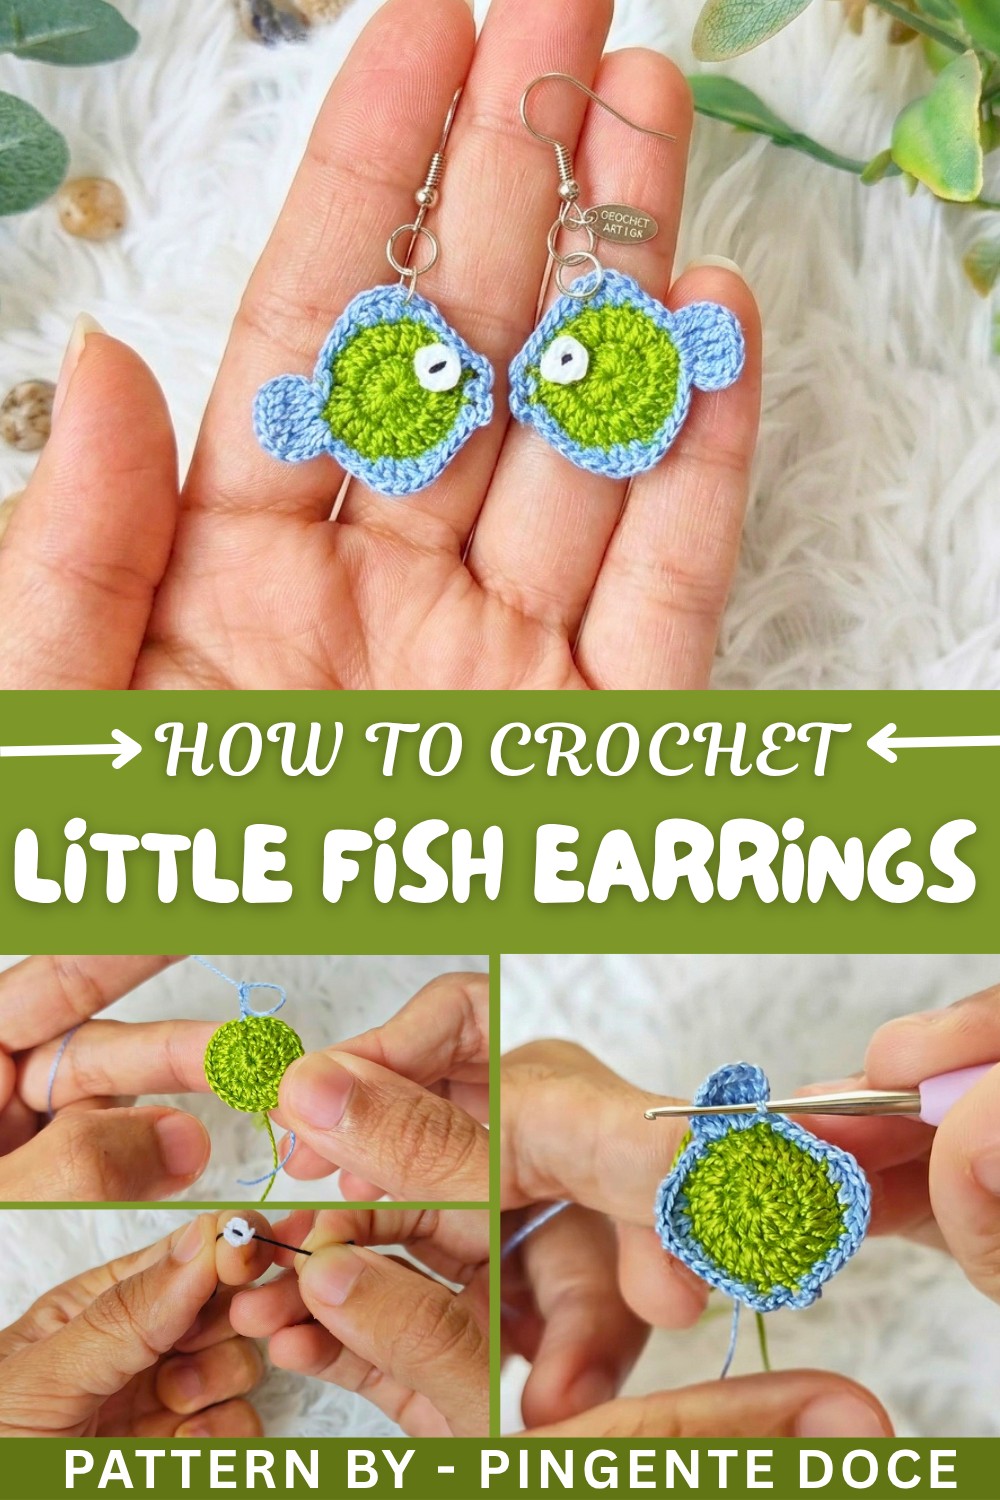
These earrings work great for beginners because the instructions guide you step-by-step, starting with the magic ring to build the base and gradually increasing stitches to form the body. The color changes in the thread create pretty contrasts that highlight the fish’s details beautifully. Plus, working with a 1 mm needle and fine yarn results in a neat, professional look that is surprisingly easy and fast to make.
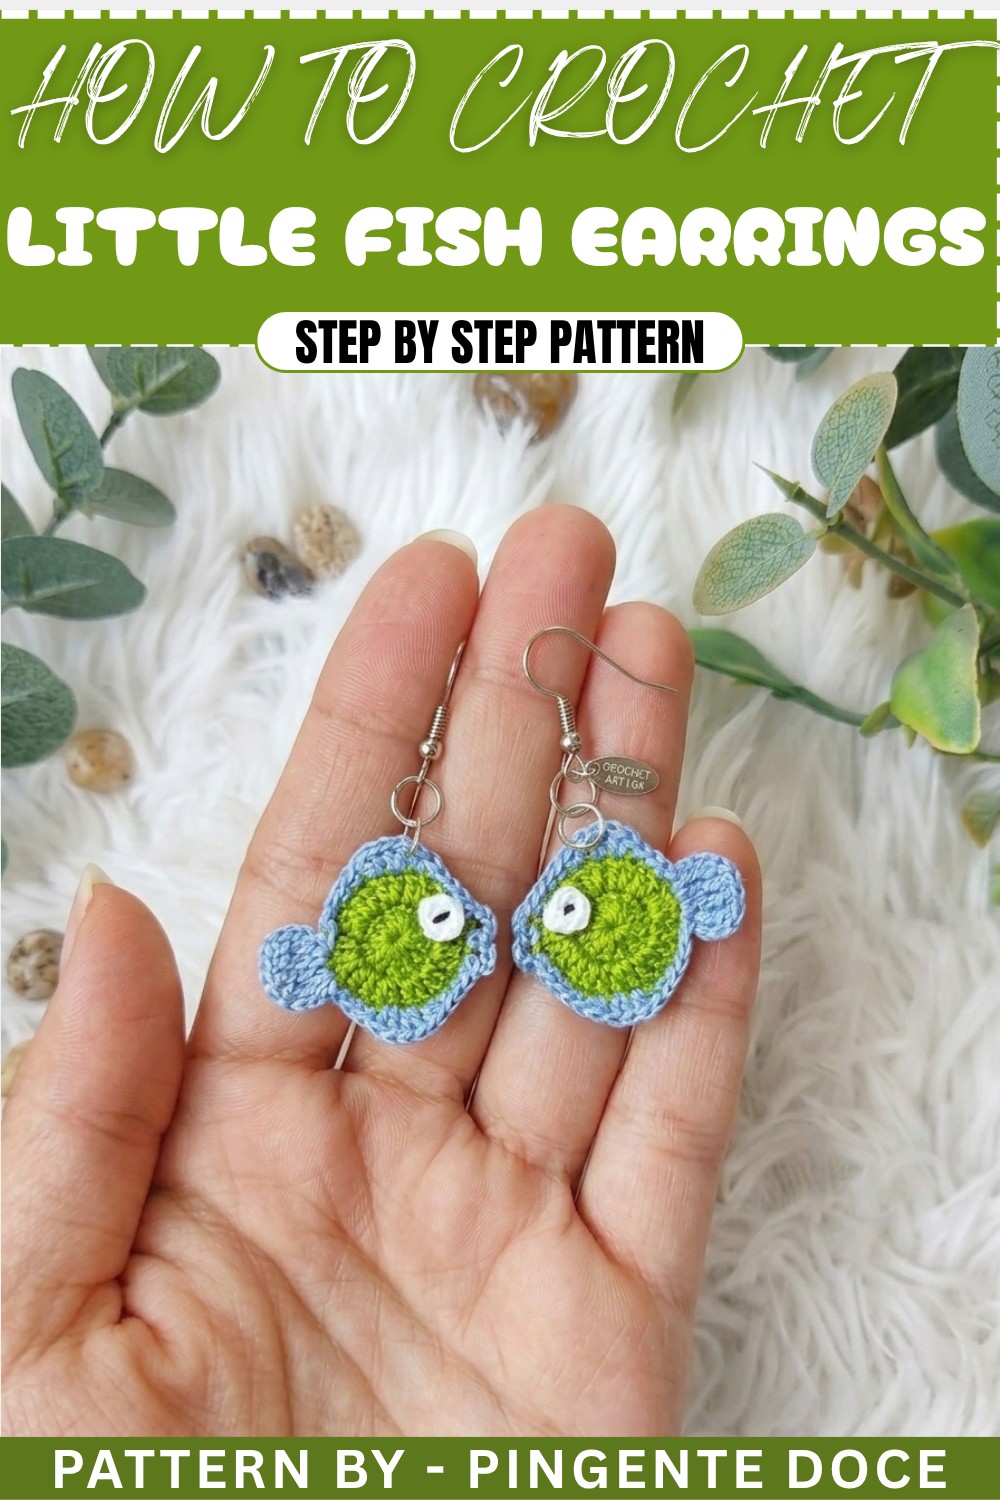
Crochet Fish Earring Pattern
This pattern provides step-by-step instructions to create an adorable crochet fish earring. Using basic stitches like the magic ring, double crochet, and medium stitches, this pattern builds a playful accessory perfect for everyday wear or gifting. The pattern is lightweight, customizable, and works up in no time. Ideal for crochet beginners and fish enthusiasts alike, this pattern combines simple shaping techniques with playful detailing. These earrings can be customized with different colors for a unique, handmade touch.
Uses of This Pattern
- Jewelry: Add a touch of fun and creativity to your accessory collection.
- Gifts: Makes an excellent handmade present for ocean lovers or fishing enthusiasts.
- Decor: Create a series of colorful fish for keychains, garlands, or other decorative projects.
- Crochet for Sale: A trendy item for handmade markets and shops.
Skill Level & Terminology
- Skill Level: Beginner-friendly. Requires basic knowledge of crochet stitches.
- Terminology: U.S. Crochet Terms
Materials & Tools
- Thread: Anchor thread (or any similar yarn in two colors: one for the body and one for the details).
- Crochet Hook: 1 mm crochet hook for small, precise work.
- Additional Tools: Scissors, pliers, sewing needle, earring hooks, hoops, and hardener (fabric glue mixed with water).
Gauge
Gauge is not critical for this pattern. The tension should be tight enough to ensure a firm structure but flexible enough to comfortably crochet small details.
Abbreviations List
- MR: Magic Ring
- ch: Chain
- sc: Single crochet
- sl st: Slip stitch
- dc: Double crochet
- m st: Medium stitch
Special Stitch Instructions
- Magic Ring (MR): Make a loop with the yarn, insert the hook into the loop, pull up a loop, and chain to secure. Work stitches into the ring and pull the tail to tighten.
- Medium Stitch (m st): Yarn over, insert the hook into the stitch, yarn over again, and pull through all three loops on your hook.
Finished Size
The finished crochet fish earring is approximately 1.5–2 inches, making it a lightweight and perfect accessory.
Pattern Overview
The fish pattern features a main circular body worked in rounds with standard increases, a long tail fin with layered details, and a small magic ring for the eye. With minimal assembly, this pattern gives you quick results in just a few steps.
The Pattern Itself
Part 1: Creating the Fish Body (Round 1)
- Magic Ring: Start with a MR.
- Starting Chains: Make 2 ch (counts as the first stitch).
- Double Crochets: Work 12 dc into the MR, evenly spaced.
- Close the Round: Pull the magic ring tight and secure the round with a sl st into the first dc.
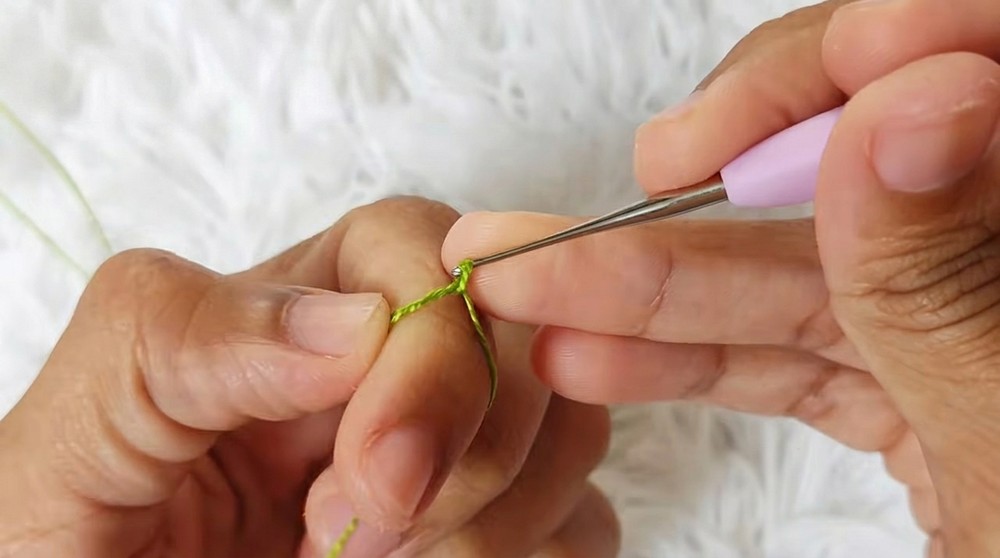
Note for Beginners: This step creates the foundational circular base for the fish body. Make sure to evenly distribute the stitches and close the magic ring tightly for a neat finish.
Part 2: Adding Increases to the Body (Round 2)
- Starting Chains and Increase: Begin with 2 ch and work 2 dc into the same stitch.
- Double Crochet Increases: Work 2 dc in each base stitch around, creating a total of 24 dc.
- Color Change: In the last stitch, leave the last two loops on your hook, attach the new color, and pull through to complete the stitch.
- Slip Stitch to Join: Secure the round with a sl st in the first dc.
Note for Beginners: Adding increases ensures the fish body expands evenly. The color change introduces a contrast layer, so use this to add your creative touch!
Part 3: Creating the Long Tail Fin
- Four Chains: Work ch 4, then cut the previous thread to avoid tangling.
- Elongated Double Crochets:
- Yarn Over Twice: Insert the hook into the same base stitch.
- Pull up a loop, pull through one loop, then two loops, and finally the last two loops to create an elongated dc.
- Repeat this elongated dc for a total of 2 stitches in the same spot.
- Slip Stitch to Anchor: Make a sl st in the next stitch to secure.
- Continue Fin Details: Repeat steps 9–11 in the next stitch to form additional fins.
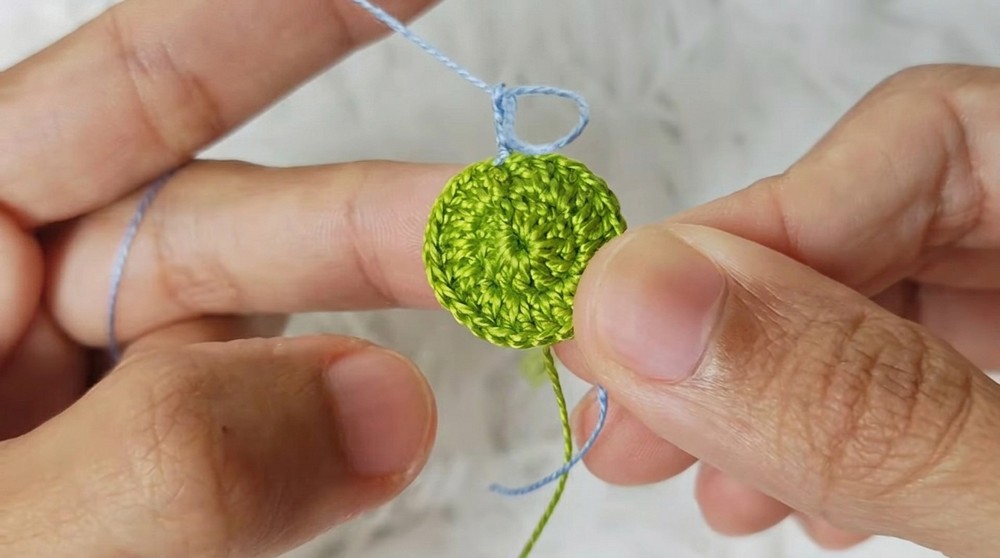
Note for Beginners: The elongated double crochet adds flow and dimension to the fishtail. Follow the sequence carefully to maintain consistency on each fin.
Part 4: Flipping the Body with Decorative Swim Fins
- On the Right Side:
- Make 3 sc across three consecutive stitches.
- Add 2 dc in the next stitch, followed by 2 m st in the next stitch.
- Continue with 4 sc across the next four stitches.
- Repeat Chains: Add 3 ch, secure with an sc, and repeat the loop.
- Balancing the Other Side:
- Work the same sequence in reverse to complete the regular shape of the fins.
- End with 4 dc across the final four stitches, followed by a sl st to secure.
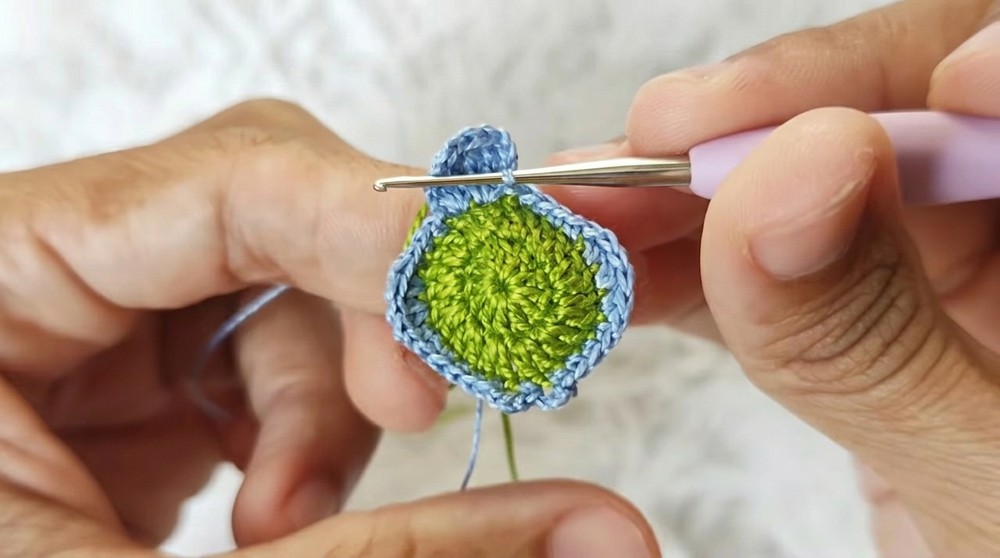
Note for Beginners: Decorative stitches mimic the flow of natural fish fins. Adjust tail details to desired lengths for customization.
Part 5: Adding the Eye
- Create a Small Magic Ring: Work a MR with 6 sc.
- Slip Stitch and Detail: Close the round with a sl st, and switch to black thread. Use a sewing needle to sew small details like a line and “pupil” on the fish eye.
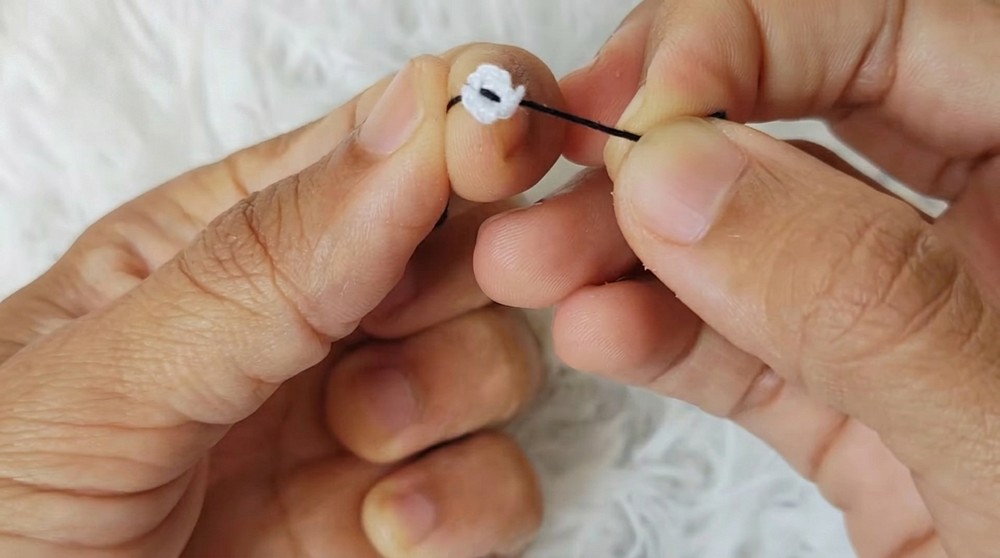
Note for Beginners: The eye adds a striking detail to your project. Use contrasting colors to make the eye stand out.
Assembly & Finishing
- Stiffen the Fish: Mix a small amount of fabric glue with water to create a hardener. Apply the mixture sparingly to the back of the fish and let it dry for durability.
- Attach Hooks and Hoops: Use pliers to attach the earring hoops to the top of the fish body. Secure the earring hooks to the hoops.
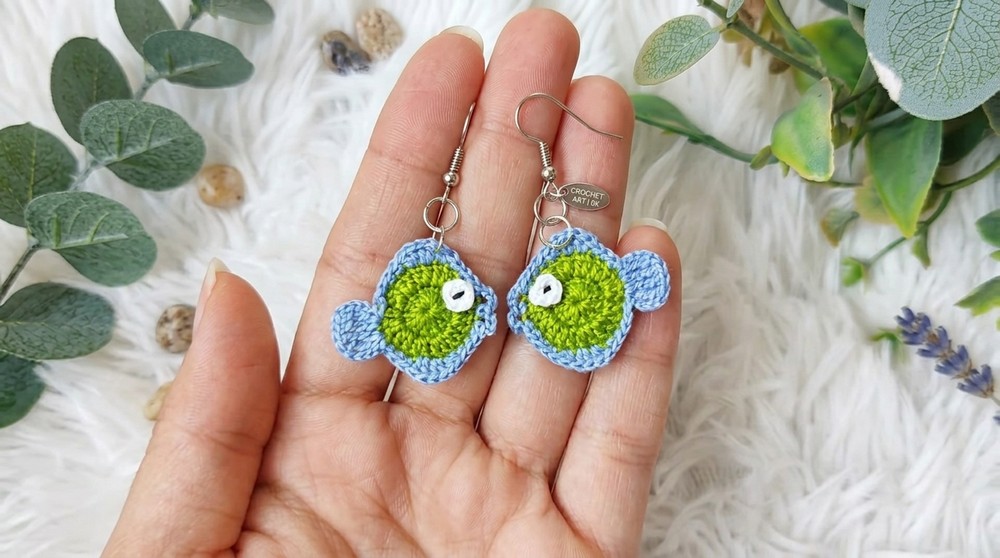
Note for Beginners: Make sure the fabric glue has completely dried before adding the earring hooks. Carefully handle the piece while attaching jewelry parts to prevent damage.
What You’ll Learn
- Magic Ring Mastery: Use this essential technique to create seamless, circular designs.
- Shaping Skills: Understand how to increase stitches for perfect curves.
- Creative Detailing: Use yarn and sewing techniques for intricate designs like eyes and fins.
- Jewelry Assembly: Convert crochet pieces into functional, wearable art.
Pattern Difficulties and Solutions
Common Challenges:
- Managing the small size of the design and maintaining a consistent tension.
- Color changes and weaving in thread ends to prevent unraveling.
- Achieving symmetry in the fins and other details.
Solutions:
- Use a light workspace and crochet slowly to manage small stitches.
- Use a sewing needle to secure thread ends neatly at the back.
- Count your stitches carefully while shaping the fins and body for a balanced result.
Why You’ll Love This Pattern
This crochet fish earring pattern combines simplicity and creativity, allowing you to make a lightweight, whimsical accessory that’s both fun and stylish. With its quick crafting time and minimal materials, it’s perfect for gifts or last-minute projects. The playful pattern speaks to your love of the ocean and animals, making it both meaningful and trendy.