
Free Crochet Frog Keychain Pattern You’ll Want to Try
Bring smiles with this Free Crochet Frog Keychain Pattern that is simple to make and perfect for adding a fun touch to your keys or bags today.
Making your own adorable crochet accessories doesn’t get much more fun than with the Free Crochet Frog Keychain Pattern. This project is perfect for anyone looking to create a small, handmade item that’s both functional and eye-catching. Frog keychains are tiny, lightweight, and great for decorating your keys, backpacks, or zipper pulls, adding a playful charm wherever you use them.
Free Crochet Frog Keychain Pattern – Perfect for Handmade Gifts
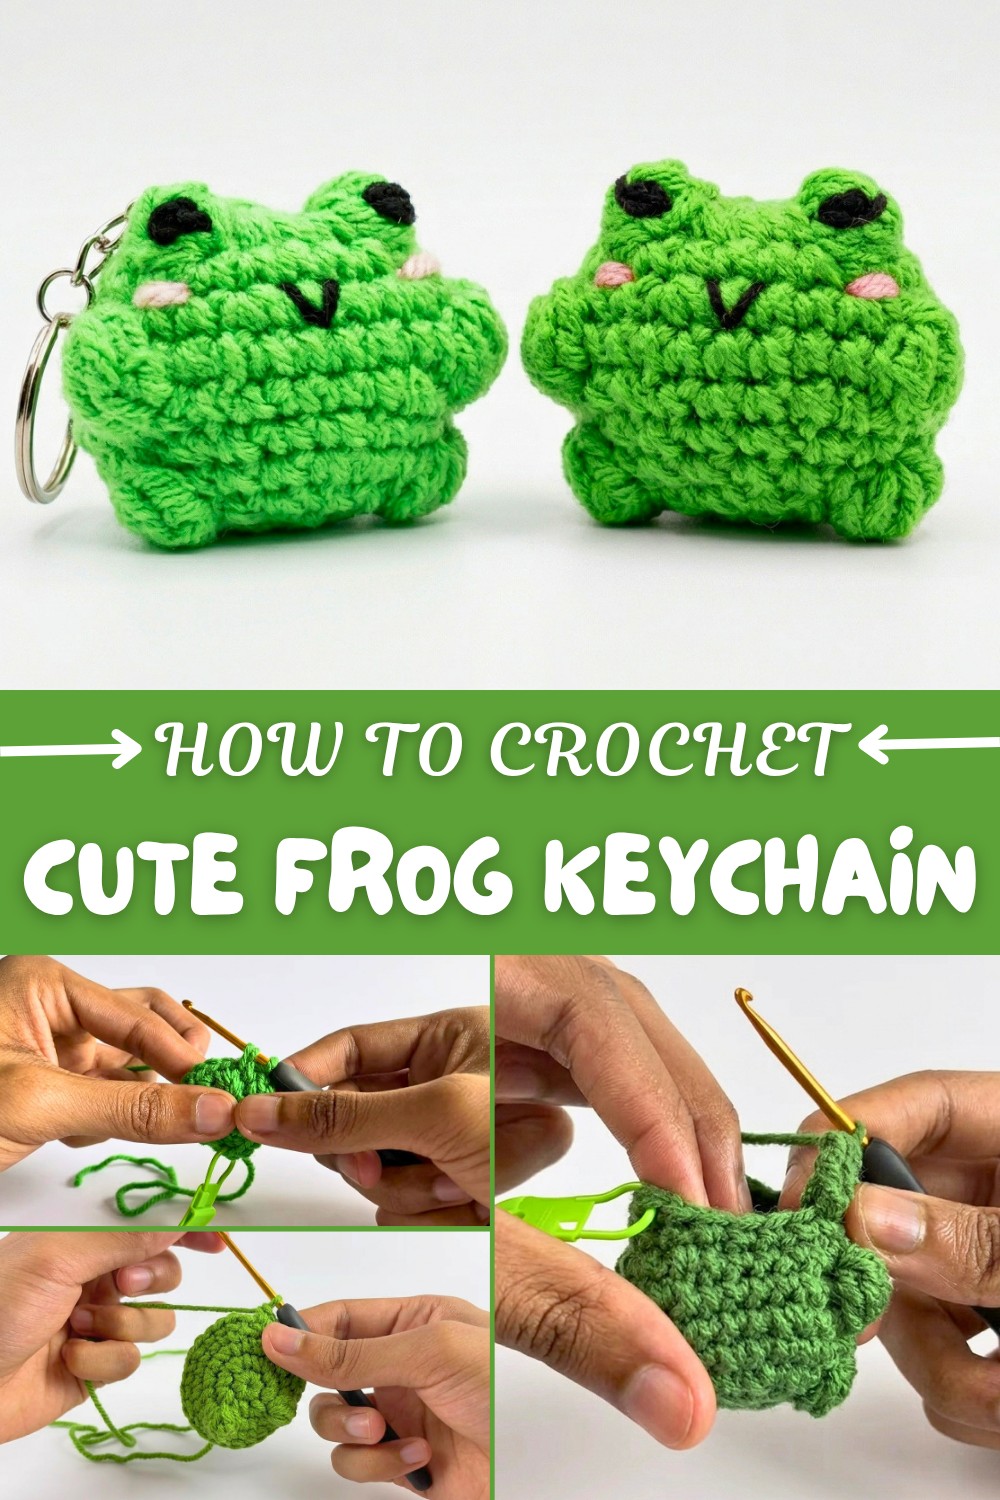
The finished frog keychain has a charming design that makes it stand out. Its rounded body, distinct bulging eyes, and little arms bring the look of a friendly frog to life. The texture is soft, and you can customize the frog with vibrant green yarn or any other colors to make it uniquely yours. Add a couple of stitched details, like a tiny smile or spots, to give it even more personality. These keychains are not only cute but versatile, they make wonderful small gifts, decorative accents, and even fun collectibles.
This project is suitable for beginners and experienced crocheters alike. The main stitch used is the single crochet, and the pattern incorporates basic shaping techniques like increases and decreases. It’s worked in rounds, which makes it easy to follow and keeps the process straightforward. Plus, because it’s so small, it works up quickly.
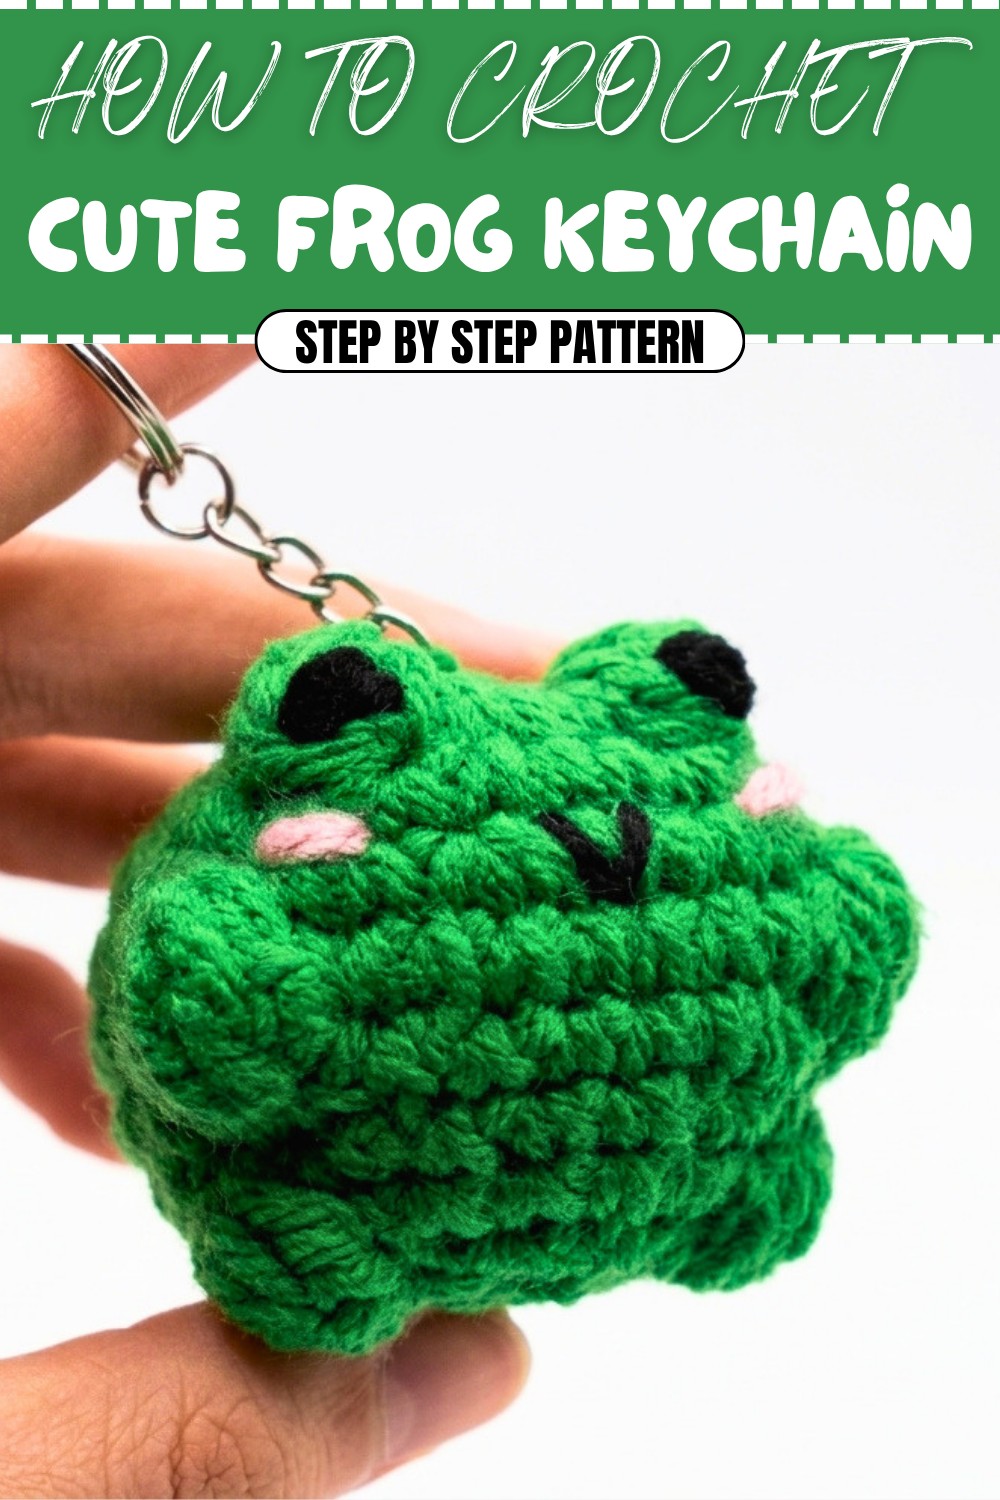
These frog keychains are perfect for gifting to frog lovers, kids, or anyone who enjoys unique and handmade items. They also make fun party favors or memorable keepsakes. Whether for personal use, home decor, or as thoughtful gifts, these little frogs are a joy to create.
Crochet Frog Keychain Pattern
This crochet frog keychain is a fun and adorable project that can be completed in just a few hours. It is crocheted as a seamless piece, incorporating cute details such as bobble eyes, a tiny embroidered mouth, and blush details. This pattern makes an excellent gift or a whimsical addition to your accessories.
Skill Level
Intermediate
This pattern is designed for crocheters who are comfortable working in the round, increasing and decreasing, and using basic embroidery to add facial details. It also includes bobble stitches and invisible decreases, making it ideal for those looking to expand their skills.
Materials
- Yarn:
- Weight 4 (medium) yarn in:
- Green Grass (for the body).
- Black (for the eyes and mouth).
- Pink (for the blush).
- Weight 4 (medium) yarn in:
- Hook:
- 3 mm crochet hook.
- Other Tools:
- Scissors.
- Yarn needle.
- Stitch marker.
- Stuffing (polyfill or yarn scraps).
- Keyring (to attach the frog).
Special Stitches
1. Bobble Stitch (bobble):
Yarn over, insert the hook into the stitch, yarn over, and pull up a loop (three loops on the hook). Repeat this process until five loops are on your hook, yarn over, and pull through all five loops.
2. Invisible Decrease:
Insert the hook into the front loop only of the next two stitches, yarn over, and pull through both loops (two loops remain on the hook). Yarn over and pull through the last two loops.
3. Slip Stitch (sl st):
Insert the hook into the stitch, yarn over, and pull through both loops on the hook to create a clean join.
Stitch Abbreviations
- ch – Chain
- sc – Single Crochet
- sl st – Slip Stitch
- bobble – Bobble Stitch
- inc – Increase (2 sc in the same stitch)
- dec – Decrease (crochet 2 stitches together)
Useful Tips
- Track Your Rounds: Use a stitch marker to mark the first stitch of each round, as the pattern is worked in joined rounds. This will help you keep track of your progress easily.
- Frog Shape: Stuff the body progressively as you crochet to avoid stretching the stitches or missing the opportunity to shape the frog properly.
- Facial Embroidery: Keep the facial features small and whimsical. Use the bobble stitches as guides for positioning the eyes and mouth.
- Keyring Placement: Ensure the keyring is securely attached to the beginning ring for durability.
Pattern Instructions
1. Foundation
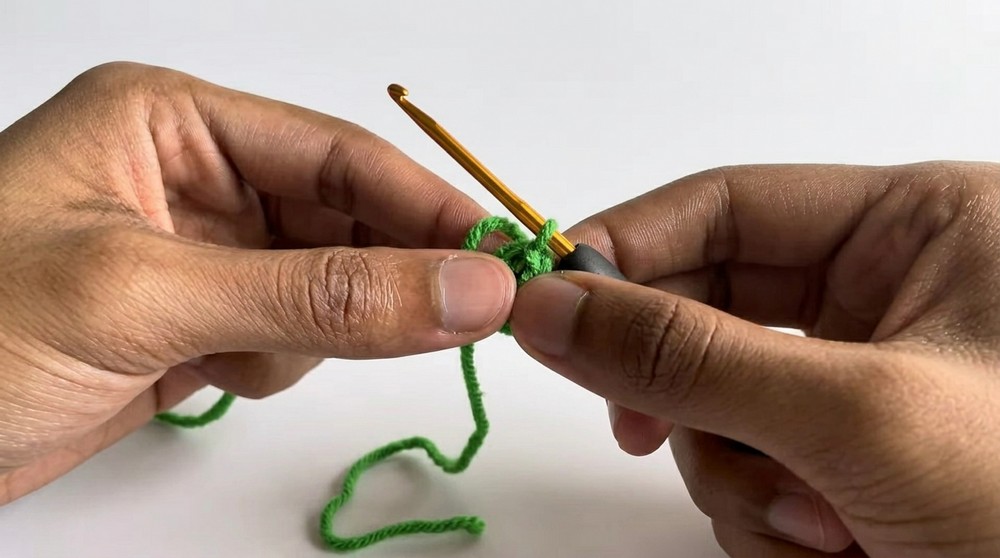
- Make a slip knot and chain 6.
- Slip stitch into the first chain to form a ring.
2. Frog Body
Round 1:
- Work 8 single crochet (sc) into the ring.
- Slip stitch into the first sc and chain 1. (8 stitches)
Round 2:
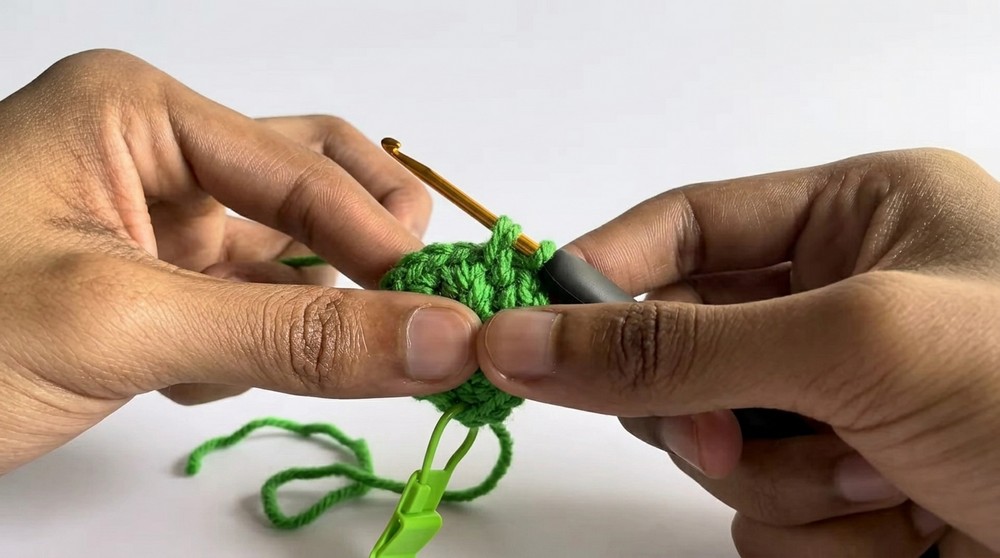
- Work 2 sc in each stitch around.
- Slip stitch to the first sc, chain 1. (16 stitches)
Round 3:
- (1 sc, 1 inc) 3 times.
- Work 1 bobble stitch, (1 inc, 1 sc, 1 inc) once.
- Work 1 bobble stitch, (1 inc, 1 sc, 1 inc, 1 sc, 1 inc) to complete the round.
- Slip stitch into the first sc and chain 1. (24 stitches)
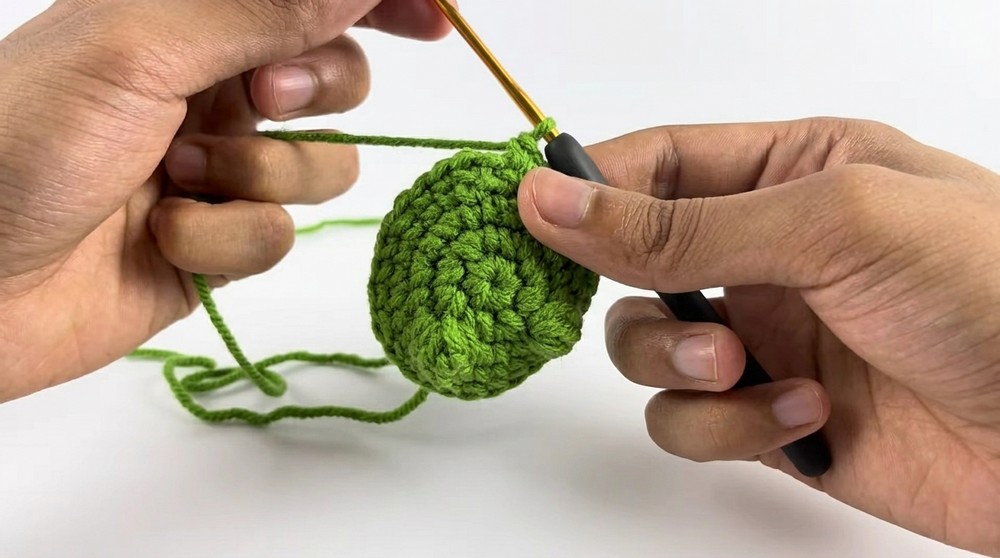
Round 4:
- Work 1 sc in each stitch all the way around.
- Slip stitch into the first sc and chain 1. (24 stitches)
Round 5:
- (3 sc, 1 inc) repeat around.
- Slip stitch into the first sc and chain 1. (30 stitches)
Round 6:
- Work 10 sc, 1 bobble stitch, 9 sc, 1 bobble stitch, and finish with 9 sc.
- Slip stitch into the first sc and chain 1. (30 stitches)
Round 7:
- (3 sc, 1 invisible decrease) repeat around.
- Slip stitch into the first sc and chain 1. (24 stitches)
Round 8:
- (2 sc, 1 dec) repeat around.
- Slip stitch into the first sc and chain 1. (18 stitches)
Round 9:
- Work 6 sc, 1 bobble stitch, 6 sc, 1 bobble stitch, and finish with 4 sc.
- Slip stitch into the first sc and chain 1. (18 stitches)
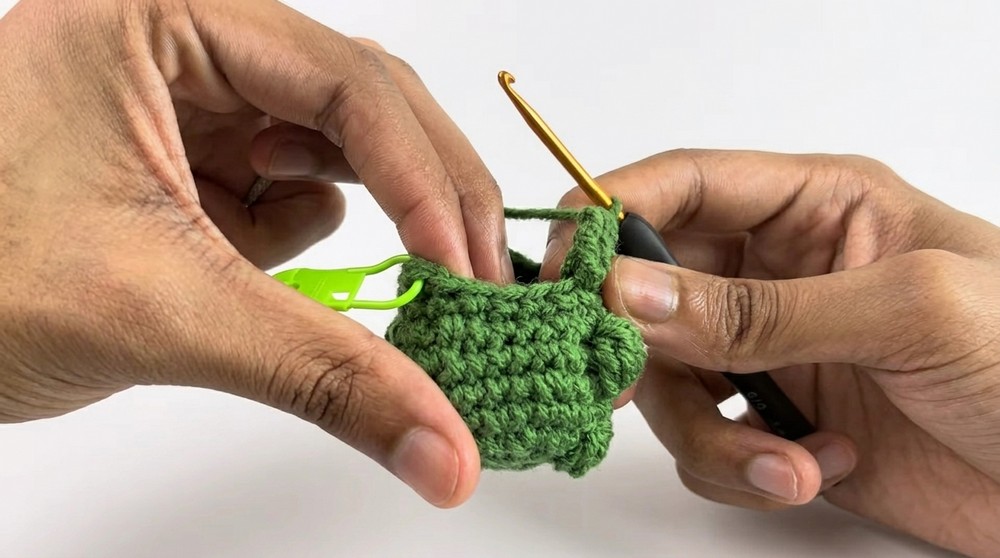
Round 10:
- (1 sc, 1 dec) repeat around.
- Slip stitch into the first sc and chain 1. (12 stitches)
Stuffing:
- Stuff the frog firmly with polyfill or yarn scraps. Shape the body as you stuff to ensure proper proportions.
Round 11:
- Work 1 decrease in every stitch around. (6 stitches)
- Slip stitch to join.
3. Closing the Body
- Cut the yarn, leaving a long tail.
- Use a yarn needle to weave the tail through the front loops of the final six stitches.
- Pull the yarn tight to close the top of the frog. Secure with a knot and weave in the end.
4. Embroidered Details
- Eyes: Using black yarn, embroider small lines following the placement of the first round of bobble stitches. These mimic the frog’s distinctive eyes.
- Smile: Use black yarn to embroider a small "V"-shaped smile, centered below the eyes.
- Blush: Use pink yarn to create tiny lines or blush marks under each eye.
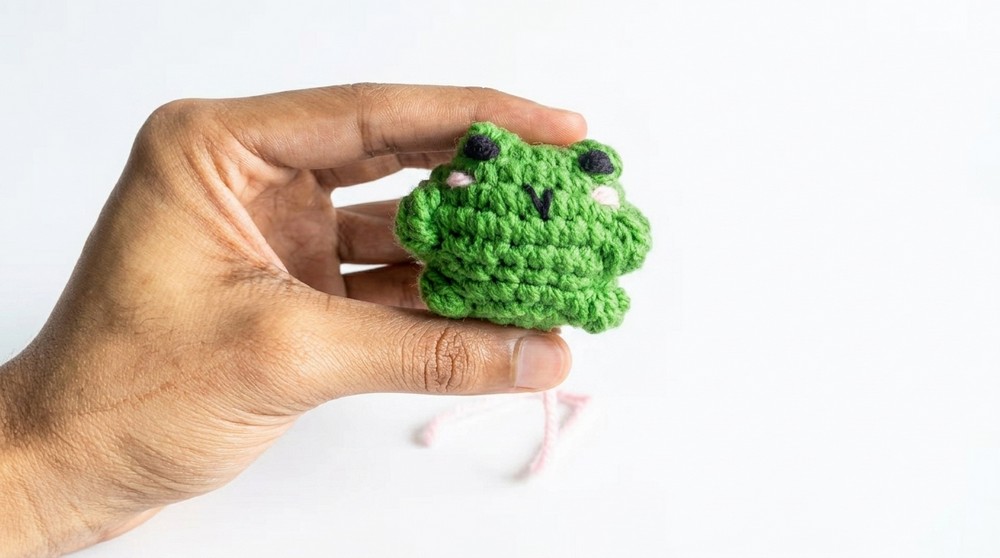
5. Attaching the Keyring
- Securely attach the keyring to the top of the frog at Round 1. Thread the yarn through the stitches from the early rounds with a yarn needle and knot tightly. Trim any excess yarn.
Assembly and Sizing
The completed frog keychain is approximately 6–8 cm tall, depending on your individual tension and yarn thickness. Its lightweight and compact size make it ideal for attaching to keys, backpacks, or zippers.
Conclusion
This crochet frog keychain is not only fun to create but also adds a charming handcrafted touch to your accessories. The use of bobble stitches and embroidery ensures a cute and detailed appearance, making it perfect for gifting or personal use. The process is straightforward and enjoyable, resulting in a delightful finished product sure to bring a smile to anyone's face.