How To Make Flower Ring Free Pattern For Lovely Handmade Gifts
Upgrade your look effortlessly by using a free crochet flower ring pattern that brings delightful floral flair to your fingers.
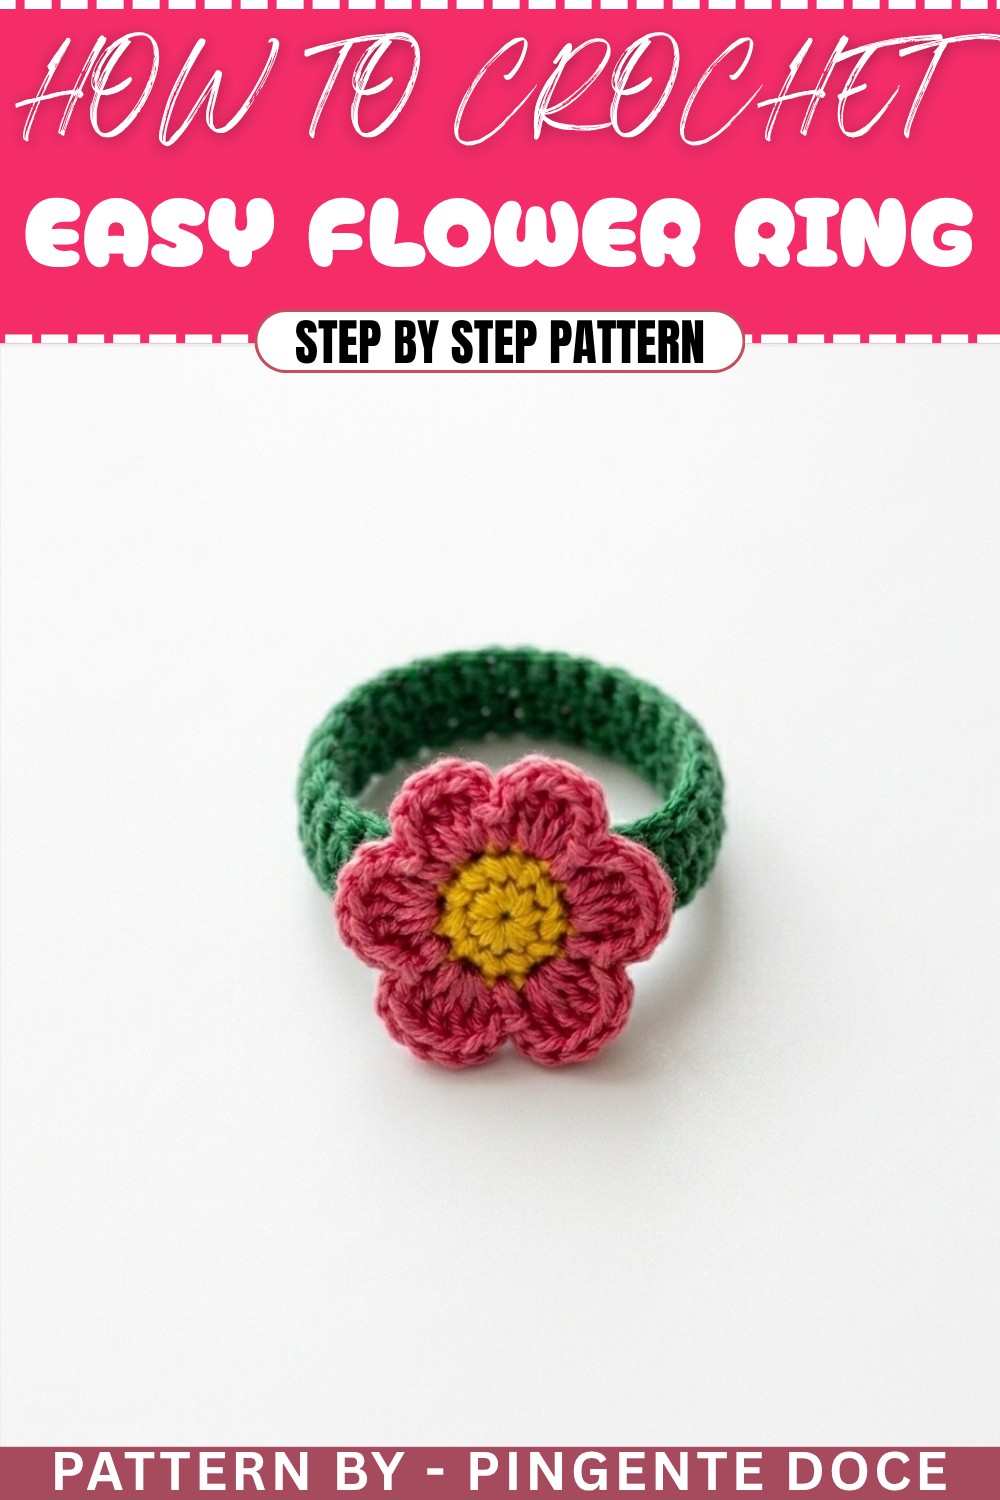
When I first tried making this sweet little ring, I was amazed at how something so simple could look so pretty. It’s like wearing a tiny garden on your finger! The ring features a delicate flower motif that adds a gentle pop of color and charm to your hand. It’s perfect for everyday wear, special occasions, or even as a handmade gift that anyone would appreciate. What makes this project special is the use of soft yarn and basic crochet stitches like single crochet and double crochet, which are easy for beginners to learn. These stitches come together to form petals that look like a real flower, giving the ring a lovely texture and shape.
More Fun Projects from This Pattern
The same flower design can easily be used for other lovely crochet items. Try making hair clips, brooches, or headbands by attaching the flower to different bases. You could also crochet several flowers and join them to create a beautiful garland or decorate bags and scarves. This pattern is a wonderful way to practice basic crochet skills and make charming accessories for yourself or your loved ones.
Crochet Your Own Flower Ring Pattern For Everyday Chic

The pattern starts with a magic ring, helping you create a neat and tight center for the flower. From there, chains and a combination of stitches build graceful petals that softly stand out. A small chain band fits comfortably around your finger, and you can customize the size by adding or reducing the number of chains. Since the stitches are simple and repetitive, even someone just learning to crochet can follow along without much trouble. Finishing it off with a tapestry needle to sew ends and a tiny dab of glue keeps everything neat and secure.

Crochet Pattern: Flower Motif Ring
Introduction
In this tutorial, you’ll learn how to create beautiful flower motif crochet rings. This beginner-friendly project is perfect for crafting quick and elegant accessories for gifting, party favors, or selling at craft fairs. Using basic crochet stitches like single crochet, chain, and double crochet, these rings are simple yet eye-catching. With just a few materials, you can complete a delightful and versatile piece of jewelry in no time.
Uses of This Pattern
- Accessories: Stylish rings that add a playful touch to your daily outfits.
- Handmade Gifts: Great personalized gifts for friends and special occasions.
- Party Favors: These thoughtful and affordable rings are perfect for weddings, birthday parties, or baby showers.
Skill Level & Terminology
- Skill Level: Beginner. Only basic stitches are used, and the step-by-step instructions will guide you through every detail.
- Terminology: This pattern follows US crochet terms.
Materials & Tools
To create your crochet flower rings, you’ll need:
- Yarn:
- Yellow yarn for the flower center.
- Pink yarn for the flower petals.
- Green yarn for the ring band.
- Leftover yarn can be used for this quick project.
- Crochet Hook: Matches yarn size; suggested 2.5 mm hook.
- Tapestry Needle: To sew and weave in loose ends.
- Scissors: For trimming yarn neatly.
- Glue (Optional): Silicone glue or fabric glue mixed with water to attach pieces or stiffen them.
- Bead (Optional): A small bead for embellishing the center of the flower.
Gauge
Gauge is not crucial for this design due to its decorative nature, but the tension should remain consistent to ensure the flower rings retain their shape.
Abbreviations List
Below is a list of abbreviations used throughout the pattern:
- ch: Chain stitch
- sc: Single crochet
- dc: Double crochet
- sl st: Slip stitch
- MR: Magic Ring
Special Stitch Instructions
Magic Ring (MR):
The magic ring is a technique used to create a tightly closed circle for crocheting in rounds. Wrap the yarn around your fingers to form a loop, insert the hook into the circle, grab yarn, and pull through. Lock it with a chain stitch.
Finished Size
The completed ring will measure approximately 1.5 inches in diameter for the flower and fit most adult fingers.
The Pattern
Step 1: Creating the Flower Center with Yellow Yarn
- Start with a Magic Ring (MR):
- Use yellow yarn to make a magic ring. Insert the hook into the loop, yarn over, and pull through to lock the ring with a chain.
- Round 1:
- Work 10 single crochets (sc) inside the magic ring.
- Tighten the ring completely by pulling the yarn tail.
- Close the round with a slip stitch (sl st) into the first stitch.
- Fasten Off:
- Cut the yarn, leaving a short tail for weaving in with a tapestry needle.
Note for Beginners: The flower center is straightforward to make and forms the base of the flower motif. The magic ring creates a neat, circular foundation.

Step 2: Crafting the Petals with Pink Yarn
- Attach Pink Yarn:
- Insert your hook into any one of the ten stitches from the yellow center. Attach pink yarn by pulling through, then chain 2 to begin.
- Petal Formation:
- Work 2 double crochets (dc) into the same stitch.
- Ch 2 and finish with a sl st into the next stitch.
- Repeat for Each Petal:
- Continue working 2 dc, ch 2, sl st in the same stitch for every stitch in the ring.
- Work until you have 10 petals around the yellow center.
- Fasten Off:
- Cut the yarn, leaving a small tail for weaving in with the tapestry needle.
For Beginners: The flower petals are formed by repeating a simple sequence within every stitch. Keep your chains and double crochets consistent for uniform and pretty petals.

Step 3: Crocheting the Ring Band with Green Yarn
- Attach Green Yarn:
- Using green yarn, make a slip knot and attach the yarn to your hook.
- Chain the Band:
- Ch 16, ensuring this length approximates the circumference of your finger. Adjust the number of chains for larger or smaller sizes as needed.
- Work Across the Chain:
- Ch 1 (turning chain), skip the first chain, and work 1 sc in each remaining chain.
- Repeat Rows:
- Ch 1, turn the piece, and work 1 sc into each stitch across.
- Continue for several rows, depending on the width you prefer for your band.
- Fasten Off:
- Leave a long tail for sewing and use the tapestry needle to weave and secure the edges.
Tip: The chain determines the band’s length, so check the size by testing the chain around your finger before proceeding.

Step 4: Joining the Band Ends
- Connect Ends:
- Join the two ends of the green band using either a couple of stitches with the tapestry needle or tie a slip knot and work a few single stitches directly.
- Secure:
- Knot the leftover thread tightly and trim the excess.
For Beginners: Ensuring the tight joining of the band is crucial for durability. Double-check the tied ends for a snug fit before proceeding.
Step 5: Attaching the Flower
- Glue or Sew:
- Use silicone glue to attach the flower to the center of the green band. Alternatively, use the tapestry needle and green yarn to sew the flower to the band securely.
- Add Bead (Optional):
- Sew or glue a small bead to the center of the flower for added charm.
Custom Tip: Get creative with extras—try sequins, buttons, or even glitter to give your flower ring a personal touch.

Step 6: Optional Finishing
- Apply Glue:
- For extra sturdiness, apply a mix of fabric glue and water to the back of the flower using a small brush. This will stiffen the flower and make it durable for regular wear.
Note: This optional step is helpful if you want your ring to last longer or hold its shape more firmly.
What You’ll Learn From This Pattern
- Magic Ring Creation: Form tightly closed circles that serve as the foundation for circular designs.
- Back-and-Forth Crochet: Understand how rows of single crochet create simple and flexible shapes like the ring band.
- Basic Assembly: Learn to join parts of a project together for decorative and functional purposes.
- Customization: Develop techniques for adding embellishments like glue, beads, and other decorations.
This project allows you to hone your crochet skills while crafting a fun and easy accessory. It’s a creative project that demonstrates how small, quick designs can be practical and fun.
Difficulties You May Encounter
Difficulty: Tight Magic Ring
It may take a few tries to close the magic ring tightly without gaps.
- Solution: Ensure you wrap the yarn consistently and firmly around your fingers, and pull the yarn tail slowly while adjusting the stitches to tighten.
Difficulty: Mismatched Petals
The flower petals may not be uniform if your tension varies.
- Solution: Crochet slowly, ensuring the same amount of tension in your chains and double crochets.
Difficulty: Joining the Band Ends
If the band isn't joined tightly, it might come undone after use.
- Solution: Verify your knots or seaming stitches and secure them with glue as needed.
Final Notes: Why You’ll Love This Pattern
These crochet flower rings are simple yet striking pieces that demonstrate the versatility of crochet as both a craft and a creative outlet. The fast nature of the project makes it an excellent choice for beginners and those who love the satisfaction of completing something in one sitting. Plus, it requires only small amounts of yarn, making it great for using up leftovers from other projects.
The adorable flower design, with its customizable colors and embellishments, ensures that every ring is full of personality, making it a perfect gift or accessory. Whether you're selling, gifting, or simply enjoying crafting, this pattern gives you the tools to create something beautiful with minimal effort.