
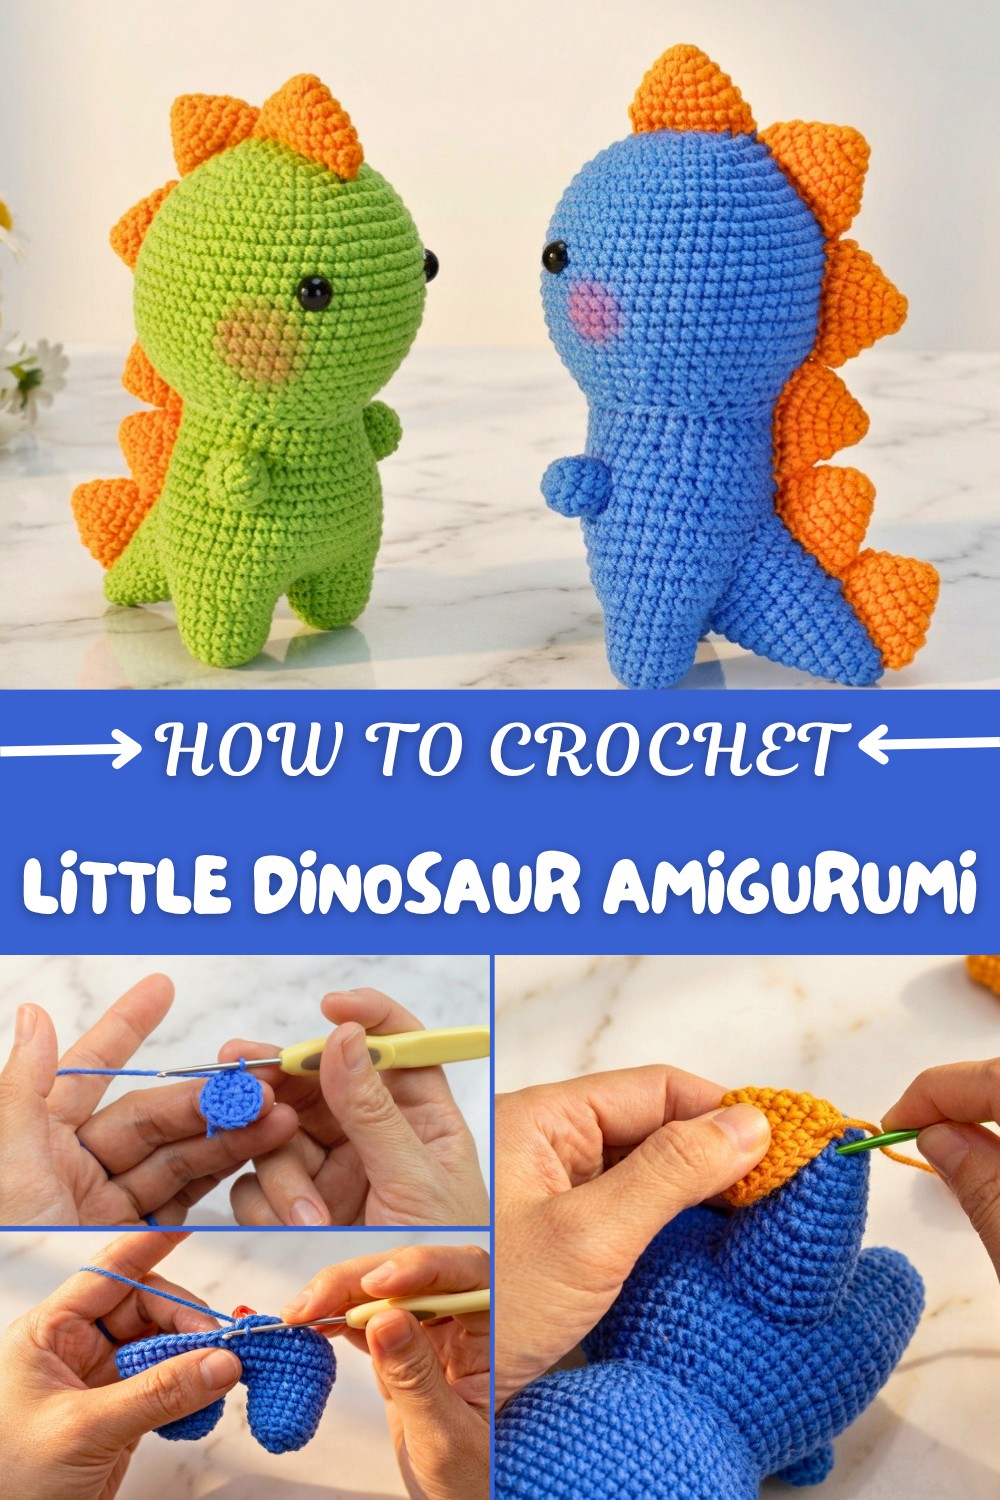
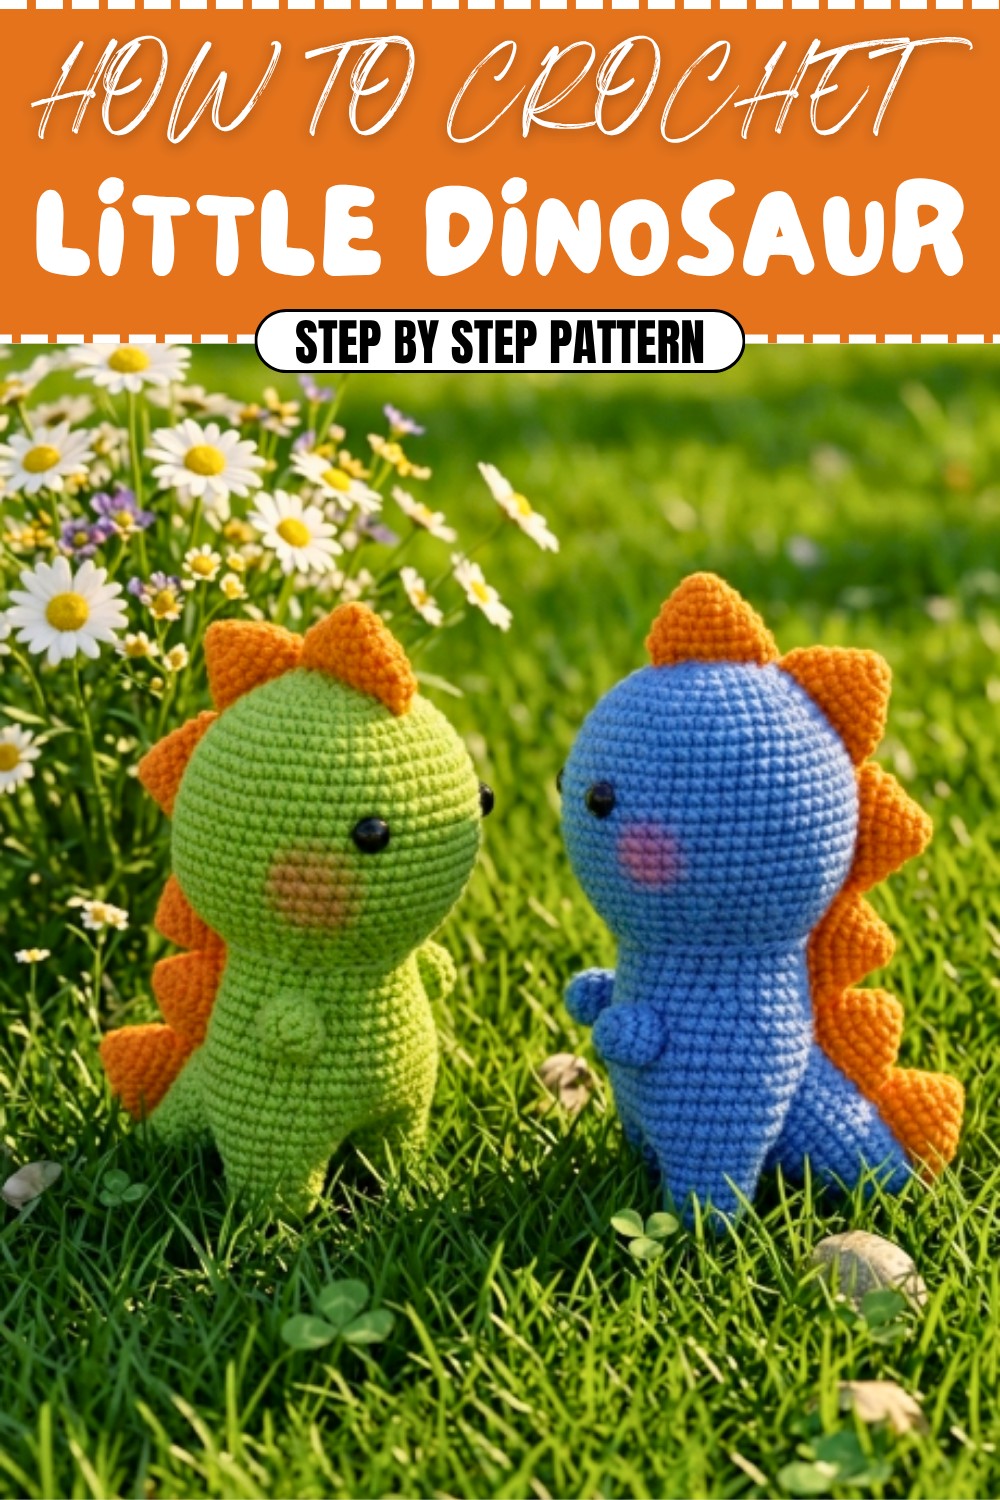
Crochet Little Dinosaur Amigurumi Pattern for Handmade Legend
Add joy to your gifts using a free crochet little dinosaur amigurumi pattern for a happy, easy-to-follow dino friend.
What if you could create a tiny, adorable dinosaur that feels like a hug in yarn form? This Crochet Little Dinosaur Amigurumi Pattern is perfect for bringing a burst of color and charm into your crochet projects. Whether it’s a soft green dino with yellow fins or a pastel pink one with blue accents, this pattern allows endless customization to match your creativity. With its plump body, kawaii little arms, and playful dorsal fins, this tiny dinosaur is sure to steal hearts!
Cute Crochet Little Dinosaur Amigurumi Pattern for Beginners
The beauty of this pattern lies in its simplicity; it primarily uses beginner-friendly techniques like the single crochet (sc), magic ring, and basic increases and decreases. These stitches work together to shape all the adorable curves of the dinosaur, while the magic ring helps to create seamless, rounded parts like the head, body, and tiny limbs. By mastering these fun and straightforward techniques, you’re not just crocheting a cute dino—you’re also building skills that can be used for so many other crochet projects like amigurumi toys, plant accessories, or small figurines.
What Else Can You Create?
Using the same skills from this pattern, you can easily branch out to make:
- Mini animals: Bunnies, bears, or even another species of dinosaur.
- Keychains or bag charms: Add little hoops and chains to turn them into functional accessories.
- Themed decorations: Adjust the design to make ornaments or decorations for nurseries or parties!
Tips for Making the Most of This Pattern:
- Mix and match colors to add flair and personality!
- Use embroidery for cute facial details or personal touches.
- Get creative by turning this pattern into a dinosaur-themed collection with accessories or props!
Crochet Baby Dinosaur Pattern – Step by Step Guide
Have you ever wanted to make a cute, playful crochet project that turns heads and warms hearts? This Baby Dinosaur Crochet Pattern is a fantastic choice! From its adorable dorsal fins to its kawaii finish, this pattern is perfect for creating a cuddly little dinosaur toy or decoration. Using simple techniques like magic ring, single crochet (sc), slip stitch (sl st), and decrease stitches, you will create a three-dimensional, structured dinosaur with detachable parts. Whether you’re making this for a child, a nursery décor, or just as a fun gift, this pattern lets your creativity shine. Plus, you'll get hands-on experience with vital stitches for shaping, joining, and sewing your crochet projects.
Skill Level & Terminology
- Skill Level: Beginner-friendly with step-by-step instructions.
- Terminology: US Crochet Terms.
Materials & Tools
- Yarn: Milk cotton yarn in five strands:
- Main body color (e.g., green, pink, or blue).
- Contrasting color for dorsal fins.
- Hook Size: 3.0 mm crochet hook.
- Accessories: Safety eyes or beads for eyes, fiberfill stuffing, scissors, yarn needle.
- Optional: Blush for making the dinosaur extra adorable.
Gauge
Gauge is not critical for this pattern. However, aim for tight stitches to avoid gaps when stuffing the finished dinosaur.
Abbreviations List
- ch: Chain
- sc: Single Crochet
- sl st: Slip Stitch
- inc: Increase (2 single crochets in the same stitch)
- dec: Decrease (combine two stitches into one)
- st(s): Stitch(es)
- BLO: Back Loop Only
Special Stitch Instructions
- Magic Ring: Wrap the yarn around your fingers to form a ring. Insert the hook into the ring, pull up a loop, and chain 1 to secure. Stitches are worked directly into this loop.
- Increase (inc): Crochet 2 single crochets into the same stitch.
- Decrease (dec): Insert the hook into the front loop of the next two stitches, yarn over, pull through both loops, yarn over again, and pull through the remaining loops.
Finished Size
Approximately 8 inches tall once assembled. Adjust the size by using thicker yarn or larger hooks as needed.
The Pattern Itself
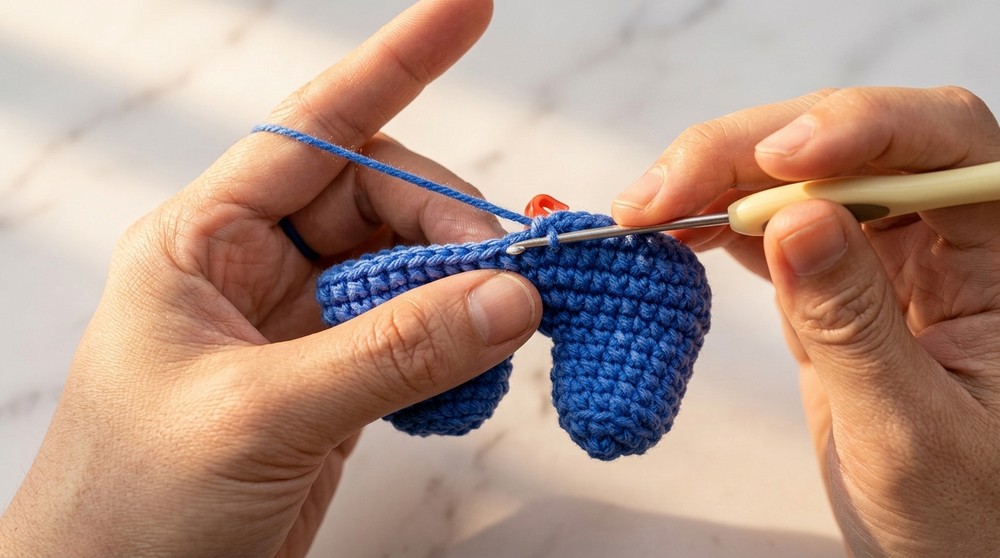
Step 1: Legs
R1: Create a magic ring, and work 6 sc into the ring. Tighten the ring by pulling the yarn tail and join with a sl st into the first stitch (6 sts).
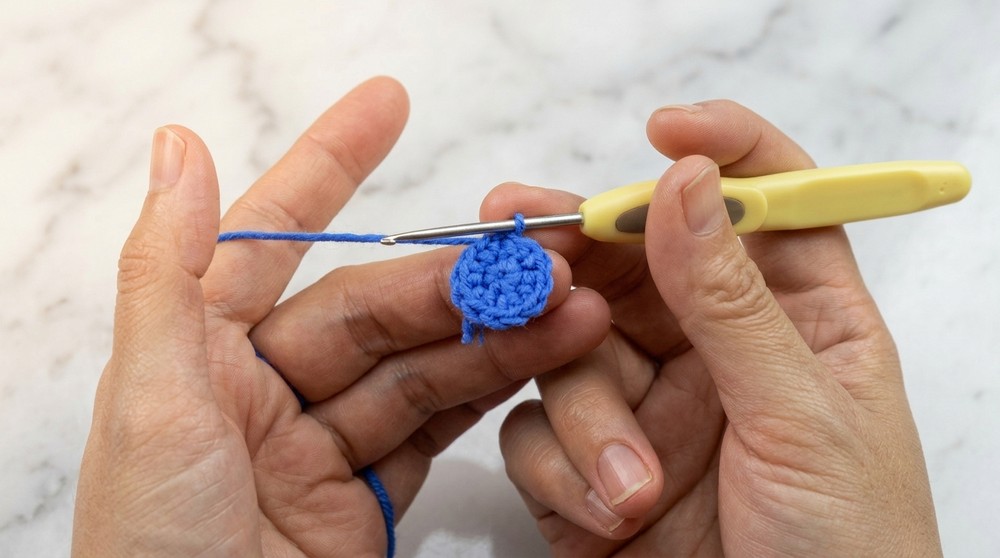
👉 This forms the foundation of the leg.
R2: Ch 1, crochet 6 inc (2 sc into one stitch). Mark the first stitch as needed. Finish with sl st to connect the round (12 sts).
The leg widens here, adding bulk to the base.
R3: Ch 1, crochet (3 sc, inc) around, repeating 3 times (15 sts).
By working into the back loop only (BLO), you add a shaped curve to the leg.
R4–R6: Ch 1, work 1 sc in each stitch across (15 sts per round).
These rounds build the length and structure of the leg. You can adjust the length by adding or reducing the number of rounds.
Step 2: Connecting the Legs
- Cut yarn after finishing the first leg, and weave in the ends.
- Repeat Step 1 to crochet a second leg but do not cut the yarn.
👉 Now you’ll connect both legs together.
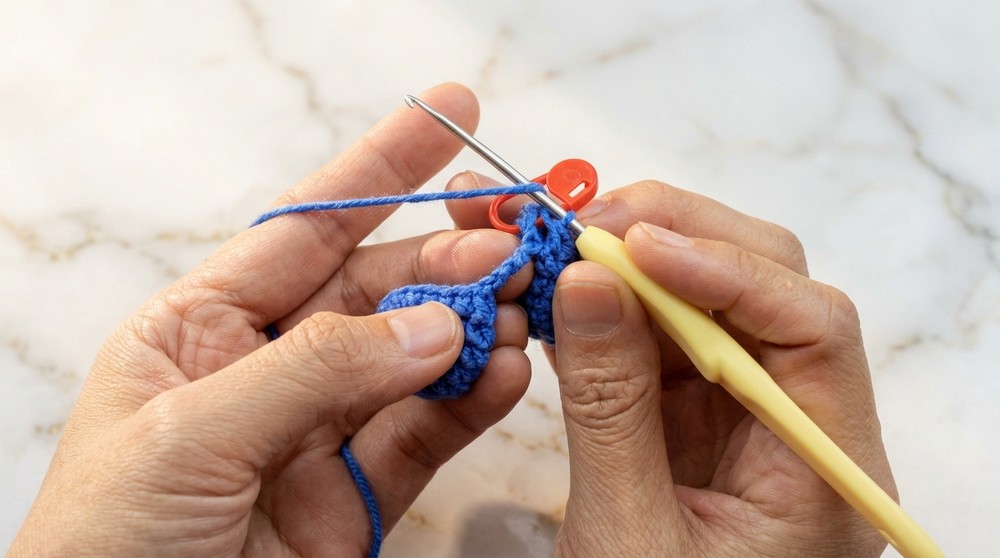
Connecting R7:
- Ch 3, sl st into the first leg. Ch 1, crochet around the first leg’s stitches.
- Work 3 sc into the chain stitches (one sc in each chain), then crochet around the second leg until the chain stitches are complete (36 sts).
This forms the round base that leads to the dinosaur body.
Step 3: Body
R8: Ch 1, crochet (5 sc, 1 inc) across, repeating 6 times (42 sts).
R9–R11: Crochet 1 sc in each stitch across rounds (42 sts per round).
The body grows in width, adding to the adorable round shape of the dinosaur.
R12: Ch 1, crochet (6 sc, 1 dec) across, repeating 6 times (36 sts).
R13–R20: Continue shaping the body:
- Alternate rounds of increases or decreases based on the diagram provided (sizes adjust accordingly).
- Once complete, leave the yarn tail long for assembly.
Stuff the body with fiberfill before closing.
Step 4: Head
- Follow the diagram provided to crochet approximately 48 stitches, shaping the round head using single crochet increases and decreases. Use safety eyes or beads for the eyes, attaching them between rounds 13 and 14 with 12 stitches apart.
Be sure to secure the eyes before adding stuffing into the head.
Step 5: Arms, Tail & Dorsal Fins
- Arms: Crochet two smaller arms using the same technique as the legs but adjust shape through fewer stitches (e.g., 6 sc, followed by increases and decreases).
- Tail: Create the tail in rounds, building shape with increases (e.g., 1 inc every 3 stitches) and decreasing toward the base.
- Dorsal Fins: Crochet 6 separate fins by working double crochets into specific anchor stitches on the tail section.
Assembly & Finishing
- Sew Head to Body: Align the head and body symmetrically, ensuring that stitches match round by round (approximately 30 stitches). Sew stitch by stitch to create a clean seam.
- Attach Arms: Position the arms symmetrically between rounds 14–15 and sew them carefully to avoid uneven placement.
- Sew Tail: Place the tail between the legs and sew in a circular pattern for stability.

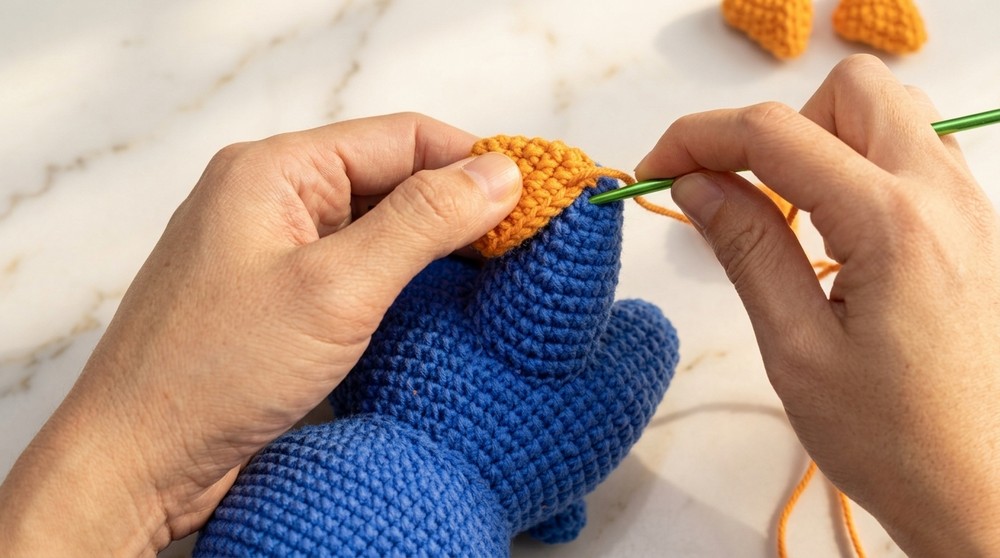
Sewing Dorsal Fins
- Placement: The fins should evenly span the back along the spine area.
- Attach each fin by sewing them stitch by stitch at an interval of 3 stitches apart.
- Secure with double stitches to ensure durability.
What You'll Learn From This Pattern:
This pattern is a confidence booster, teaching skills that go beyond just making a dinosaur!
- You’ll master starting with a magic ring, the secret to creating circular designs without gaps.
- Practice perfecting increases and decreases, helping you give dimension and personality to your crochet projects.
- Learn clean assembly techniques to keep things professional and symmetrical.