
Coin Purse With Flower Crochet Pattern – Step-by-Step Guide
Enhancing small accessory with Free Crochet Coin Purse With Flower Pattern features floral detail and pocket friendly elegance for daily use.
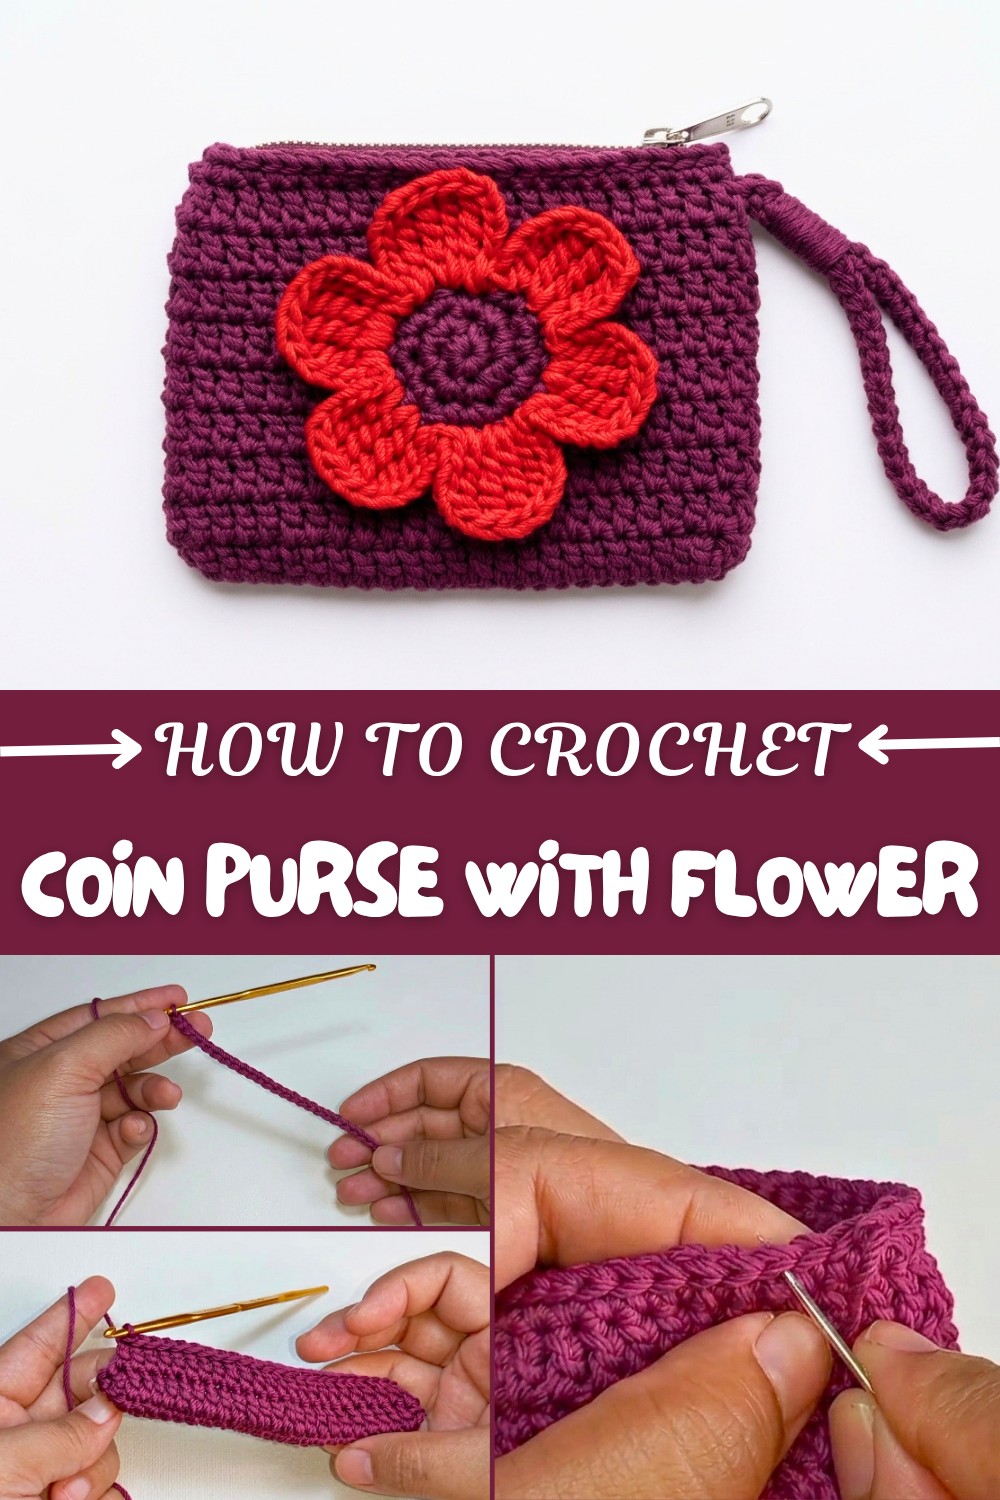
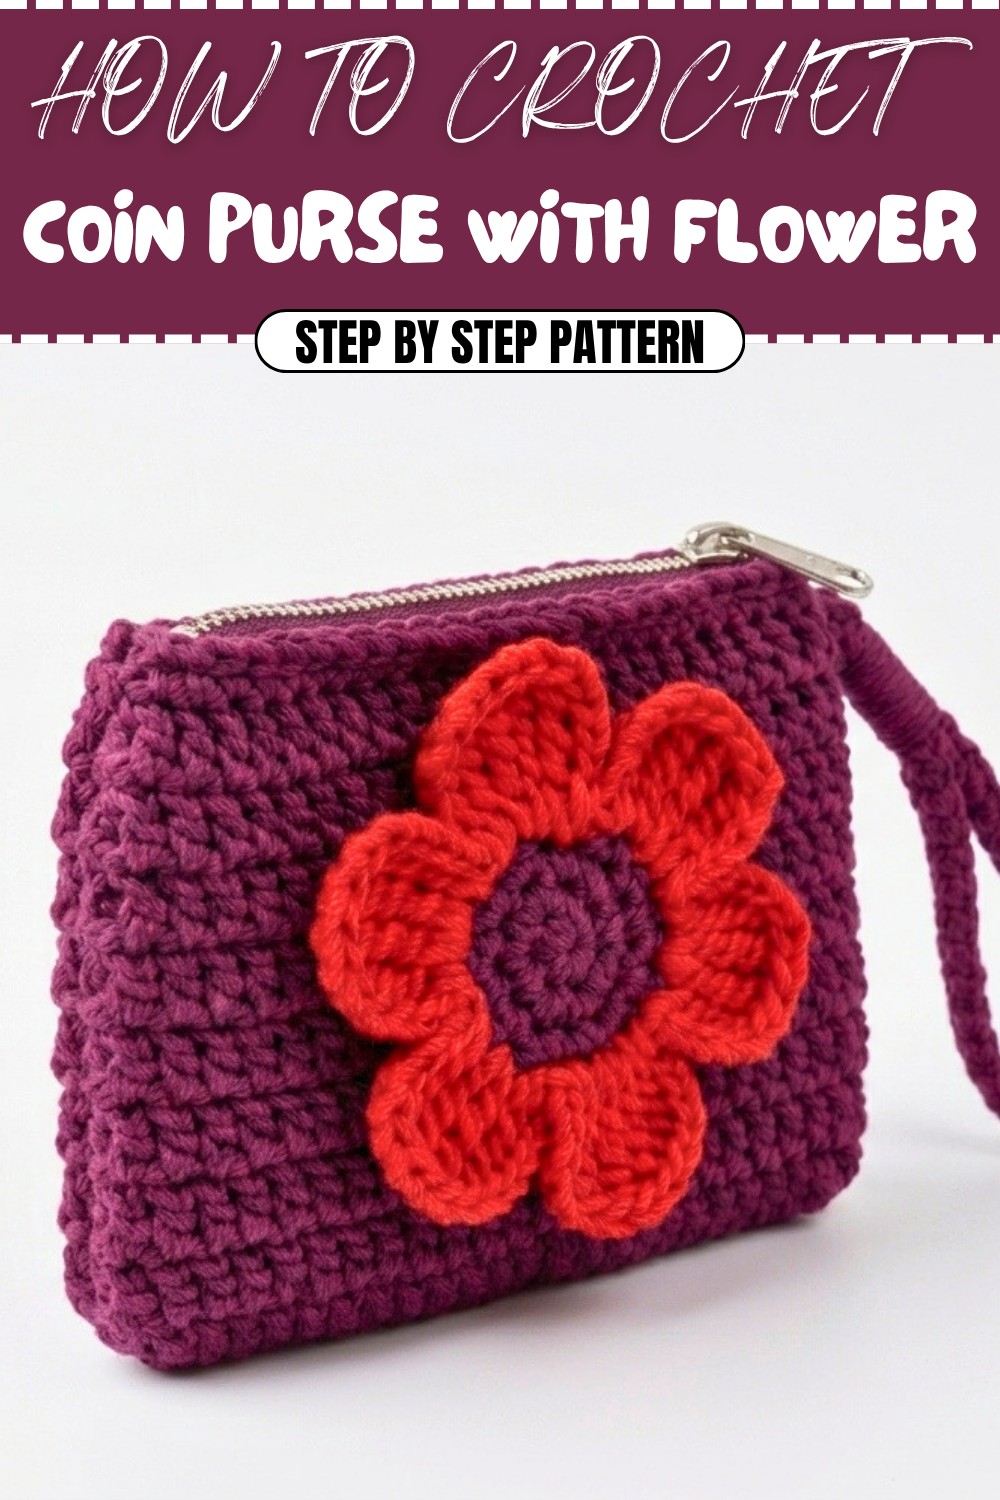
Looking for a quick and adorable crochet project that’s both fun and useful? This little coin purse, made with the Free crochet Coin Purse With Flower Pattern, is exactly what you need. It’s the perfect little pouch to stash your loose change, keys, or tiny essentials—and it looks absolutely charming with its sweet flower decoration on the front. The best part? You can easily customize it! Play around with different colors, try out bigger or smaller sizes, or swap that flower for something funky and unique. It’s a simple way to create something totally your own.
The design is compact and cozy, fitting right into your hand or bag without taking up much space. Its texture is soft but durable, making sure your coins stay put and your purse holds up over time. That little flower adds a pop of personality that makes this coin purse feel extra special—as if it’s been made just for you. Plus, it’s stylish enough to be more than just a coin holder; imagine using it as a tiny wallet or a cute mini clutch for a quick outing!
How to Crochet Coin Purse With Flower Pattern
This project is great for beginners since it sticks mostly to basic stitches, so you won’t get overwhelmed learning complicated techniques. The instructions are clear and straightforward, taking you through the steps smoothly from start to finish. Whether you keep it for yourself, gift it to a friend, or make a batch to sell at crochet fairs, this coin purse is a delightful and rewarding crochet project that brings a bit of joy with every stitch.
Crochet Floral Wallet Coin Purse Pattern
This beautiful crochet floral wallet coin purse is both functional and stylish. Featuring a textured pattern created with double crochet and single crochet stitches, this wallet is decorated with beautiful floral motifs (that you can make separately) and includes a zipper for secure closure. The pattern is beginner-friendly and a great project to practice basic stitches while crafting a useful accessory.
Skill Level & Terminology
- Skill Level: Beginner to Intermediate
- Terms: This pattern uses US crochet terms. Familiarity with chains, double crochet (dc), single crochet (sc), slip stitches (sl st), and working in rows is recommended.
Materials & Tools
- Yarn: Poliçkas (Politiks) thread from Oni Suga or similar size 5 or 6 thread in two colors.
- Crochet Hook: Size 6 (likely 3.5 mm to 4 mm depending on manufacturer).
- Other Tools:
- Leather crochet hook handle (optional, for comfort)
- Scissors
- Tapestry needle for weaving ends and sewing
- Zipper and zipper pull, length adjusted to size of wallet
- Matchstick (optional, likely to help weaving)
Gauge
- Gauge is not critical for this pattern.
- Aim for a fabric dense enough to hold wallet shape, approximately 15–18 dc across 10 cm. Adjust hook accordingly.
- Swatching is recommended to ensure correct fabric firmness and wallet dimension.
Abbreviations List
- ch = chain
- dc = double crochet
- sc = single crochet
- sl st = slip stitch
- st/sts = stitch/stitches
Special Stitch Instructions
- Double Crochet (dc): Yarn over, insert hook in stitch, yarn over and pull through, yarn over and pull through two loops, yarn over and pull through last two loops.
- Slip Stitch (sl st): Insert hook into stitch, yarn over, pull through stitch and loop on hook (used at row ends to join or finish).
Finished Size
- Wallet measures approximately 20 cm wide by 12 cm tall (adjustable by chain count and number of rows).
The Pattern
Starting the Base
- Make a Slip Knot and chain 25.
- This chain forms the foundation for the wallet width.

Row 1: Foundation Row with Double Crochet
- Chain 3 (counts as first dc).
- Beginning in the 4th chain from the hook, work 1 dc in each chain across until you have a total of 25 dc stitches in the row (including the chain 3).
- Mark the first stitch to keep track of row starts.
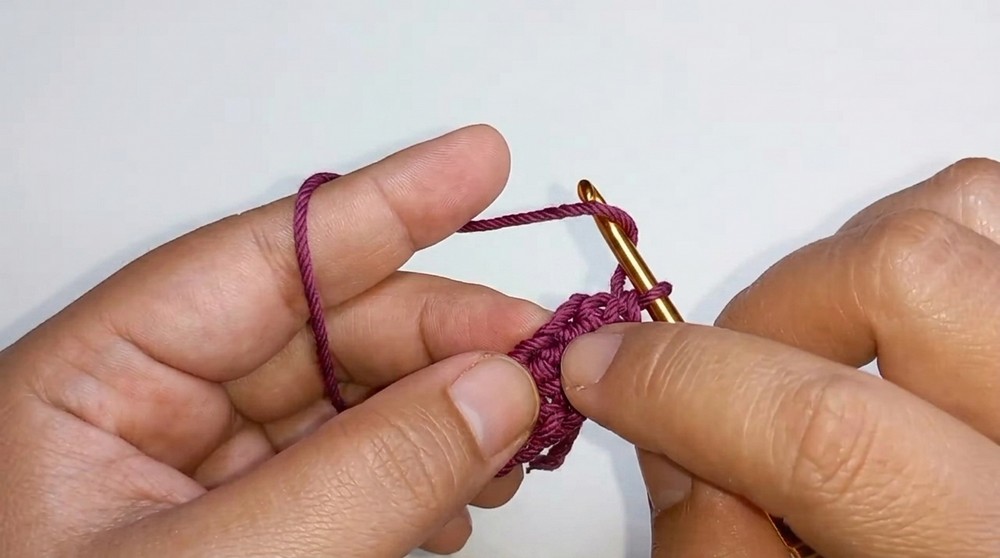
You have now created the first row of your wallet fabric with 25 double crochets forming a firm base.
Row 2: Double Crochet Around Both Sides (25 dc on each side)
- Turn your work.
- Work 4 dc stitches along the edge of the row you just completed to turn the work around.
- Work 25 dc stitches back on the opposite side of your starting chain, effectively forming a rectangle with 50 dc stitches per round total (25 per side).
- This forms a continuous loop of double crochets.
Now your fabric is worked around both sides of the chain to create a sturdy rectangle base for your wallet.
Rows 3 to 9: Double Crochet Rows
- Ch 2 to start each row.
- Work 1 dc in each stitch across the entire 50 stitches.
- Repeat this row pattern until you have completed 9 rows of double crochet loops.

This creates the main textured fabric of the wallet with a consistent row of double crochets.
Row 10: Single Crochet Edge
- Chain 1 to begin.
- Work 1 sc in each stitch around the wallet fabric for a neat edge finish. The total remain 50 sc.
- Slip stitch to the starting sc to close the round.
Row 10 finishes the edge with neat single crocheted stitches giving the wallet a polished look.
Row 11: Slip Stitch Border
- Work a round of slip stitches (sl st) around all stitches of the wallet to tighten and strengthen the edges.
- This helps the wallet remain in shape and durable during use.

The final round solidifies the wallet edges and prepares it for finishing.
Assembly & Finishing
- Cut the yarn, leaving a long tail for woven details.
- Using a tapestry needle, neatly weave in yarn tails inside the wallet fabric for hidden ends.
- Use the needle and yarn to reinforce any seams or weak spots invisibly for durability.
- Attach the zipper along the wallet opening with a needle and thread or sewing machine; the zipper length should match the wallet width.
- Neatly sew the zipper pull and test functionality.
Floral Decoration
- Crochet flowers separately using your preferred flower pattern (refer to linked tutorial or make your own).
- Using a matching yarn color and tapestry needle, stitch flowers onto the wallet fabric.
- Embellish freely and creatively for a personal touch.
- Ensure flowers are securely attached to withstand regular use.
Wallet Strap (Optional)
- Crochet a thin strap or cord from yarn.
- Attach strap loops on either side of the wallet with tight stitches.
- This can be used for carrying or hanging the wallet purse.
Tips for Beginner Crochet Wallet Makers
- Keep your tension even to avoid curling.
- Mark the first stitch of each row for easy counting.
- Weave in ends as you go to keep your project tidy.
- Use stitch markers if needed to track row ends.
- Customize chain length and number of rows for your wallet size.
Summary
This floral crochet wallet coin purse combines simple double crochet and single crochet stitches to create a durable yet elegant item. Starting with a chain foundation, it is worked both sides to build a solid rectangular piece. The finishing touches include a slip stitch border for neatness and functional zipper attachment. The decorative floral motifs add a charming, customized element perfect for gifting or everyday use.
Completed Wallet Features
- Functional coin holder size with sturdy fabric.
- Elegant floral decoration for aesthetic appeal.
- Secure zipper closure.
- Optional strap for easy carrying.