
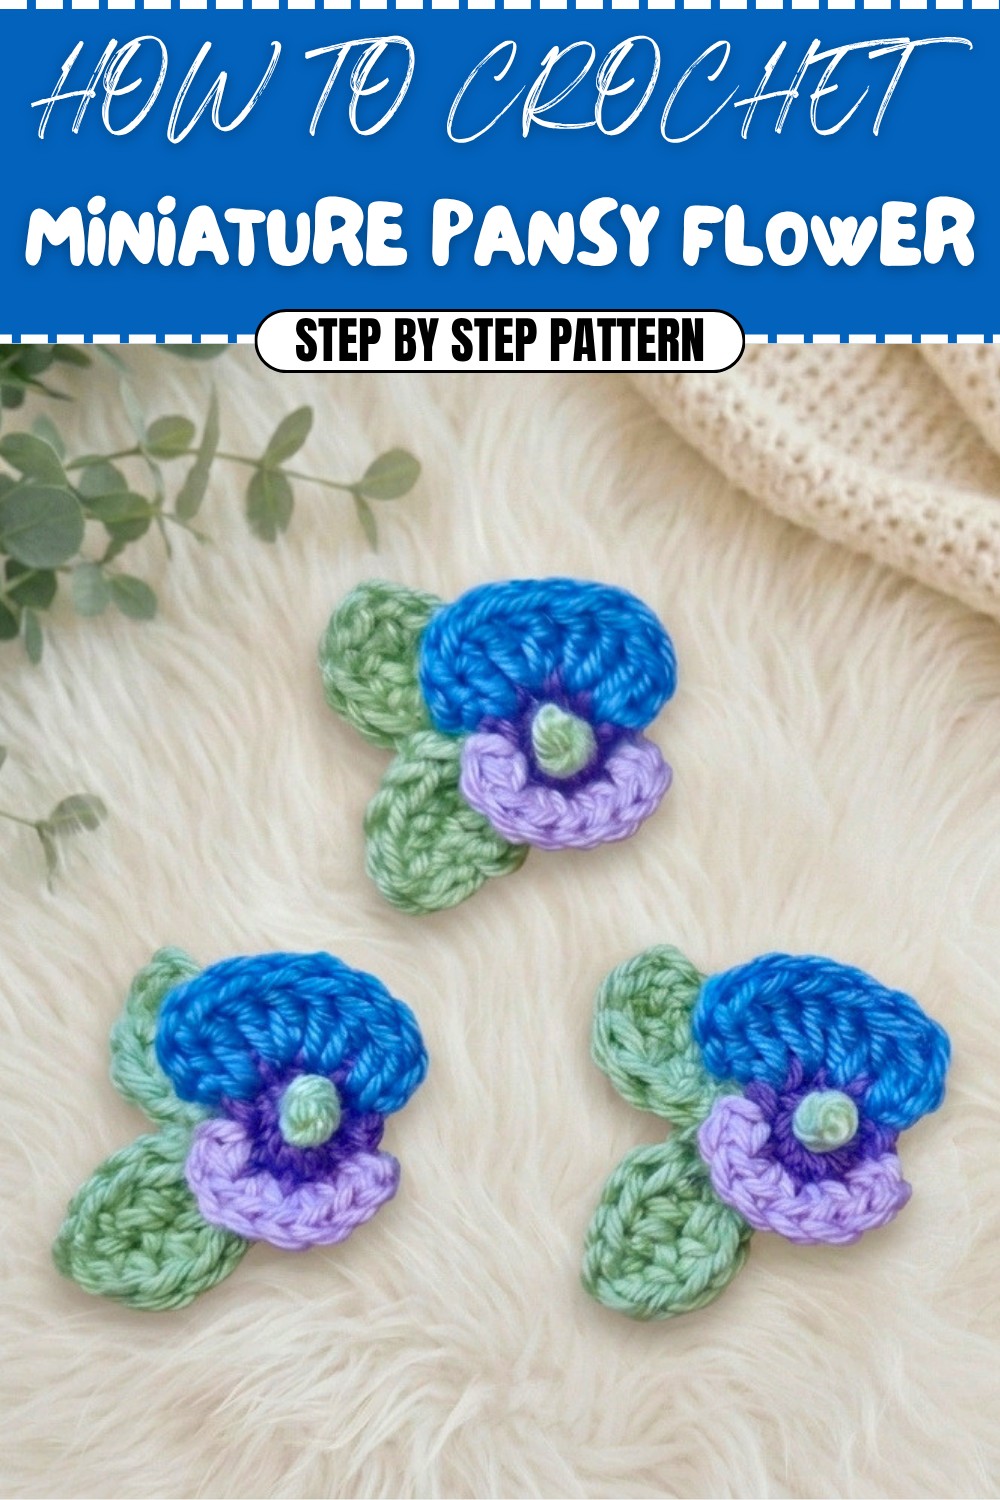
Cute Free Miniature Pansy Flower Crochet Pattern For Decor
If you’ve been searching for a charming and satisfying crochet project, the Free Crochet Miniature Pansy Flower Pattern is perfect for you! As someone who loves quick crafts that deliver beautiful results, I can tell you these tiny pansies are not only fun to make but also incredibly versatile. Whether you’re a beginner or experienced crocheter, this pattern guides you step by step, turning simple yarn into delightful miniature blooms. They’re the perfect way to add a handmade touch as embellishments for bags, clothing, cards, or even as keyrings and gifts.
Free Crochet Miniature Pansy Flower to Attach Anywhere

What makes this pattern special is the use of vibrant, mercerized cotton yarn, which adds a gentle sheen and makes the flowers pop. Each pansy features soft blends of purple, blue, and lilac shades, highlighted with a green center and delicate leaves. The main stitches used are single crochet, double crochet, and half double crochet—easy and beginner-friendly! By making small adjustments, you can turn your miniature pansy into brooches, fridge magnets, or even create a whole bouquet by attaching them to stems. The back is flat, making it perfect for gluing onto surfaces or layering in other crochets.
Key Steps You Can’t Miss:
- Start with a magic ring for a neat, tight center
- Use a 3mm crochet hook (or size up for a larger pansy)
- Work over yarn tails for easy weaving and a tidy back
- Sew in all ends securely before gluing
- Make two leaves with chain and basic stitches
- Add the finishing touch with a knotted green center
Possible Issues & Fixes:
You may find your center hole is too loose or open—just pull the magic ring tighter before fastening off. Yarn fraying is another common problem, especially with cotton; if it splits, twist your yarn a little before threading onto your needle. If the leaves or petals are not sitting flat, press lightly with your fingers or block with a damp cloth.
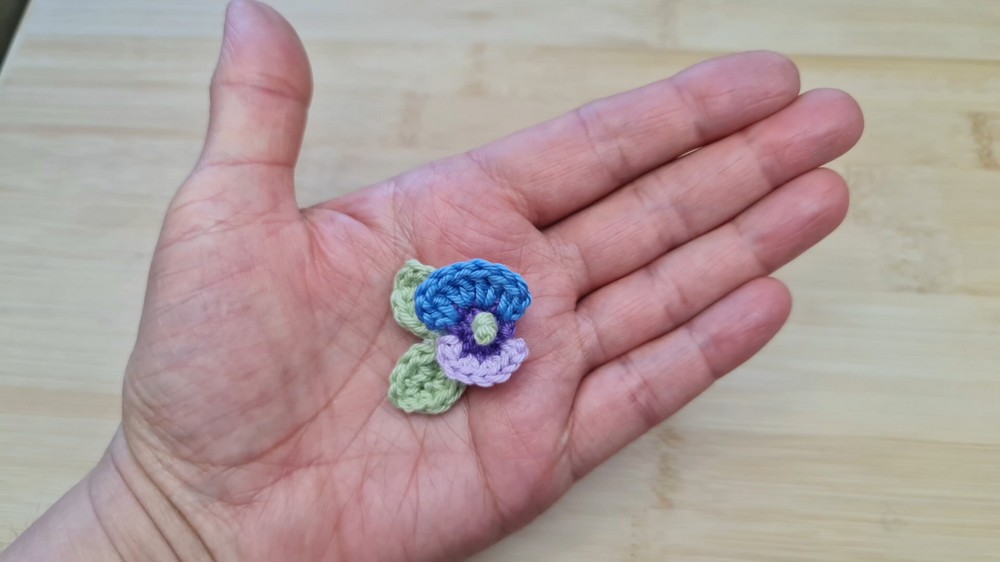
Once you reach the final stage, glue and trim loose ends at the back for a professional finish. The finished pansy is about 1 inch wide and long, or slightly larger if you use a bigger hook. This adorable size makes them ideal for all sorts of craft ideas. The Free Crochet Miniature Pansy Flower Pattern is truly a must-try for anyone who loves making beautiful things by hand!
Crochet Pansy Flower Pattern
A cute and charming crochet pansy flower—perfect for embellishments, brooches, scrapbooking accents, or pockets, and makes a thoughtful handmade gift. This pattern provides clear, step-by-step instructions in a classic format to guide you from the magic ring center, through the petal shaping, to the final assembly.
Skill Level & Terminology
- Skill Level: Confident Beginner / Easy
- Terminology: Uses US crochet terms throughout
Materials & Tools
- Yarn: DK weight mercerized (shiny) cotton; colors: purple (center), blue, lilac (petals), green (leaves)
- Crochet Hook: 3.0 mm (use up to 3.5 mm for larger flowers)
- Scissors
- Yarn Needle (for weaving/sewing ends)
- Hot Glue Gun (optional, for secure finishing)
Gauge
Gauge is not crucial for this motif. The finished pansy (including leaves) measures about 1–1.25 inches wide. If you prefer a larger flower, simply use a larger hook.
Abbreviations
| Abbreviation | Meaning |
|---|---|
| ch | chain |
| sc | single crochet |
| hdc | half double crochet |
| dc | double crochet |
| sl st | slip stitch |
| MR | magic ring |
| st(s) | stitch(es) |
Special Stitch Instructions
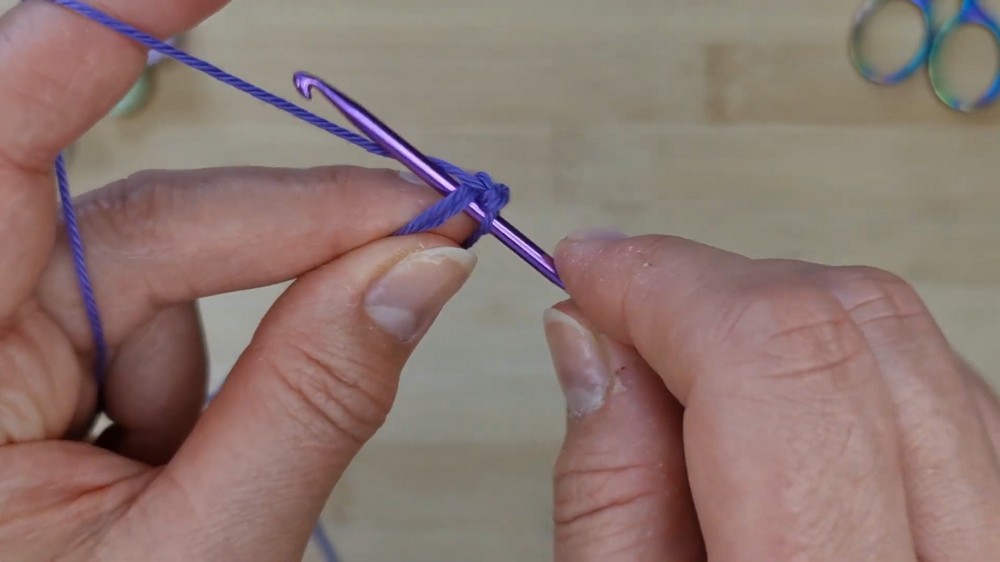
- Magic Ring (MR):
- Wrap yarn around two fingers to form a loop, insert hook under loop and pull up yarn, ch 1 to secure.
- Half Double Crochet (hdc):
- Yarn over, insert hook in stitch, yarn over, pull through (3 loops), yarn over, pull through all 3 loops on hook.
- Invisible Join:
- Fasten off, thread tail to yarn needle, insert into both loops of first st, then back into the last st for a seamless finish (optional but neat).
Bring color and whimsy to your craft projects with these delicate, flat-backed pansy flowers. Easy to customize, these pansies are ideal additions for keyrings, hats, hair clips, cushions, bags, and cards. Choose your favorite color combinations for endless creative joy!
Finished Size
Pansy flower measures approx. 1–1.25" (2.5-3 cm) across, including leaves.
The Pattern
Center of the Pansy
- With purple (or center color) yarn and 3 mm hook:
- Start with MR, ch 1.
- Work 8 sc into ring. (8 sts)
- Pull ring tight.
- Sl st to first sc to join.
- Fasten off (leave tail for sewing in later).
Make a tight circle using a magic ring and fill it with 8 single crochets. Join to the first stitch to complete the ring.
Top Petals (Blue)
- Join blue yarn in any stitch, preferably the first sc (of previous round).
- Ch 2 (counts as first dc)
- Dc in same st (now 2 dc in 1st st)
- 2 dc in next st
- 2 dc in next st
- In last st of “fan,” dc, ch 2, sl st in same st.
- Fasten off blue yarn.
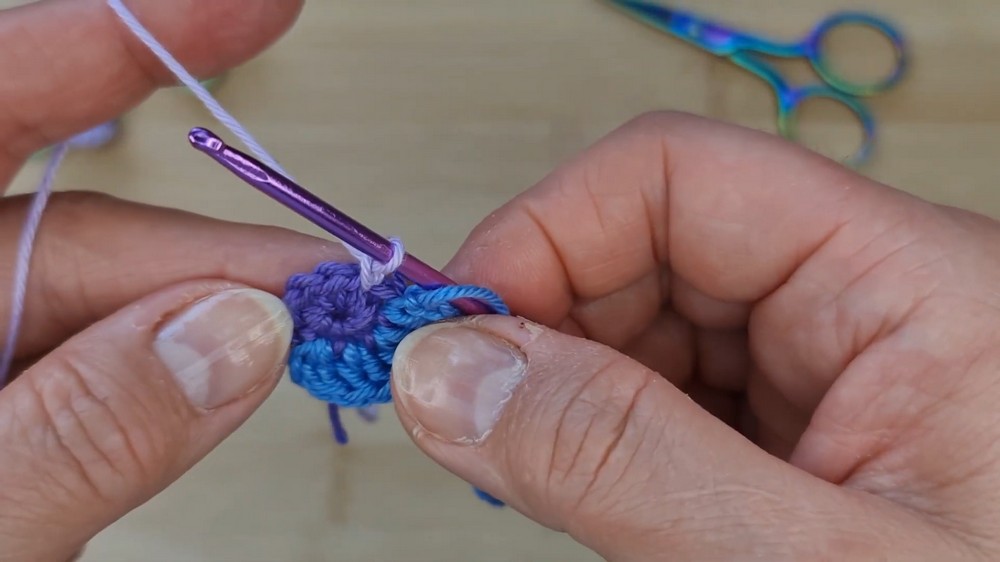
For the top petal, work a small fan by making two double crochets in each stitch across the next 4 stitches, creating a gently curved upper edge. Chain 2 at the end for a rounded finish, then slip stitch and cut yarn.
Bottom Petals (Lilac)
- Join lilac yarn at the next unused stitch (moving in order around center).
- Ch 1
- Sc in same st
- 2 sc in next st
- 2 sc in next st
- Sc in next st
- Ch 1, sl st in same st to finish.
- Fasten off.
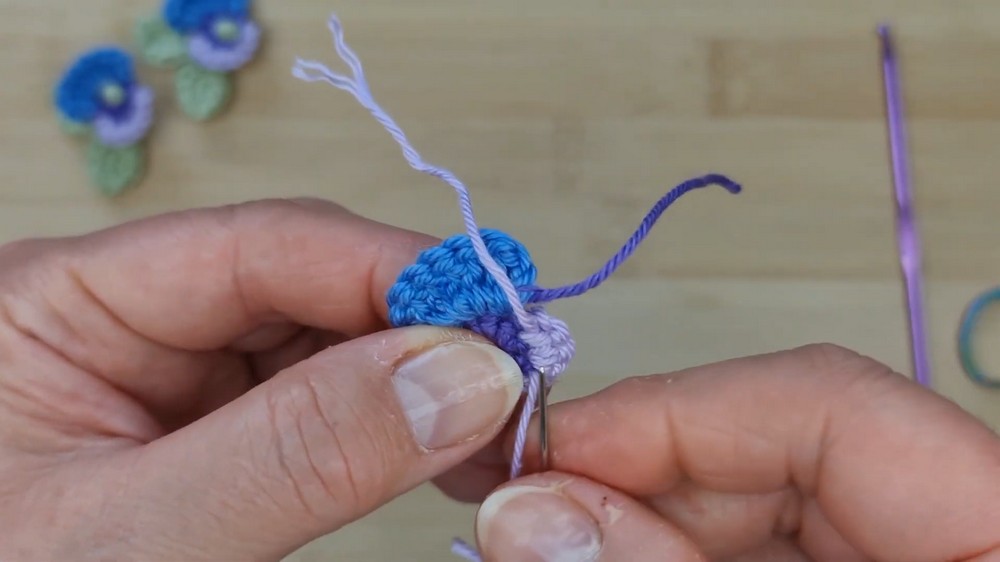
For the lower petal, work single crochets evenly across the next 4 stitches to create a second, rounded mini-fan beneath the first.
Weaving in Ends
- Using a yarn needle, carefully weave in all yarn ends to the back of the flower, ensuring your stitches remain neat and the flower retains its nice shape.
Take your time to secure and hide all yarn ends for a tidy, professional finish on the back of your pansy.
Center Bump (Stamen)
- With green yarn: Cut an 8" (20cm) length of yarn, fold in half.
- Tie 2 overhand knots on top of each other at the folded end to create a small bump.
- Thread both yarn tails onto a yarn needle.
- Insert needle from front, through center of flower to back, pulling until knots rest securely in the center.
- Sew/weave yarn ends at the back, knot, and trim.
Create a double knot with green yarn for the flower center, thread through the flower middle, and secure tightly at the back.
Pansy Leaves (Make 2)
- With green yarn:
- Ch 4.
- In 2nd ch from hook: sc.
- In next ch: 2 hdc
- In last ch: 3 sc
- Rotate work and continue along the unused loops:
- Next ch: 2 hdc
- Last ch: sc
- Ch 1, sl st to first sc to give a pointed tip.
- Fasten off, leaving a 4" tail for sewing.
- Repeat for a second leaf.
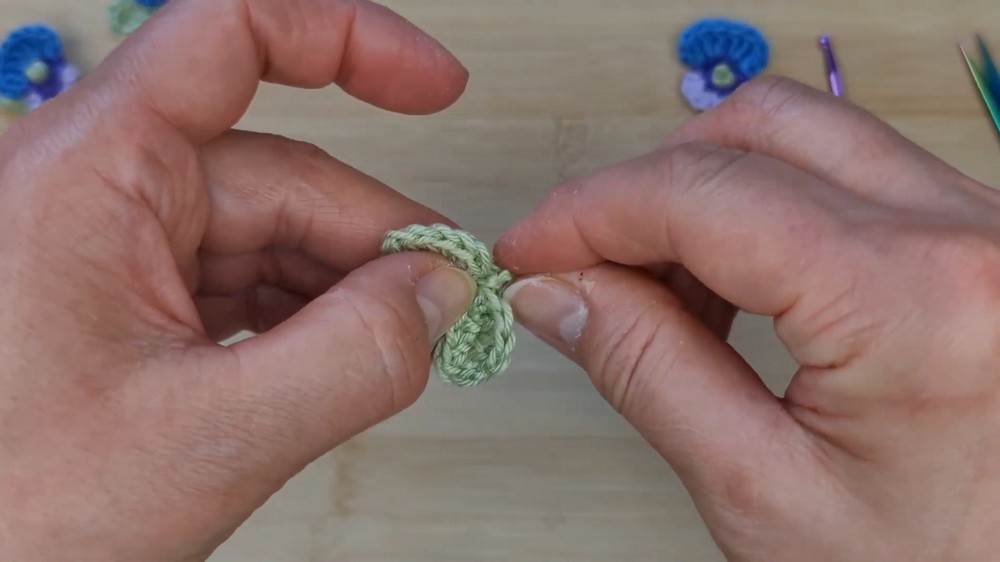
Work an oval leaf starting from a chain, combining single and half-double crochets to shape a tapered leaf. Sew ends toward the leaf base for assembly.
Assembly & Finishing
- Sew in Leaf Tails:
- Thread the tail of each leaf to the pointed tip, so sewing ends emerge from the narrow base.
- Joining Leaves Together:
- Pair leaves at the base (narrow end).
- Tie or sew two tail ends together to secure leaves as a group.
- Attaching Leaves to Flower:
- Place leaves at back edge of pansy flower, angled outward.
- Use remaining tails and sew or tie securely to center back of pansy.
- Secure All Ends:
- For extra durability, use a dab of hot glue at back to keep all knots from fraying.
Arrange the leaves neatly behind your pansy and sew or glue securely in place. The leaves should peek out from beneath the flower, giving a natural look.
Pattern Notes & Customization
- You can use any color combination for the petals.
- Add a brooch pin, hair clip, or sew to clothing or accessories.
- Alter the hook size or yarn weight for bigger/smaller pansies.
- Make a bouquet by joining several pansies and leaves together.
Stitches Used & Getting Started
This pattern features single crochet (sc), half double crochet (hdc), double crochet (dc), and slip stitch (sl st). Begin with a magic ring or adjustable loop, and work in the round for neat flat flowers.
All Done!
Your flat, delicate crochet pansy is complete and ready to brighten up any project. By working simple stitches in clever combinations, you have created a pansy with realistic petal clustering and bold coloring. Enjoy gifting your flowers or using them to embellish your favorite items!