
Beginners Crochet Mushroom Pouch Pattern In Simple Steps
Immediately solve storage needs in style by using the Free Crochet Mushroom Pouch Pattern for a unique, whimsical touch.
A small pouch shaped like a mushroom brings a fun and cozy vibe to your everyday essentials. This pattern features a rounded form with clean, tight stitches that give it a sturdy yet soft feel. The main stitch used is the single crochet, which is easy to learn and works well for making strong, durable fabric. The mushroom pouch pattern is not only practical for holding coins or tiny treasures but also adds a touch of charm to your accessories collection.
Guidance to Crochet a Stylish Mushroom Pouch Without Any Trouble for Free

Beginning with a magic ring, you work in rounds to shape the mushroom cap, increasing stitches carefully to keep the perfect roundness. The sides are built up row by row using single crochet stitches to create the body of the pouch. This project is worked in two parts—the cap and the lower portion—and then assembled. A drawstring made from chained stitches slips through the rows, allowing you to open and close the pouch easily and securely.
Other Items You Can Make from This Pattern
Adjusting the size and color can turn this pattern into small handbags, makeup bags, or playful storage pouches for organizing your belongings. Adding simple details like appliqués or buttons can personalize each piece to suit your style. This pattern is excellent practice for crocheting in the round and mastering consistent stitch work while making delightful, useful items.

Crochet Pattern: Mushroom Pouch
Skill Level & Terminology
- Skill Level: Beginner
- Terminology: Pattern uses US crochet terms.
Materials & Tools
- Yarn:
- Main color (e.g., red) for the mushroom cap.
- Contrasting color (e.g., white) for the pouch base and spots.
- Crochet Hook: 3.00 mm hook, or appropriate size for your yarn.
- Scissors: To trim yarn ends.
- Tapestry Needle: For sewing pieces together and weaving in ends.
Gauge
Gauge is not critical for this project; however, if you’d like an exact size or stiffness for your pouch, ensure your stitches are tight enough to hold all items securely. The tighter your stitches, the more stable your pouch will be.
Abbreviations
- ch: Chain
- sc: Single Crochet
- sl st: Slip Stitch
- st(s): Stitch(es)
- yo: Yarn Over
- inc: Increase (2 single crochets in the same stitch)
Special Stitch Instructions
Magic Ring
The magic ring creates a seamless and tight center:
- Wrap the yarn around your fingers to form a loop.
- Insert your hook into the loop, yarn over, and pull up a loop.
- Yarn over again and pull through the first loop to secure the knot.
Single Crochet (sc)
- Insert your hook into the stitch.
- Yarn over and pull up a loop (2 loops on the hook).
- Yarn over again and pull through both loops on the hook.
Increase (inc)
Work 2 single crochets into the same stitch to widen your work and give it shape.
Finished Size
The finished mushroom pouch will measure approximately 4–5 inches in height and 3 inches in diameter, depending on the tightness of your stitches and yarn used.
The Pattern
Step 1: Crochet the Pouch Base
- Begin with a Magic Ring:
- Wrap the yarn around your fingers to form a loop, insert the hook into the loop.
- Ch 1 to secure, and work 6 sc into the magic ring.
- Close the ring by pulling the loose yarn end. Work a sl st into the first sc of the round to secure the circle.
- Round 2:
- Ch 1, then work 2 sc into each stitch around (increase). You’ll have 12 sts at the end.
- Continue for Rows 3–18:
- Work 1 sc into each stitch around for the next 16 rows, without adding or decreasing stitches.
- Each row will still have 12 single crochets in total.
- Fasten Off:
- Tie the yarn securely and cut it, leaving a long tail for assembly.
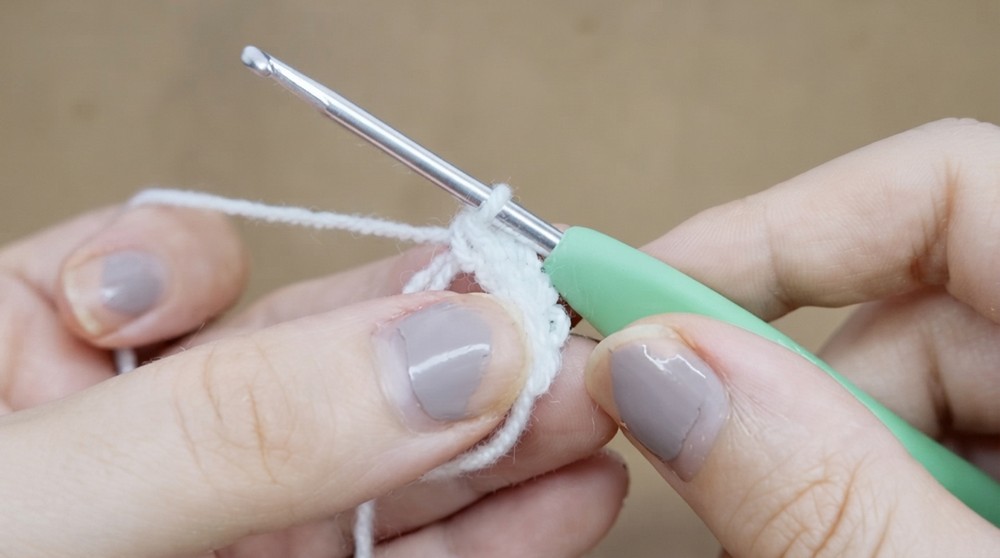
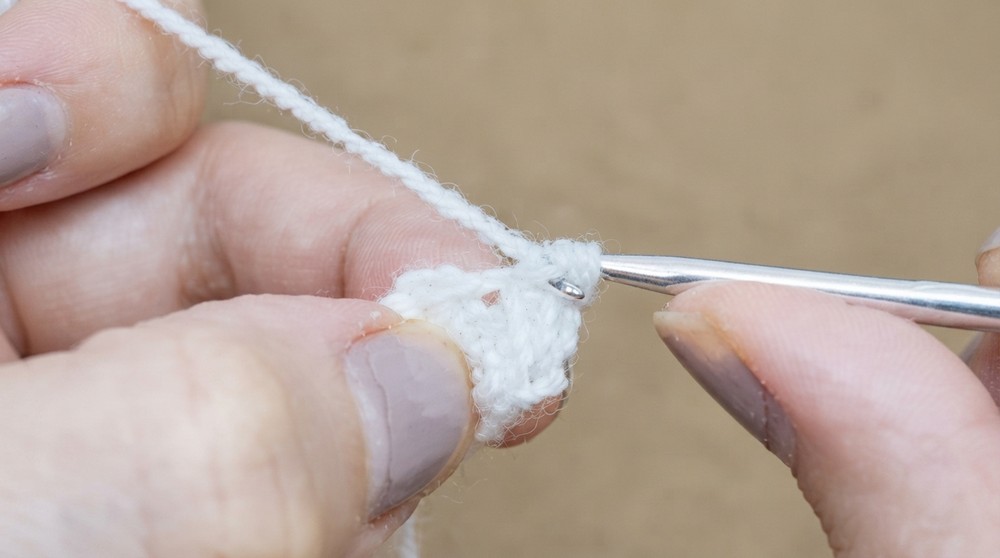

For Beginners: The pouch base is created using the magic ring, followed by single crochets. Practice keeping your tension consistent to create an even shape.
Step 2: Crochet the Mushroom Cap
- Begin with a Magic Ring:
- Create a ring, then ch 1 and work 6 sc into the ring. Close by pulling the yarn tail and securing with a sl st into the first sc.
- Round 2:
- Ch 1 and work 2 sc into each stitch (increase) around for a total of 12 sts. Close with a sl st.
- Round 3:
- Work 1 sc in the first stitch, then 2 sc into the next stitch (inc). Alternate between 1 sc and 2 sc (increase every other stitch) to create a total of 18 sts.
- Round 4:
- In this round, work 1 sc into each stitch around (no increases). Close with a sl st.
- Round 5:
- Work 1 sc in the first 2 stitches, then 2 sc in the next stitch (inc). Repeat until you have 24 sts.
- Rounds 6–8:
- Work 1 sc into each stitch around. Close each round with a sl st.
- Fasten Off:
- After Round 8, ch 1, tie the yarn, and cut it with scissors, leaving a long tail for assembly.

This section creates the mushroom top, which gets its shape from alternating increases and single crochet rounds. Be sure to count your stitches on each row to avoid ending up with lopsided or deformed caps!
Step 3: Drawstring Chain
- Create a long chain for the drawstring of the pouch.
- Start with a slip knot and ch 50 stitches (or adjust depending on your preferred length).
- Fasten Off: Tie the yarn securely and cut.
For Beginners: This chain functions as the mechanism to open and close your mushroom pouch. You can adjust its length to create a longer or shorter drawstring depending on your preferences or the use case for the pouch.
Step 4: Assemble the Pouch
- Combine the Pouch and Mushroom Cap:
- Use your tapestry needle to sew the mushroom cap onto the opening of the pouch. Ensure the stitches are continuous, and the cap covers the top edge of the pouch completely.
- Insert the Drawstring:
- Using your hook or tapestry needle, thread the drawstring chain through the stitches in Row 3 of the pouch base. Skip every other stitch for a consistent gathering effect.
- Secure the Drawstring:
- Tie the ends of the chain together to complete the drawstring. This allows the pouch to open and close when the string is pulled.
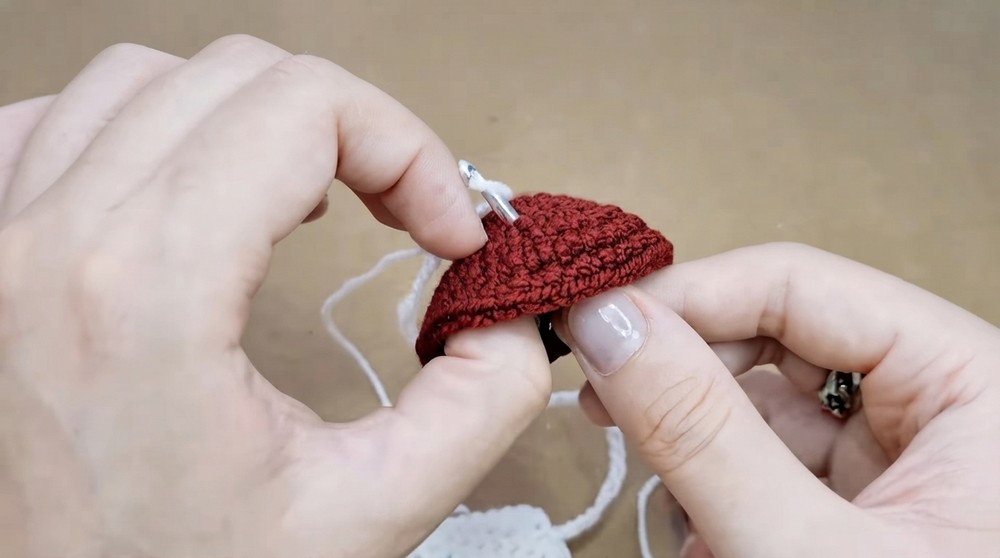
This step brings all the pieces together. Take your time to sew the cap onto the pouch carefully for a polished look. When threading the drawstring, ensure it goes in and out of the stitches uniformly.
Troubleshooting & Solutions
Problem 1: Loose Magic Ring
Solution: Make sure to pull the magic ring tightly and secure the loop with a tight knot to prevent it from loosening in the future.
Problem 2: Uneven Mushroom Cap or Pouch
Solution: Recount your stitches at the end of each row to ensure you’re following the increase patterns correctly. Incorporate stitch markers if necessary.
Problem 3: Drawstring Doesn’t Tighten Smoothly
Solution: Double-check that the drawstring is threaded through alternating stitches in Row 3. Avoid tight or uneven tension while inserting the drawstring.
What You’ll Learn
- Magic Ring Technique: A versatile method for starting circular crochet projects.
- Shaping a 3D Pouch: Learn how to create depth using increases and basic stitches.
- Crocheting and Attaching Components: Assemble separate pieces of crochet into a functional structure.
- Customizable Drawstrings: Practice creating simple chain stitch drawstrings for practical use.
Why You’ll Love This Pattern:
The pattern is both functional and fun, making it a whimsical yet practical accessory. The simplicity of the pattern makes it ideal for beginners looking to explore 3D crocheting and customization options. You can experiment with colors, sizes, and uses to make this project your own!