
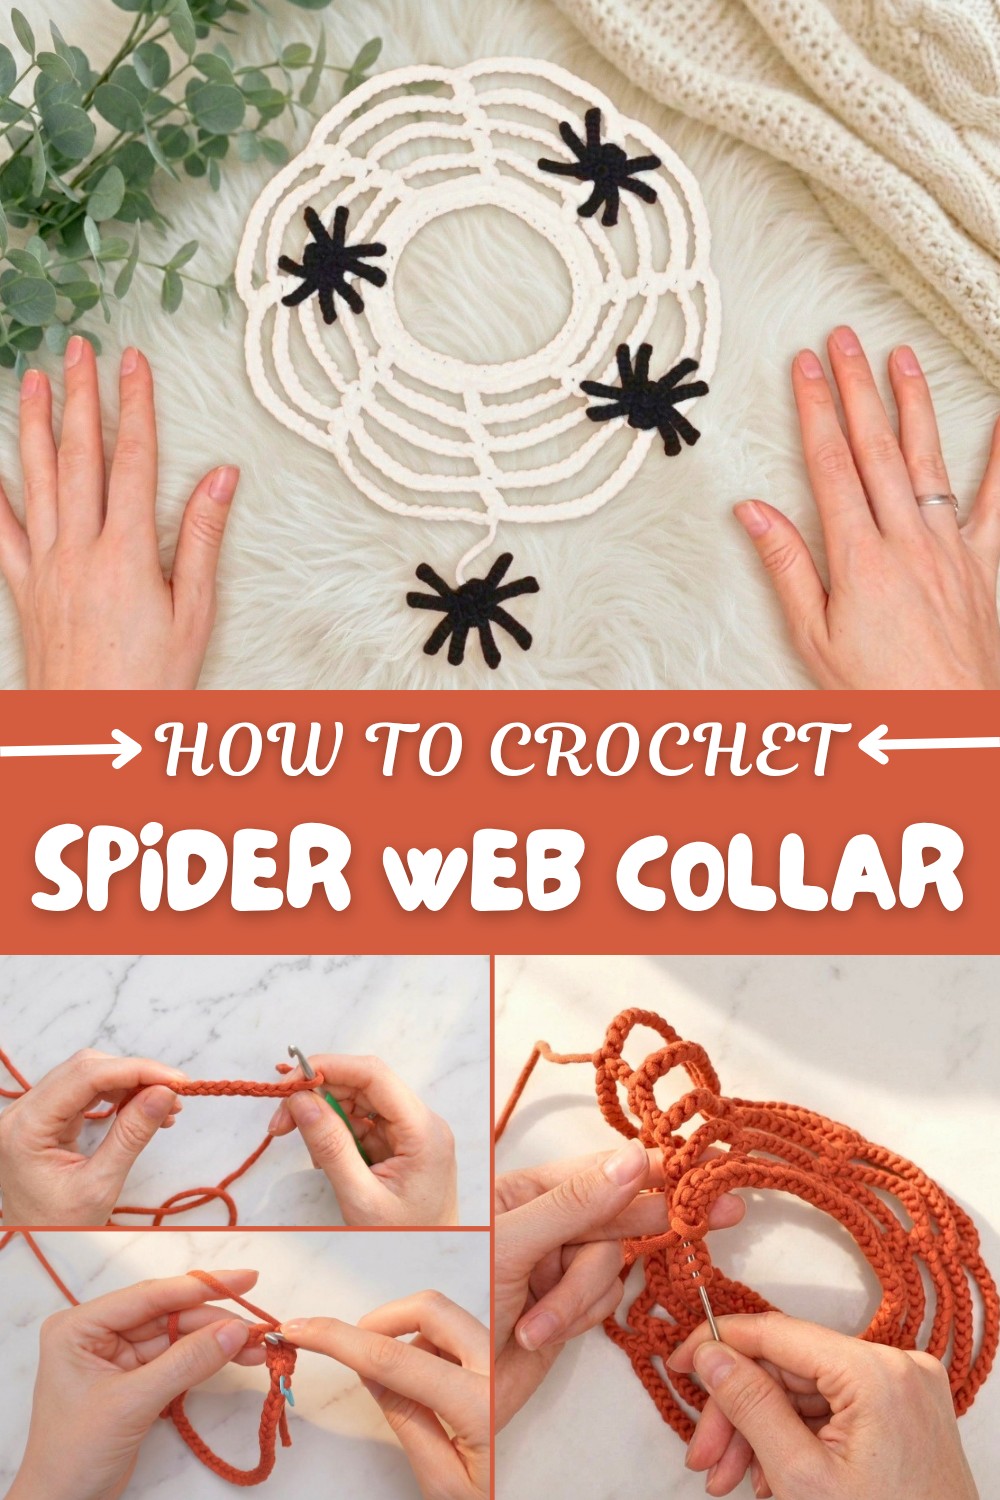
Easy Crochet Spiderweb Collar Free Pattern for Pets
Turn your pet into a Halloween star with this fun and free crochet spider web collar pattern that's for adding spooky charm to your furry friend’s outfit.
Looking for a simple way to make a pet’s Halloween more festive? This easy crochet spiderweb collar can add just the right touch! The collar looks like a little spiderweb that slips comfortably over a cat’s or dog’s neck. It’s made with soft, stretchy yarn so pets can move around easily.
To start, choose any colors, black and orange are classic, but purple or green works too. Use a 5.5 mm crochet hook for the web and a 3.5 mm crochet hook for the tiny spiders.
Free Crochet Spider Web Collar Pattern to Make
Make the starting chain in multiples of six to keep the web shape balanced. The stitches used are basic: chain, single crochet, double crochet, and slip stitch. When finished, each spider is about the size of a small crochet flower.
This spiderweb collar is more than just a pet accessory. Make a longer chain and wear it as a headband, or wrap it around your wrist as a bracelet. It can also become a fun decoration for a Halloween party.
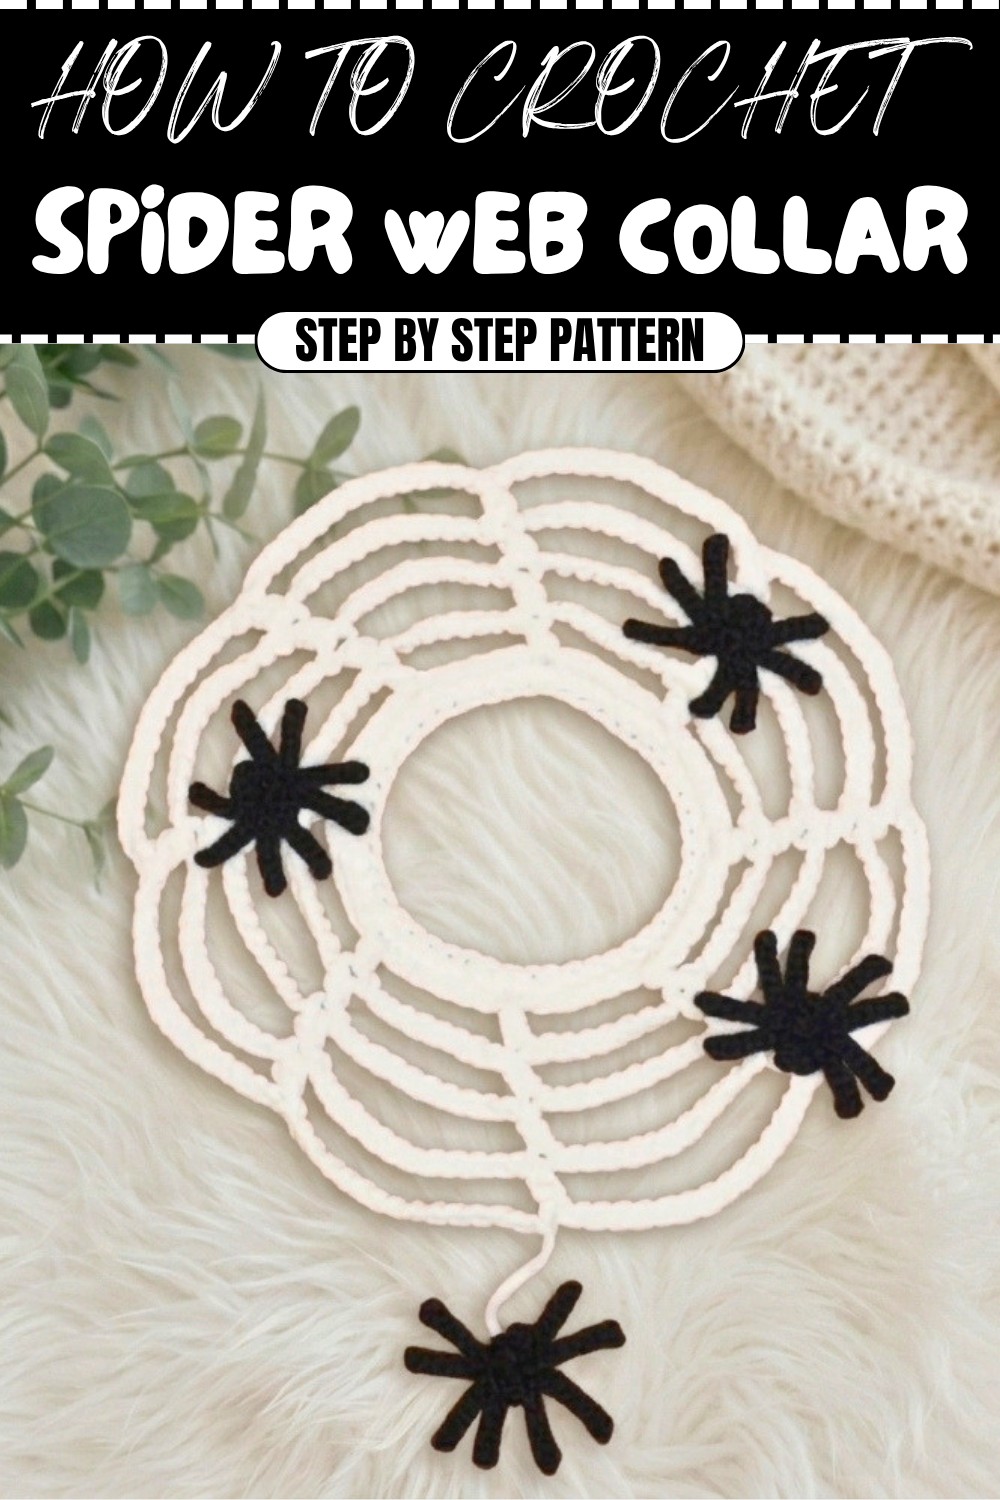
Spooky Spiderweb Pet Collar: Step-by-Step Pattern
Materials
- Web Yarn: Tubular cotton-nylon blend, or other stretchable yarn (such as Woobles Easy Peasy or similar)
- Spiders Yarn: DK (light worsted) yarn in black, bright or any “spider” color
- Hooks: 5.5 mm (for web); 3.5–3.75 mm (for spider)
- Stitch Markers
- Yarn Needle
- Pins and Blocking Mat (optional)
- Scissors
- Steamer/Iron (optional for blocking)
Abbreviations (US Terms)
- ch: chain
- sl st: slip stitch
- sc: single crochet
- dc: double crochet
- tr: treble crochet
- st: stitch
Spiderweb Collar Pattern
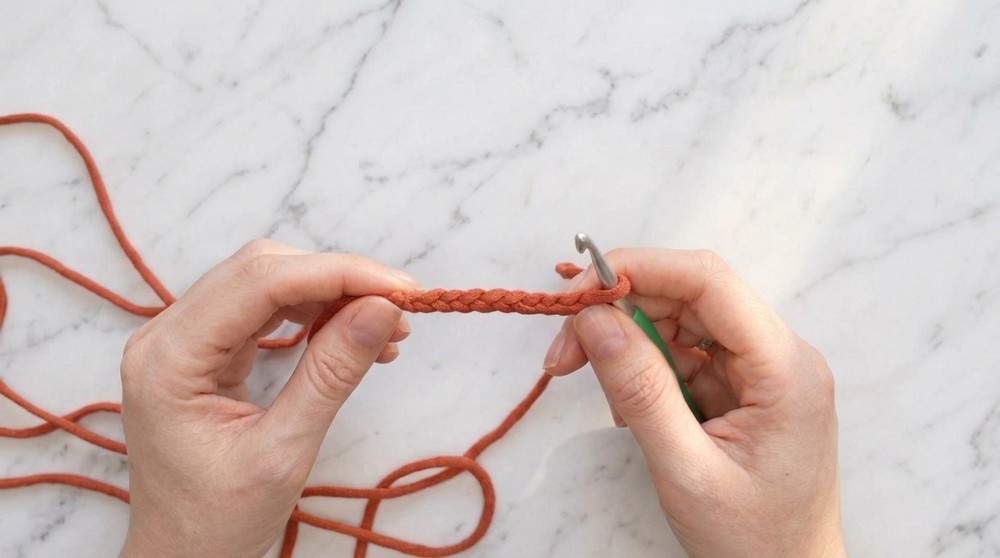
1. Foundation Chain (Adjust for Pet Neck)
- Measure your pet’s neck and choose a number of chains that’s:
- Slightly shorter than needed, as the web will stretch.
- MUST be a multiple of 6. (e.g. 6×8=48, 6×9=54, etc.)
Example:
- Ch 48 (for a small-medium cat or dog).
Tip: Check that the chain fits comfortably over your pet’s head but doesn’t hang too loosely.
2. Connect the Chain
- Mark your last chain with a stitch marker.
- Lay chain flat, with all the “V’s” (front side) up.
- Join with a sl st to first chain, making sure not to twist your chain.
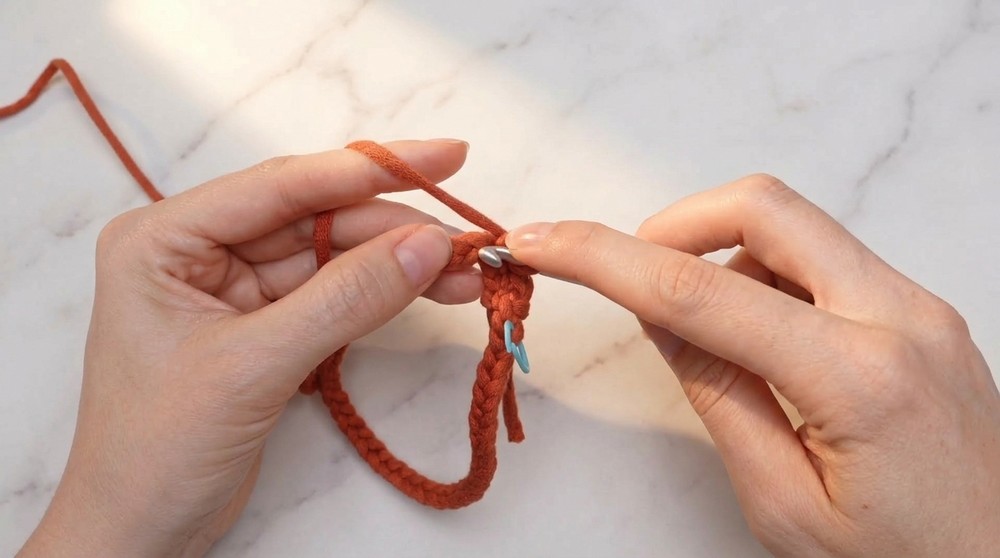
Now you have a circular base for the collar!
3. Round 1: Single Crochet Base
- Ch 1 (counts as first sc).
- Sc in each chain around.
- Remove stitch marker, sc in marked chain.
- Sl st into the beginning ch 1 to join.
This round makes the collar sturdy and gives a base for the web. Make sure you have the same number of sc as your starting chain!
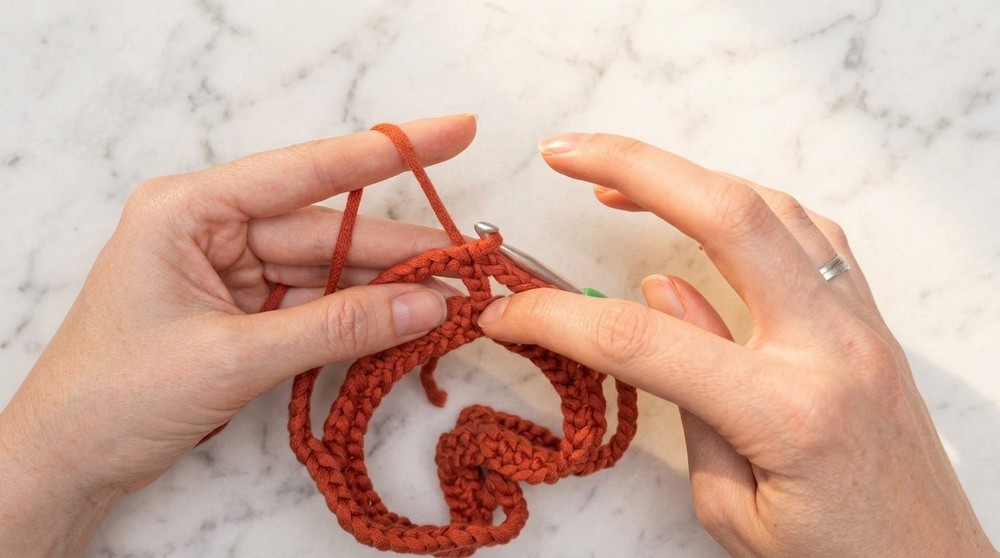
4. Round 2: Begin Web Columns
- Ch 3 (counts as dc—this sets “height”).
- Ch 8 (for “web span”).
- Skip the next 5 sc. In the 6th stitch, dc.
- Repeat:
- Ch 8, skip 5 sc, dc in next sc
- ...around the collar, until you reach your starting point.
- At the end, you’ll be back at the start. Omit the last dc, and instead:
- Sl st into the 3rd ch of your starting ch-3.
Explanation: Each ch-8 stretches between double crochets. The skipped stitches allow the web to spread outward. You’ve created the individual “spokes” for your spiderweb.
5. Round 3: Second Web Layer
- Ch 3 (counts as dc).
- Ch 10.
- Dc in next dc from the previous round (the “spokes”).
- Repeat:
- Ch 10, dc in next spoke
- ...all the way around.
- At the end: Sl st into the 3rd ch of starting ch-3.
Explanation: This round adds more distance between your spokes, expanding the web and creating the classic web shape.
6. Round 4: Third Web Layer
- Ch 3 (counts as dc).
- Ch 12.
- Dc in next dc (spoke from last round).
- Repeat:
- Ch 12, dc in next spoke, around.
- Join with sl st into the 3rd ch of starting ch-3.
Explanation: Each round adds two extra chains between spokes, expanding the web. The web should be getting wider.
7. Round 5: Fourth Web Layer
- Ch 3 (counts as dc).
- Ch 14.
- Dc in next dc (spoke).
- Repeat:
- Ch 14, dc in next spoke, around.
- Join with sl st into the 3rd ch of starting ch-3.
- To finish, sl st once more and cut yarn, leaving a tail for weaving in.
Your finished web should look like a spooky star when laid flat!
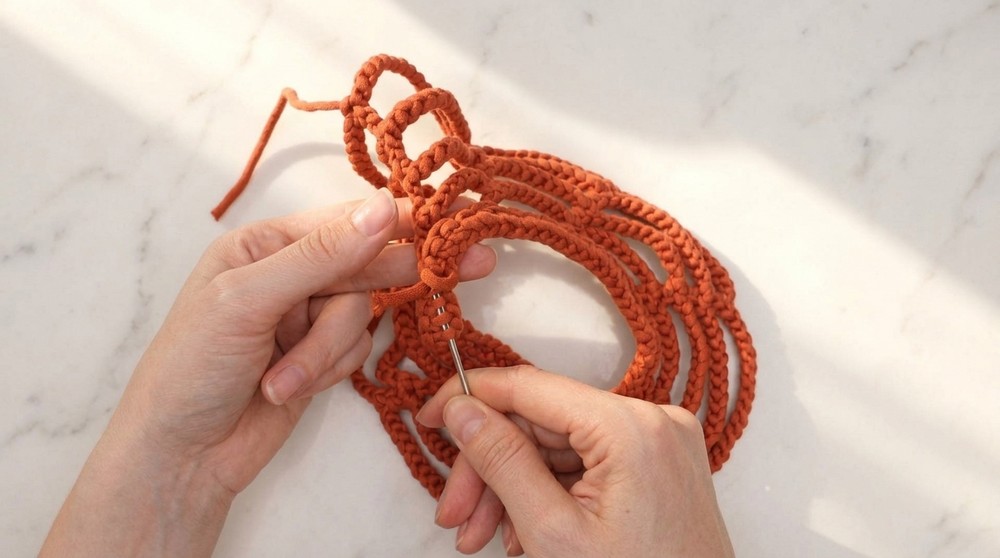
8. Finishing the Web
- Weave in all ends neatly using the yarn needle.
- Block the collar:
- Pin collar flat on a blocking mat/yoga mat.
- Shape points and spaces evenly.
- Steam lightly and let dry.
Blocking will “set” the web’s shape, so it lays nice and flat around your pet’s neck.
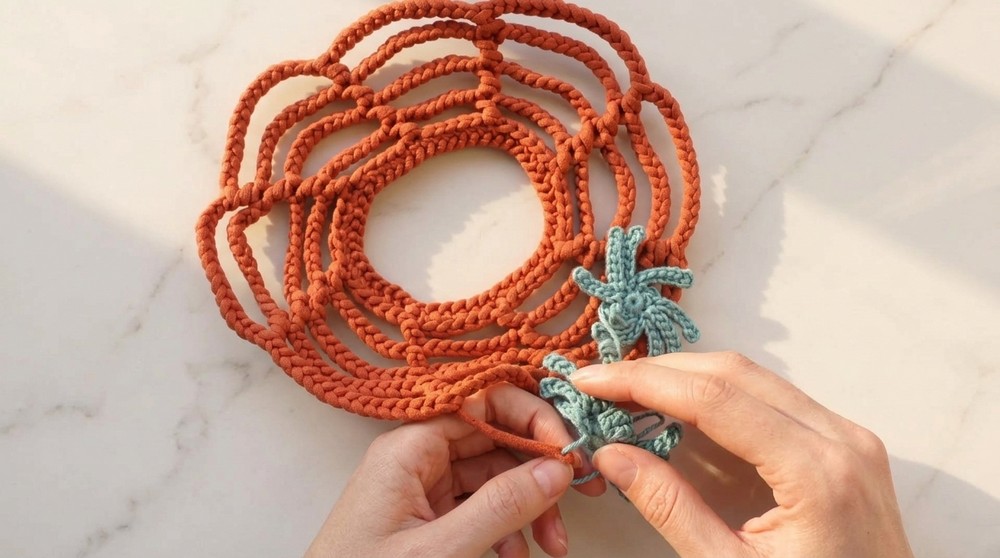
Spider Motif (Make ~4 per collar)
Body
- Make a magic ring.
- Sc 8 into the ring. Tighten ring.
- Sl st to the first sc to close the circle.
- Do not break yarn! You’ll now make legs branching out from single crochets.
Legs
For each “leg” (repeat as you go around the spider’s round of sc):
- Slip stitch (sl st) into next sc.
- Ch 7.
- Ch 1 more and turn.
- Sl st in the second ch from the hook and in each ch down (total of 6 sl st).
- Sl st into the same sc again to anchor.
- Repeat for the next leg.
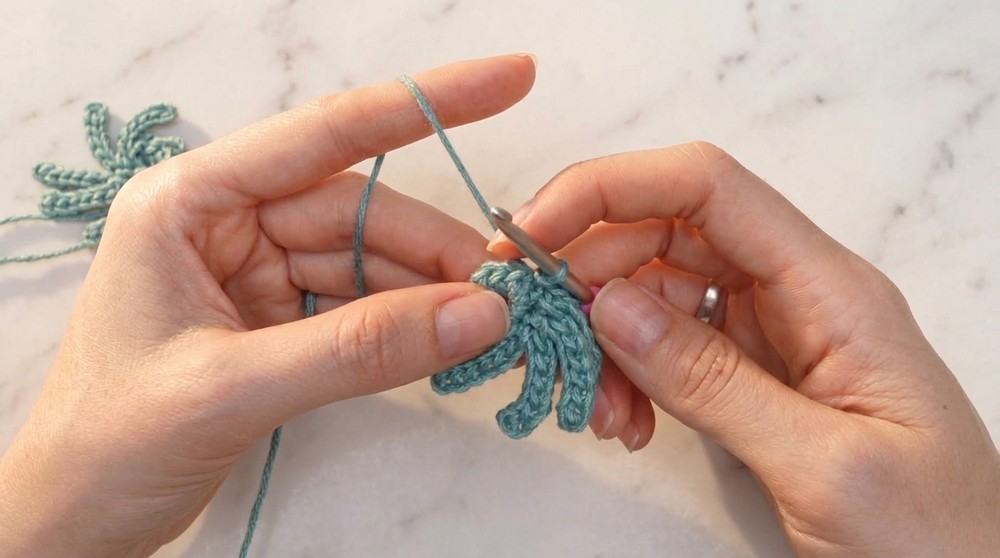
Suggest: 2 legs per sc on both left and right, head (2 tr) between legs, for "spider" look.
You end up with 8 legs, 4 per side. Adjust length if desired. For the spider's face, in two central sc, use treble crochets for a bigger head.
Finishing the Spider
- Leave long tails for tie-on application.
- Sew or tie spiders by their tails in desired web locations (corners, edges, as “danglers”).
- Optionally, block spiders for shape.
Attaching Spiders
- Use the yarn tails to securely tie or sew spiders onto the web.
- For dangling effect, sew one spider to the hanging web end.
- Trim and weave in ends.
Blocking and Final Touches
- Pin out both web and spiders on a mat, arrange as desired.
- Steam or dampen and allow to dry for a crisp spiderweb look.
- Optionally add a small touch of glue or sew down for extra security, especially if your pet is energetic.
Explanations Along the Way
- Each round you chain more between “columns,” growing the web wider.
- Blocking ensures your work lays perfectly flat and shows off the spooky shape.
- Attaching spiders is your creative moment—try different placements and leg lengths for variety!
What You Learn
By crocheting this pattern, you’ll learn:
- Working in the round; pattern multiples for symmetry
- Expanding works (by increasing chains each round)
- Basic amigurumi (magic circle, simple face/leg attachment)
- Blocking for shape and durability
Customization Ideas
- Add embroidered details to the web or spiders.
- Change out yarn for sparkly/glow-in-the-dark for extra Halloween magic.
- Vary spider size and placement for dramatic effect.
- Use different “web” colors for other occasions!
Final Notes
This pattern is designed for beginners but delivers impressive results. Measure as you go for best fit; block for best form. Have fun creating a piece your pet (and everyone else) will love.