
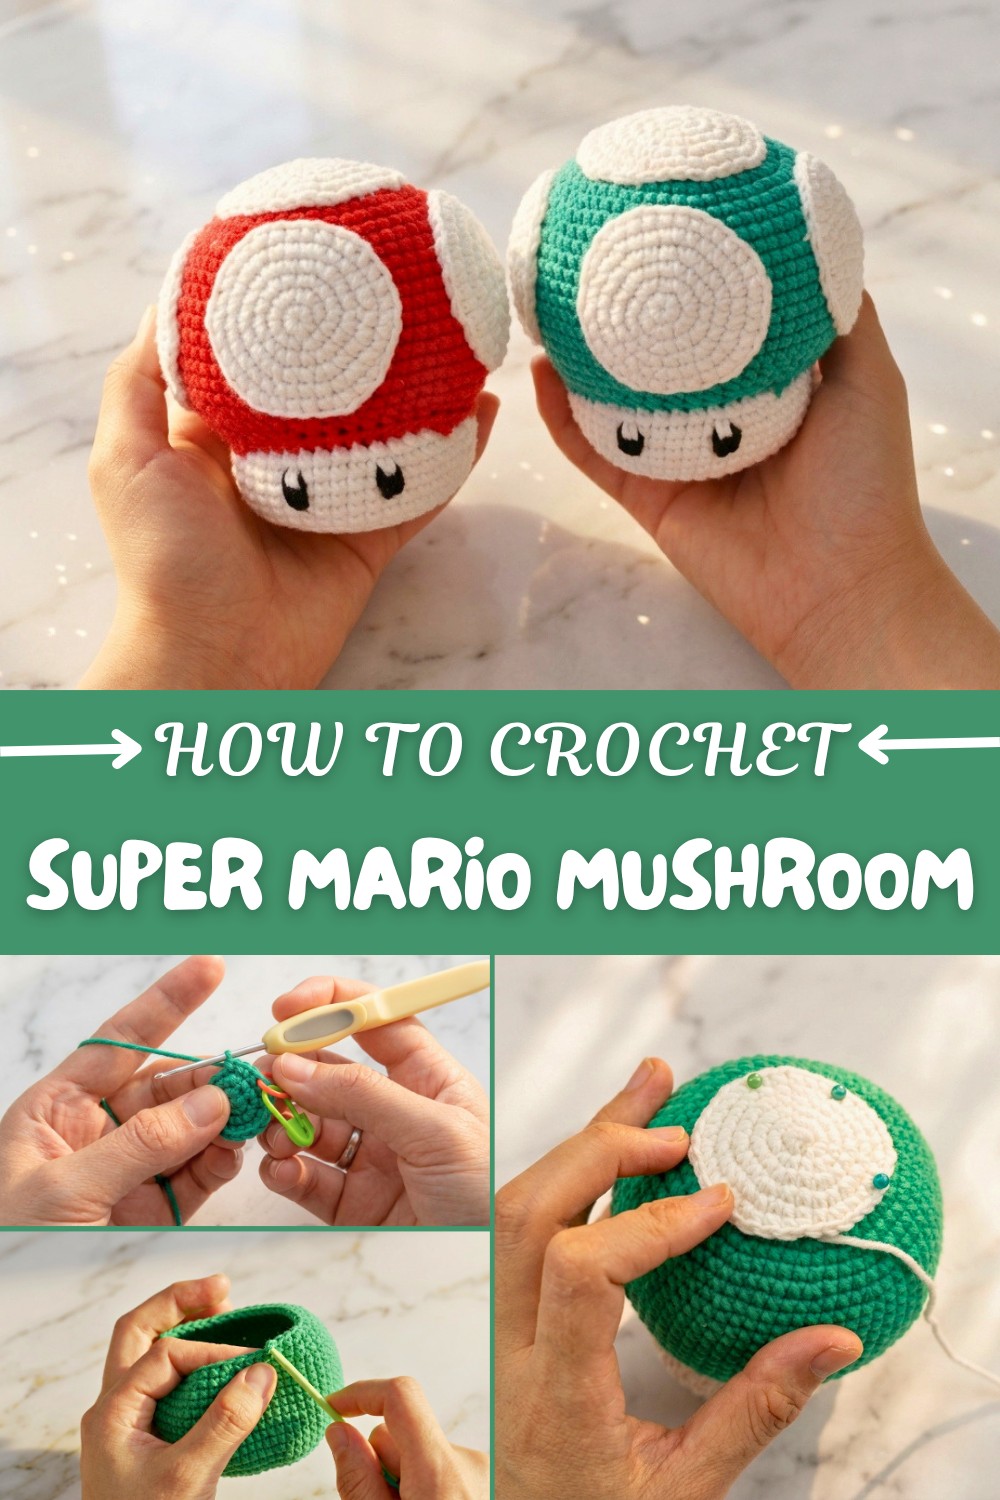
Super Mario Mushroom Free Crochet pattern for Beginners
Relive classic game fun with this Free Crochet Super Mario Mushroom Pattern featuring iconic mushroom details and playful character for fans.
If you love crochet and enjoy a bit of Mario-themed fun this Free Crochet Super Mario Mushroom pattern is a fantastic project to try out. It’s a charming amigurumi piece that perfectly captures the iconic mushroom with its round plump cap and those cute little spots. The texture is wonderfully soft thanks to the use of velvet yarn and tight single crochet stitches which give the mushroom a firm yet cuddly feel — just the right combination for a decorative little toy or keepsake.
This pattern suits crocheters at any level especially beginners looking to sharpen their skills with working in rounds increases and decreases. Plus depending on your choice of yarn and hook size you can make your mushroom bigger or smaller customizing it to your liking. It makes a lovely gift — whether it’s for a gamer friend’s birthday a quirky home accent or even a playful addition to a nursery.
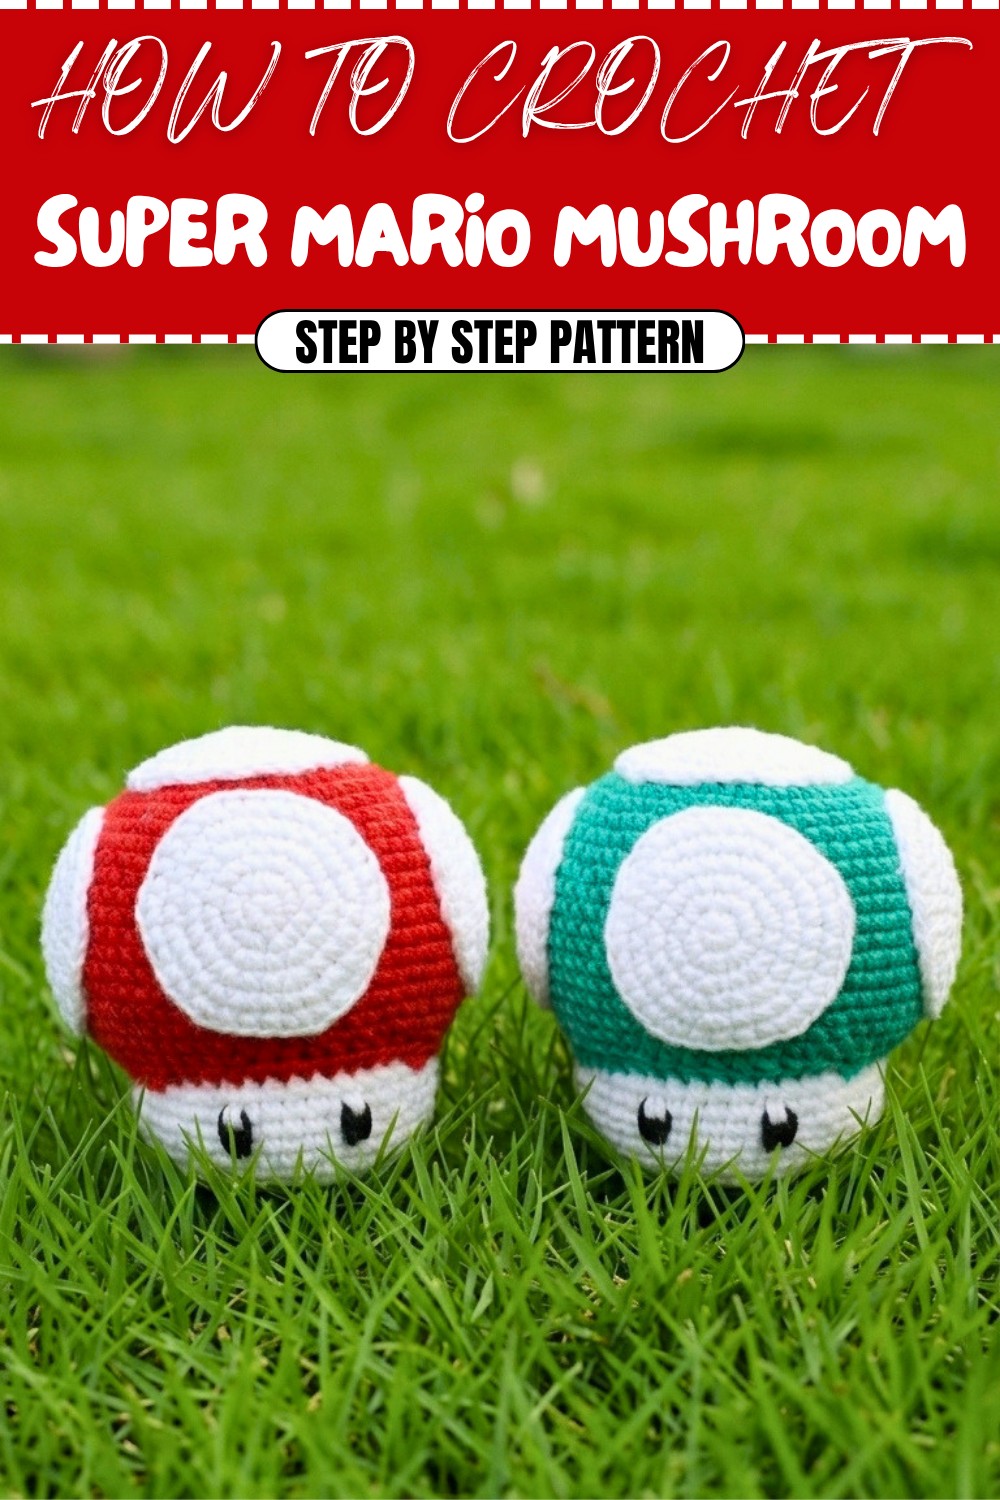
Free Crochet Super Mario Mushroom pattern with Retro Look
The mushroom’s construction starts with a magic ring building up through carefully counted rounds to shape that dome-shaped cap so recognizable to fans everywhere. One trick I often recommend is to use a hook slightly smaller than what the yarn calls for — this keeps the stitches tight and your stuffing hidden giving your piece a neat polished look.
I adore how the milk cotton yarn enhances this pattern: its softness and slight sheen make each stitch pop beautifully while keeping a velvety smooth finish. Creating this mushroom offers not just a project but a chance to personalize and have fun—whether by experimenting with colors or embellishments. It’s a delightful way to sprinkle some whimsy into your crochet world!
Crochet Life Mushroom Amigurumi Pattern
Introduction
Welcome to this delightful crochet tutorial where we will create an adorable life mushroom amigurumi together. This charming doll features a round mushroom head with spots, a mushroom stalk, and expressive eyes. The pattern is straightforward, focusing on beginner-friendly stitches and simple shaping techniques to bring the mushroom to life. Perfect for home décor or gifting, this pattern combines a textured look and playful features to make a classic amigurumi project.
Skill Level & Terminology
- Skill Level: Beginner
- Terminology: US crochet terms.
This pattern uses simple stitches such as single crochet (sc), increases (inc), decreases (dec), slip stitches (sl st), and chains (ch). Magic ring technique is used to begin each round. Basic knowledge of crochet in continuous rounds and working into specific loops is helpful.
Materials & Tools
- Five strands of milk cotton yarn (or any similar yarn suitable for amigurumi)
- 2 mm crochet hook
- Stitch marker to keep track of rounds
- Yarn needle for sewing and weaving ends
- Fiberfill stuffing
- Black and white yarn for eyes (or safety eyes as an option)
- Scissors
Gauge
Gauge is flexible but important to maintain a tight tension for good stuffing and shaping. With 2 mm hook & 5 strands milk cotton yarn, approximately 10 single crochets (sc) equal 4 cm.
Abbreviations List
| Abbreviation | Stitch | Description |
|---|---|---|
| ch | Chain | Creating foundation or turning chains |
| sc | Single crochet | Basic crochet stitch |
| inc | Increase | 2 sc stitches worked into one stitch |
| dec | Decrease | Crochet 2 stitches together |
| sl st | Slip stitch | Connects rounds or moves yarn without height |
| st / sts | Stitch / Stitches | Crochet stitch unit(s) |
Special Stitch Instructions
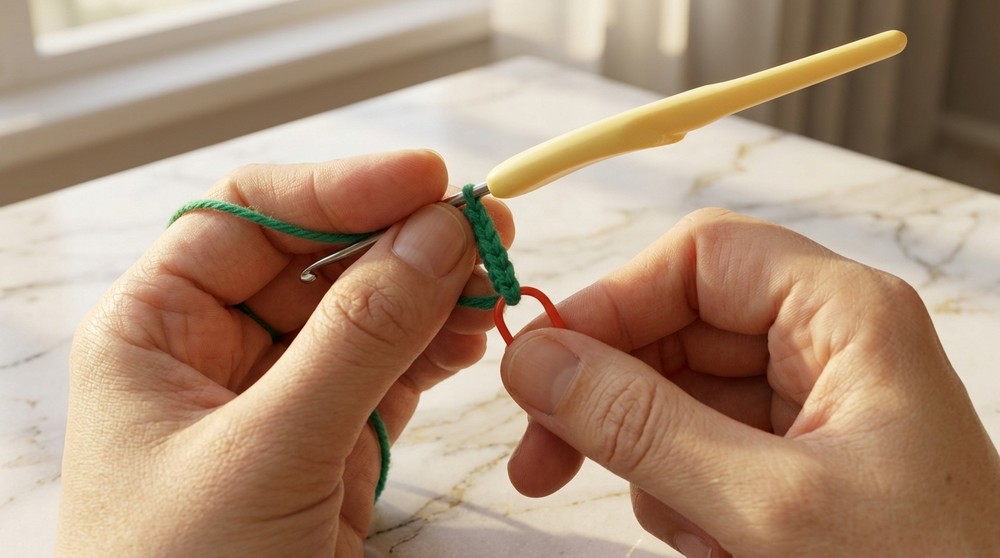
Magic Ring: Begin your rounds with adjustable loop stitch so the center hole is closed tight.
Increase (inc): Work two single crochets into the same stitch.
Decrease (dec): Insert hook into front loop of two adjacent stitches and draw yarn through all loops to combine stitches.
Finished Size
The finished mushroom amigurumi measures approximately 15 cm (6 inches) tall and 10 cm (3.9 inches) wide at the cap. Dimensions may vary depending on yarn choice and tension.
The Pattern
Mushroom Head
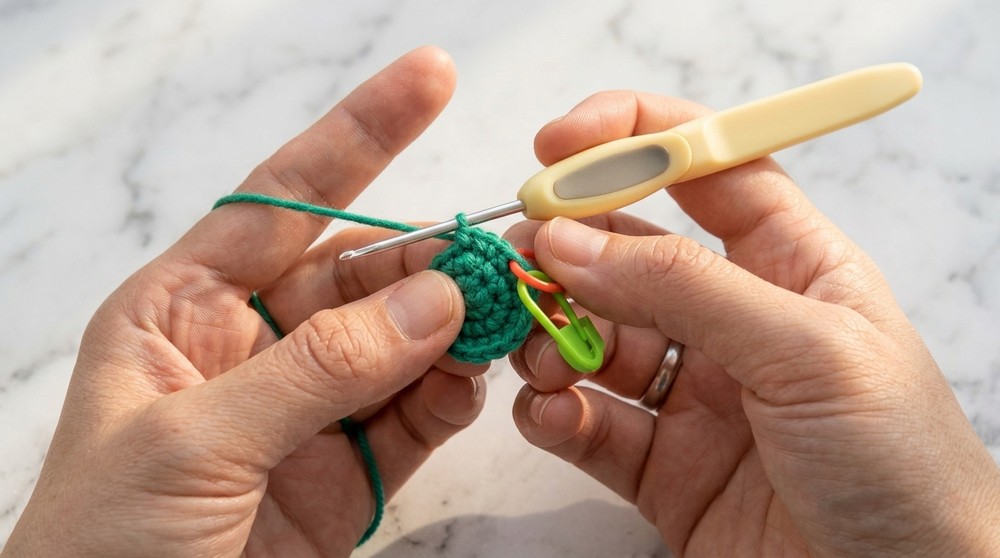
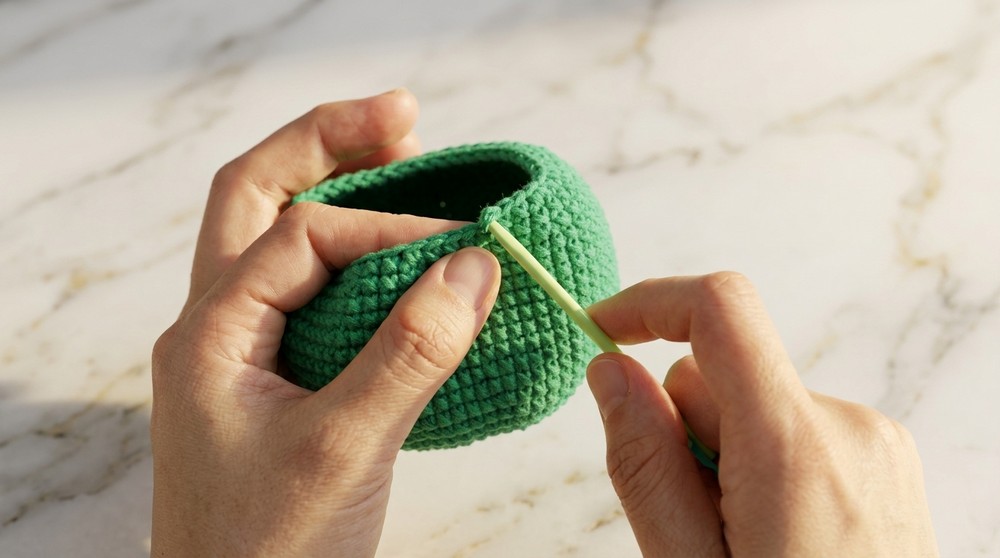
- Round 1: Begin in a magic ring and work 6 sc. Mark the first stitch for the round start.You now have a tight round base to build the mushroom cap.
- Round 2: Crochet 2 sc in each stitch around (inc in every stitch) for a total of 12 sts. Mark the last stitch.The head diameter doubles with these increases.
- Round 3: Repeat [1 sc, inc] six times around (18 sts).
- Round 4: Repeat [2 sc, inc] six times (24 sts).
- Round 5: Repeat [3 sc, inc] six times (30 sts).
Rounds 6 to 20
- Follow the provided diagram or standard increase patterns, adding stitches as the mushroom cap expands. These rounds will further shape the mushroom’s curvature.
- Each round follows a pattern of a specific number of single crochets (sc) followed by an increase (inc), gradually increasing the stitch count up to round 20.
Work these rounds carefully to create the domed shape of the mushroom cap.
Decreasing Rounds (21 to 24)
- Round 21: Repeat 6 times the pattern: 9 sc, dec (60 sts total).
- To execute the decrease (dec):
- Insert your hook into the front loop of the next two stitches, yarn over and pull through all loops on hook to merge two stitches.
- To execute the decrease (dec):
- Rounds 22 to 24: Follow the diagram for gradual decreases, maintaining smooth shaping.The mushroom begins to taper toward the stalk.
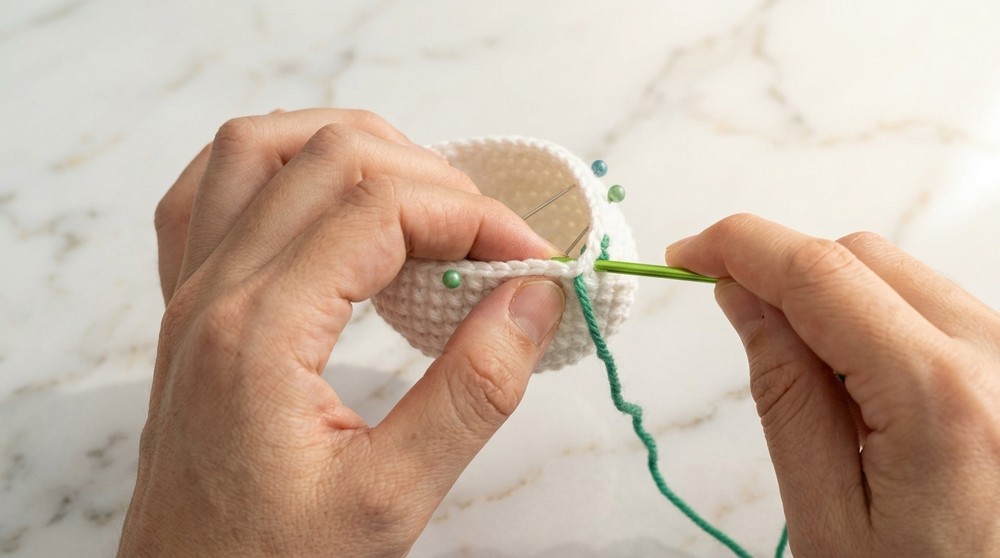
Connecting the Mushroom Parts
- After finishing round 24 on the head, leave a long yarn tail.
- Use a yarn needle and matching yarn to sew the mushroom head to the stalk carefully.
- Because this pattern is crocheted in spirals, when joining, sew through the back loops and the loops below the stitches to maintain an even seam.
- Use stitch markers or visually count stitches to align the mushroom cap evenly with the stalk.
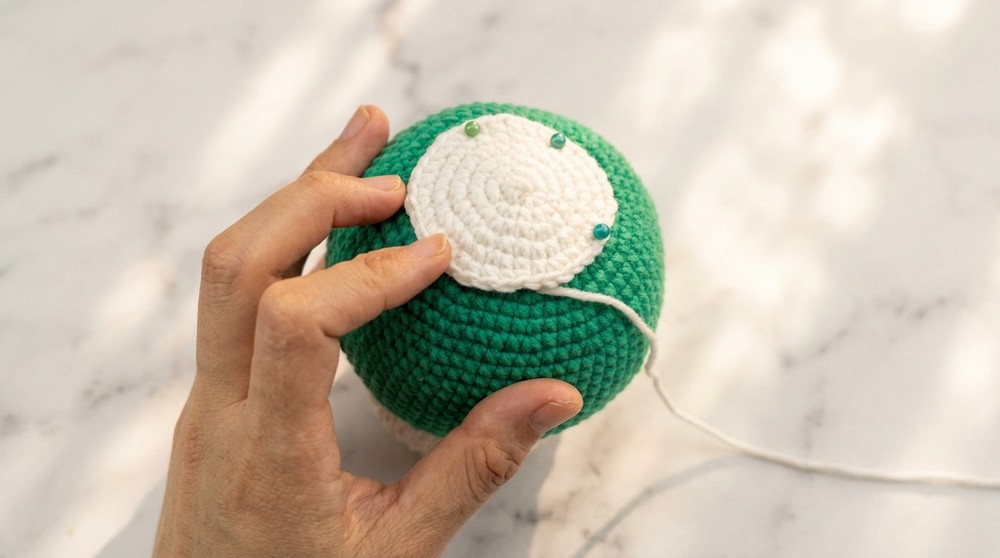
Mushroom Stalk and Spots
- Mushroom Stalk: Crochet according to the diagram or written instructions (not detailed here but involves working in rounds with consistent sc stitches).
- Mushroom Spots: Crochet five circular patches identical in size, representing the characteristic mushroom spots.
- Securely sew these spots onto the mushroom cap in balanced arrangement.
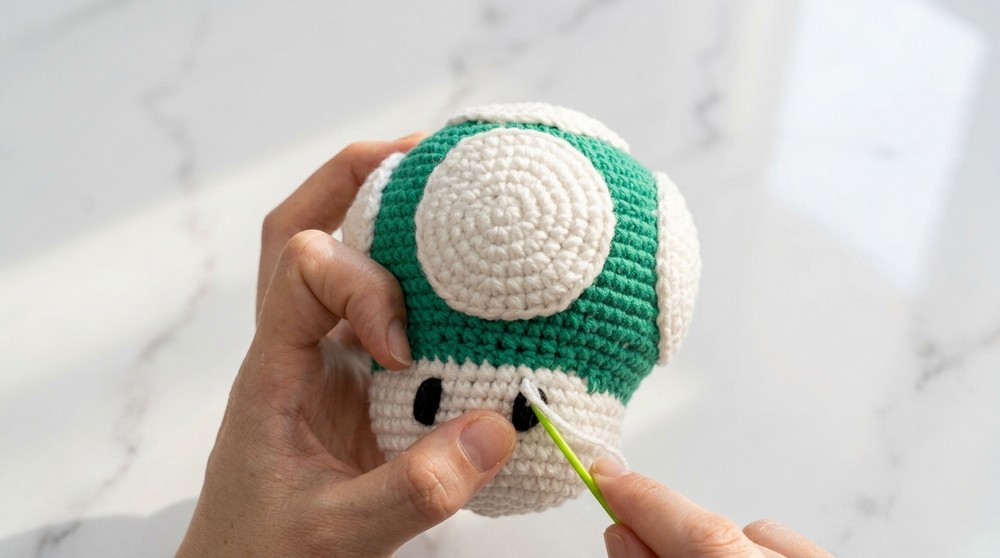
Eyes Detailing
- Using black yarn, embroider the eyes centered near the front of the mushroom head.
- Make symmetrical loops by pulling the yarn back and forth through the stitches 3–5 times to form open eye shapes.
- With white yarn, add highlights over the black to finish the eyes, making them expressive and cute.
Assembly & Finishing
- Firmly stuff the mushroom head and stalk with fiberfill to retain shape.
- Use a yarn needle to sew all parts together securely, including mushroom spots.
- Ensure seams are neat and yarn tails are woven inside.
- Trim any excess yarn tails.
Summary and Tips
This mushroom uses simple crochet fundamentals: single crochets, magic rings, increases, decreases, and sewing. Working in spirals requires close stitch counting and neat joinery to avoid uneven edges. Taking time with proper stuffing and assembly will ensure a clean and sturdy finished product. Use stitch markers to keep track of rounds and increases/decreases for accuracy.