
Simple Free Crochet Frog Froggy Amigurumi Pattern for Plushies
Turn yarn into a charming frog with this Free Crochet Frog Froggy Amigurumi Pattern, ideal for making delightful keepsakes everyone will cherish.
When I decided to create a whimsical touch for my home, I reached for my crochet hook and some bright green yarn, eager to bring a little frog to life. The Free Crochet Frog Froggy Amigurumi Pattern soon became my new project, promising a playful, squeezable companion that would add cheer wherever it landed.
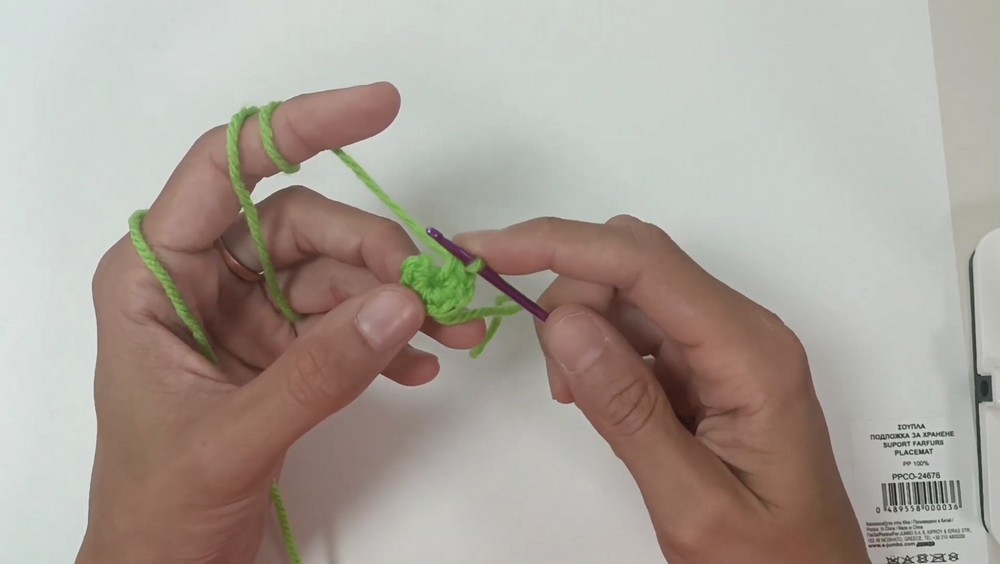
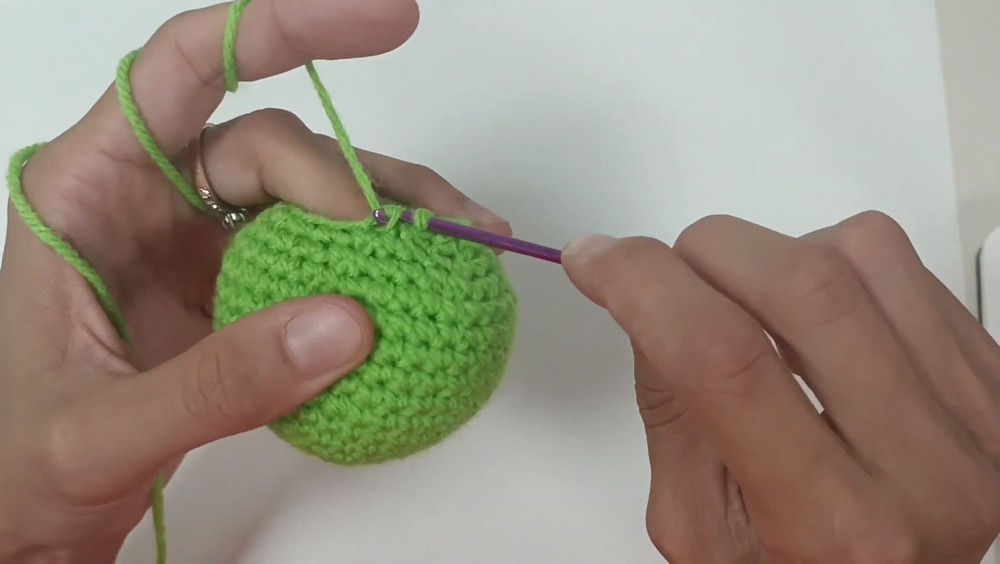
As I started, the magic ring technique felt almost magical, I watched my stitches spiral into a neat, rounded base for the frog’s body. Row by row, I added single crochets and gentle increases, feeling the shape emerge between my fingers. Soon, I had a soft, plump little sphere, sturdy and perfect for stuffing.
Free Crochet Frog Froggy Amigurumi Pattern with Detailed Instructions
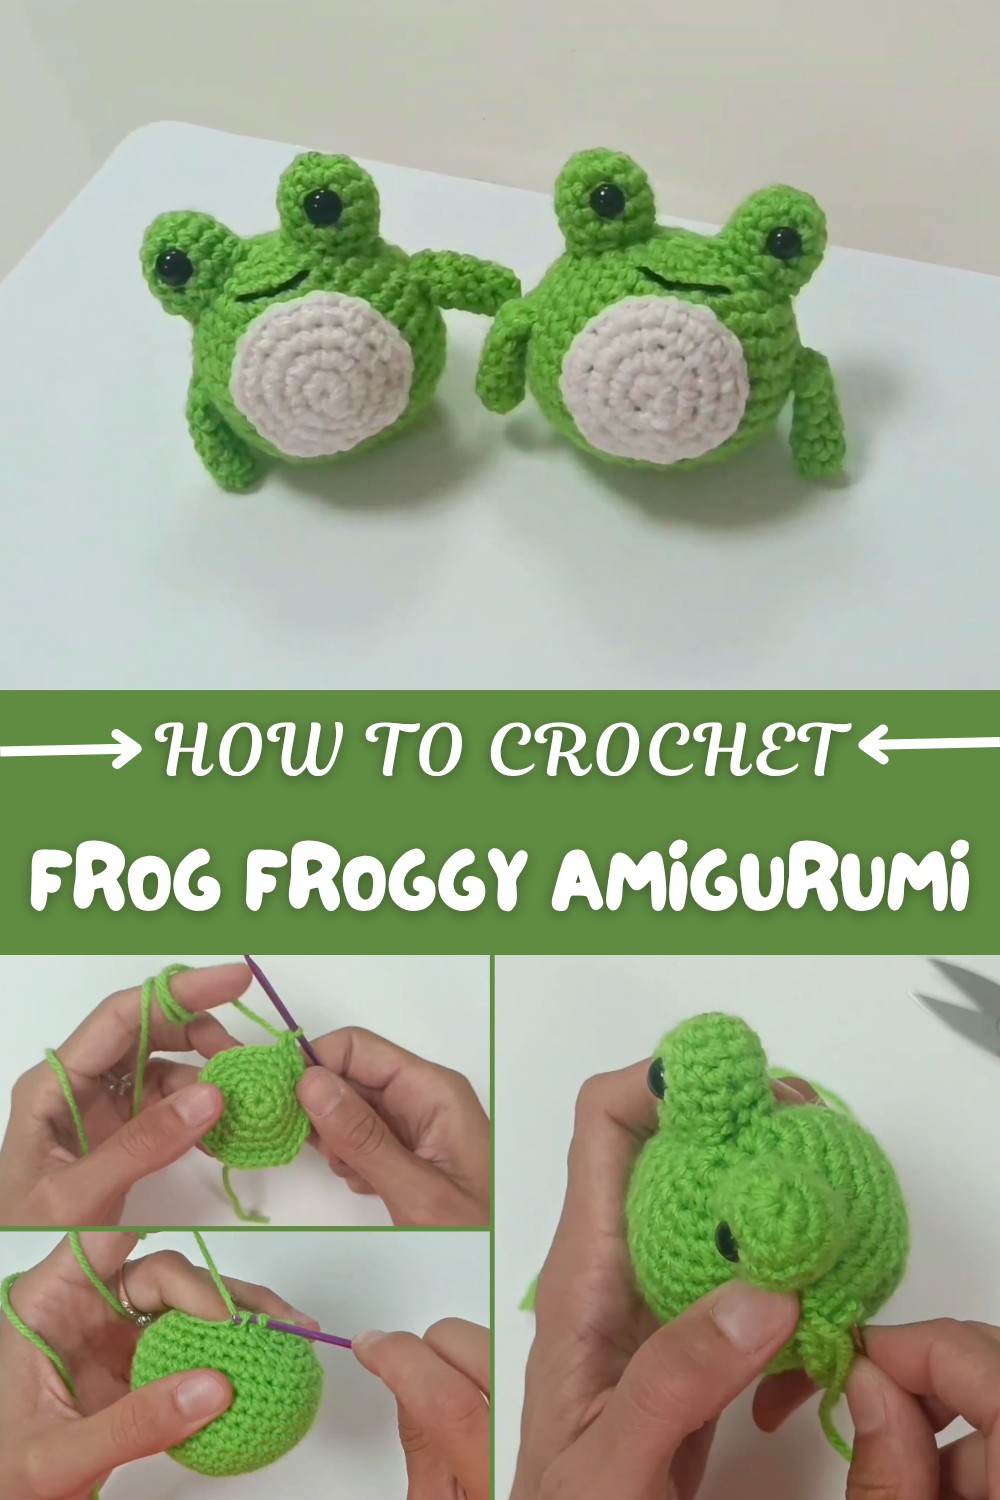
Adding the frog’s unique features was my favorite part. Crocheting the bulging eyes with their own rounds of stitches, and selecting the safety eyes for a lively sparkle, made the frog’s personality shine. Stitching together the little arms, I learned to flatten and join them just right, and the fluffy white belly added a fun contrast. When I embroidered the smiling mouth, it felt as though the frog was truly smiling back at me.
Working on this project was not just about following a pattern, it was a joyful experience in shaping, joining, and subtly customizing a little creature. Along the way, I honed skills like invisible decreases, sewing tiny parts, and giving amigurumi its signature tight, cozy texture.
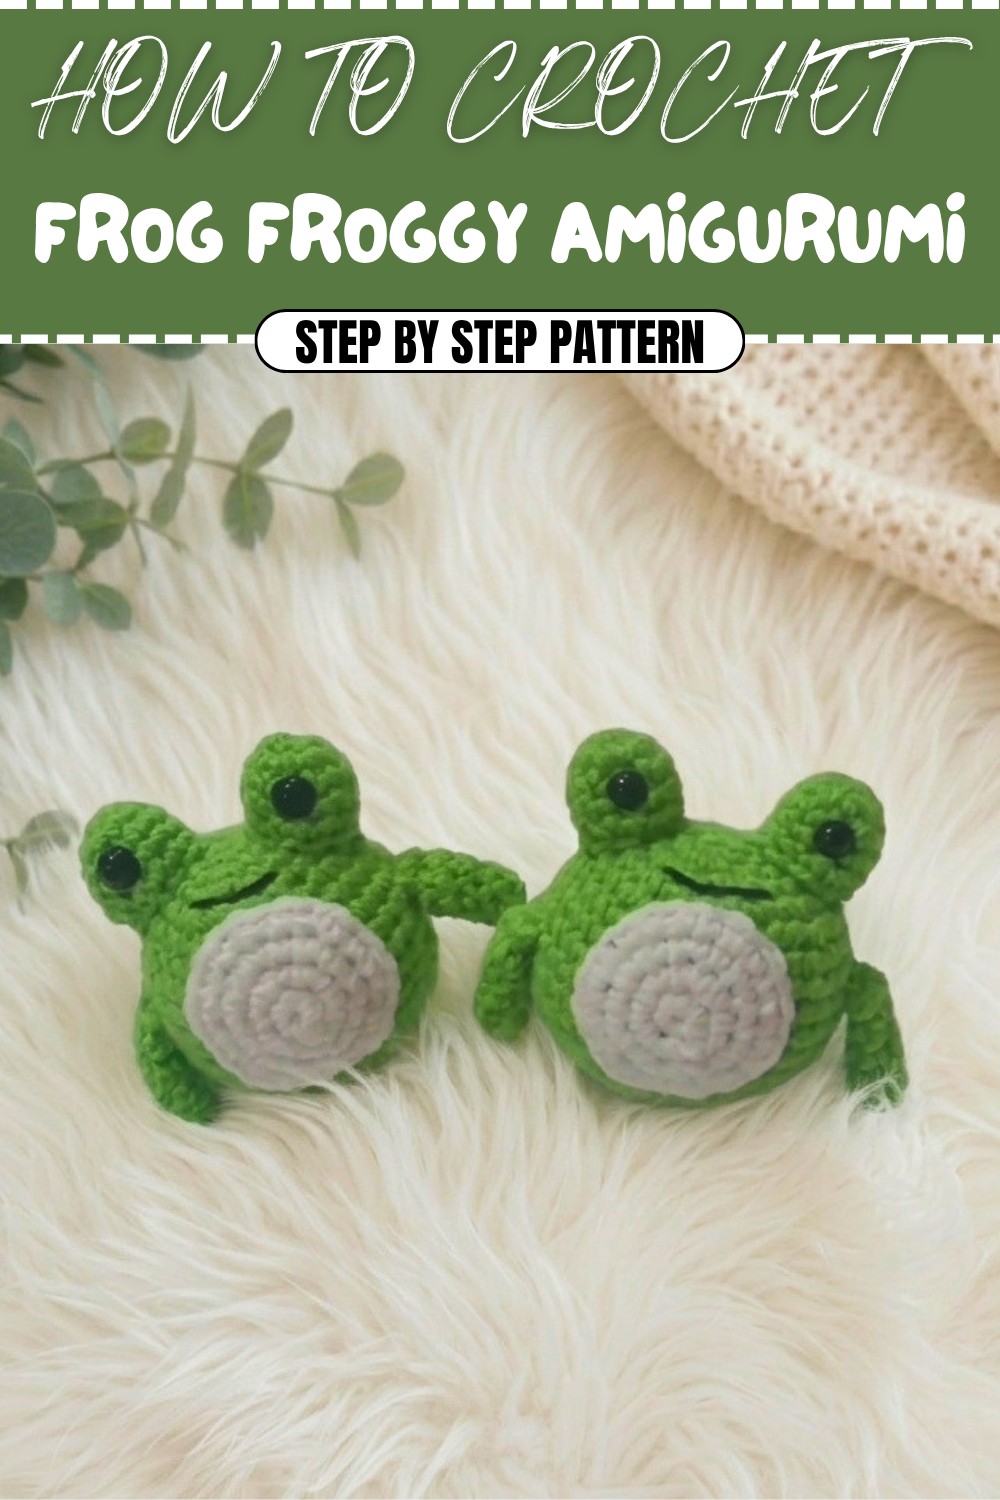
Now, my little froggy sits on my shelf, a cheerful reminder of creativity and patience. Whether as a gift, decoration, or simply a keepsake, this amigurumi frog brings a burst of personality to any space. If you’re looking for a fun, skill-building project that welcomes both beginners and seasoned makers, this pattern is sure to make you smile with every stitch.
Crochet Amigurumi Frog (Fall Frog) Pattern
Before You Start
- Familiarize yourself with crochet in the round (amigurumi method), increases, decreases, and basic sewing techniques.
- Prepare all components before assembly.
- Use safety eyes with caution. For very young children, embroider eyes for safety.
- Count stitches at the end of each round to ensure accuracy.
- Adjust yarn thickness or hook size for a larger or smaller frog.
Pattern Notes
- Spiral rounds: Pattern is worked continuously in a spiral. Do not join rounds unless specified.
- Use a stitch marker or contrasting yarn to mark the first stitch of each round.
- Always stuff the body and parts firmly but with enough softness to shape well.
- If instructed, work invisible decreases for a neater, gap-free finish.
- Long yarn tails help with sewing pieces together.
How I Made the Crochet Pattern?
- Started with a classic amigurumi sphere for the frog body, using incremental rounds of increases, even rounds, then symmetrical decreases.
- Crocheted separate flat circles for the eyes and belly patch.
- Made simple, non-stuffed cylindrical arms and used the “flatten-and-seam” method for finishing.
- Incorporated strategic sewing for secure, cute assembly and embroidered a bold smile for personality.
Skill Level
Beginner to Intermediate.
Amigurumi basics, very simple shaping, and easy sewing.
Finished Size
Height: Approx. 9–11 cm (3.5–4.5 inches) tall
Width: Around 7–8 cm (3–3.25 inches)
Materials
- DK or light worsted weight acrylic yarn (green for body and arms, white for belly, scrap black for mouth)
- Small amount of fiberfill stuffing
- 3.0 mm crochet hook
- 7 mm safety eyes (or black yarn to embroider)
- Yarn/tapestry needle
- Scissors
Measurements/Sizing
- Body circumference: 19–21 cm (approx. 7–8")
- Arms: 5–6 cm long, 1–1.5 cm thick
- Eyes: ~2.5–3 cm wide
- Belly patch: ~3.5–4 cm diameter
Gauge
Gauge is not crucial. Focus on even tension and no stuffing leaks.
Typical: 8 sc x 8 rows ≈ 2” (5 cm)
Stitch Abbreviations
- MR = Magic Ring
- sc = single crochet
- inc = increase (2 sc in same st)
- dec = decrease (sc2tog, or invisible decrease)
- sl st = slip stitch
- st(s) = stitch(es)
Special Stitches
Magic Ring (MR):
Loop yarn into a ring, work required stitches into center, then pull tight.
Invisible Decrease:
Insert hook into front loop of next 2 sts, yarn over, pull through both, yarn over, pull through both again.
The Pattern!
BODY
- With green yarn, make a MR.
- Round 1: 6 sc in MR. (6)
- Round 2: 6 inc (2 sc in each st around). (12)
- Round 3: [1 sc, inc] x 6 (18)
- Round 4: [2 sc, inc] x 6 (24)
- Round 5: [3 sc, inc] x 6 (30)
- Round 6: [4 sc, inc] x 6 (36)
- Rounds 7–12: 1 sc in each st around (36) for 6 rows
- Round 13: [4 sc, dec] x 6 (30)
- Round 14: [3 sc, dec] x 6 (24)
- Round 15: [2 sc, dec] x 6 (18)
- Stuff the body firmly as you go.
- Round 16: [1 sc, dec] x 6 (12)
- Round 17: 6 dec (6)
- Sl st, fasten off leaving long tail. Use tapestry needle to weave through front loops of last 6 sts and pull tight to close. Secure and weave in.

Paragraph:
To make the frog’s body, begin with a magic ring and increase each round to form a sphere. After your shape is full and even, maintain size with plain single crochet rounds, then decrease evenly to close. Stuff as you go to make a cuddly, nicely-shaped figure.
EYES (make 2)
- With green, MR.
- Round 1: 6 sc in MR. (6)
- Round 2: 6 inc (2 sc in each st). (12)
- Rounds 3–5: 1 sc in each st (12) for 3 rounds
- Sl st, fasten off leaving long tail for sewing.
- Insert safety eye through center and secure (or embroider a black dot).
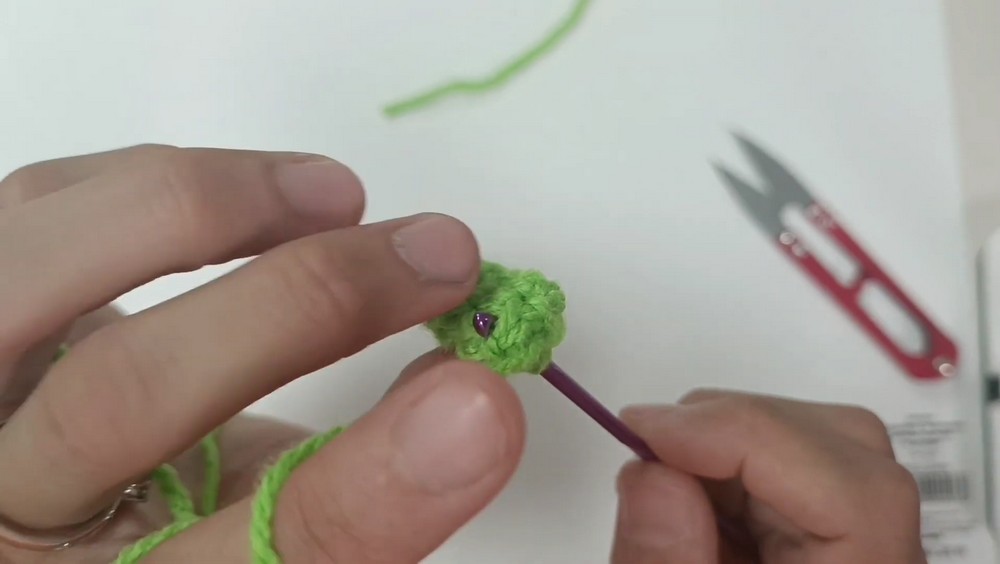
Paragraph:
Create each eye by working a tiny circle: start with six, double to twelve, then keep the shape with plain rounds. Add your safety eye in the center before sewing to the body.
ARMS (make 2)
- With green, MR.
- Round 1: 6 sc in MR. (6)
- Rounds 2–5: 1 sc in each st (6) for 4 rounds
- Flatten the tube, aligning stitches.
- Single crochet or slip stitch across both edges to close the end (3 times).
- Ch 1, fasten off leaving a long tail for sewing.
Paragraph:
Arms are made as short tubes, then flattened and seamed for flipper-like cuteness. You do not need to stuff the arms—simply flatten and seam together.
BELLY PATCH
- With white yarn, MR.
- Round 1: 6 sc in MR. (6)
- Round 2: 6 inc (12)
- Round 3: [1 sc, inc] x 6 (18)
- Round 4: [2 sc, inc] x 6 (24)
- Sl st, fasten off with long tail for sewing.
Paragraph:
The belly is just a flat white circle, made by increasing in each round to sit neatly under your frog’s “chin.”
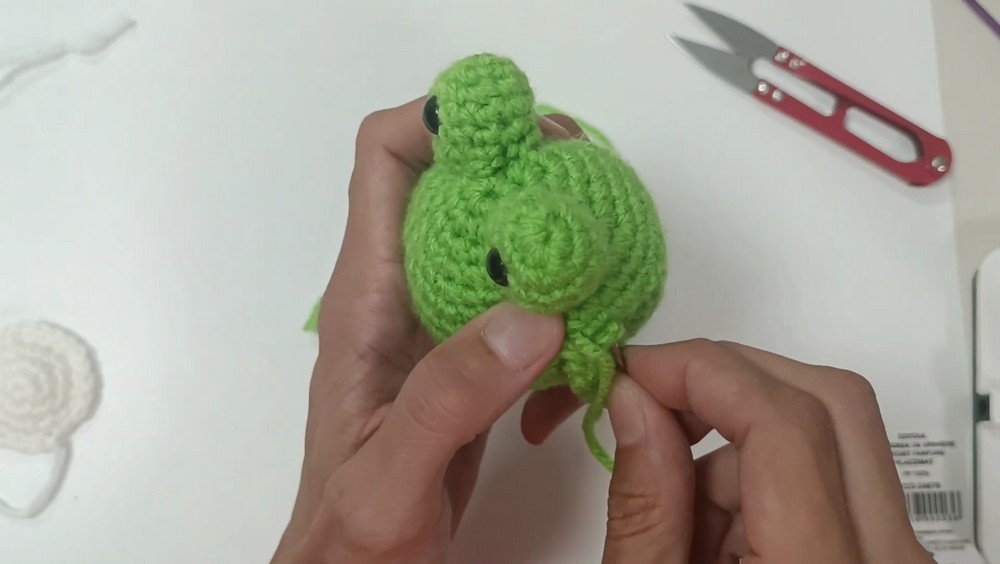
Assembly & Finishing
- Attach the eyes to the top of the frog body, slightly angled outward. Use tails to sew securely.
- Add arms to each side of the upper body using yarn tails.
- Sew the white belly patch on the bottom front of the frog, centered and slightly overlapping the lower edge.
- Use black yarn and a tapestry needle to embroider a wide, smiling mouth between the eyes and belly patch.
- Weave in all ends neatly inside the body parts.
- Adjust eyes, arms, and belly for symmetry before finalizing.
Solution of Problem
Possible Problem: Eyes/arms/belly not aligned during sewing.
Solution: Pin each part in place before sewing to check symmetry. Adjust as needed, then sew with small, hidden stitches for a professional look.
What You Can Make Using These Stitches
- Stuffed toy frogs—great gifts or desk buddies
- Customize with different colors for frog friends
- Attach a keyring for a cute bag charm
- Create pond or garden themes for kids’ rooms
- Try larger yarn for pillows or smaller yarn for mini frogs
For Non-Pattern Readers
You’ll begin by crocheting a ball for the frog’s body, starting with a small magic ring and getting bigger with each round, then shrinking again as you decrease. Stuff your froggy friend as you close him up. You’ll then crochet little circles for the eyes and sew on black or safety eyes in the centers. Tiny tube-shaped arms are created, flattened, and stitched on, and a white circle is added on the tummy. Finally, sew everything in place, eyes on top, arms by the sides, the white round on the belly and give your frog a big smile with black yarn for the mouth.