
Joyful Free Crochet Sunflower Granny Bag Pattern Step by Step
Brighten your summer style with this free crochet sunflower granny bag pattern and create a cheerful handmade bag that you'll absolutely love to carry.
When I first came across crochet sunflower granny squares, I knew they were something special. Their warm and sunny appearance instantly made me smile, and I couldn’t wait to use them for a project that would brighten my day. This particular bag is made up of several sunflower squares connected together, resulting in a functional yet cheerful accessory for every occasion. Whether you’re heading out for a picnic, doing errands, or looking for an eye catching bag for everyday use, it's as fun to carry as it is easy to crochet.
The sunflower squares are created using puff stitches to form raised and textured petals, giving the design depth and charm. Puff stitches bring character to your work and are so versatile that you can use them to make cozy throws, seat cushions, or even vibrant pillow covers. Surrounding the sunflower is a series of traditional granny square stitches, which keeps the project simple and manageable for beginners.
Free Crochet Sunflower Granny Bag Pattern for Cute Outfits
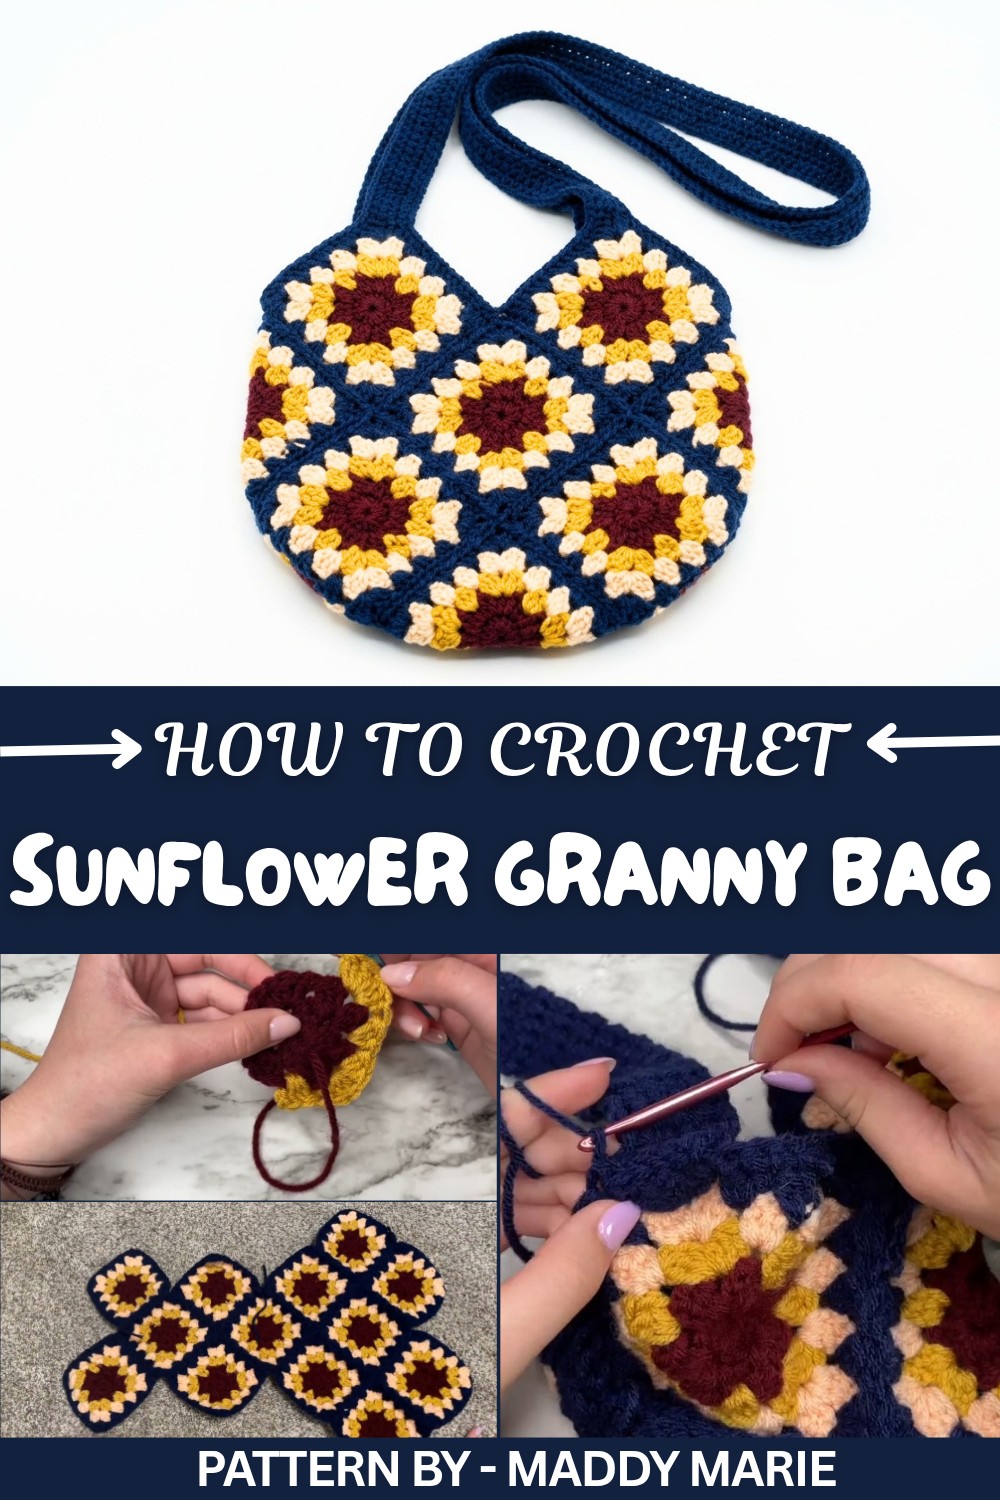
Featured By Maddy Marie
This bag’s beauty lies in the freedom to customize. From earthy sunflower tones like yellow, brown, and green to ombre effects or pastel accents, the right color choices can make it entirely your own. You can easily adjust the size to suit your needs by adding or reducing the squares, or experiment with different yarn types to see how they enhance your finished piece.
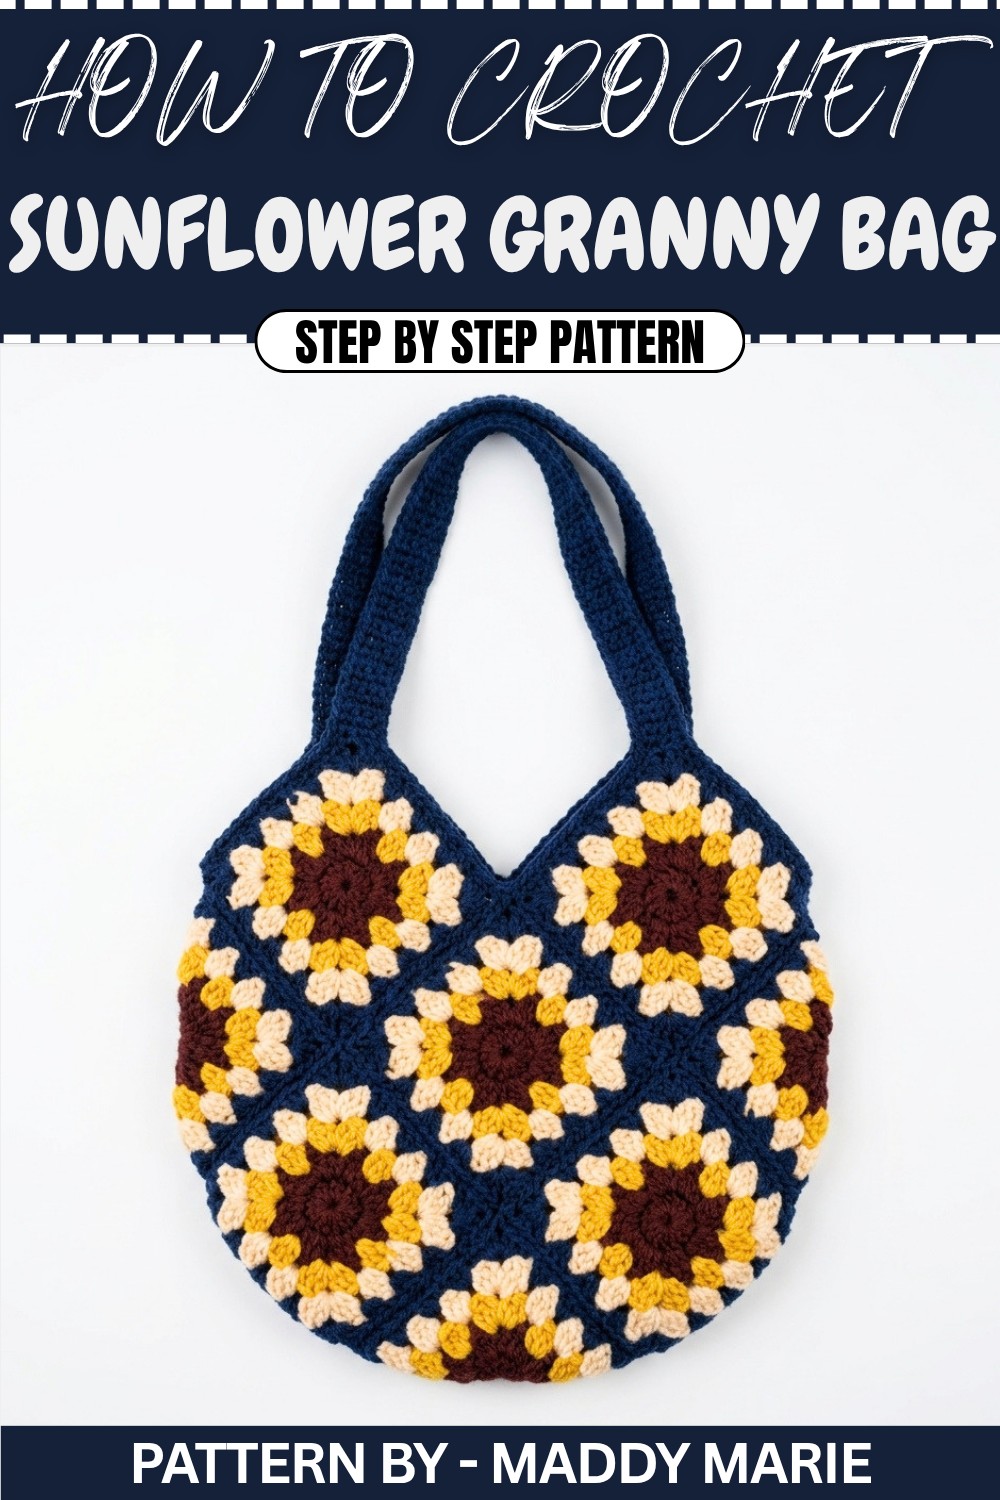
Making this bag is a great way to add brightness to your day or a loved one’s. It’s a thoughtful gift that radiates positivity and the warmth of summer. Whether you want to add a lining for extra sturdiness or keep it airy and flexible, this bag will quickly become one of your favorites to carry. Try this Sunflower Granny Bag Pattern and let your crochet bloom in a beautiful way.
Crochet Granny Square Tote Bag Pattern
Quick Overview of Pattern
- Bag is made from 13 granny squares.
- Squares are made using:
- Magic ring
- Cluster stitches (dc + 2 dc together)
- Squares are joined with a yarn needle.
- Bag is folded and side seams are sewn.
- A round of single crochet is added along the top edge.
- Two single crochet straps are worked directly onto the bag.
Notes
- Each granny square is worked in the round from a magic ring.
- Each cluster = 1 double crochet + 2 double crochets joined together (dc2tog).
- Corners use 2 clusters separated by 1 chain.
- Side spaces (non corners) later use 1 cluster only.
- You can change color at the end of a round by:
- Cutting the current yarn.
- Joining the new color in the top of the beginning chain.
- Squares may curl slightly; stretch the corners to flatten them.
Skill Level
- Confident Beginner / Intermediate
(You should be comfortable with: magic ring, ch, sl st, dc, sc, seaming.)
Materials
- Medium weight yarn (worsted) in 4 colors:
- First color (center)
- Second color (round 2)
- Third color (round 3)
- Fourth color (border/granny edge and sewing)
- Approximate hook size:
- 4.0 mm (G) or suitable for your yarn
- Tapestry / yarn needle
- Scissors
Measurements / Sizing
- Each granny square: approx. 4" x 4" (after stretching/flattening).
- Total: 13 squares.
- Finished bag (approximate):
- Width: 10–12 inches
- Height: 10–12 inches
- Strap length in video:
- 104 rows of 5 sc (long shoulder strap).
Gauge
- 1 granny square ≈ 4" x 4”.
- If much smaller or larger, adjust hook size.
Stitch Abbreviations
- ch – chain
- sl st – slip stitch
- dc – double crochet
- dc2tog – double crochet two together
- sc – single crochet
Special Stitches
- Magic Ring
- Double Crochet Two Together (dc2tog)
- Cluster (as used in this pattern)
The Crochet Pattern
A. Granny Square (Make 13)
Round 1
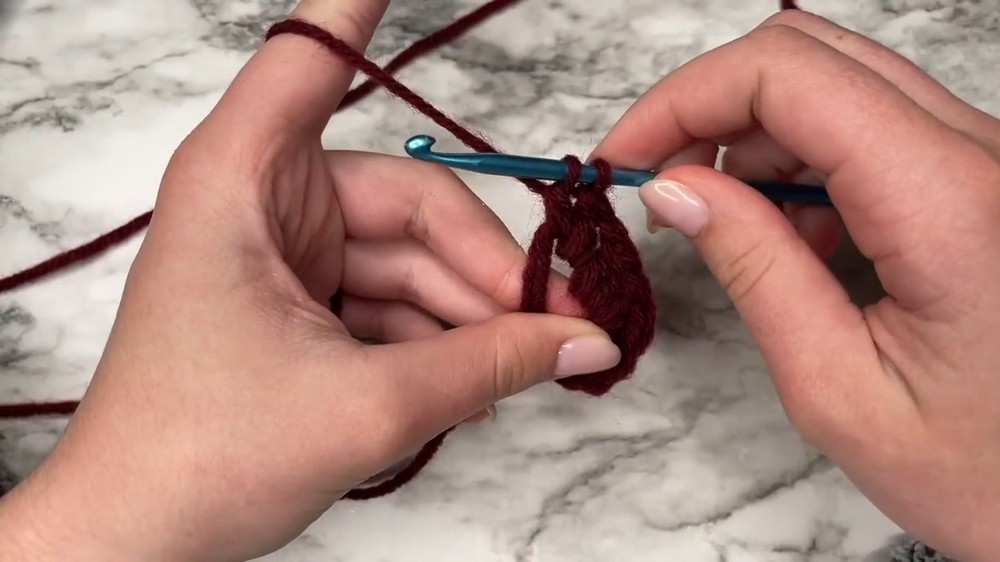
- Make a magic ring.
- Ch 3 (counts as first dc).
- Work 1 dc into the magic ring.
- Work dc2tog:
- (Yarn over, insert hook in ring, pull up a loop, yarn over, pull through 2) × 2
- Then yarn over, pull through remaining 3 loops.
- You now have first cluster.
- Ch 1.
- Repeat steps 3–6 3 more times for a total of:
- 4 clusters, each separated by ch 1.
- Pull the magic ring tight.
- Join with sl st into the 3rd chain of the beginning ch 3.
Round 2
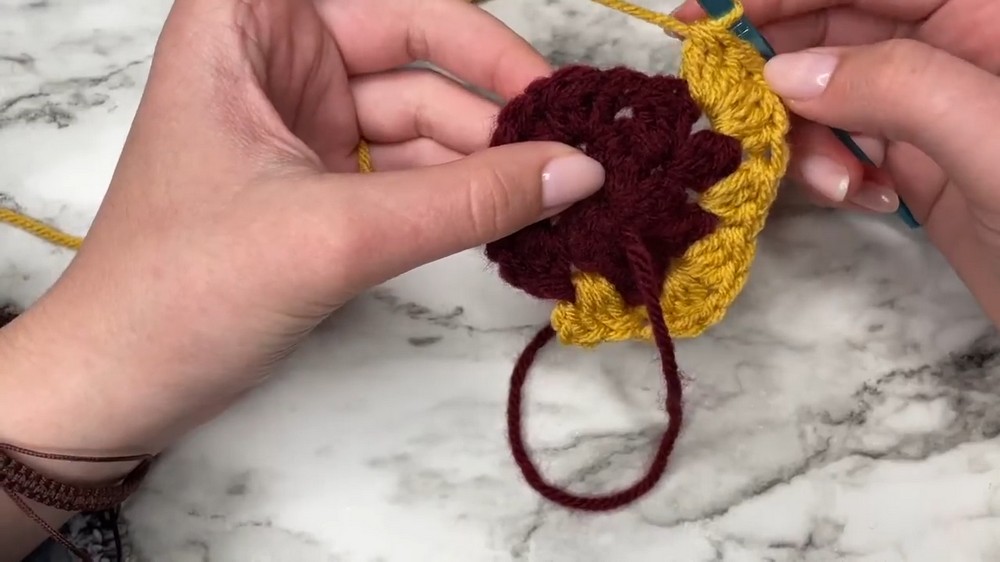
- Ch 3.
- Turn your work (as shown in video).
- In the first ch 1 space:
- Work 1 cluster
(1 dc + dc2tog joined as above). - Ch 1.
- Work another cluster in the same space.
- Work 1 cluster
- Move to the next ch 1 space; do NOT ch 1 between spaces:
- Work 1 cluster.
- Ch 1.
- Work another cluster in the same space.
- Repeat for all remaining ch 1 spaces:
- Each original corner space gets 2 clusters, separated by ch 1.
- At the end of the round, join by sl st into the 3rd ch of beginning ch 3.
Color Change to Round 3
- Cut the current yarn (leave a short tail).
- Insert hook into the 3rd ch of the beginning chain of round 2.
- Place new color on the hook.
- Pull new color through the stitch.
- Work a sl st to join.
- Ch 3.
- Tie the two yarn tails together with two knots to secure.
- Crochet over the tails to hide them as you work.
Round 3
- This round is similar to round 2 but starts using “corner vs middle” logic.
- From the joined point, identify the next space:
- If it is a corner space (where two clusters meet with a ch 1 between them):
- In that corner space:
- Work 1 cluster.
- Ch 1.
- Work another cluster (this keeps the corner).
- In that corner space:
- If it is a middle (side) space:
- Work 1 cluster only (no extra ch except between corners).
- If it is a corner space (where two clusters meet with a ch 1 between them):
- General rule for this round:
- Corner spaces: 2 clusters separated by ch 1.
- Side/middle spaces: 1 cluster each.
- Continue around the square:
- Work 1 cluster in each middle space.
- Work 2 clusters (ch 1 between) in each corner space.
- At the end of the round:
- Cut the yarn.
- Change to next color as done previously.
Round 4 (Final Border Color)
- Join new color in the 3rd ch of previous round’s starting chain.
- Ch 3.
- In first space:
- Work 1 cluster.
- Follow the same pattern as Round 3:
- Middle spaces:
- Work 1 cluster each.
- Corner spaces:
- Work 2 clusters, separated by ch 1.
- Middle spaces:
- At the final corner:
- Finish the last corner with 2 clusters.
- To close the round:
- Sl st into the first dc (top of initial cluster).
- Ch 1, cut yarn, and pull through.
- Pull ends tight and weave in with a tapestry needle.
Repeat all above steps until you have 13 granny squares.
Assembly (Joining Squares & Bag Construction)
1. Prepare the Squares
- Weave in all ends on all 13 squares.
- Flatten each square:
- Grab opposite corners.
- Stretch firmly.
- Repeat for all corners.
2. Layout for Sewing
Lay squares in this layout (as per video):
- Row 1: 2 squares
- Row 2: 3 squares
- Row 3: 2 squares
- Row 4: 1 square
- Row 5: 2 squares
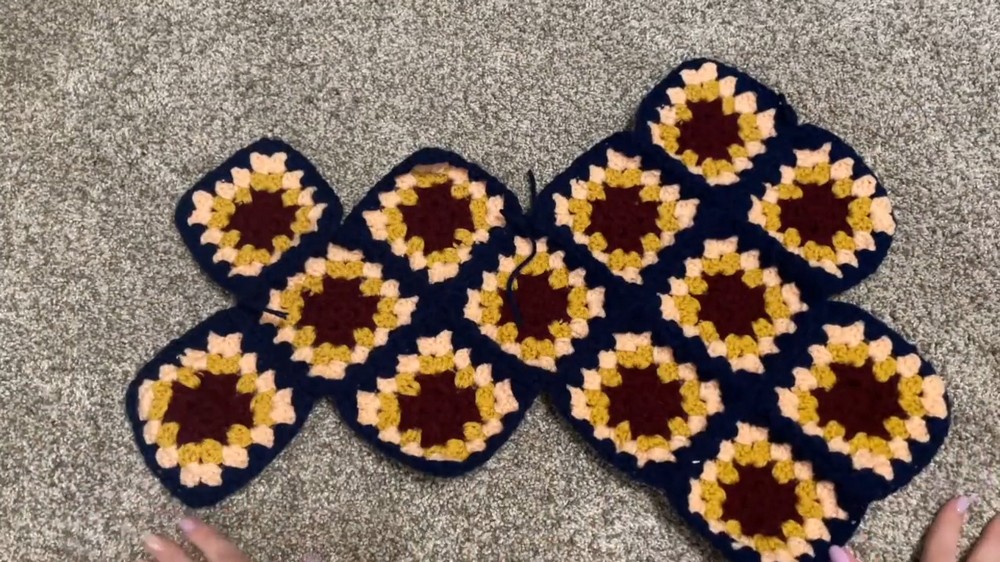
(You can screenshot or sketch this for reference.)
3. Sewing Squares Together
- Use navy (border) color yarn.
- Thread your tapestry needle.
- Start with a pair of squares:
- Place them right sides facing up.
- Align edges.
- Insert needle:
- Through the first dc stitch on the edge of square A.
- Then through the corresponding dc stitch on square B.
- Continue:
- Sew through matching stitches on both squares.
- Keep tension even so seam is straight.
- After finishing a seam:
- Move to the next square according to the layout.
- Continue until all 13 squares form one large joined piece.
Forming the Bag Shape
- Place the joined piece flat.
- Fold the piece in half horizontally so the top and bottom edges meet.
- Extra side squares:
- Fold the “sticking out” squares inward to align side edges.
- Side Seam – One Side:
- With yarn and needle, start at bottom corner.
- Sew up along the side where folded squares meet the main body.
- Repeat for the other side:
- Sew up from bottom to top.
Now the bag body is formed.
Top Edge – Single Crochet Round
- With bag held upright, locate the top edge:
- Where three squares meet at the top center.
- Attach yarn:
- Insert hook into a top stitch.
- Pull yarn through.
- Ch 2 to start.
- Work around:
- Into each visible stitch along the top edges:
- Work 1 sc in each stitch.
- Into each visible stitch along the top edges:
- Continue:
- All the way around the top opening of the bag.
- At end:
- Join with sl st into the first sc.
- Tighten and fasten off if you like, or continue directly to strap start.
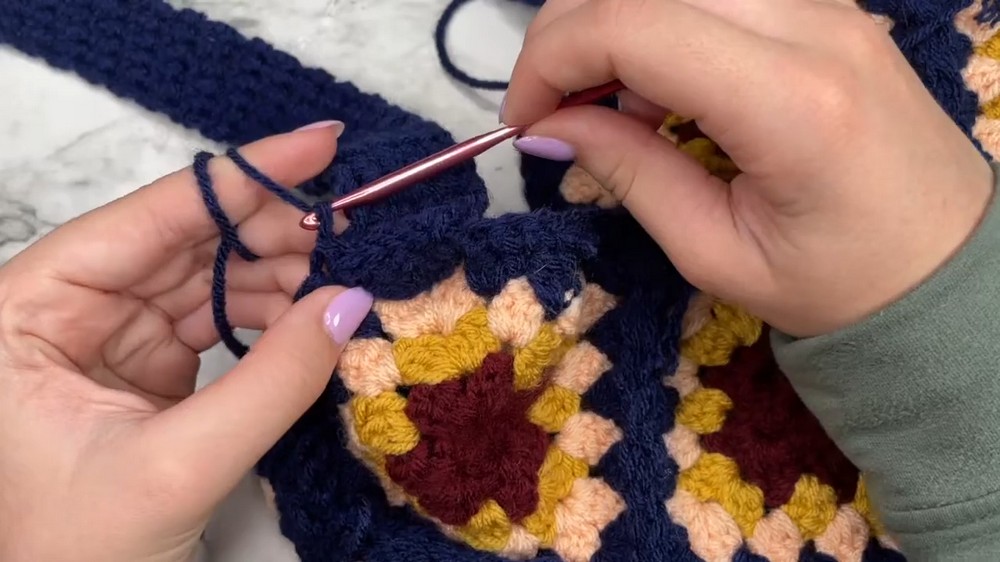
Straps
First Strap – Start
- Choose either top corner:
- There should be 5 sc forming that corner area:
- Middle stitch + 2 on each side.
- There should be 5 sc forming that corner area:
- Attach yarn into the first sc of that corner.
- Ch 2.
- Row 1 of Strap:
- Work 1 sc in each of 5 stitches across the corner:
- sc in st 1
- sc in st 2
- sc in st 3
- sc in st 4
- sc in st 5
- Work 1 sc in each of 5 stitches across the corner:
Strap Rows (Build Length)
- Ch 1, turn.
- Row 2:
- Work 1 sc in each of the 5 sc.
- Ch 1, turn.
- Repeat:
- Work 1 sc in each of 5 stitches every row.
- Chain 1 and turn at end of each row.
- Continue until desired length:
- In video: 104 rows of 5 sc.
Attach Strap to Other Corner
- Lay the strap flat:
- Ensure it is not twisted.
- Find the matching corner on the opposite side of the bag:
- Locate 5 sc stitches across that corner.
- For each of the 5 stitches:
- Insert hook through:
- 1 stitch on bag.
- 1 stitch on strap.
- Yarn over, pull through both, then through loop on hook → sl st.
- Insert hook through:
- After 5 sl sts:
- Work 1 extra sl st into next bag stitch to secure.
- Ch 1, cut yarn, and pull through.
- Weave in yarn ends.
Second Strap
- Repeat all steps for the second strap:
- Same starting rules.
- Same number of rows (e.g., 104).
- Attach to matching opposite side.
Assembly & Finished Size
- Make sure:
- All seams are secure.
- All ends are woven in.
- Approximate final bag:
- Height: 10–12"
- Width: 10–12"
- Strap length: depends on your row count (about hip/waist length with 104 rows).
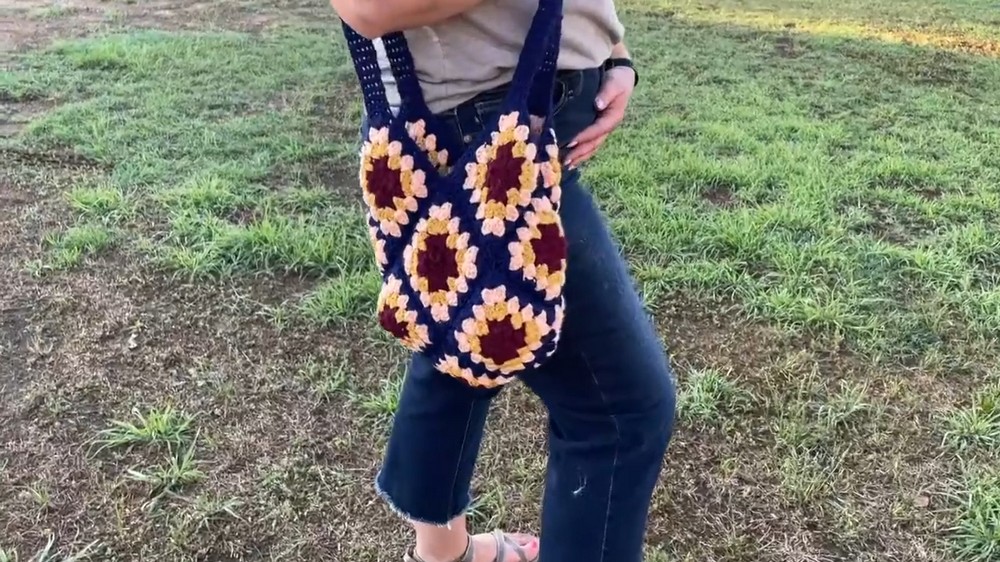
Conclusion and Ending Words
Your crochet granny square tote bag is now complete. The combination of colorful granny squares, neat joins, and sturdy single crochet straps makes this bag both beautiful and functional. You can experimentwith different color layouts, add a fabric lining, or even pockets in a separate project. If you followed along, this pattern helped you practice magic rings, cluster stitches, joining motifs, seaming, and strap construction. Enjoy using or gifting your handmade bag, and keep creating more projects with your granny squares.