
How To Crochet Mini Fish Keychain Pattern - Free
Learn how to crochet a mini fish keychain that is simple and fun to make while adding a touch of charm to your everyday accessories using this free crochet guide.
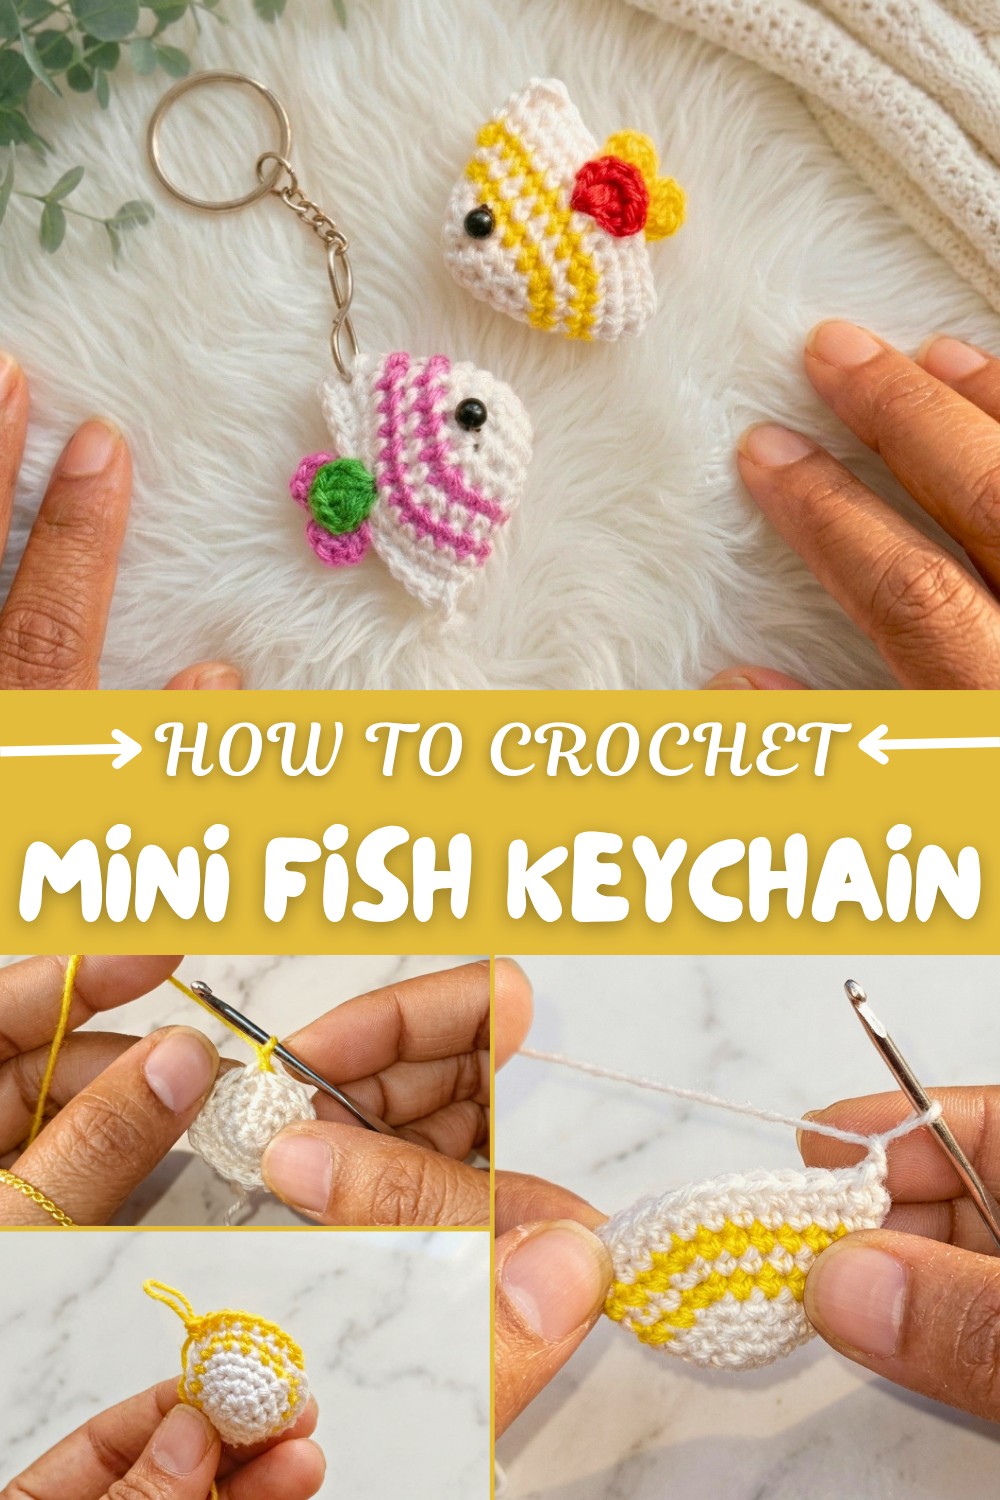
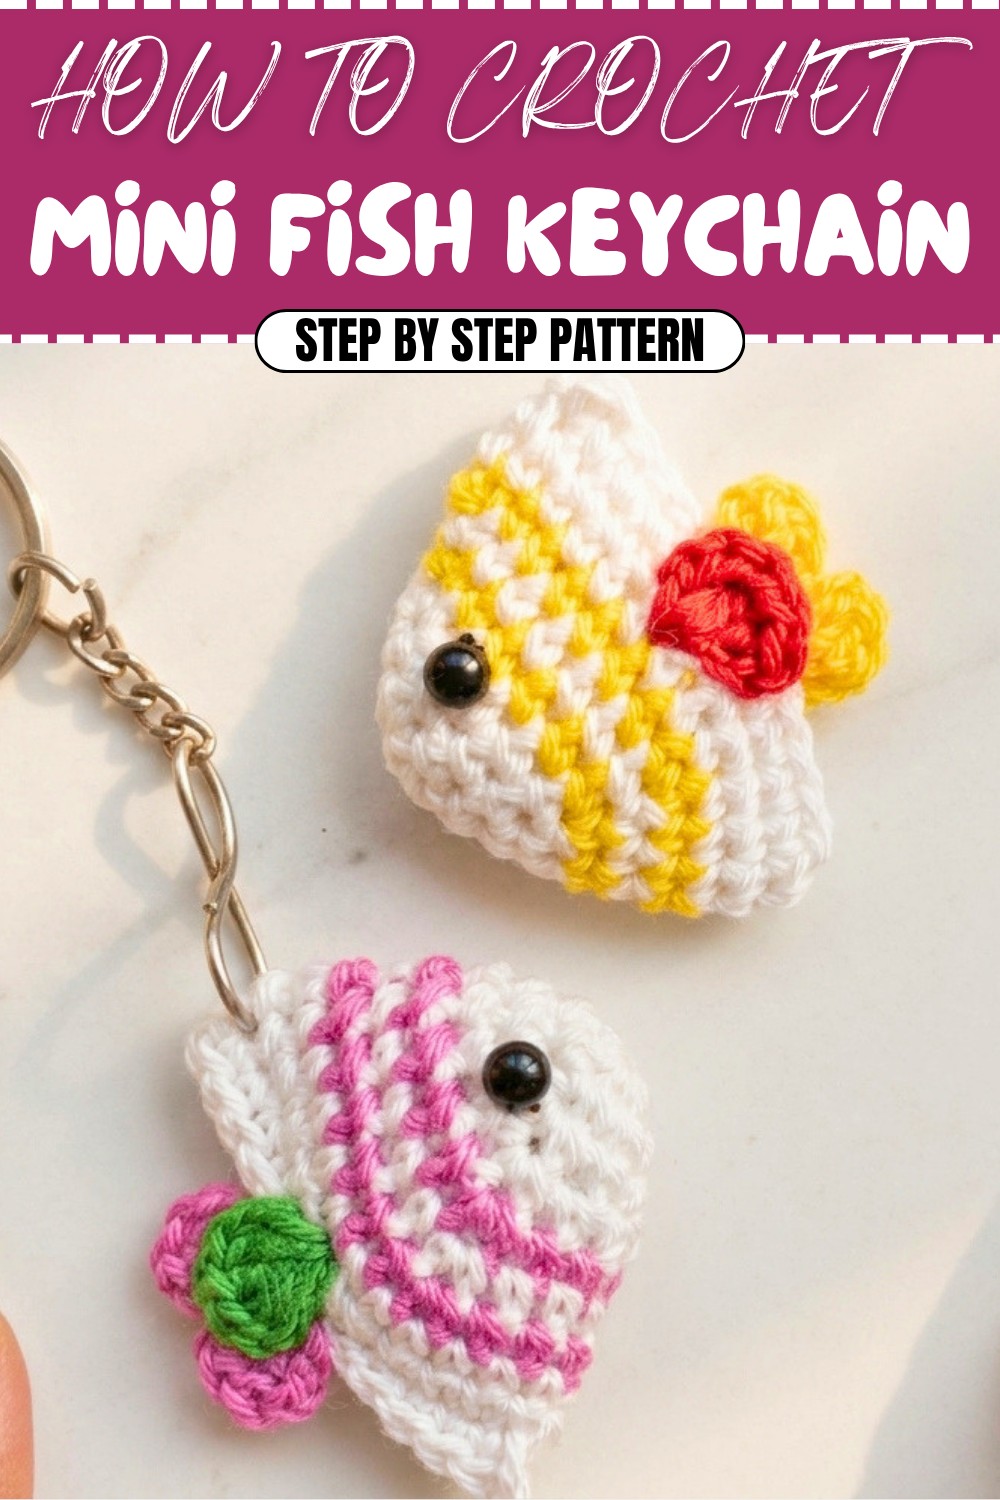
If you’re looking for a charming and quick crochet project, this Free Crochet Mini Fish Keychain Pattern is a wonderful choice. This little fish stands out for its sweet shape and bright colors. The body is made with rounds of single crochet, blending yellow and white for a cheerful look. It has a soft, neat texture that feels nice in your hand and creates a cute plump shape perfect for a keychain.
Free Crochet Mini Fish Keychain Pattern with Colorful Fins
The most attractive features are its tail and fins, made with simple chains and double crochet stitches. These give it a playful and lively appearance, and you can easily see the fish’s form thanks to the crisp details. Adding beads for the eyes brings the fish to life and adds an extra touch of fun. The overall appearance is so cute and eye-catching, perfect for gifting or keeping for yourself.
Crocheters will enjoy making this pattern because it uses very little yarn and can be finished quickly. It’s wonderful for beginners, and you can try changing the colors to make a whole school of fish in different shades. The pattern can also be easily adjusted, making the fish bigger or smaller, or adding extra beads for a sparkly look. You might even try attaching the fish to a zipper or making it into a charm for a purse.
The mini fish is mostly used as a keychain, but it’s also great as a bag charm, or even as a cheerful decoration for your home. You can hang it on your backpack or use it as a little gift for friends and kids. Its cute design and soft texture make it enjoyable to make and use, and it’s sure to bring a smile wherever you display it!
Crochet Small Fish Kitchen Decoration Pattern
Welcome to the crochet tutorial for making a small, cute fish, a perfect addition for kitchen decor or as a fun keychain. This easy project uses minimal yarn and works up quickly with simple stitches, ideal for beginners and anyone wanting to make a cheerful, creative kitchen ornament. The pattern is written step-by-step, with clear instructions and explanations after each section for those less familiar with crochet notation. Let’s create your adorable fish!
Skill Level & Terminology
Skill Level: Beginner
Terminology: US Crochet Terms
This fish is made using basic stitches, worked in the round, and completed with fast assembly. If you’re comfortable with single crochet, slip stitch, chains, and double crochet, you’ll enjoy this project!
Materials & Tools
- Yarn: DK or light worsted in yellow, white, and a third accent color for fins & tail
- Crochet Hook: 2.5mm–3.5mm (according to yarn)
- Stuffing: Polyester fiberfill (small amount)
- Beads: 2 small black beads for eyes
- Needle: Yarn needle and sewing needle
- Scissors: For cutting yarn
Gauge
Gauge is not crucial; just keep stitches tight to prevent stuffing from showing.
Finished Size: Approx. 6–7cm (2.5–3in) long, perfect for a kitchen chain, keychain, or decoration.
Abbreviations List
| Abbreviation | Meaning |
|---|---|
| MR | Magic Ring |
| ch | Chain |
| sc | Single Crochet |
| inc | Increase (2 sc in 1) |
| sl st | Slip Stitch |
| dc | Double Crochet |
| FO | Fasten Off |
Special Stitch Instructions
- Magic Ring (MR): Make an adjustable loop, work stitches into the ring.
- Increase (inc): 2 sc in the same stitch.
- Double Crochet (dc): Yarn over, insert hook, yarn over, pull through, yarn over, pull through two, yarn over, pull through two.
- Slip Stitch (sl st): Insert hook, yarn over, pull through both loops.
Pattern Construction & Stitches
You’ll start by crocheting the fish’s body in the round using single crochet and increases. Color changes create stripes, and shaping is achieved by separating and joining stitches for the body. The tail and fins are worked flat using chains, double crochet, and slip stitches. Finally, beads are sewn for the eyes.
The Pattern Itself
A. Fish Body
Foundation & Rounds
R1:
- Create a Magic Ring.
- Ch 1 (does not count as a stitch).
- Work 6 sc into ring.
- Pull ring tight to close, sl st to top of first sc. (6)
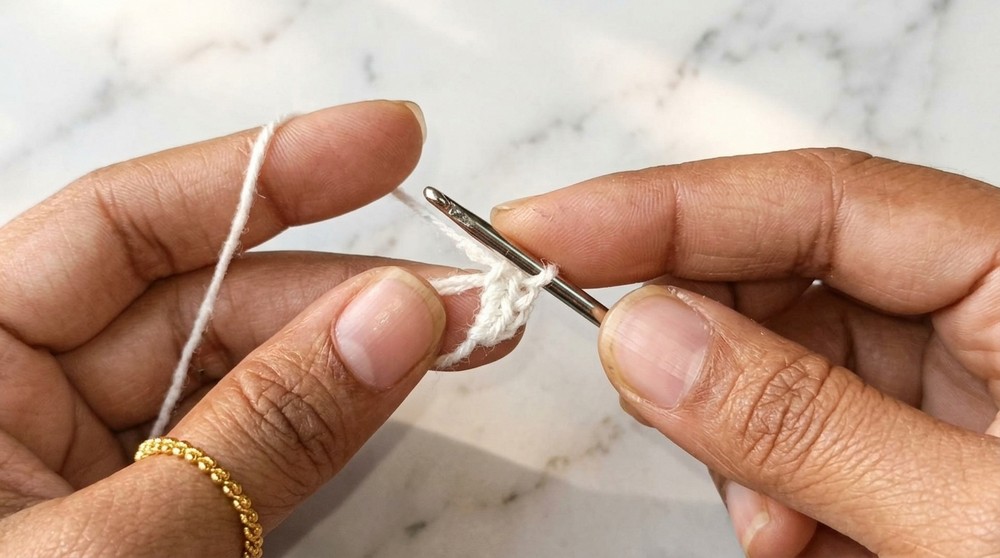
You just began the fish’s body with a classic amigurumi circle.
For non-pattern readers:
Make a loop, crochet 6 stitches into it, pull tight, and join to the first stitch.
R2:
- Ch 1.
- Work [1 sc in next sc, 2 sc in next sc] around.
- Repeat three times. (9)
- Sl st to top of first sc.
This increases the body evenly.
R3:
- Ch 1.
- Work [1 sc in next 2 sc, 2 sc in following sc] around.
- Repeat three times. (12)
- Sl st to top of first sc.
You’re increasing again, making the fish wider.
R4:
- Ch 1.
- Work [1 sc in next 3 sc, 2 sc in next sc] around.
- Repeat three times. (15)
- Sl st to join.
Continue to grow the body’s shape.
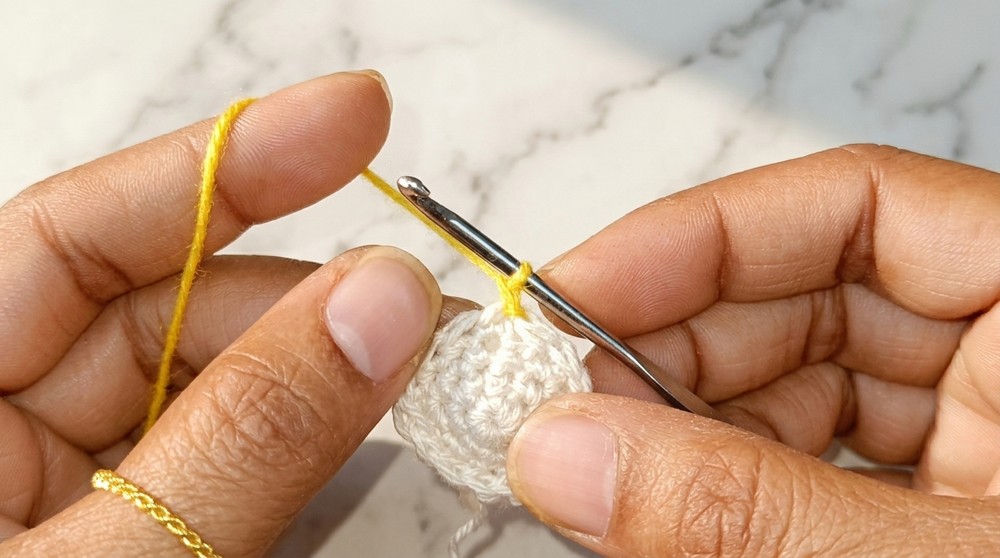
R5:
- Ch 1.
- Join yellow or stripe color.
- Work [1 sc in next 4 sc, 2 sc in next sc] around.
- Repeat three times. (18)
- Sl st to join.
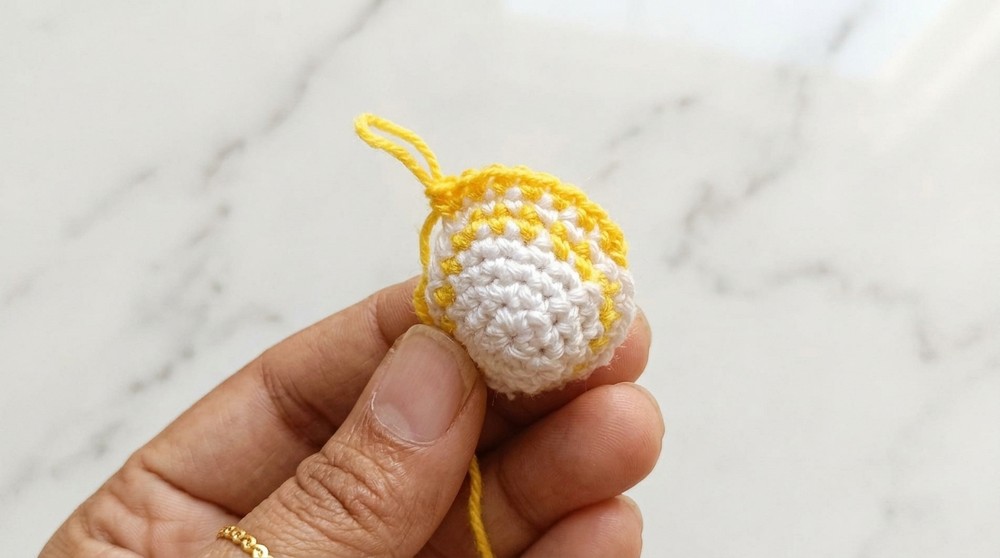
Add your first stripe for variety!
R6:
- Ch 1.
- Work [1 sc in next 5 sc, 2 sc in next sc] around.
- Repeat three times. (21)
- Sl st to join.
The body grows longer.
R7:
- Ch 1.
- Join white yarn.
- Work [1 sc in next 6 sc, 2 sc in next sc] around.
- Repeat three times. (24)
- Sl st to join.
Switch colors again for a bold stripe.
R8–9:
- Ch 1.
- Using white, sc in each stitch around (24).
- Sl st to join each round.
These rounds keep the fish smooth and evenly sized.
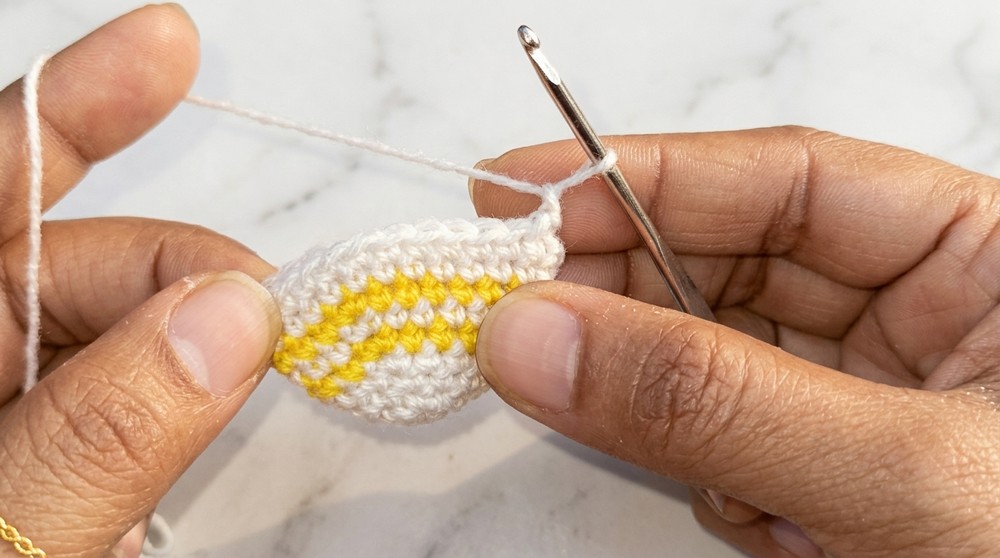
R10:
- Ch 1.
- Fold the circle in half; you’ll work single crochets to join the two sides.
- Insert hook through one stitch from front and one from back, sc to join (repeat across).
- Continue joining, then stuff fish lightly before closing completely.
You just finished shaping and stuffing the body. Now time to add the tail and fins.
For non-pattern readers:
After crocheting a wide circle, fold it in half and crochet across to join both sides, stuffing with cotton before closing up.
B. Tail Fin
- Attach yellow yarn to the closed end.
- Ch 3 (counts as dc), 2 dc in same stitch.
- Ch 3, turn, sl st in same space.
- Move to adjacent stitch, sl st, ch 3, 2 dc in same space, ch 3, turn, sl st in same space.
- Repeat for 2–3 tail peaks.
Your fish’s tail should look like little triangles sticking out!
C. Side Fins (Make 2)
- Attach accent color at the sides mid-body.
- Ch 3 (counts as dc), 3 dc in same space.
- Ch 3, turn, sl st in same space.
- Repeat opposite side.
This creates 2 side fins for your fish.
For non-pattern readers:
Attach yarn to the side of the fish’s body, make some chains, crochet double crochets, then chain and slip stitch to shape the fins. Repeat for other side.
D. Eyes
- Use small black beads.
- Stitch securely onto fourth round’s sides of the fish for cute eyes.
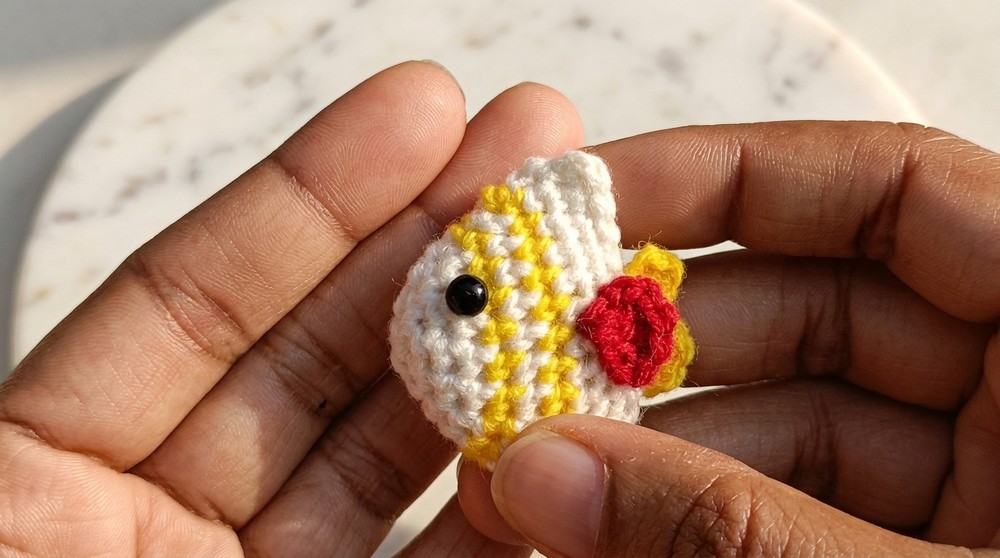
Alternatively, embroider or glue on felt eyes.
Assembly & Finishing
- Weave in all thread ends with yarn needle.
- Stuff fish lightly for a soft touch.
- Attach tail and fins firmly using slip stitches and weaving.
- Sew on beads for eyes (or embroider).
- If desired, add a chain loop to top for hanging or as a keychain.
Conclusion
Your small crochet fish kitchen chain is now ready! Enjoy this beginner-friendly pattern that uses simple increases, color changes, and easy flat fin construction. Customize colors and bead eyes for a variety of styles. Share your result with friends, use as a kitchen decoration, or gift to someone special!