
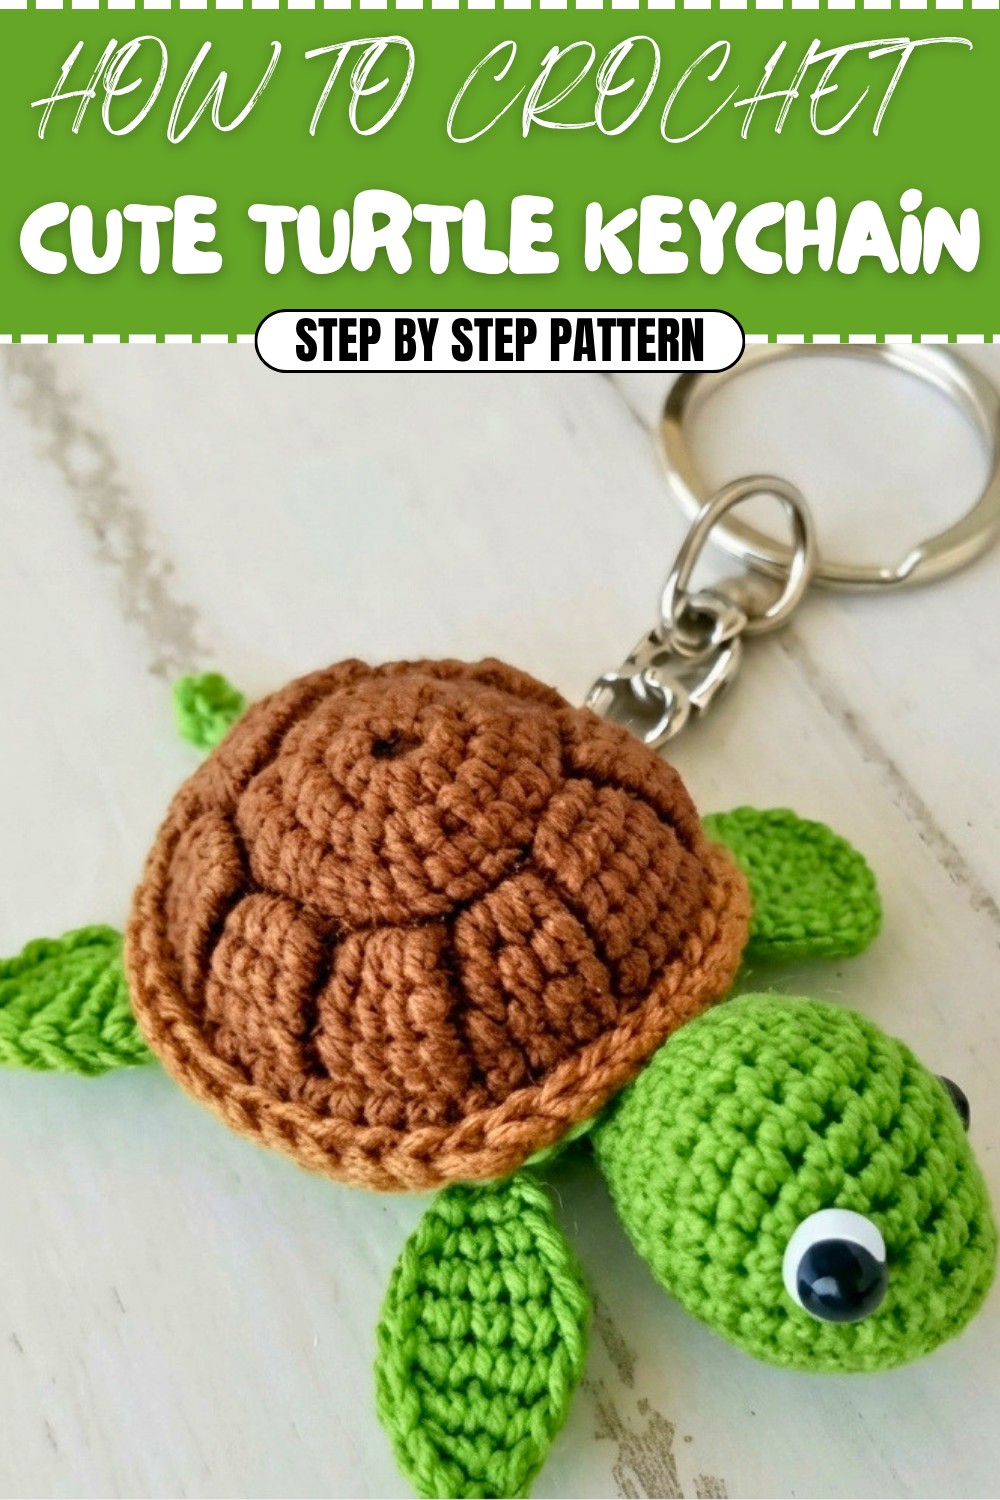
Free Crochet Turtle Keychain Pattern With Detailed Instructions
Follow this simple and free crochet turtle keychain pattern that guides you through making a cute accessory, suitable for beginners to try.
The tiniest turtle is bursting with cheerful, lovable personality. The Free Crochet Turtle Keychain Pattern lets anyone form a plushie that looks eager for adventure, with a gentle face, shy smile, and stubby legs ready to wiggle. Every turtle captures its own charm depending on the colors maybe classic green, soft blue, or even bright stripes and fun patterns.
Soft cotton yarn and a 2.5 mm hook shape this turtle, with the single crochet stitch building a sturdy, squishy body. The rounded shell and petite flippers give each turtle its own unique look sometimes bold and lively, sometimes quiet and sweet, just by the way the stitches are placed.
Simple Free Crochet Turtle Keychain Pattern for Kids
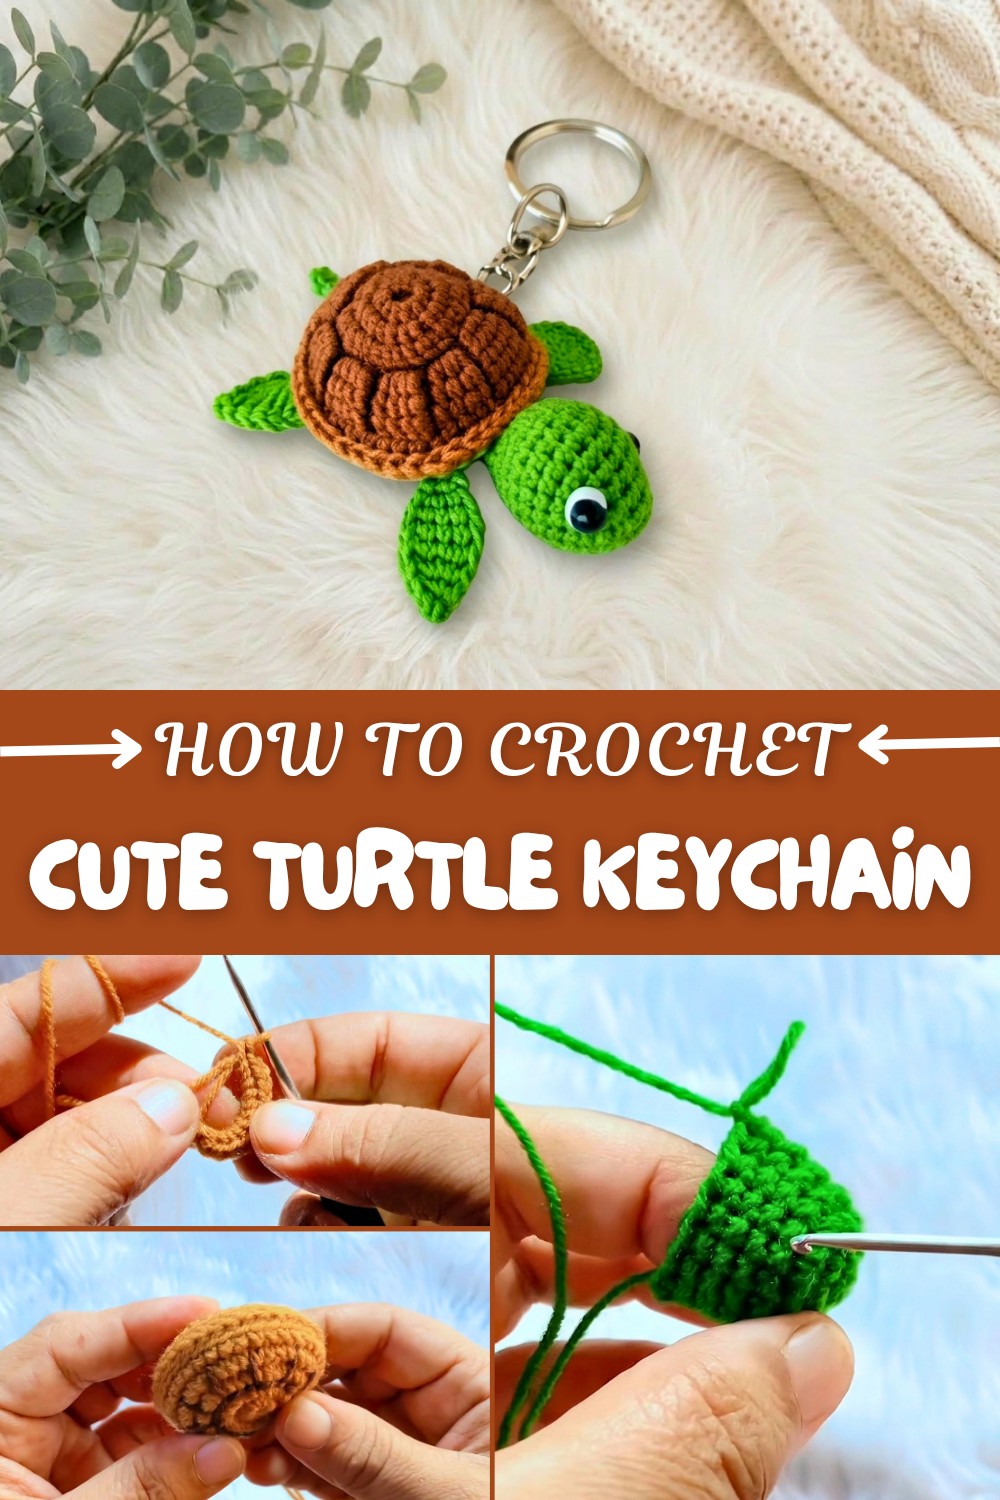
The finished friend measures about 6 cm long. This size easily fits in a pocket, can dangle from a backpack, or decorate a favorite pencil case. What’s most special is how the turtle seems almost like a tiny pet, always keeping a gentle watch and spreading smiles with its playful face.
Beyond being a keychain, this little turtle suits many roles: bag charms, party favors, desk pals, simple ornaments, or tokens of friendship all spring from this one pattern. Every tiny turtle carries its own friendly character and is happy to travel anywhere you do, brightening small moments wherever it lands.
Crochet Key Chain Turtle Pattern
Bismillahirrahmanirrahim. Welcome to this delightful Key Chain Turtle crochet pattern, inspired by the warmth of handmade gifts and perfect for any age. With easy-to-follow instructions, you’ll create a charming mini turtle with a textured shell, head, legs, and a cute leaf accent. This project is ideal for beginners wanting to learn basic amigurumi techniques and stitch shaping. Each section includes a brief explanation for readers who need additional clarification.
Skill Level & Terminology
Skill Level: Confident Beginner
Terminology: US crochet terms
This pattern uses basic stitches and the magic ring, ideal for those comfortable with single crochet, slip stitch, increases, and decreases. Clear instructions are provided for color changes and shaping.
Materials & Tools
- Worsted weight yarn (100% cotton or acrylic) in:
- Green (shell and body)
- Brown (shell detail)
- Optional contrast (leaf/feet accent)
- Crochet hook: 2.5–3.5 mm (match yarn weight for tight amigurumi)
- Polyester stuffing (fiberfill)
- Tapestry needle
- Scissors
- Key chain ring/fob (optional, for attachment)
Gauge
Gauge is not critical, but aim for tight stitches so stuffing does not show through. Finished turtle measures about 2–3” long, suitable for a key chain.
Abbreviations List
| Abbreviation | Meaning |
|---|---|
| MR | Magic ring |
| ch | Chain |
| sc | Single crochet |
| sl st | Slip stitch |
| inc | Increase (2 sc in 1 st) |
| dec | Decrease (sc2tog – 2 sc worked as one) |
| st(s) | Stitch(es) |
Special Stitch Instructions
Magic Ring (MR): Make a loop, insert hook, pull up a loop, sc as instructed into ring, then pull ring tight.
Increase (inc): Work two sc into the same st.
Decrease (dec): Insert hook in next st, pull up loop, insert hook in following st, pull up loop, yarn over, pull through all loops.
Back Loop Only (BLO): For joining, insert hook only into the back loop of stitches.
Finished Size
- Turtle: Approximately 2.5–3” (6–8 cm) long
- Leaf: About 1” (2.5 cm) long
- Slightly varies with yarn and hook size
Pattern Process Overview
This pattern begins with the turtle’s shell, made in the round with single crochet and increases. Two shell pieces are made and joined only through the back loops. The head, legs (foot), and leaf are made separately and sewn together. Simple embroidery or yarn detailing completes the shell, and everything is assembled firmly for durability.
Stitches Used: MR, sc, inc, dec, sl st, BLO; simple colorwork.
The Pattern Itself
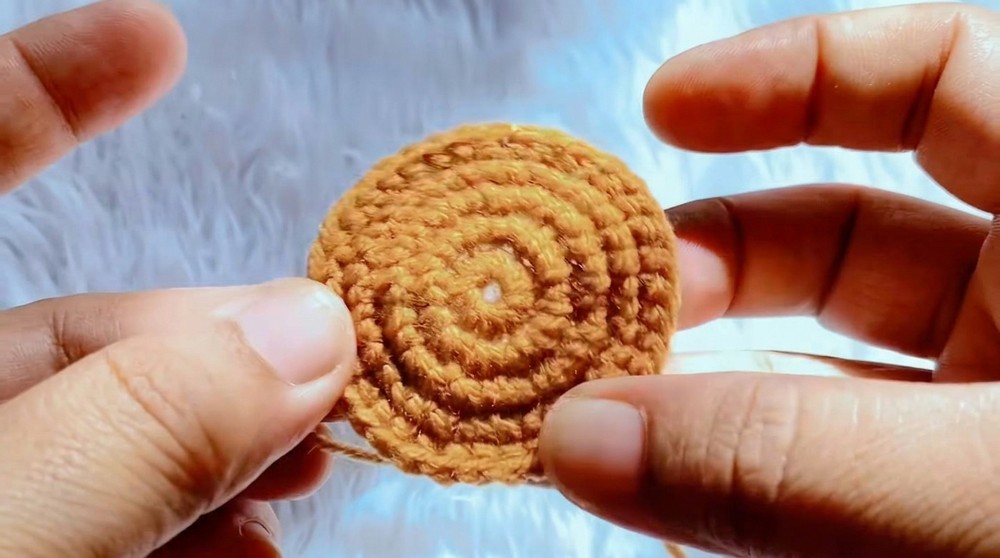
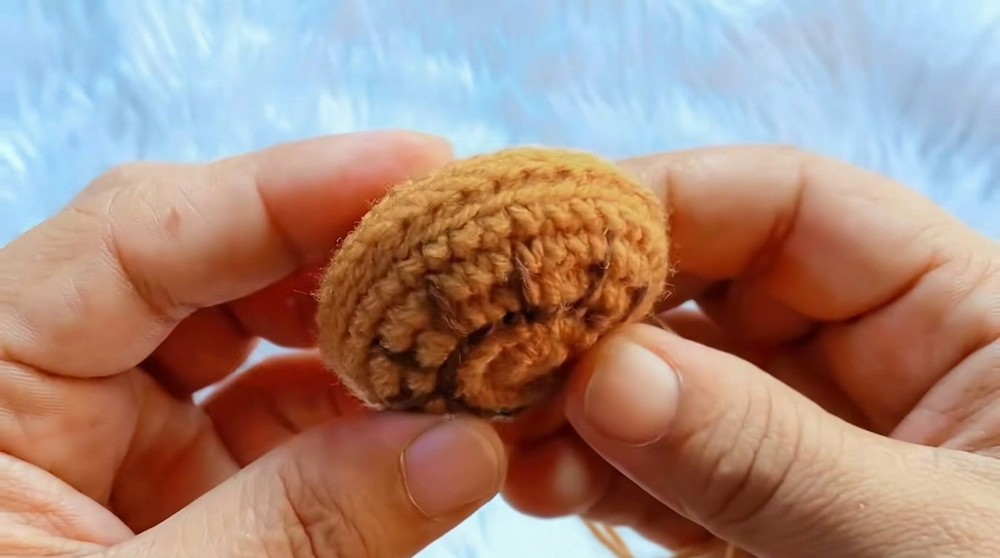
Turtle Shell (Make 2)
First side (Top):
Round 1:
- Make a MR, ch 1, work 12 sc in ring.
- Pull ring tight, sl st to first sc to join. (12 sts)
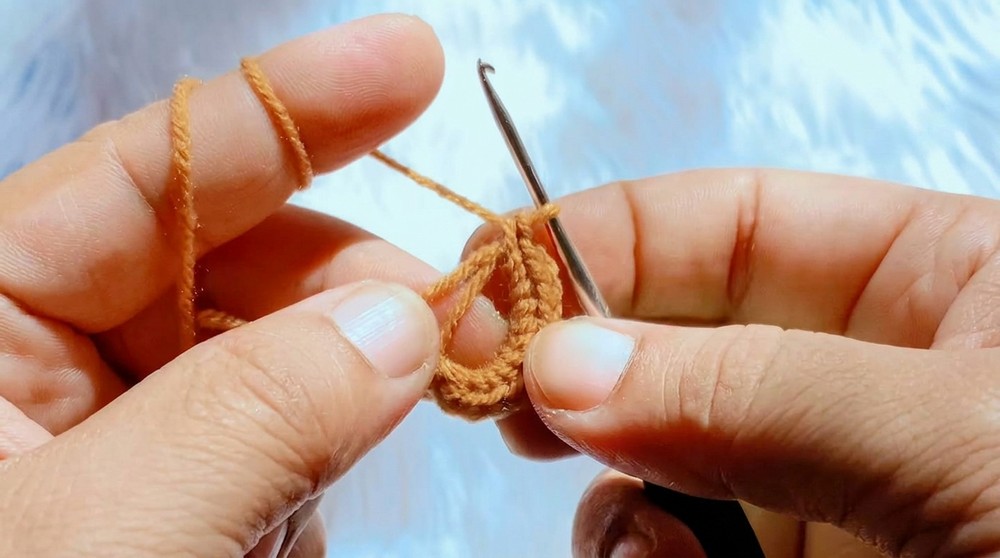
You start by making a magic ring and crocheting 12 single crochet stitches into it. This forms the base of the shell.
Round 2:
- Ch 1, inc in each st around (2 sc in each st). (24 sts)
- Sl st to join.
Work two single crochets in every stitch for a flat circle.
Round 3:
- Ch 1, inc in next st, sc in next st; repeat around. (36 sts)
- Sl st to join.
Alternate between increases and single crochets for a larger circle.
Rounds 4–6:
- Ch 1, sc in each st around (36 sts per round).
- Sl st to join after each round.
Work even rounds to build up the shell’s height and smooth curvature.
Fasten off, leave a long tail for joining later. Make another shell piece the same way.
Shell Detailing
- With brown yarn, embroider lines or surface crochet on one shell piece to make textured markings on the turtle shell.
- Weave in all yarn tails neatly.
You can add lines or stitches to make your turtle shell look realistic and fun.
Joining the Shells
- Take both shell pieces and align. Using BLO (back loops only), join the shells with sc, leaving a small gap.
- Stuff lightly with cotton/polyester fiberfill before fully closing.
- Continue joining with BLO sc to close completely.
Join the two shell pieces by working single crochets only in the back loops. Stuff as you go to give your turtle a three-dimensional shape.
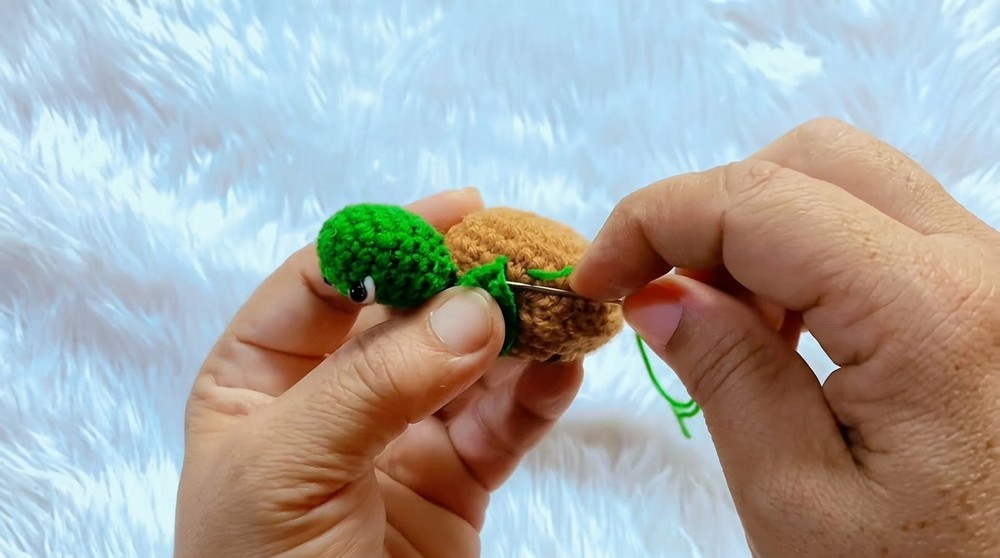
Turtle Head
Round 1:
- Make a MR, ch 1, 6 sc into ring.
- Pull tight, sl st to join. (6 sts)
Start the head with a magic ring and 6 single crochet.
Round 2:
- Ch 1, inc in each st around (12 sts).
- Sl st to join.
Work two single crochets in each stitch for a round head.
Round 3:
- Ch 1, inc in next st, sc in next st; repeat around. (18 sts)
- Sl st to join.
Increase every other stitch.
Rounds 4–7:
- Ch 1, sc in each st around (18 sts).
- Sl st to join after each round.
Work four rounds of single crochet for head depth.
Decrease Round:
- Ch 1, dec in each st; repeat around until closed (should reduce to 6 sts).
- Stuff before closing. Fasten off and sew to front of shell.
Reduce stitches to close the head, stuff lightly, and sew securely to the shell’s edge.
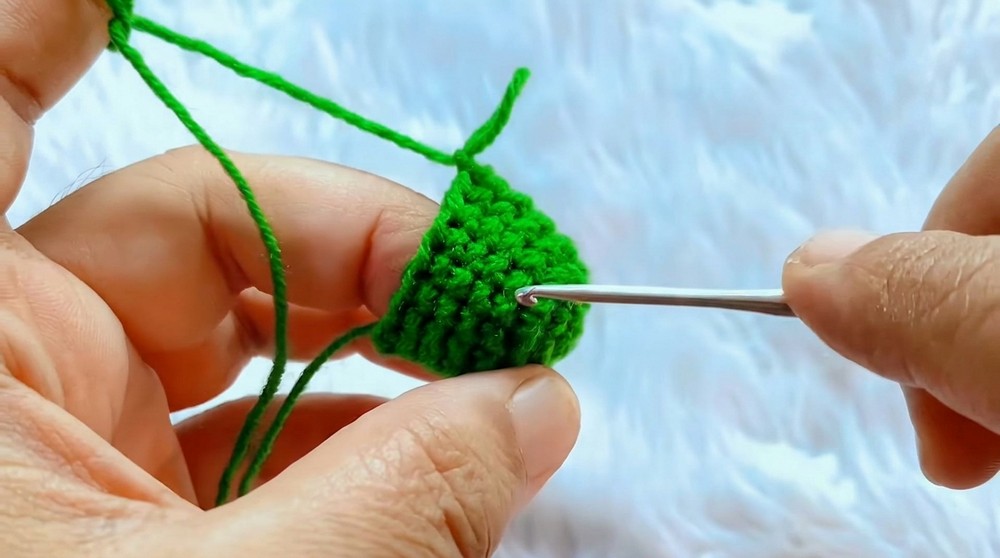
Turtle Leaf
Leaf Base:
- Ch 2, skip 1 ch, 2 sc in next ch. Ch 1, turn.
- 2 sc in both sts (4 sc). Ch 1, turn.
Work 4 sc across, ch 1, turn. Repeat this for about 5 rows.
This creates the leaf’s base with increasing rows.
Decrease Row:
- Ch 1, turn, sc2tog (dec), sc2tog (dec) (reduces to 2 sc), ch 1, turn.
- Sc2tog, fasten off.
Decrease stitches to make the leaf tip.
Leaf Edge:
- Sc evenly around sides, add 2 sc at tip, 2 ch at tip, and 1 sl st, then continue edging.
- Fasten off, weave in ends.
Work single crochets around the leaf and add extra stitches at the tip to make it pointy.
Turtle Feet (Make 4)
- Ch 2, skip 1 ch, 2 sc in next ch. Ch 1, turn.
- 2 sc in both sts (4 sc).
- Ch 4, sc in each st across. Continue for 4 rows. At the end, decrease as for the leaf.
- Fasten off, weave in ends.
- Sew feet to underside or sides of shell with tapestry needle.
Make the feet by chaining and working single crochets, then shape with decreases. Sew them to your turtle for a complete look.
Assembly & Finishing
- Sew head, feet, and leaf securely to the shell.
- Attach key chain ring at the shell’s top or leaf.
- Weave in all remaining ends.
- Fold or shape turtle as desired.
Sew all parts together. Attach your turtle to a keychain, bag, or anywhere you like. Shape as you wish and enjoy!
Conclusion
Your Key Chain Turtle is now ready! You have crafted a lovely mini turtle using basic amigurumi stitches, simple increases, and textured accents. This beginner-friendly pattern enables you to personalize each turtle with colors and leaf shapes. Perfect as a cute keepsake, a gift, or a functional accessory, your little turtle is sure to bring smiles.
Pattern Recap:
- Turtle shell (make 2), join and stuff.
- Decorate shell with brown yarn.
- Create head, feet, and leaf using single crochet, increases, and decreases.
- Assemble and attach everything securely.
- Finish as a keychain or bag tag.
Stitches Used: MR, sc, inc, dec, BLO, sl st.
How to start: Begin with the magic ring, work in rounds, increase, and shape as described.