
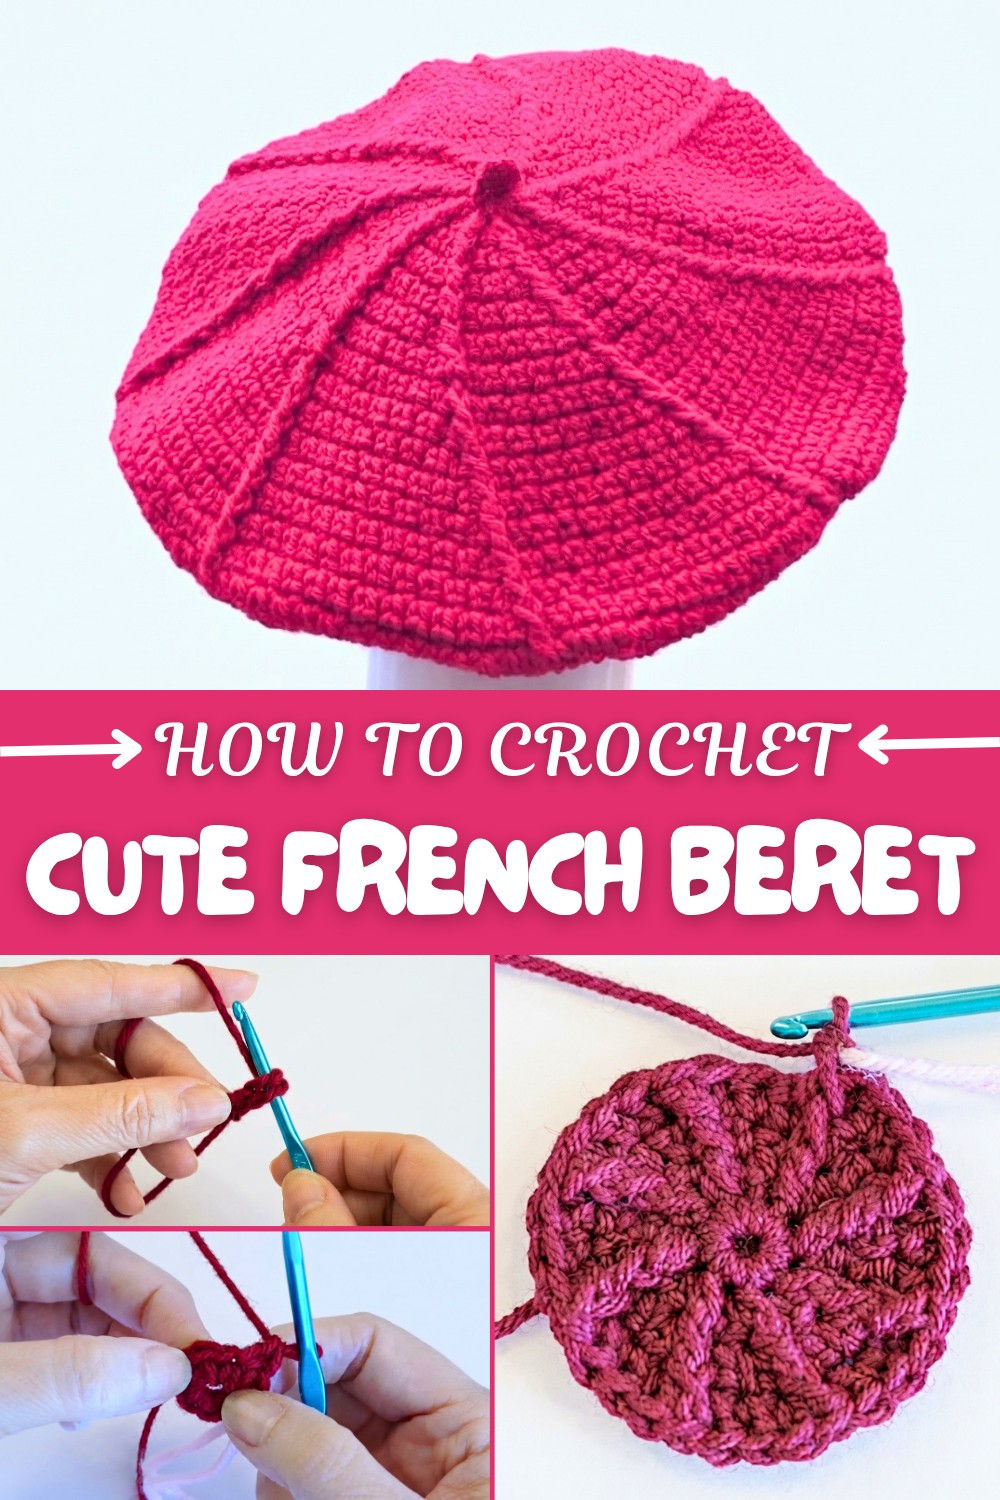
How to Crochet French Beret Pattern for Parisian Flair
Quick solution for stylish accessorizing, the Free Crochet French Beret Pattern adds effortless sophistication to your look.
Adding a touch of lasting elegance to your wardrobe is easy when you make this charming beret yourself. This pattern beautifully combines extended single crochet and front post extended single crochet stitches to create a textured fabric that is both stylish and comfortable. Beginning with a magic ring ensures a smooth, tight center, and working in rounds allows the classic beret shape to form naturally as you increase and decrease stitches.
Free and Fashionable Crochet French Beret Pattern for Trending Style
The textured front post stitches give the beret a lovely raised pattern that adds depth and stretch, making it fit snugly while remaining breathable. The seamless transition from the crown to the brim, finished with simple single crochets and a little stock on top, captures that signature French look with ease. This technique transforms basic stitches into something special and visually interesting.
Beyond hats, these stitches are great for other accessories too. Try making textured cowls, snug headbands, or stylish scarves using the same combination of extended single crochet and front post stitches. This pattern opens up many creative options, letting you explore new projects with confidence and flair.
Crochet Pattern: Stylish French Beret
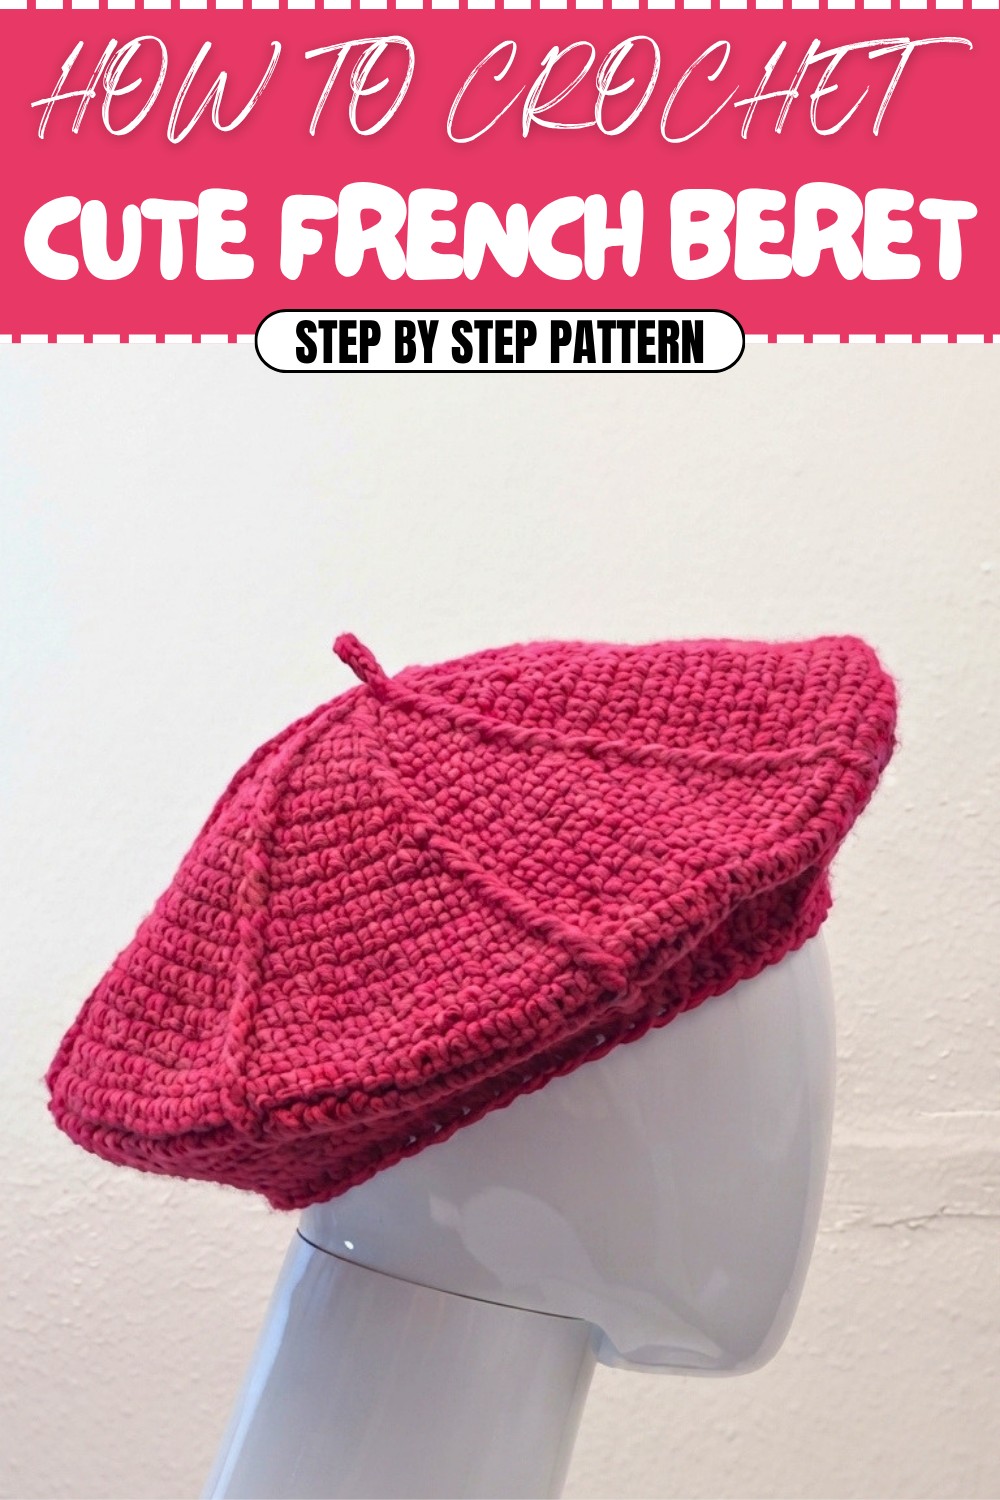
Crochet your very own classic French beret that’s both cozy and fashionable! This pattern uses extended single crochets and front post stitches to create a beautifully textured, elegant headpiece that suits all occasions. With its rounded top, tapered underside, and neat brim, this beret is a must-have accessory in every wardrobe.
This French Beret Crochet Pattern is designed to create a classic silhouette with a modern feel. It starts with a top circle, worked in the round with increases. These increases ensure a smooth, flat shape for the crown of the beret. Then, you’ll shape the underside by gradually reducing the stitches and complete it with a beautifully tapered brim.
Skill Level & Terminology
- Skill Level: Intermediate
- Terminology: This pattern uses US crochet terms.
Although this pattern includes increases, decreases, and post stitches, the repetitive nature of the design makes it ideal for anyone ready to take their skills up a notch.
Materials & Tools
- Yarn: Size 4 worsted weight acrylic yarn (~150g or 5 oz).
- Crochet Hook: 5 mm crochet hook.
- Notions:
- Yarn needle
- Scissors
- Stitch marker or contrasting strand of yarn (to mark rounds).
Gauge
10 stitches by 12 rows of extended single crochet = 4 inches (10 cm).
Ensure you maintain consistent tension for proper drape and fit.
Abbreviations
- ch: Chain
- sc: Single crochet
- e-sc: Extended single crochet
- fp-e-sc: Front post extended single crochet (increase stitch)
- dec: Decrease (single crochet two stitches together)
- sl st: Slip stitch
Special Stitch Instructions
Extended Single Crochet (e-sc):
- Insert hook into the stitch and pull up a loop (2 loops on hook).
- Yarn over and pull through 1 loop (creates an extended loop).
- Yarn over and pull through both loops.
Front Post Extended Single Crochet (fp-e-sc):
- Insert the hook around the post of the stitch below (instead of into the top of the stitch).
- Yarn over, pull up a loop (2 loops on hook).
- Yarn over and pull through 1 loop only.
- Yarn over and pull through the last two loops to complete the stitch.
Decrease (sc2tog):
- Insert the hook into the front loop of the next stitch and pull up a loop.
- Insert the hook into the front loop of the next stitch and pull up another loop (3 loops on hook).
- Yarn over and pull through all 3 loops.
Finished Size
- Diameter: 11.5 inches across when laid flat (adjustable).
- Height: 6.5 inches flat or 10 inches folded, with a stretchy brim for a snug fit.
What You’ll Learn from This Pattern
This pattern introduces:
- Extended single crochet, a versatile stitch that adds subtle texture.
- The front post stitch, which is great for adding definition and shaping.
- How to seamlessly shape and close rounded crochet projects using increases and decreases.
The Pattern Itself
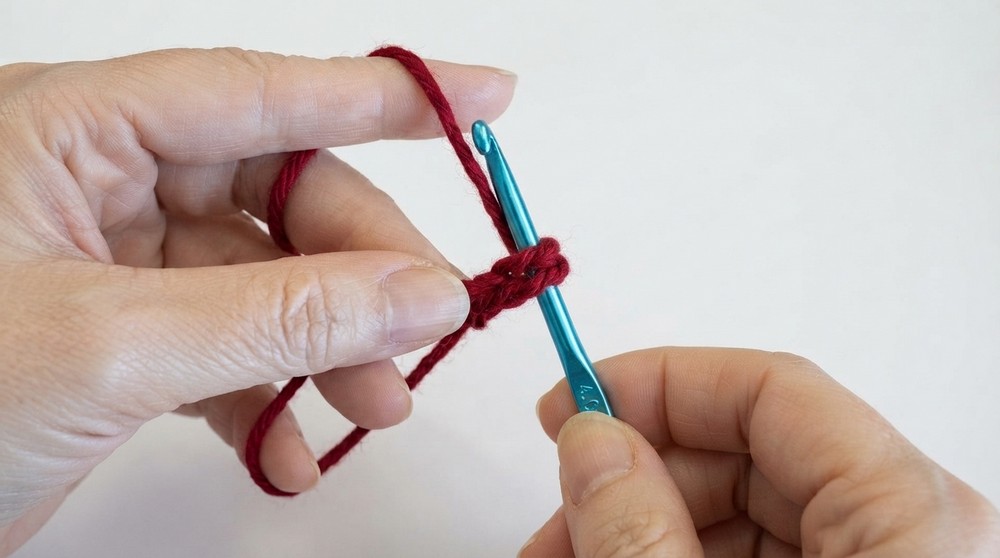
Step 1: Start the Magic Ring
- Create a magic ring: Wrap the yarn around your fingers to form a loop. Insert the hook into the loop, yarn over, and pull up a loop. Ch 1 to secure.
- Work 8 sc into the magic ring.
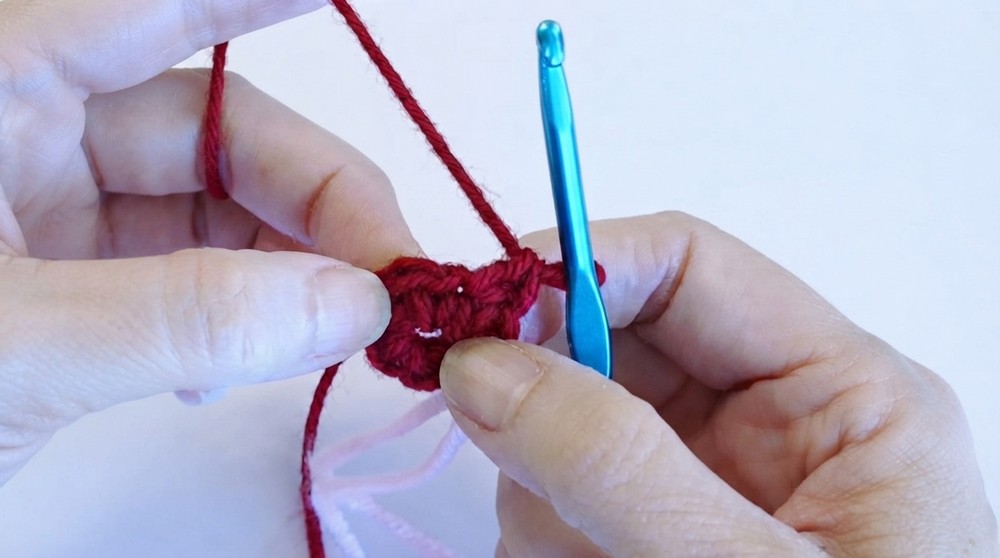
- Pull the yarn tail tightly to close the ring.
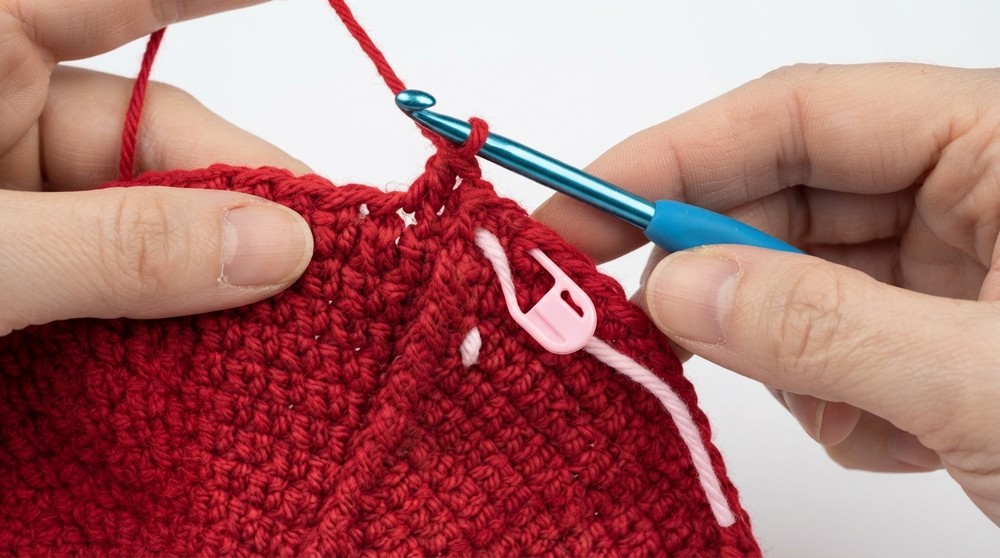
- Use a stitch marker to mark the 8th (last) stitch of the round.
For beginners: The magic ring creates a tight center, allowing your circle to lay flat without a hole in the middle.
Step 2: Round 2 – Increase to 16 Stitches
- Begin the round with 1 extended single crochet (e-sc) in the first stitch of Round 1.
- Then work 1 fp-e-sc (front post extended single crochet) around the post of the same stitch (this creates an increase).
- Repeat this pattern (1 e-sc, 1 fp-e-sc in the same stitch) all the way around.
- At the end of the round, you should have 16 stitches.
Instead of joining rounds with sl sts, this pattern continues in a spiral. Always move the stitch marker to the last stitch of each round to keep track.
Step 3: Round 3 – Increase to 24 Stitches
- Start with 1 e-sc in the first stitch.
- Work 1 e-sc in the next stitch.
- Then work 1 fp-e-sc into the previous round’s front post stitch (this creates an increase).
- Repeat this pattern (1 e-sc, 1 e-sc, 1 fp-e-sc) around the circle.
- At the end of the round, you should have 24 stitches.

Step 4: Round 4 – Increase to 32 Stitches
- Work 1 e-sc in each of the next 3 stitches.
- Then work 1 fp-e-sc in the previous front post stitch.
- Repeat this pattern (3 e-sc, 1 fp-e-sc) all the way around.
- At the end of this round, you’ll have 32 stitches.
By working every stitch in the back loop and maintaining the pattern, you create the signature texture and structure of the beret.
Step 5: Rounds 5–15 – Expanding the Top of the Beret
- Continue repeating the established pattern, adding one additional e-sc between the front post stitches with each round.
- Round 5: 4 e-sc, 1 fp-e-sc.
- Round 6: 5 e-sc, 1 fp-e-sc, and so on.
- Continue until the circle measures 11.5 inches across (approximately 15 rounds for a medium adult size).
The repeating pattern increases the size of the circle evenly, forming the flat top of the beret while maintaining the 8-section design.
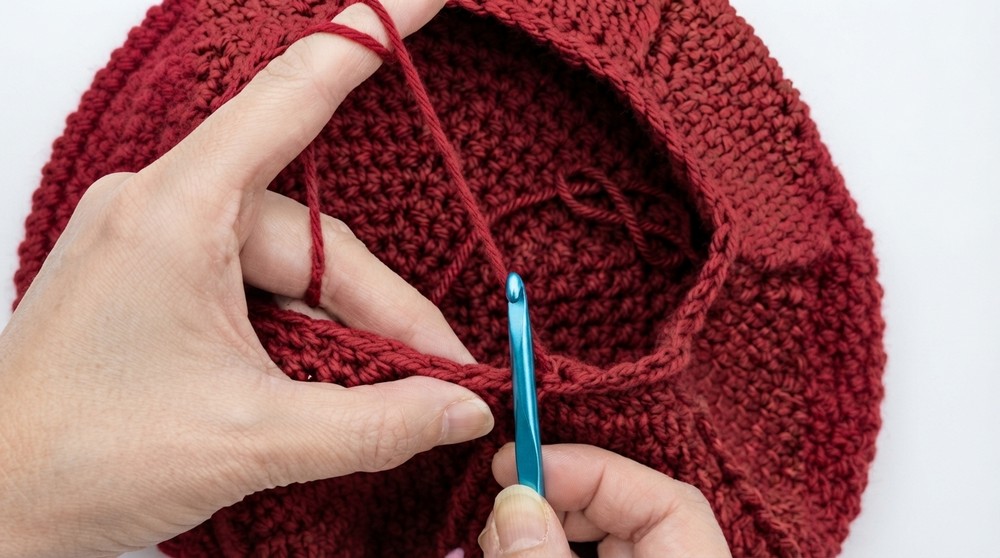
Step 6: Rounds 16–23 – Shaping the Underside
- In Round 16, decrease 8 stitches evenly by combining stitches at the start of each section:
- For the first decrease: Insert the hook into the front loop of the first stitch, yarn over, and pull up a loop. Insert the hook into the front loop of the second stitch, yarn over, and pull up another loop (3 loops on hook). Yarn over and pull through all loops.
- Continue with 1 e-sc in each stitch until the next front post stitch.
- Repeat this pattern (decrease, e-sc) around the circle.
- In subsequent rounds, continue decreasing 8 stitches evenly per round (one decrease per section) to shape the beret.
- Work until you complete 23 rounds or until the beret measures 6.5 inches across lying flat.
Step 7: Working the Brim
- Start with sc (single crochet) across all stitches. This creates a snug-fitting brim for the beret.
- Work 5 sc, then decrease at the 6th and 7th stitches: Insert the hook into the front loop of the 6th stitch, yo, pull up a loop. Insert the hook into the front loop of the 7th stitch, yo, pull up a loop, yo, pull through all loops.
- Repeat this pattern (5 sc, 1 decrease) around.
- Complete 2 rounds of single crochet for the brim, following the same sequence.
- Finish with 2 sl sts and fasten off.
The focused decreases in the brim create a balanced, clean edge while giving a seamless, matching look.
Step 8: Add the Beret Stalk
- Make a slip knot and attach a new strand of yarn to the top of the beret.
- Ch 4, skip the first 2 ch, and work 1 sc into the next 2 chains.
- Sl st back into the starting point and fasten off to create the stalk.
- Secure the stalk to the top of the hat with a yarn needle, using overhand knots to attach it.
Step 9: Weave in Ends
- Weave all loose ends into the beret with a yarn needle.
- Ensure the edges and brim are smooth and secure.
Your French beret is now complete!
Assembly & Finishing
- Seamlessly join the stalk and securely weave in each loose end.
- For a polished look, block the beret lightly to perfect its shape.
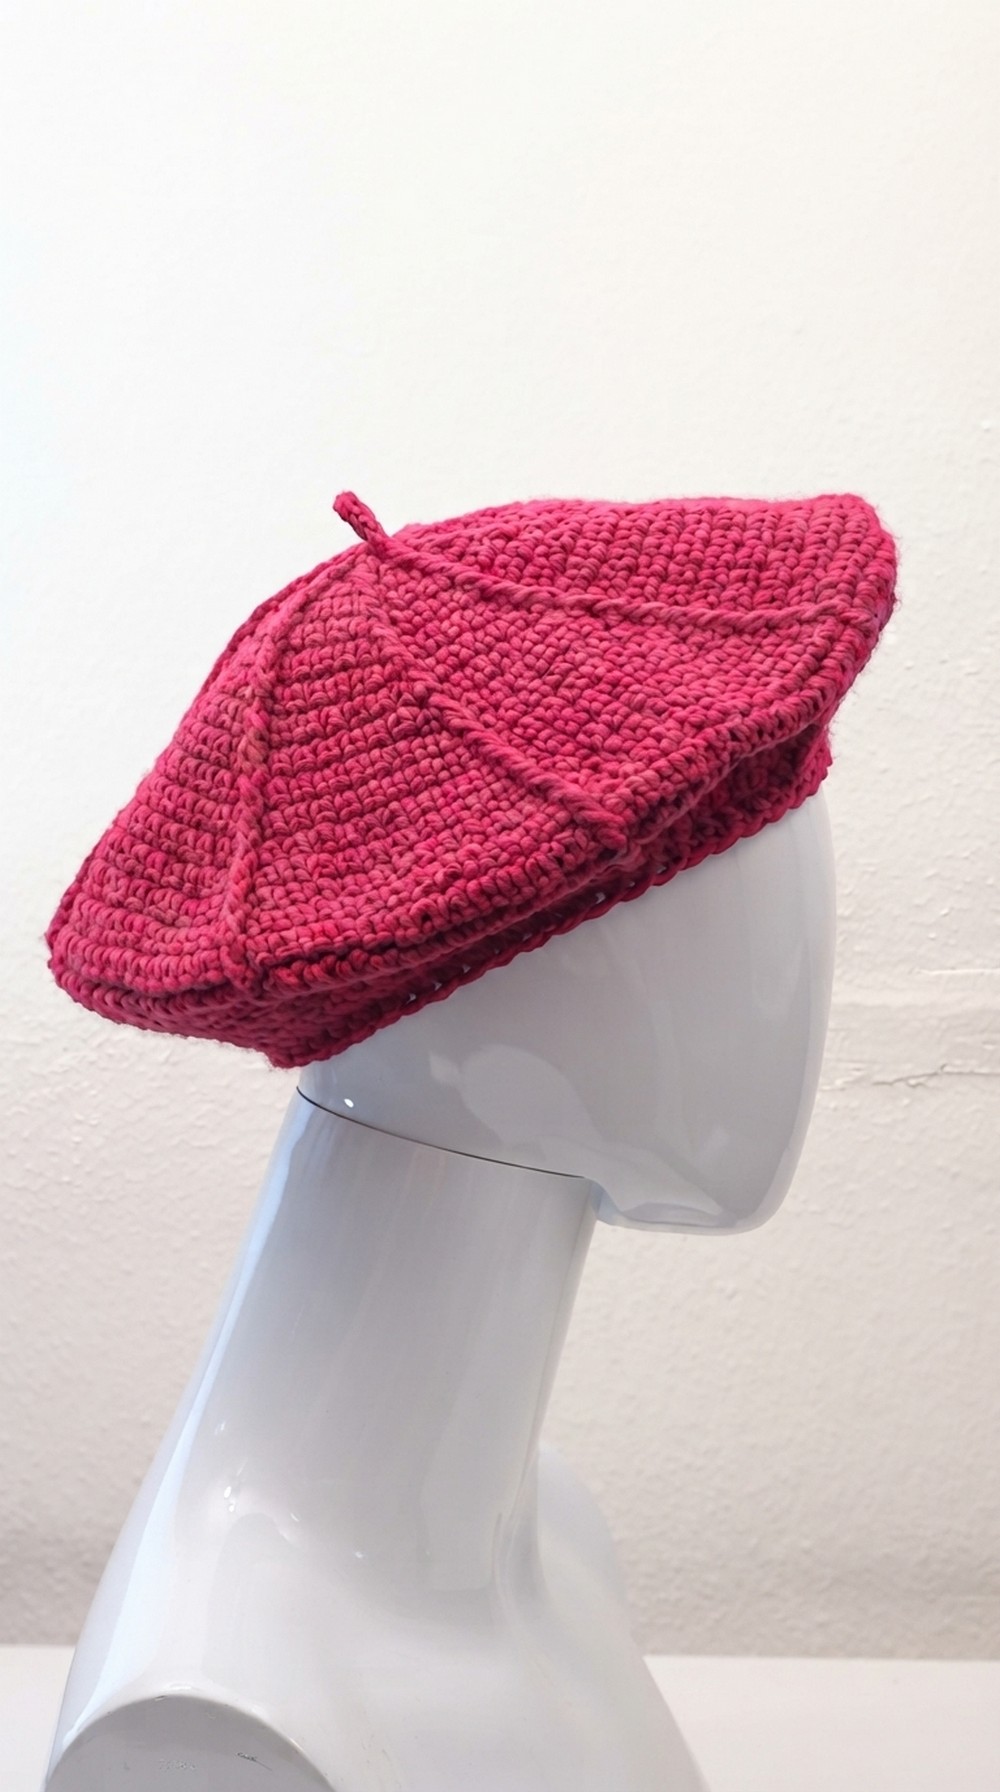
Why You’ll Love This Pattern
With its stylish and functional design, this beret will quickly become a favorite! The ribbed texture provides stretch and structure, while the stalk detail offers a playful, finishing touch. Easy to customize for different sizes, this beret makes for a classic wardrobe addition or a thoughtful handmade gift.