
How to Crochet Bow Keychain Free Pattern
Holding the cutest little crochet bow in your hand, perfectly sized to jazz up your keys, decorate a bag, or give as a thoughtful handmade gift. That’s what makes the Free Crochet Bow Keychain Pattern so exciting for both beginners and experienced crocheters. This project is a creative journey, starting with just a scrap of your favorite yarn and a few basic supplies.
Free Mini Bow Keychain Crochet Pattern for Scrap Yarn
If you’ve ever felt the urge to crochet something quick, practical, and charming, crocheting this bow keychain is a wonderful place to begin. You don’t need a lot of fancy tools—just a crochet hook, some acrylic yarn (in any color you love), and a little patience. Even if you’re new to crochet, this project will gently guide you through all the steps, offering the joy of accomplishment in just an afternoon.

Beautiful Features and Versatile Uses
- Colorful Choices: The pattern is shown in a delightful pink, but you can use any color or even mix shades for a unique look.
- Simple Stitch: This project uses the single crochet stitch, keeping things straightforward and beginner-friendly.
- Cute Details: With only four rows to complete for each strip, you get a neat and sturdy little bow that holds its shape perfectly.
- Versatility: With minor tweaks, you can transform this basic bow pattern into bookmarks, hair accessories, brooches, or fancy bag charms.
- Personalization: Adding beads, buttons, or using sparkly threads is a fun way to make your creation extra special.

Important Steps to Remember
Start by making a slip knot and chaining 21 stitches.
Work single crochet into each chain for four rows per strap.
Create two identical straps—one with a longer tail for tying.
Sew ends, fold, and shape the straps to form the bow.
Secure and wrap the middle tightly for that perfect bow shape.
Don’t forget to weave in and trim all loose ends for a tidy finish.
Attach a keyring securely through the bow’s center loops if you want a keychain.

Common Issues and Troubleshooting
- Uneven Edges: Keep your tension consistent and make sure you’re working into both loops of each stitch.
- Bow Not Forming Well: Shape gently and adjust the central wrap for the best results.
- Loose Ends: Make sure all yarn tails are sewn in snugly to prevent unraveling.
- Missing Texture: Double-check your stitch count for even rows.
Size Guide
The finished bow measures just a few inches—ideal for a keychain or a cute bag charm. With attention to shaping and finishing, you’ll have a beautiful result every time, adding a pop of color and charm wherever you go!
Pretty Crochet Bow – Keychain or Decoration
This adorable, easy-to-crochet bow is perfect for making keychains, decorating gifts, or adding a cute touch to bags and clothes! I was inspired to create something quick and cheerful to use up my pink yarn scraps. You’ll love how fast you can make one of these bows—plus, the project is adaptable to any color you like!
Skill Level & Terminology
- Skill Level: Beginner
- Terminology: US crochet terms
Materials & Tools
- Less than 15g of medium (Worsted/Aran) weight yarn (Category #4), shown in pink
- 5 mm crochet hook
- Yarn needle (for sewing and weaving in ends)
- Scissors
- (Optional) Key ring for keychain version
Gauge
- Not critical for this project.
- For reference: After 4 rows of single crochet (sc) worked in pattern, piece should measure approximately 6" x 1" (15 x 2.5 cm).
Finished Size
- Approximately 3" x 2" (8 x 5 cm) when assembled, but easily adjustable.
Abbreviations
| Abbreviation | Meaning |
|---|---|
| ch | chain |
| sc | single crochet |
| st(s) | stitch(es) |
| sl st | slip stitch |
| RS | right side |
Special Stitch Instructions
Single crochet (sc):
Insert hook into stitch, yarn over, pull up a loop (2 loops on hook), yarn over, pull through both loops.
Pattern Instructions
PART 1: Top of Bow Strap
- Make a slip knot and place it on your hook.
- Chain (ch) 21.
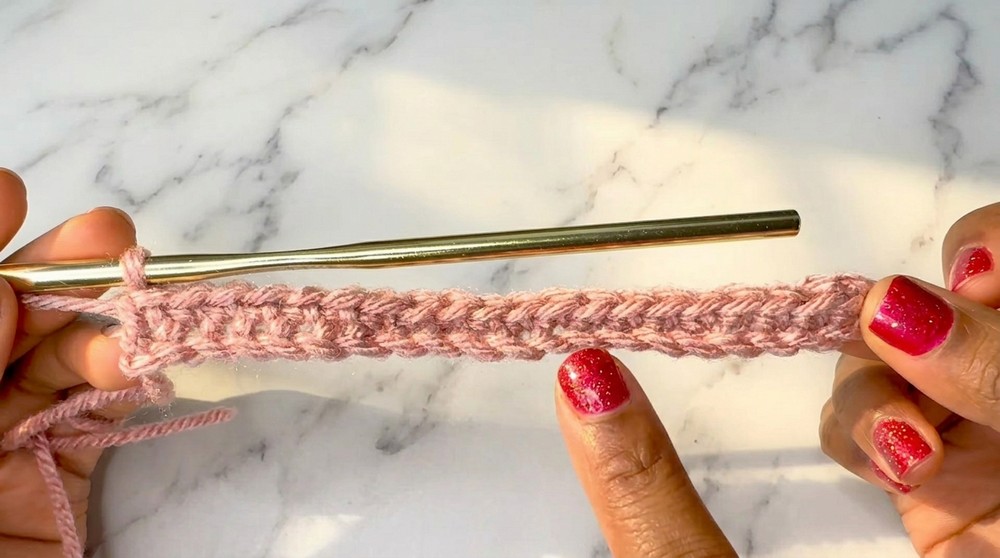
- Row 1: In the 2nd ch from the hook, single crochet (sc). Sc in each ch across. (20 sts)
- Row 2: Ch 1, turn. Sc in each st across. (20 sts)
- Row 3: Repeat Row 2.
- Row 4: Repeat Row 2.
- Fasten off, leaving a long tail for sewing (about 12"/30cm).

Explanation:
You just made a flat strap—the "top" of the bow. If you fold it in half, you can already imagine the bow’s top part. Leave the long yarn end attached for now (you’ll use this to assemble the bow later).
PART 2: Bottom of Bow Strap
- Repeat Steps 1–6 as for the first strap (make another flat strap).
- Fasten off with a short tail this time (just 2–3"/5–8cm).

Explanation:
You have crocheted a second strap for the bottom layer of your bow. Because you don’t need to sew this one, you can trim the yarn ends short.
PART 3: Weaving in Ends (Bottom Strap Only)
- Take your yarn needle and weave in both loose ends of the bottom strap by threading them through a few stitches along the edge.
- Trim any excess yarn.
Explanation:
You’re tidying up the bottom strap so it’s neat when the bow is finished. Only do this step for the strap with short tails; leave the long ends on the "top" strap for now.
PART 4: Sewing the Top Strap Into a Loop
- Take the top strap (with long yarn tails) and fold it in half at the short ends to form a loop.
- With your yarn needle, thread the long tail and sew the two short ends together. Insert the needle through the outer loops of each corner to join neatly.
- Continue sewing across the edge until fully joined.
- Do not cut the yarn yet!

Explanation:
You've now created a ring. This will become the "top" part of your bow. Make sure your seam sits in the center, as it will be hidden on the back of the bow.
PART 5: Shaping & Tying the Top Bow
- Slide the seam to the center back of your loop.
- Bring the long tail from your sewing to the back. Tie a tight knot with the other end to secure the shape.
- Tie a second knot for extra security.
- Do not trim the ends yet—you’ll use the long tail to secure the whole bow.
Explanation:
By knotting the center, you instantly form a classic bow shape. The secure knots will help the bow keep its puffy structure.
PART 6: Assembling the Bow
- Fold the bottom strap in half (just like before) and pinch the center to create a bow shape.
- Place the top "bow" (the sewn loop with knot) over the center of the bottom strap—align so the seam and knot are at the back.
- Using the long yarn tail, wrap firmly around the center of both straps, several times, to cinch them together. Leave just enough yarn to tie off.
- Tie a couple of secure knots at the back with the remaining tail.

Explanation:
You’re creating the classic cinched bow look by wrapping the center tightly. The two layers give the bow nice structure and “fluff.”
PART 7: Final Touches & Weaving in Ends
- Using a yarn needle, neatly weave in any remaining yarn ends at the back of the bow.
- Trim excess yarn ends close to the stitches.
Explanation:
Weaving in the ends will keep your bow looking tidy from any angle.
Optional: Attach a Keychain
- Take your key ring and use a crochet hook or yarn needle to help insert it underneath the center wraps at the top of the bow.
- Twist and wiggle the ring till fully secured.
Explanation:
This step makes your crochet bow into a keychain. You could also attach it to a hair elastic, safety pin, or sewn onto clothing.
Finishing & Shaping
- Adjust the bow’s shape: Pull gently on the ends to make the sides wider or the bow puffier, as desired.
- Your pretty bow is done! Add it to your favorite accessory or gift.
Congratulations!
You’ve crocheted a super cute bow, perfect for any use. If you found this project fun or have any questions, please leave a comment below!