
Free Crochet T-Shirt Yarn Bag Pattern for a Chic Look
Learn how to make an easy crochet T-shirt yarn shoulder bag that’s perfect for casual outfits and fun handmade accessories.
A ball of t-shirt yarn can turn into something beautiful and practical with just a hook and some time. One such charming project is a handmade crochet bag that’s perfect for everyday use. Projects like these bring not only a sense of achievement but also provide an eco friendly way to use recycled materials. If you’re looking for a rewarding activity, this bag idea may be just what you need.
Amazing Free Crochet T Shirt Yarn Shoulder Bag Pattern

This particular crochet bag is loved for its neat and structured look. It features a sturdy base, seamlessly worked sides, and a comfortable strap, making it durable and functional. The bag’s shape is modern and unique, a combination of clean edges and a soft, textured surface. Its spacious interior allows you to carry groceries, books, or personal items with ease. The natural flexibility of t-shirt yarn adds strength and a slight stretch, making this bag long lasting and highly practical for day to day use.
Making the bag is a simple yet rewarding experience. Starting with a carefully worked base in single crochet, the body builds up into a square shape, which is then joined flawlessly at the corners. The sturdy strap is added at the end, balancing functionality with style. You can choose the colors you love, add decorative accents, or leave it minimalistic for a more modern vibe.
For easy guidance, the Manos de Crochet YouTube channel offers a detailed tutorial to inspire you. The instructions are clear and easy to follow, guided by an experienced crocheter who makes the process smooth and approachable. This homemade bag is a perfect mix of sustainability and beauty, making it a great project for both beginners and seasoned crochet lovers alike.
Crochet T-Shirt Yarn Bag Pattern with Strap and Button Fastening
Follow this detailed pattern inspired directly by the transcription to create a stunning square crochet bag using trapillo yarn. This design includes a step by step guide for crocheting the square panels, strap, and button closure, assembling the bag, and adding decorative touches to personalize your project.
Quick Overview of Pattern
- Skill Level: Beginner
- Technique: Single crochet (puntos bajos), slip stitch (puntos deslizados), and chain stitch.
- Outcome: A square shaped crochet bag with a strap and button fastening.
- Ideal For: Lightweight, practical bags for everyday use.
Notes
- Trapillo yarn is used as the primary material, but you can substitute with other bulky yarns.
- Adjust hook size based on the thickness of your yarn.
Skill Level
Beginner friendly: This pattern uses basic crochet stitches such as single crochet, chain stitch, and slip stitch, with clear steps provided.
Materials
- Trapillo yarn: Approximately one skein, cut thinner if needed for a lightweight finish.
- Crochet hook: 6 mm, or adjust hook size based on the thickness of your yarn.
- Stitch markers: For identifying key points during assembly.
- Button: Decorative button for fastening.
- Metal ring loops: Optional, for attaching the strap.
- Scissors and darning needle: To cut, finish ends, and sew as needed.
Measurements / Sizing
- Panel Size: Approximately 9" x 9", adjustable depending on the number of rows completed.
- Strap Length: Customizable based on preference.
Gauge
Gauge is not strictly necessary for this project, but aim for a firm yet flexible stitch for bag durability.
Stitch Abbreviations
- ch: Chain stitch
- sc: Single crochet
- sl st: Slip stitch
Special Stitches
- Slip Stitch in Reverse: For joining panels neatly, work slip stitch through one loop on the back and one loop on the adjacent piece.
Crochet Pattern
Square Panel Crochet (Main Bag Body)
Round 1: Creating the Magic Circle
- Create a reverse slip knot for flexibility in tightening the magic ring:
- Hold the short yarn tail up. Loop yarn around your finger. Slide it through to create the knot. Insert your 6 mm hook.
- Begin the base stitches:
- Insert the hook into the circle and make 1 chain stitch.
- Work 8 single crochets (sc) into the magic circle. Do not pull the circle tight yet.
- Close the round:
- Locate the first stitch from Round 1. Insert the hook into this stitch, yarn over, and pull through both loops. You have created a slip stitch.
- Tighten the magic circle:
- Pull the short yarn tail to close the ring completely, ensuring a snug finish.

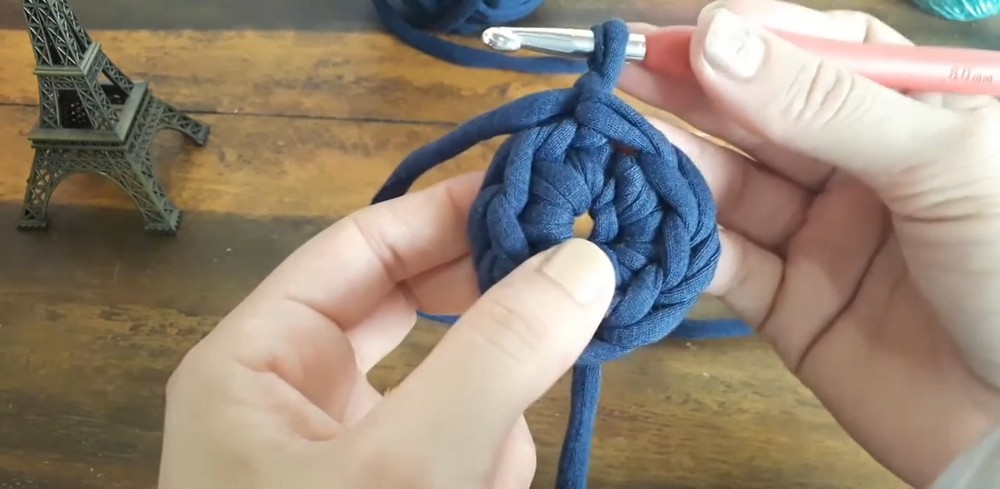
Round 2: Establishing Corners
- Create 1 chain to start the round.
- Work 1 sc into the first stitch.
- In the next stitch, work 3 sc to begin shaping the corners (corner point).
- Continue this sequence:
- Work 1 sc in the next stitch.
- Work 3 sc in the following stitch (corner).
- Repeat around the circle until four corner points are complete.
- Finish the round:
- Join with a sl st to the top of the first stitch.
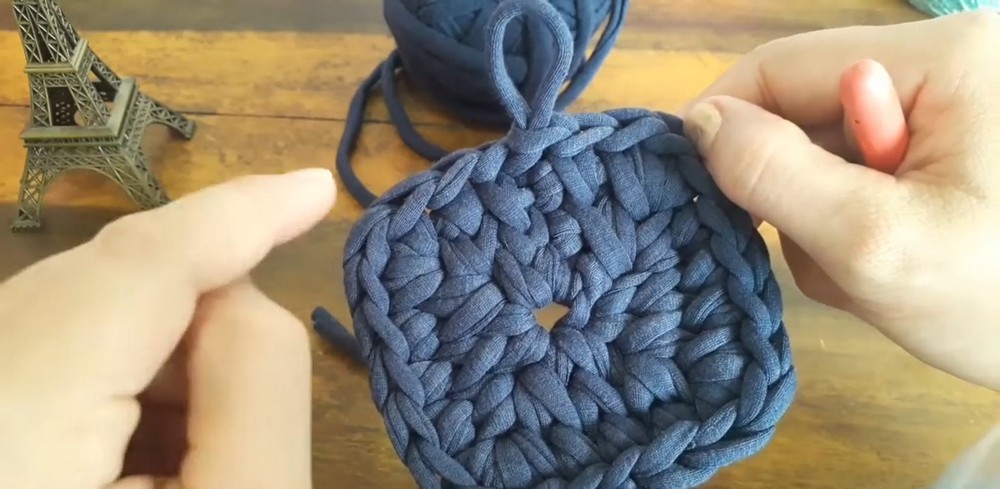
Round 3: Expanding the Square
- Start the round: Chain 1.
- Work single crochets around the previous row. Here’s the sequence:
- At standard stitches, work 1 sc.
- At corner points from the previous round (3 sc in one stitch), work:
- 1 sc into the first stitch,
- 3 sc in the second stitch (re-establish new corners),
- 1 sc in the third stitch.
- Repeat the corner sequence until all corners are completed.
- Join the round with a sl st to finish.
Repeating Rounds for Expansion
- For additional size, continue working rounds in the same manner:
- Add more single crochets between corner points.
- Maintain 3 sc at corners to preserve the square shape.
- Increase stitch counts by intervals of two in each round:
- Round 4: 5 sc between corners,
- Round 5: 7 sc between corners,
- Round 6: 9 sc between corners (or until desired size is reached).
Creating the Strap
- Begin with a slip knot and chain 46 stitches (or desired length).
- Join into a ring:
- Slip stitch into the first chain to form a loop.
- Work single crochets (sc) around the chain. Continue until you reach the starting point.
- Finish by joining with a sl st, ensuring a clean edge.

Button Closure
- Create the button:
- Chain stitch to form a loop. Work 6 sc into the loop.
- Tighten the loop and join the round with a sl st.
- Fasten off and sew the button securely onto the front panel of the bag.
- Add a tie loop:
- Cut a piece of trapillo yarn and attach it to the opposite side of the button.
Assembly & Joining
- Join the Panels: Using slip stitches:
- Work along the edges, inserting the hook through the back loop of one panel and the adjacent loop of the second panel.
- Attach the Strap:
- Sew the ends of the straps directly onto the panels or attach them to the metal ring loops.
- Secure Loose Ends: Ensure all yarn tails are woven in securely within existing stitches.
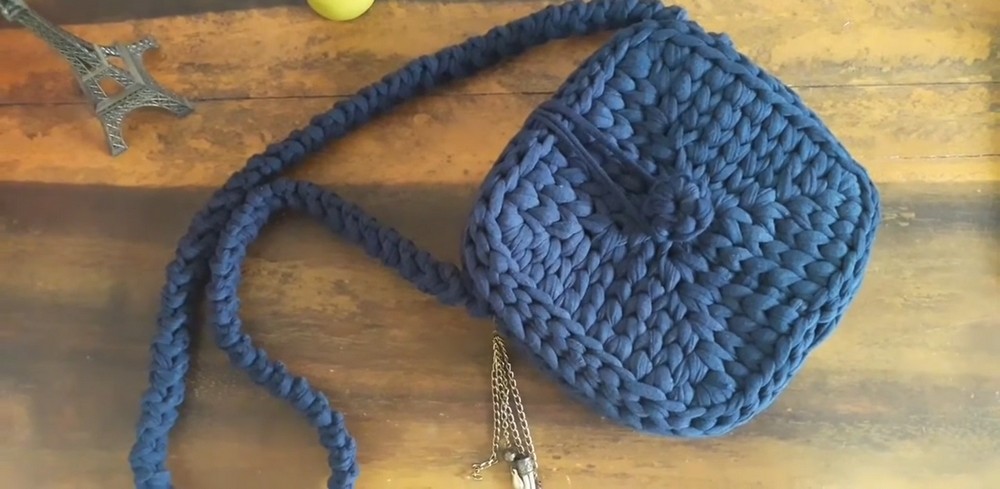
Finished Size
- Bag Size: Approximately 9" x 9".
- Strap: Adjustable depending on desired length.
Conclusion
Creating this square crochet bag is simple, fun, and highly customizable. With basic stitches and trapillo yarn, you can make a lightweight yet sturdy bag ideal for everyday use. Experiment with colors, button styles, and strap lengths to make this project your own.