
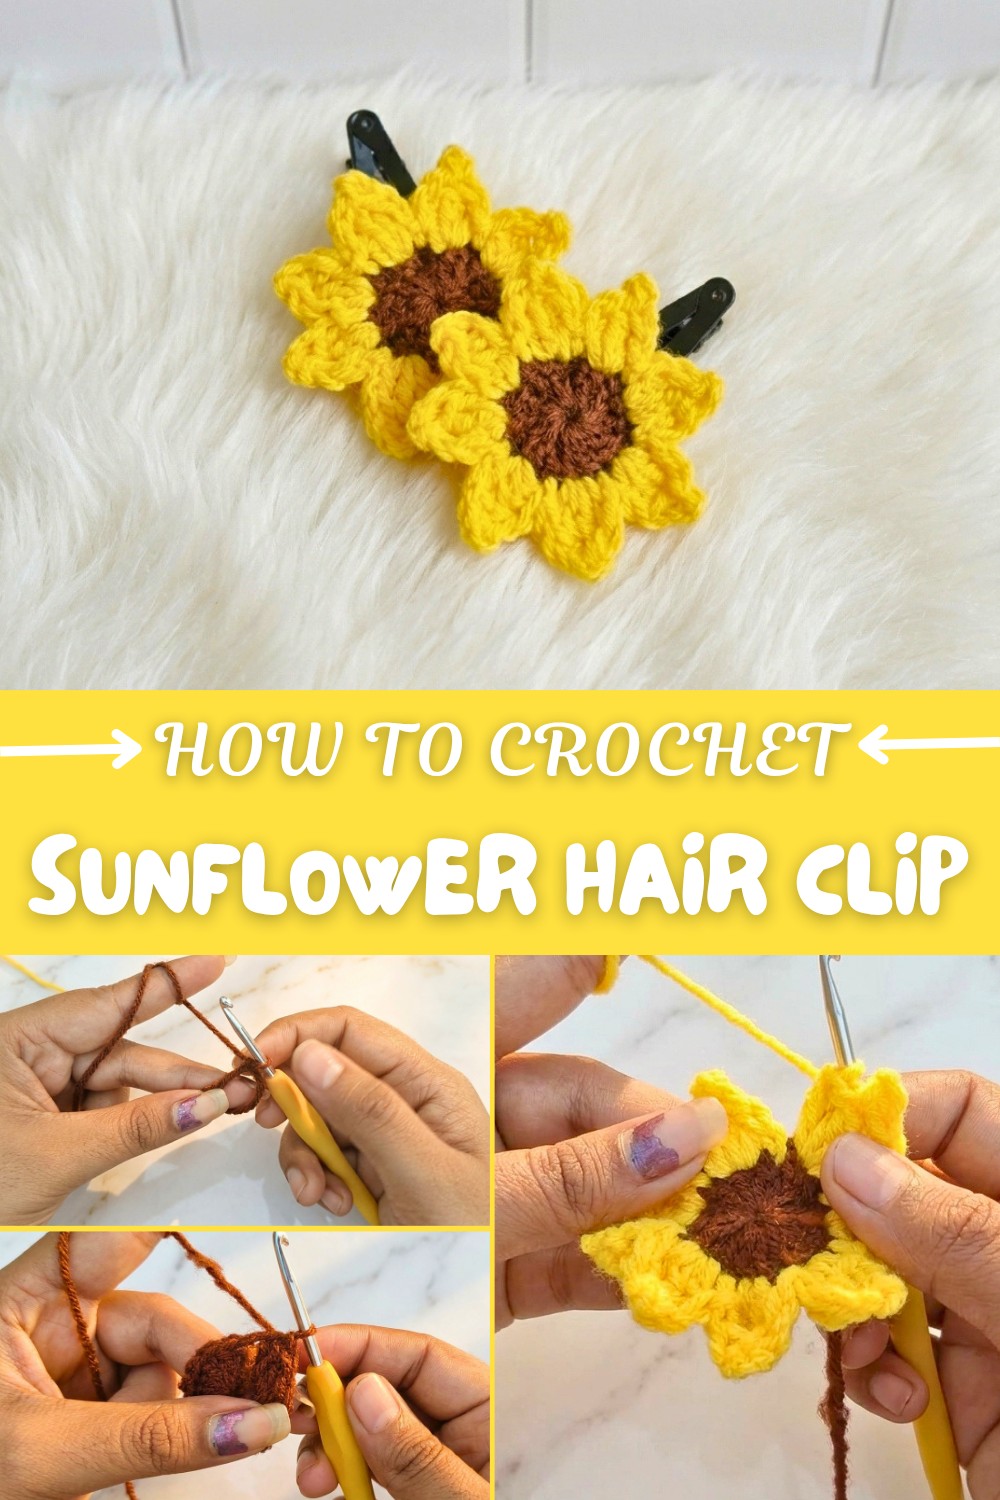
Free Crochet Sunflower Hair Clip Pattern
Stepping out the door, your hair kissed by a bright sunflower you made yourself. That’s the charm of this Free Crochet Sunflower Hair Clip Pattern. Crocheting your own sunflower hair clip transforms an ordinary day into something a little brighter and a lot more fun. Whether you’re just discovering the joy of crochet or you’re already hooked, starting with a sunflower clip might be the creative spark you need. It’s practical, a little whimsical, and best of all easy enough for beginners to follow without feeling overwhelmed.
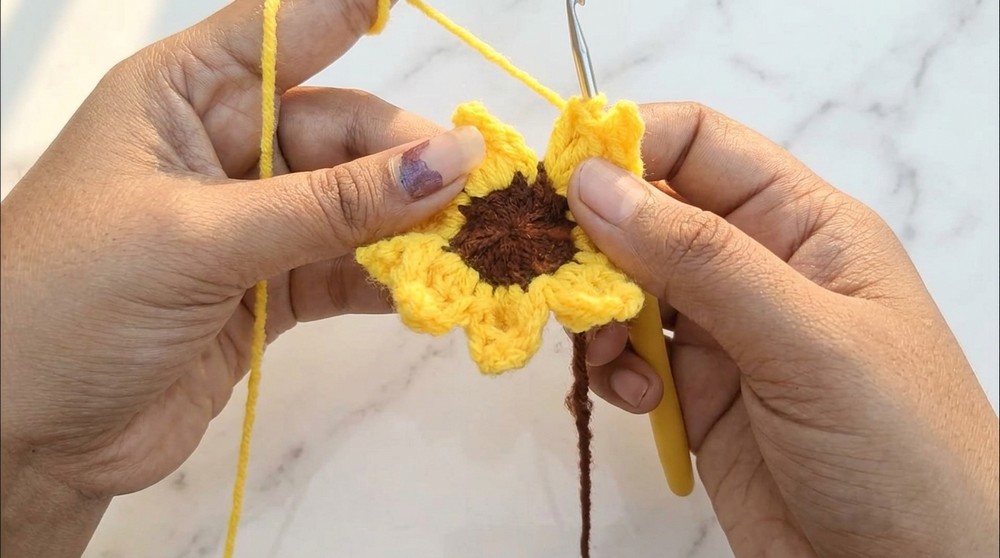
Quick Crochet Sunflower Hair Clip Pattern – Step-by-Step
Let’s talk about what makes this sunflower hair clip irresistible. The petals pop with classic golden yellow, while the textured brown center feels just like the heart of a real sunflower. The pattern keeps it simple, usually relying on slip stitches, single crochet, and double crochet to bring the flower to life. Even with these basic stitches, the result is beautifully detailed.
Change up the colors and you’ve got a daisy, a zinnia, or any floral twist you fancy. With a few tweaks, this little motif can turn into a bag charm, a brooch, a gift topper, or a cheerful garland for your next get-together.
Of course, even with a simple pattern, a few bumps can come up. Sometimes petals curl or the center puckers. Solution? Flatten each petal once finished and check your tension as you crochet. If the middle seems floppy, try switching to a smaller hook. For symmetry, always count your stitches as you go.
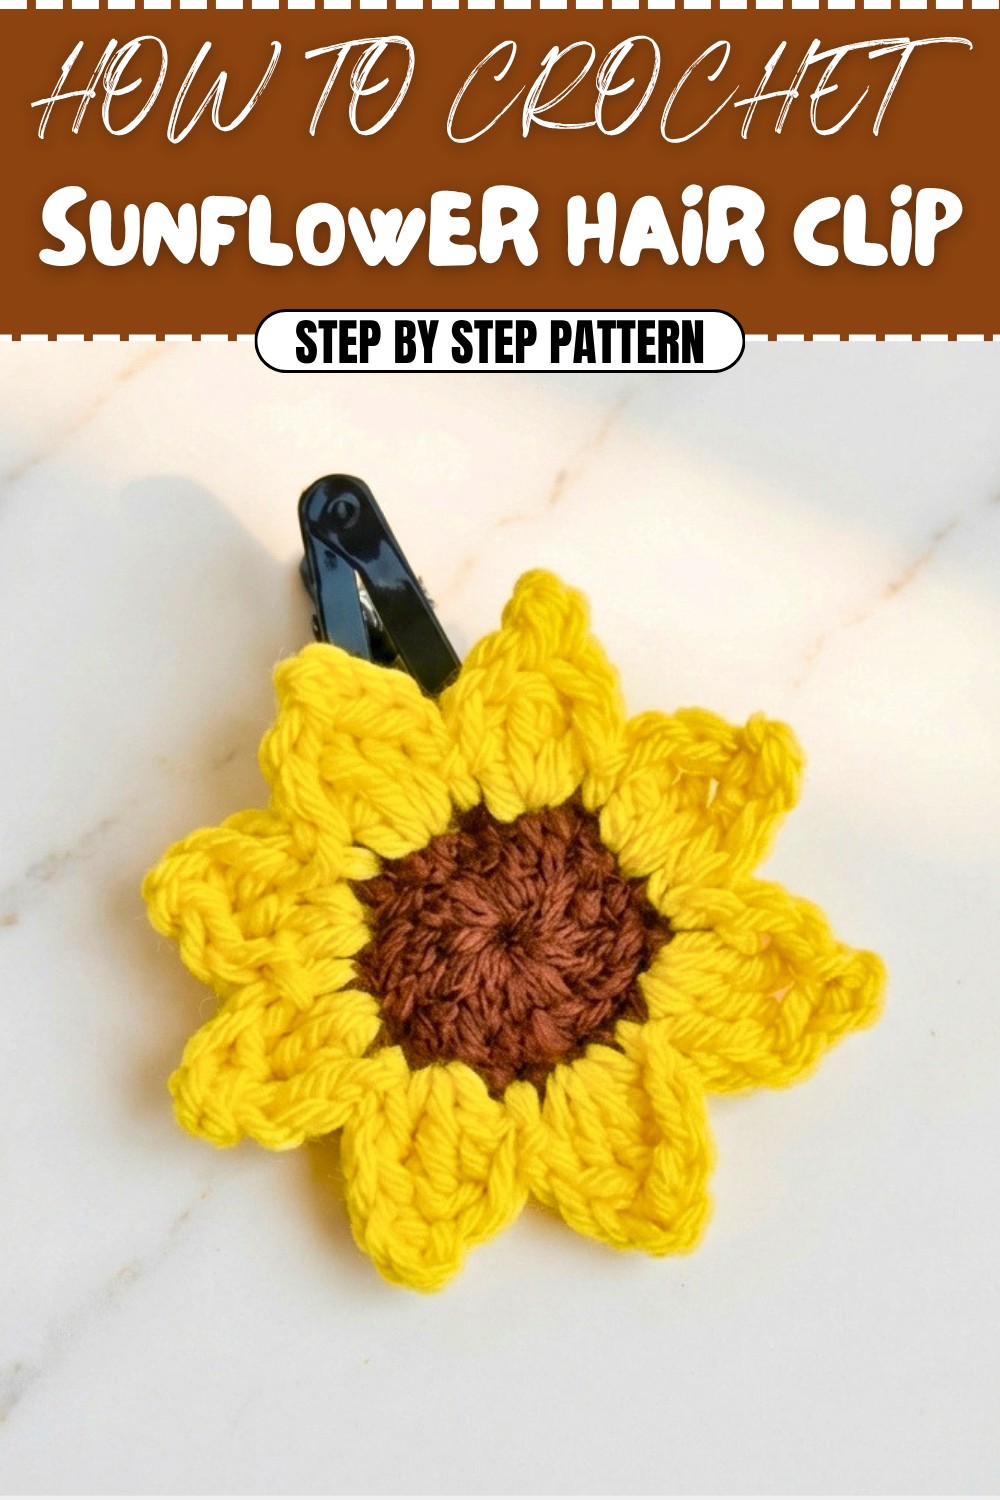
You’ll know you’ve got it right when your sunflower measures about 2 to 2.5 inches across—ideal for a hair accessory that stands out but isn’t overwhelming. With a sunflower hair clip made by your own hands, every glance in the mirror brings a little burst of sunshine and a reminder of your creative flair!
Sunflower Hair Clip Crochet Pattern
Capture the radiance of summer with this elegant Sunflower Hair Clip. This design is perfect as a charming accessory or a handmade gift. The realistic texture and petal structure give the sunflower depth and beauty, all secured snugly to a hair clip. This written pattern breaks down each step for clarity, adding beginner-friendly explanations where needed.
Skill Level & Terminology
- Skill Level: Intermediate
- Terminology: US Crochet Terms
Materials & Tools
- Yarn: Worsted weight yarn in yellow (petals) and brown (center), acrylic is recommended for durability.
- Hook: 3.5 mm crochet hook
- Notions: Scissors, yarn needle, metal hair clip/barrette
- Optional: Textile glue (for extra security), lighter (for finishing yarn ends)
Abbreviations
| Abbreviation | Meaning |
|---|---|
| MR | Magic Ring |
| ch | Chain |
| sc | Single Crochet |
| dc | Double Crochet |
| tr | Treble Crochet |
| slst | Slip Stitch |
| st(s) | Stitch(es) |
| rep | Repeat |
Special Notes
- The sunflower is worked in joined rounds.
- The petals are worked directly onto the center circle.
- Leave a long tail after finishing the center for sewing to the clip.
Pattern
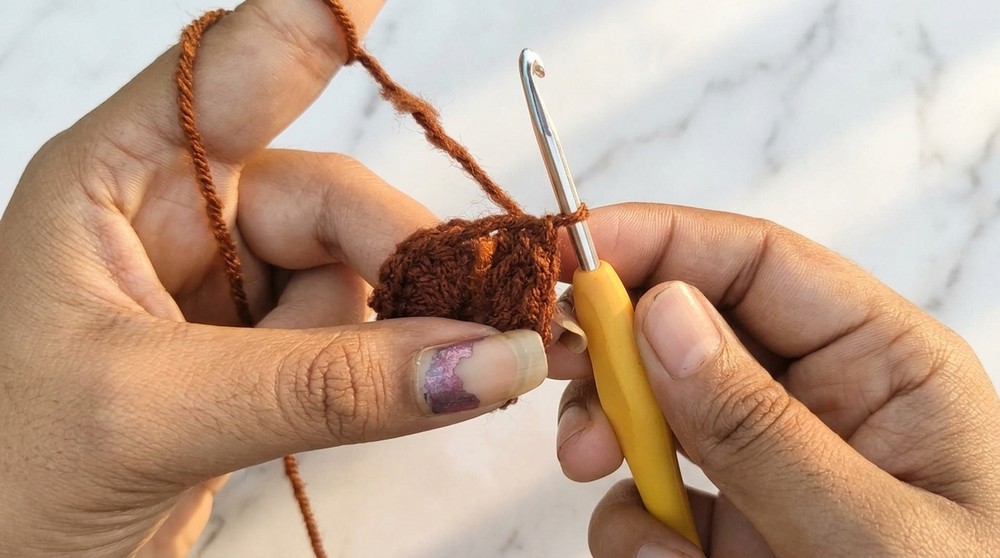
Sunflower Center (Brown)
- Round 1: With brown yarn, MR, ch 2 (does not count as a stitch), 16 dc into ring.
- Tighten ring and slst to the first dc to close the round.
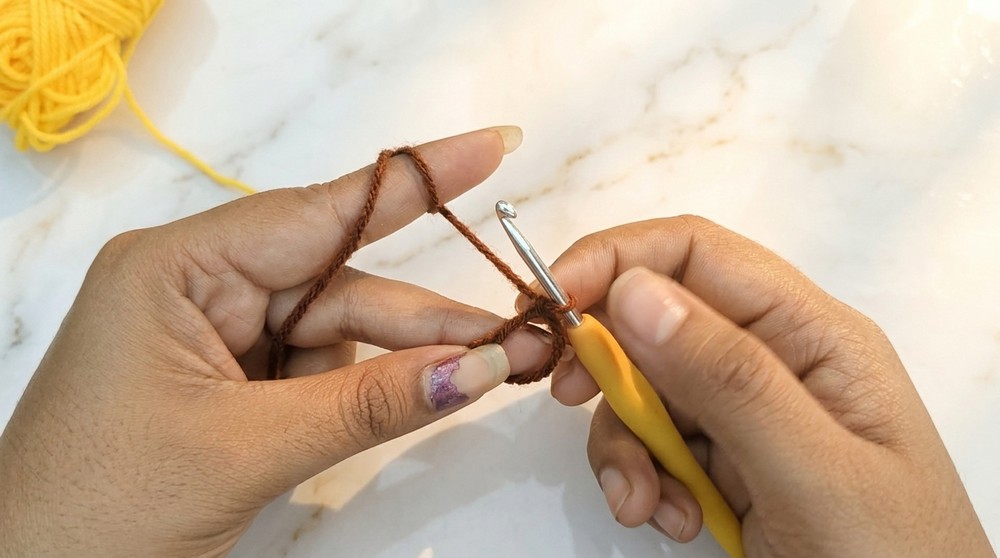
Beginner Explanation:
You are making a small, flat circle using double crochet stitches. The magic ring lets you pull the center tightly closed. Make sure you have 16 stitches before joining.
- Finishing Center:
Ch 1 and cut yarn, leaving a long tail for sewing (about 4-5 inches). Pull the yarn through the loop to fasten off.
Beginner Explanation:
After you fasten off, you’ll have a neat circle. Leave one yarn end long so you can sew this piece onto your hair clip later.
Petals (Yellow)
- Join yellow yarn in any stitch of the brown center.
- Petal Sequence (make 8 petals):
- Ch 1. In the next st:
- dc
- tr
- ch 2
- Work a "peacock stitch": Insert hook into top of tr, pull up a loop and pull through (slip stitch in top of tr with ch-2 for texture).
- tr (again in same st as before)
- dc (again in same st as before)
- Slst in next st to anchor the petal.
- Rep from Step 1-2 for each petal around, working your petals into every 2nd stitch (8 petals per flower).
- Ch 1. In the next st:
- After the last petal, slst to base of first petal to close the round.

Beginner Explanation:
Each petal is worked all into one stitch—first double crochet, then treble, then a small chain, then more treble and double crochet. When you slip stitch into the next stitch, it makes each petal stand out. Repeat this to make eight full petals around your sunflower.
- Finishing Petals:
Ch 1, cut yarn, and pull through.
Weave in all yellow ends with a yarn needle except the original brown yarn tail.
Beginner Explanation:
Hide all your threads except for the long brown yarn you saved. This makes the backside tidy and ready to attach to your hair clip.
Assembly & Finishing
- Use the long brown tail and a yarn needle to sew the sunflower to the top of your hair clip/barrette.
- Place the center of the flower over the top part of the hair clip.
- Stitch around the base, making sure the flower is held tightly.
- Optionally, add a dab of textile glue for extra hold.
- Weave in any more ends.
- For a clean look, carefully melt any tiny ends with a lighter (hold the flame near, not on, the yarn).
- Adjust petals as needed to fan out evenly.

Beginner Explanation:
Attach the flower to your clip with the leftover yarn tail, sewing securely so it doesn’t come loose. You can use a little glue as well for extra strength. Tidy up any leftover yarn ends for a neat finish.
Conclusion
Your beautiful sunflower hair clip is ready! This vibrant piece makes an eye-catching accent—perfect for gifts, summer picnics, or brightening up any hairstyle.
Pattern Correction
- Ensure you work all petal stitches into a single stitch so each petal is full and round.
- Double-count your stitches for both the center (16 dc) and the petals (8 petals in total).
Tips
- Keep the starting yarn tail long to sew flower to the clip; this makes attachment easier.
- If petals seem crowded or too loose, adjust hook size or use a lighter yarn.
- Shape the petals by pinching them with your fingers after finishing for a neat, natural look.