
Free Crochet Photo Holder Pattern to Showcase Pictures
Turn your favorite printed memories into cute aesthetic wall decor using this free crochet photo holder pattern to give your bedroom a warm personalized touch.
Ever thought about showcasing your favorite photos in a creative and handmade way? A crochet photo holder is a charming and personalized way to do just that. Shaped like a delicate decorative frame, this project is as practical as it is beautiful. The circular design of the holder has a soft and elegant texture, achieved by covering a simple costume jewelry bracelet with neat rows of single crochet stitches.
Pattern By Anerom
What makes it even more attractive is the addition of delicate scalloped edges made with five double crochets worked into specific stitches, creating a lovely lacy effect that mimics floral petals. Additionally, you can make photo holders in various sizes by choosing larger or smaller circular bases. This means the project can easily adapt to your needs, whether you're crocheting for yourself, as birthday presents, or even as adorable party favors.
Free Crochet Photo Holder Pattern for Gallery Walls
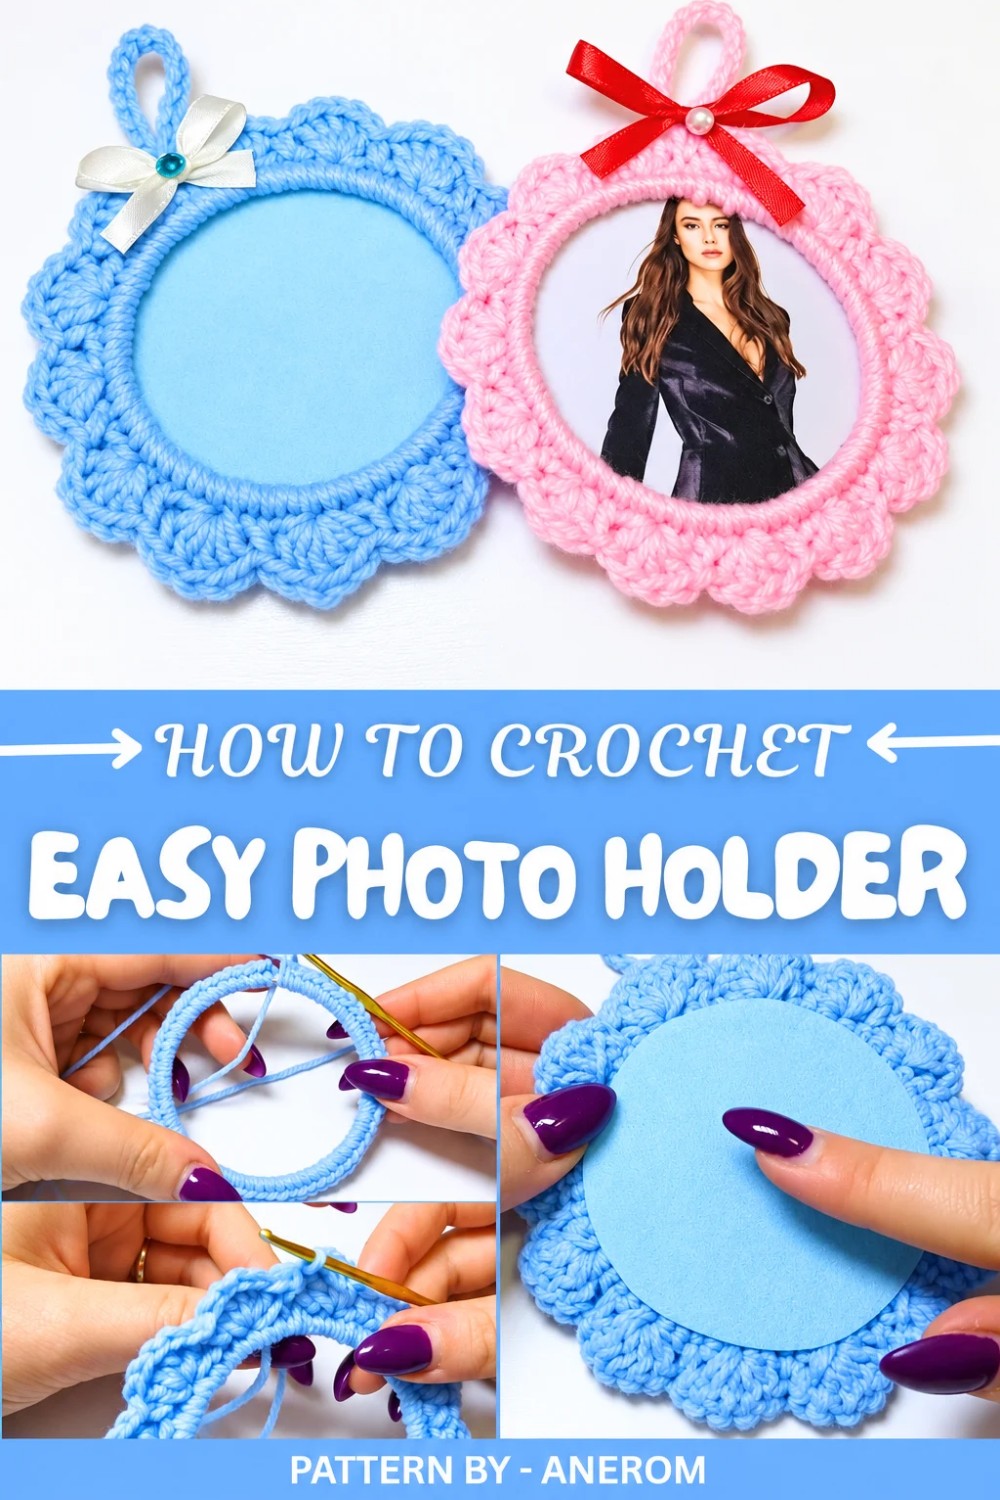
The working process is straightforward, making it perfect for both beginners and seasoned crocheters. Starting with a magic ring and basic single crochets, the entire bracelet is covered before moving on to decorative scalloped edges. For added charm, the channels suggest embellishing with ribbons, beads, or rhinestones. The back of the holder is finished with a felt backing, leaving a small opening to easily switch out photos whenever you like.
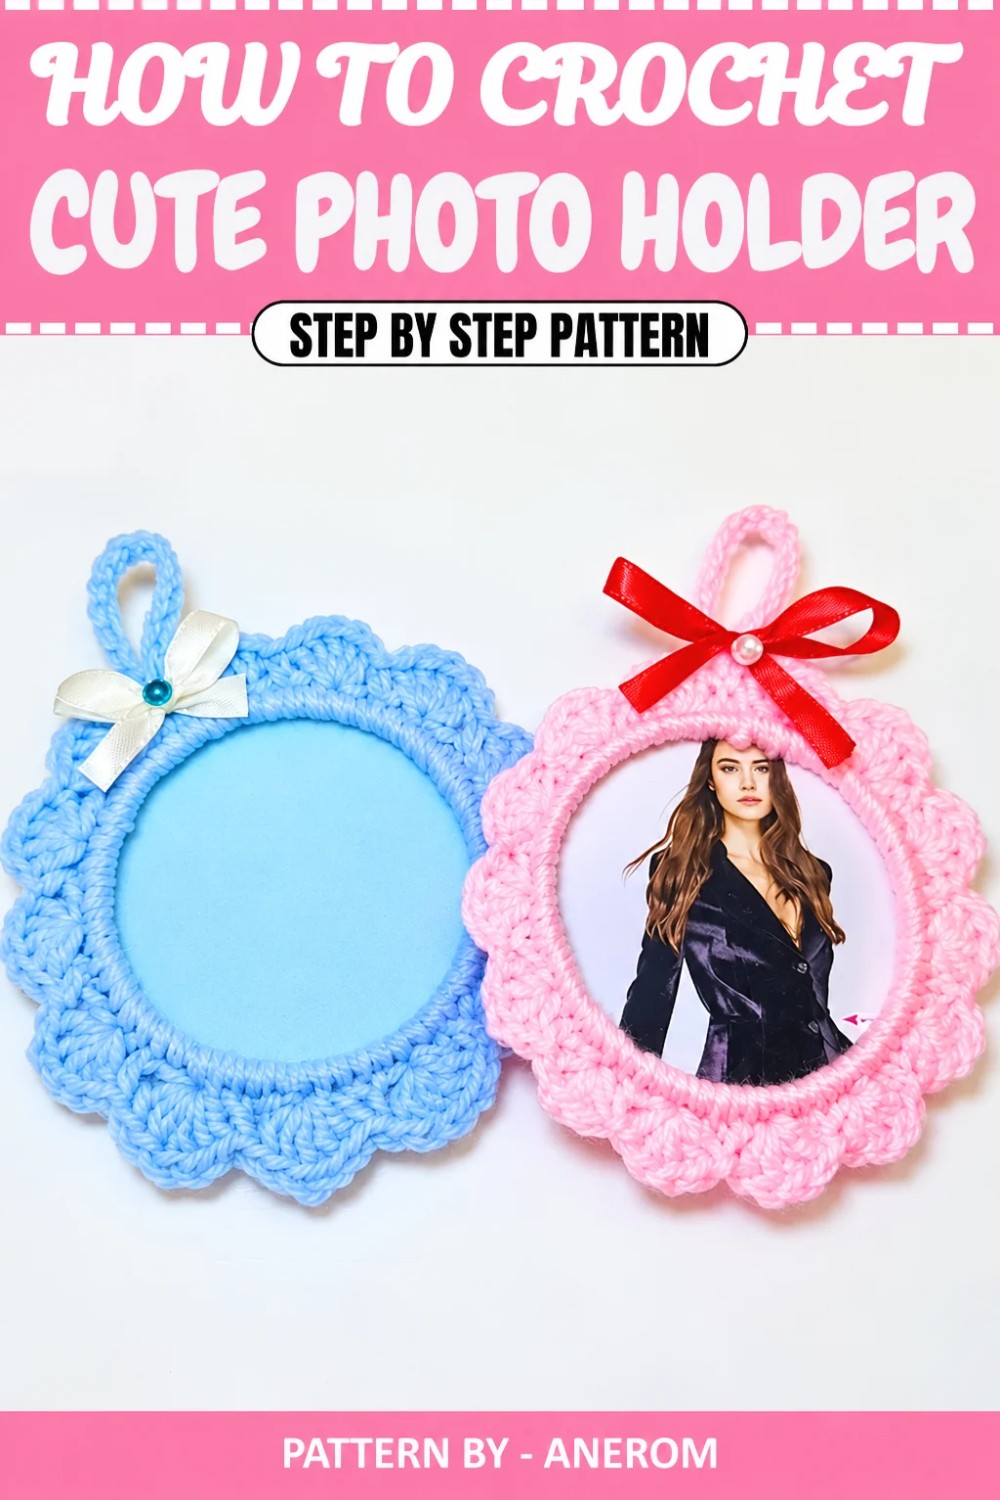
Crochet Photo Frame Pattern
Transform a simple jewelry bracelet into a gorgeous and sentimental crochet photo frame. This project is perfect for gifting as a personalized present for a baby shower, baptism, birthday, or any special occasion. In this tutorial, we show step by step how to crochet around a simple bracelet to create a beautiful frame, complete with the option to add a backing for photos. Whether crocheted in pink, blue, or the color of your choice, this quick and easy handmade piece is sure to impress.
Quick Overview of Pattern
- Create a unique photo frame by crocheting around a basic jewelry bracelet.
- Versatile design: customize colors, decorations, and even the size of the bracelet for different occasions.
- Ideal for baby showers, baptisms, birthdays, or as a timeless DIY gift.
Notes
- You can use any color yarn to match your occasion or preference.
- Attaching felt to the back of the photo frame allows you to easily replace pictures when you want.
- A generic bracelet is used as the base, but you can substitute it with any round, sturdy object, like a curtain ring or a plastic hoop.
Skill Level
Beginner – This pattern only uses basic crochet stitches (slip stitch, single crochet, and double crochet), making it suitable for beginners.
Materials
- Acrylic Yarn (size 3 weight): Choose any color you like (e.g., pink or blue).
- Crochet Hook: 3 mm.
- A simple jewelry bracelet: Can be metal or plastic; choose the size according to your desired frame size.
- Felt sheet: Try to match the felt color to your yarn, or choose complementary colors for a stylish design.
- Scissors
- Yarn Needle
- Glue (fabric glue or hot glue): For attaching the felt.
- Decorative elements: Ribbons, pearls, or sequins for embellishments (optional).
Measurements / Sizing
- The size of your photo frame will depend on the size of the bracelet/round object you use.
- The example in the tutorial uses a standard jewelry bracelet (approximately 7 cm / 2.75 inches in diameter).
Gauge
Gauge is not essential for this project, as the frame size depends on the base object (bracelet/hoop) and the number of stitches worked around it.
Stitch Abbreviations
- CH: Chain
- SC: Single Crochet
- DC: Double Crochet
- SL ST: Slip Stitch
Special Stitches
- Single Crochet Around a Hoop/Bracelet: Work SC stitches around the circumference of the bracelet or hoop to cover it with yarn completely.
The Crochet Pattern
1.Step 1: Covering the Bracelet with Single Crochets
- Create a slip knot with your yarn and place it on your crochet hook.
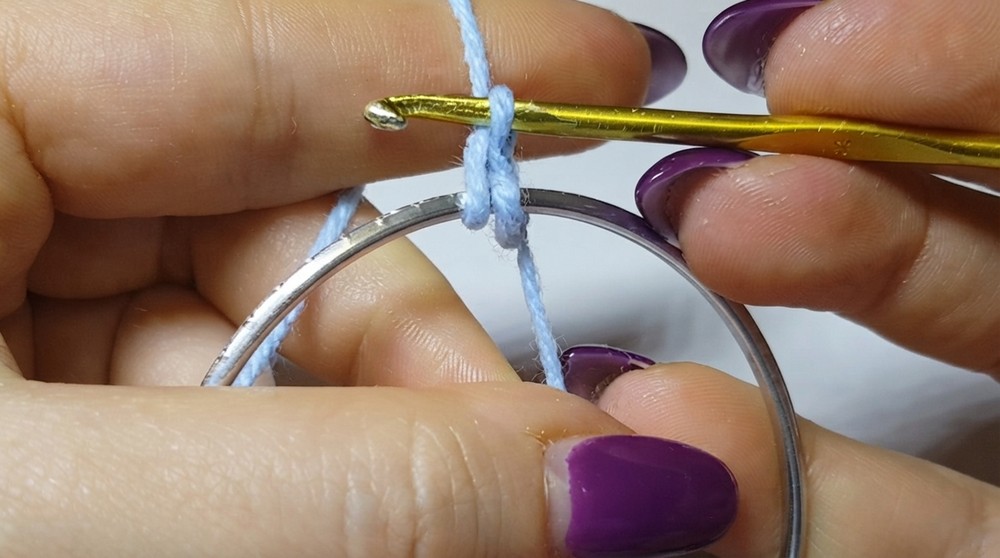
- Place your bracelet or hoop inside the loop of the crochet thread so that the hoop is enclosed.
- Bring the loose tail of the yarn and working yarn behind the hoop (this prevents tangling).
- Begin with an SC stitch to secure the yarn onto the hoop (this first stitch can feel tricky, but it gets easier afterward).
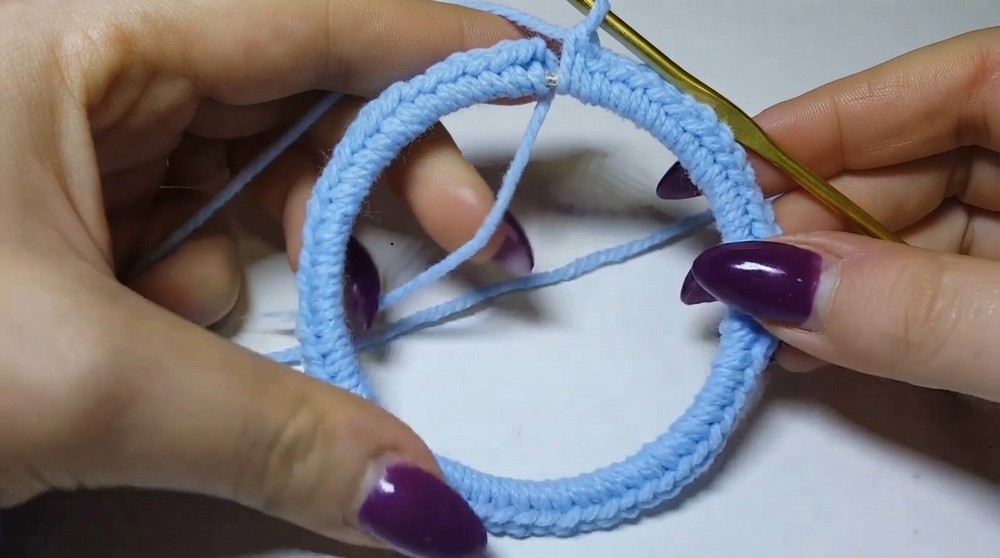
- Continue working SC stitches around the hoop until it is completely covered with yarn. Ensure the stitches are tightly packed so no portion of the bracelet shows.
- Once the entire hoop is covered, SL ST into the first SC stitch to close the round.
2.Step 2: Create the Scalloped Edging
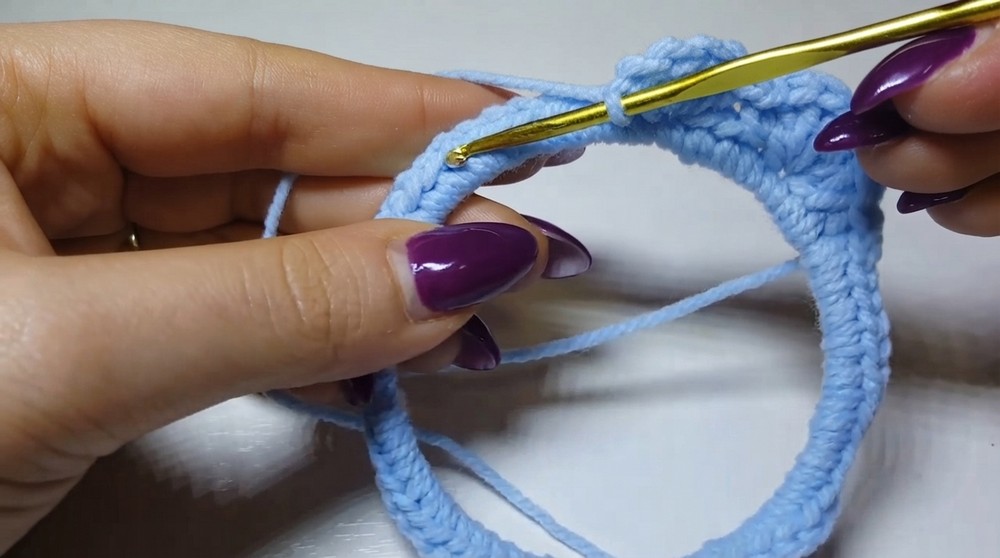
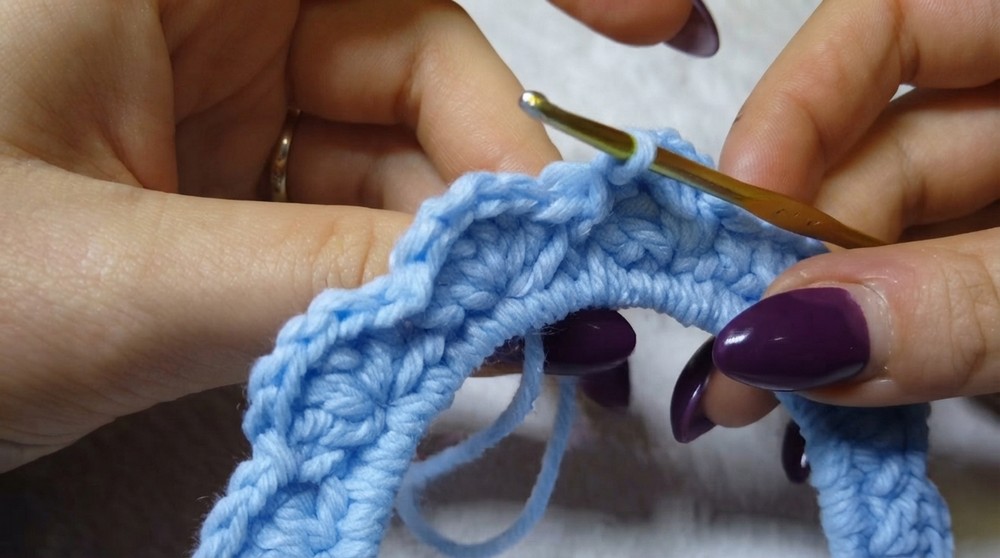
- Skip the first 2 stitches.
- In the third stitch, work 5 DC.
- Skip the next stitch. In the following stitch, work 1 SC to secure the scalloped edge.
- Repeat the pattern: Skip 2 stitches, 5 DC in the next stitch, then 1 SC in the following stitch to attach the scallop to the base.
- Continue this pattern until the entire hoop is surrounded by scallops.
- To finish, close with a SL ST into the same stitch where the first scallop started.
3.Step 3 (Optional): Adding a Hanging Loop
- To add a hanging loop (optional): CH 15 for the loop.
- Insert the hook into a stitch near where you started the first CH, and make a SL ST to secure the loop to the hoop.
- Tie off the yarn and cut the excess.
Assembly
Prepare the Felt Backing
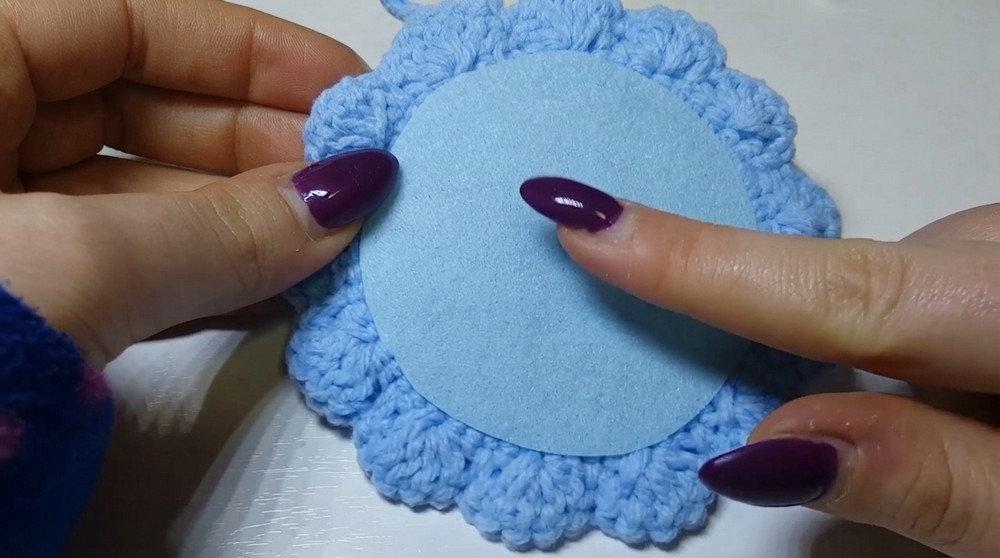
- Place the crochet covered hoop on top of your felt sheet.
- With a pencil or fabric marker, trace the shape of the hoop onto the felt.
- Cut out the circle, leaving a margin of about 2 mm around the traced line (so the felt will not pull in too tightly).
- Decide where you'll attach the felt: Align it with the back of the crochet hoop so it's centered.
Attach the Felt
- Glue the bottom half of the felt circle to the back of the crochet photo frame. Leave the top half unglued to create a pocket for the photo.
- Ensure the glue is applied securely on the bottom half only, and let it dry completely.
Step 4: Embellishing Your Frame
- For added decoration, create a bow using the ribbon and secure it onto the frame with glue (optional).
- If desired, add pearls, rhinestones, or other small embellishments to the bow or frame using glue.
- Let the glue fully dry before adding your photo.
Inserting the Photo
- Select the photo you want to showcase, ensuring it fits within the dimensions of the frame.
- Insert the photo into the pocket created by the felt backing.
Finished Size
Your crochet photo frame is now complete. The final product will match the size of the bracelet used as the base (approximately 7 cm diameter in the tutorial).
Conclusion
Congratulations on creating your own crochet photo frame! This is an excellent project for using up yarn scraps while creating memorable gifts for your loved ones. Switch up the yarn colors and decorations to make it perfect for any occasion, from baby showers to birthday celebrations.