
Free Crochet Owl Pattern That’ll Brighten Your Day
Use this free crochet amigurumi owl pattern to build a tiny owl with big personality and have fun choosing bright colors and cute details as you go.
Crocheting a crochet owl is like capturing a little piece of beauty and charm, it’s playful yet elegant, and the soft texture makes it irresistible to hold. Perfect for decoration, handmade gifts, or memorable party favors, its cheerful personality instantly brightens any space. With rounded, symmetrical features, large expressive eyes, and a tiny triangular beak, the design itself feels warm and approachable, making these owls a favorite among crocheters.
This delightful crochet project stands out for its simple yet thoughtful design. The body’s cube like shape gives it a fun and quirky twist and ensures it will sit upright, making it ideal as a display piece. The owl’s fluffy ears add an adorable touch, while the eyes and beak are completed with felt for extra personality. What's most exciting is how customizable this pattern is, you can play with yarn colors, textures, and sizes to make each owl truly unique.
Free Crochet Owl Pattern for Amigurumi Enthusiasts

The Anerom YouTube channel showcases an excellent and easy step by step guide to bring this owl to life. This particular design doesn’t require advanced skills, making it perfect for beginners who want to try their hand at magic rings, simple single crochet stitches, and increases. Using basic materials like acrylic yarn, felt, and stuffing, For crochet enthusiasts, this free crochet owl pattern is an ideal opportunity to stitch something beautiful and practical while enjoying the satisfaction of handmade creation.

Crochet Owl Cube Pattern
In this pattern you’ll learn how to create a crochet owl cube that is both adorable and perfect for gifting or decorating. This project is simple, quick, and allows for creative customization. Whether you want to make a smaller owl for a keepsake or a slightly larger design for display, this step by step guide will help you complete your own crochet owl cube with ease.
Quick Overview of Pattern
- Type: Crochet Owl Cube Amigurumi
- Purpose: Gift idea, decor piece, or toy for older children
- Difficulty: Beginner friendly, suitable for crochet enthusiasts of all levels
- Customization: Adjust the size, colors, and materials for unique creations
Notes
- Different yarn sizes and hook combinations impact the final dimensions. Using a thicker yarn makes for a larger owl, while thinner yarn results in a smaller piece.
- Accessories such as felt, fabric, and glue can add extra detail and personality to your owl cube.
- The final owl design uses a combination of crochet and felt for the eyes, beak, and facial features, which can be sewn or glued depending on your preference.
Skill Level
Beginner – Basic crochet stitches and techniques such as the magic ring, single crochet (sc), increases, decreases, and slip stitch are required.
Materials
- Yarn:
- Colored acrylic yarn (for the owl’s body)
- White acrylic yarn (for the eyes – recommended No. 3)
- Felt:
- Black felt (for pupils)
- Orange felt (for the beak)
- Hook:
- 4.5mm crochet hook (for body)
- 3mm crochet hook (for eyes)
- Accessories:
- Yarn needle for sewing
- Stitch markers or pins for tracking rounds
- Fiberfill stuffing
- Hot glue or adhesive (optional for assembly)
- Scissors
Measurements
Using a 4.5mm hook and thicker acrylic yarn, the owl cube will measure approximately 8–10 cm tall, depending on the amount of stuffing and the tension of your stitches.
Gauge
Gauge is not critical for this project; however, it is ideal to keep stitches tight so that the stuffing does not show through.
Stitch Abbreviations
- sc: Single crochet
- inc: Increase (2 single crochets into the same stitch)
- dec: Decrease (single crochet two stitches together)
- sl st: Slip stitch
Special Stitches
Magic Ring (MR)
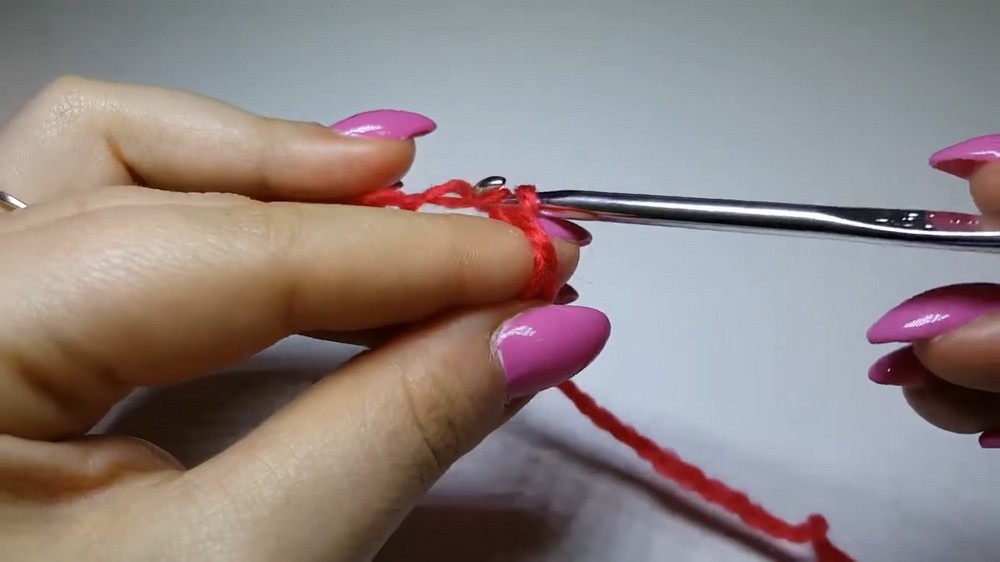
The magic ring ensures a neat, circular beginning by eliminating gaps at the center of your work. Wrap yarn into a loop, insert the hook, create a single chain, and begin crocheting directly into the loop.
The Crochet Pattern
Follow the steps below to crochet the owl cube, based on the transcription provided.
Part 1: Owl Body
- Foundation:
- With your colored yarn, create a magic ring.
- Round 1:
- Work 6 single crochets (sc) into the magic ring. Tighten the loop by pulling the yarn end.
- Total stitches: 6.
- Round 2:
- Work 1 increase (inc) in each stitch around (2 sc in each stitch).
- Total stitches: 12.
- Round 3:
- Alternate between 1 sc and 1 inc. Repeat for the entire round.
- Total stitches: 18.
- Round 4:
- Alternate between 2 sc and 1 inc. Repeat for the entire round.
- Total stitches: 24.
- Round 5:
- Alternate between 3 sc and 1 inc. Repeat for the round.
- Total stitches: 30.
- Round 6:
- Alternate between 4 sc and 1 inc. Repeat for the round.
- Total stitches: 36.
- Rounds 7–20:
- Work 1 sc into each stitch for 14 rounds, keeping the stitch count consistent.
- Total stitches: 36 per round.
- Stuffing:
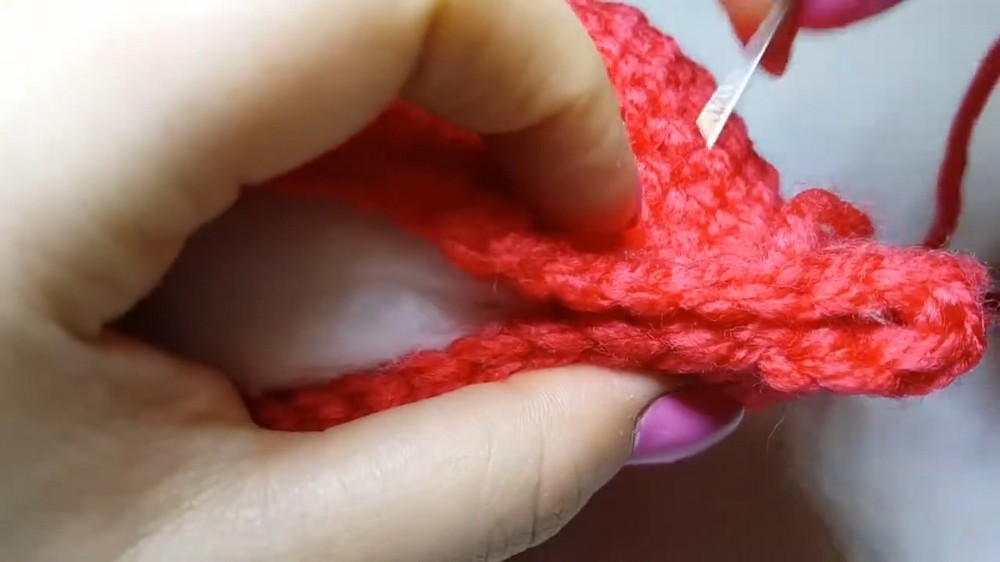
- Pause here to stuff your owl body with fiberfill stuffing.
- Ensure it is firmly packed while maintaining a soft, rounded cube shape.
- Closing the Owl Body:
- Fold the edges where needed to form the cube shape. Begin sewing the top edges together using a yarn needle and leave the two corner points unsewn for the owl’s "ears."


Part 2: Owl Eyes
- Foundation:
- With white yarn, create a magic ring.
- Round 1:
- Work 6 sc into the magic ring. Tighten the loop by pulling the yarn end.
- Total stitches: 6.
- Round 2:
- Work 1 inc in each stitch around (2 sc into each stitch).
- Total stitches: 12.
- Round 3:
- Alternate between 1 sc and 1 inc. Repeat for the round.
- Total stitches: 18.
- Round 4:
- Alternate between 2 sc and 1 inc. Repeat for the round.
- Total stitches: 24.
- Finishing Round:
- Work 1 sl st into the next stitch, cut the yarn, and weave the ends into the stitches for a clean look.
- Repeat:
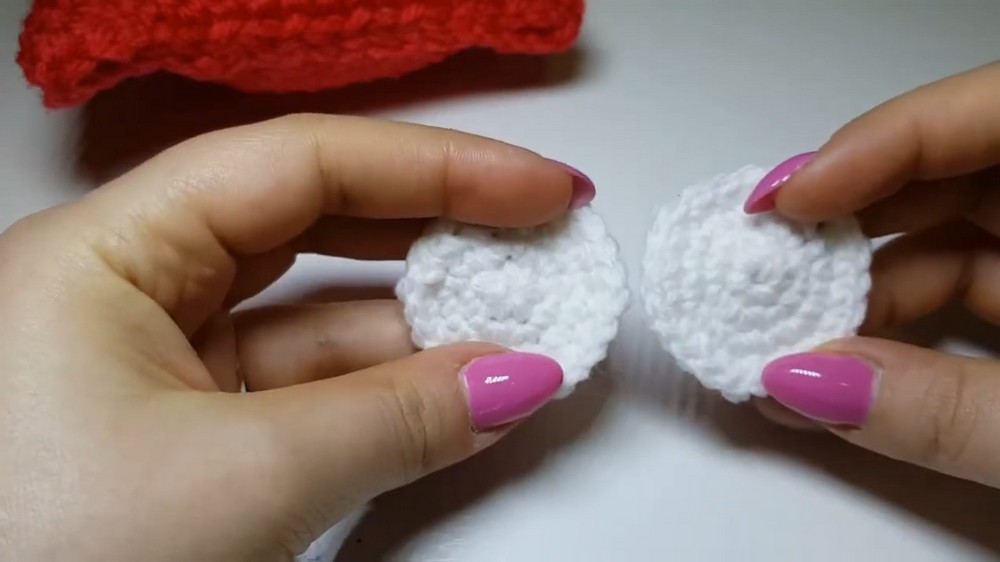
- Create a second identical eye and prepare both for attachment.
- Pupil and Beak Details (Using Felt):
- Cut out two small black felt circles for pupils and glue to the white crochet eyes.
- Cut out a small orange felt triangle for the beak.
Assembly & Finished Size
- Attach the Eyes:
- Sew or glue the white eyes onto the front of the owl body. Position them evenly for an adorable symmetrical look.
- Add the Pupils and Beak:
- Use glue or fabric adhesive to attach the black felt pupils to the center of the white eyes.
- Attach the orange felt triangle below the eyes to create the beak.
- Secure the Ear Openings:
- If the edges forming the ears feel loose, you can add a small amount of glue to secure and shape them.
- Finish Touches:
- Check your owl cube for any loose ends or gaps. Adjust stuffing if needed to maintain its shape.
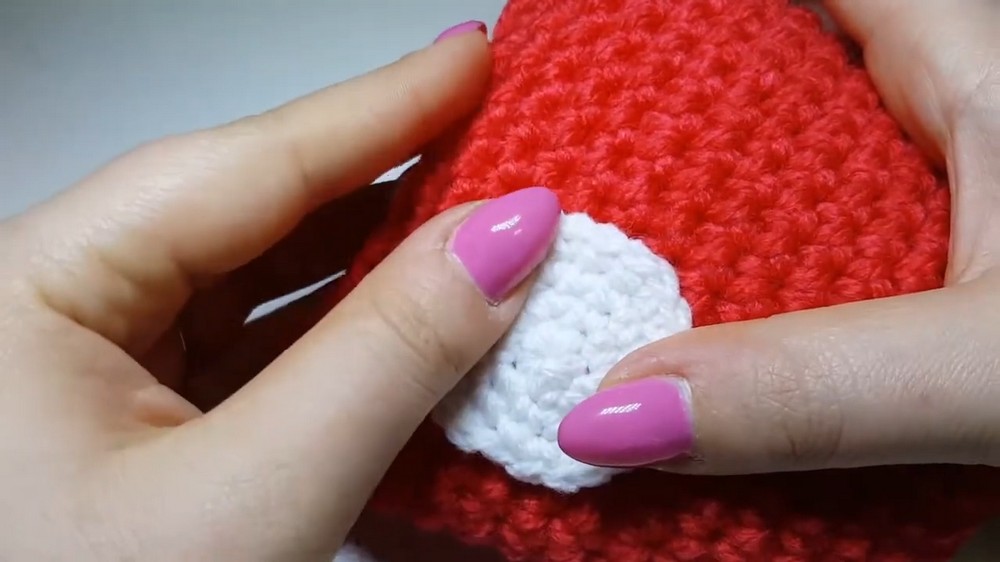
The completed owl cube is roughly 8–10 cm tall when made with a 4.5mm hook and thicker yarn.
Conclusion
Congratulations on completing your crochet owl cube. This delightful and charming project is perfect for beginners and advanced crocheters alike. With endless possibilities for customization, you can make owl cubes in various colors, designs, and sizes. Whether you’re gifting them, decorating your home, or making small bomboniere pieces, these owl cubes are sure to bring smiles.