
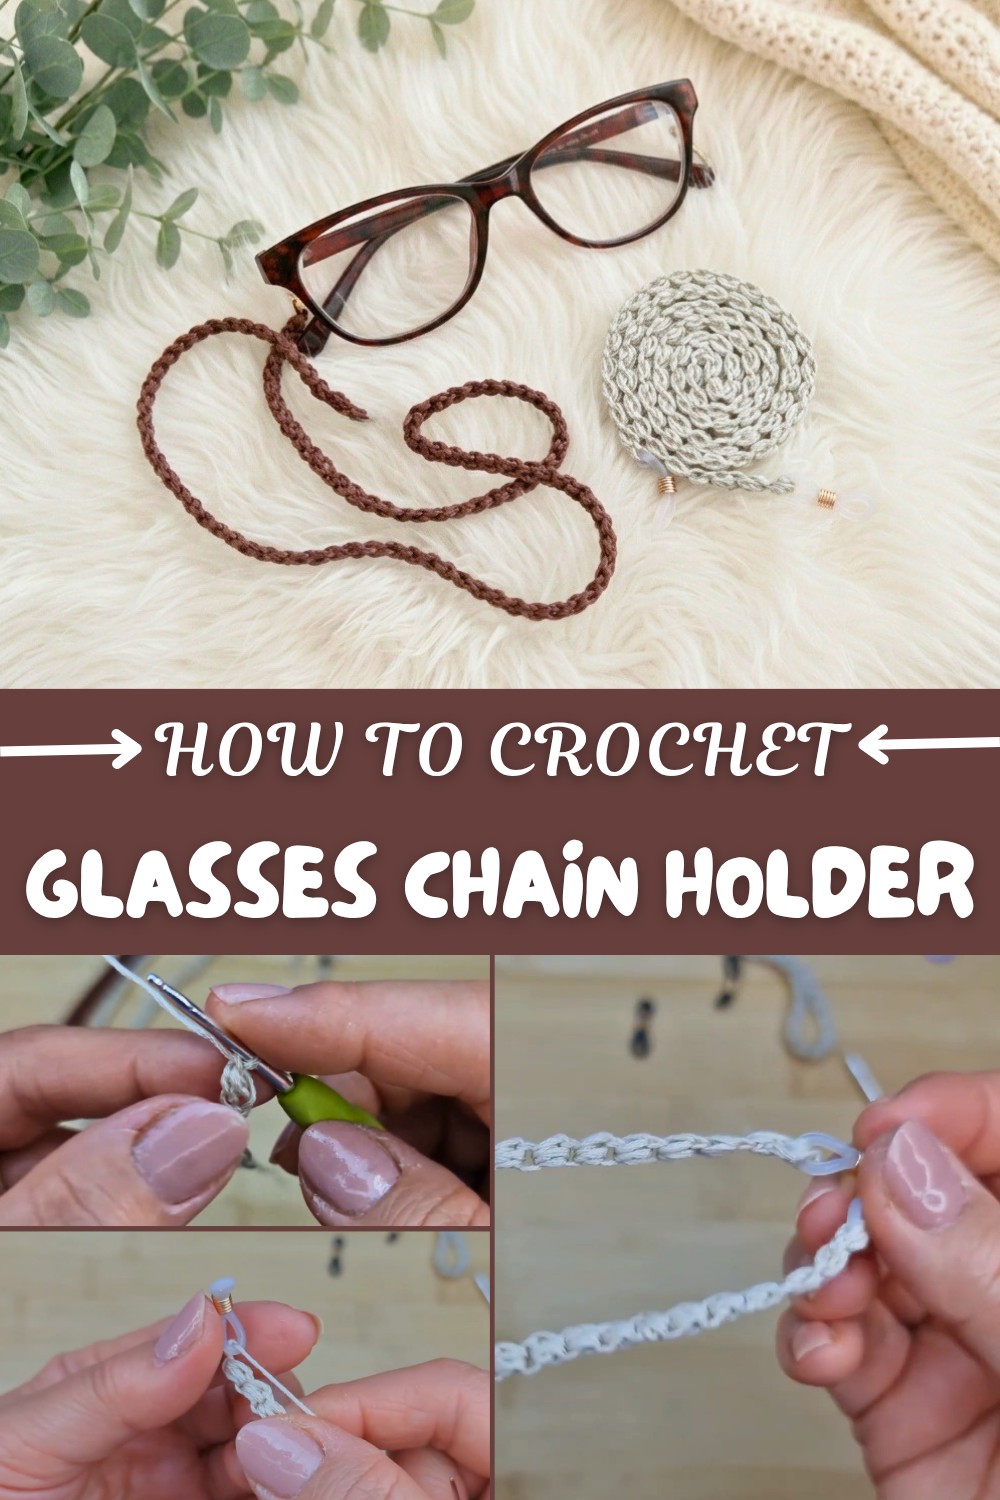
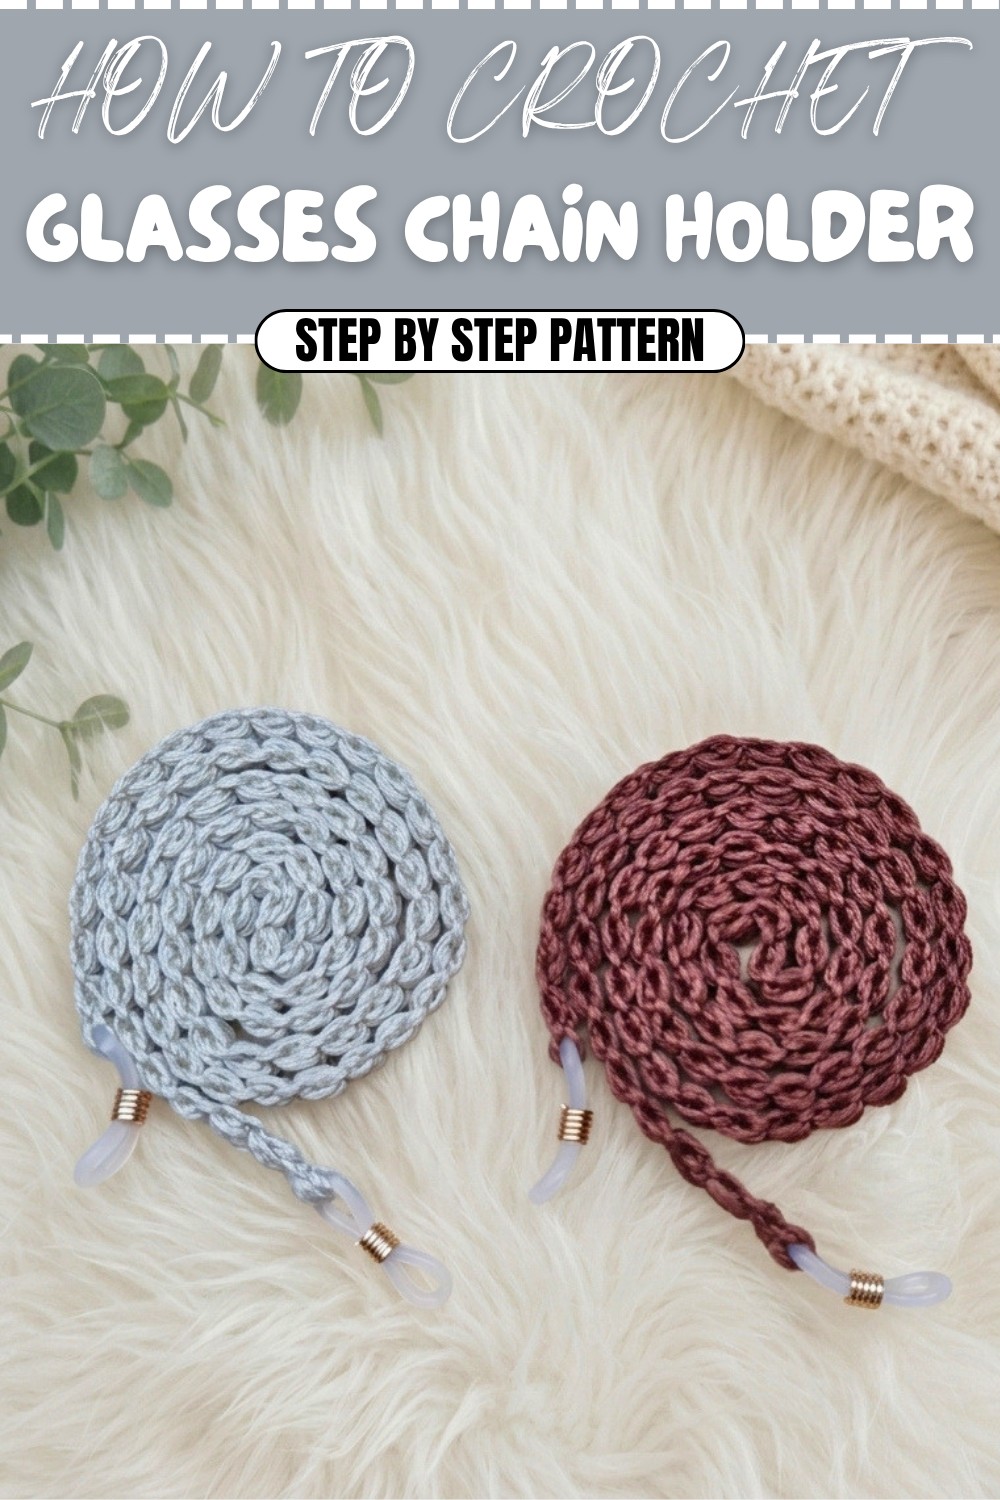
Free Crochet Glasses Chain Holder Pattern with Puff Stitches
Losing track of my glasses used to be a daily frustration, so finding a free crochet glasses chain holder pattern felt like discovering a simple solution that also lets me add a little handmade style to my day. This chain holder is more than just practical, it’s beautifully soft and has a gentle sheen thanks to tapestry cord or silky yarn, making it light and comfortable to wear.
I love that I can choose any color I fancy from creamy beige to chocolate brown or brighter shades like pink and blue, to match my mood or outfit. Attaching little rubber ends makes it easy to fit most glasses, and the finished holder drapes so nicely that it never feels bulky or in the way.
Free Crochet Glasses Chain Holder Pattern with Customizable Length
The whole process feels relaxing and accessible, even for someone new to crochet. Only a few supplies are needed: a 2mm crochet hook, some silky yarn, a small needle, and scissors. The main stitch is a puff stitch, which creates a lovely chain effect that looks pretty without requiring complicated techniques. Each puff is joined with a simple chain, and you just repeat the steps until the chain is as long as you prefer.
About 88 puffs makes a holder around 22 inches, which sits comfortably and keeps your glasses at hand. The beauty of this pattern lies in how customizable it is. Longer or shorter, delicate or chunky—just choose what works best for you.
Making a glasses chain holder feels satisfying and useful. With every puff stitch, I gain confidence and see how small projects can quickly turn yarn into a helpful accessory or unique gift. The pattern easily doubles as a necklace chain, sunglass holder, or even a stylish badge lanyard simply by adjusting the length or adding different ends.
Learning the basic puff stitch opens the door to other creative items, such as bracelets and decorative chains for bags. It’s amazing how a few simple steps can teach me new skills and help me brighten up everyday essentials with a touch of handmade charm.
Crochet Glasses Chain Holder (Eyeglass Lanyard) Pattern
Keep your glasses safe, handy, and stylish with this beautiful, silky crochet eyeglass chain holder (lanyard). This project works up in no time and is an ideal gift for friends and family—or a practical, fashionable accessory for yourself. Designed with a soft, drapey cord and modern “puffy” chain links, this pattern is both elegant and easy.
Skill Level & Terminology
- Skill Level: Beginner
- Terminology: Written in standard US crochet terms
Materials & Tools
- Yarn: Smooth, shiny cord or tapestry thread (silky/tapestry cord recommended for best drape); DK cotton or light yarns can be substituted.
- Hook: 2.0 mm crochet hook (adjust to match cord thickness)
- Needle: Fine, sharp yarn/darning needle for sewing in ends
- Scissors: Small, sharp
- Rubber Grips: 2 eyeglass chain ends with metal loops (often called rubber ends or eyeglass grips; available online/in craft stores)
Gauge
Gauge is not crucial. What matters is a soft, flexible, not-bulky chain with an even, neat texture.
- One sample chain: 88 puffs produces a strap approximately 22" (56 cm) long.
- Adjust number of puffs for your preferred length.
Abbreviations
| Abbr. | Meaning |
|---|---|
| ch | chain |
| yo | yarn over |
| st(s) | stitch(es) |
| puff | 2-part puff stitch |
| RS | right side |
Special Stitch Instructions
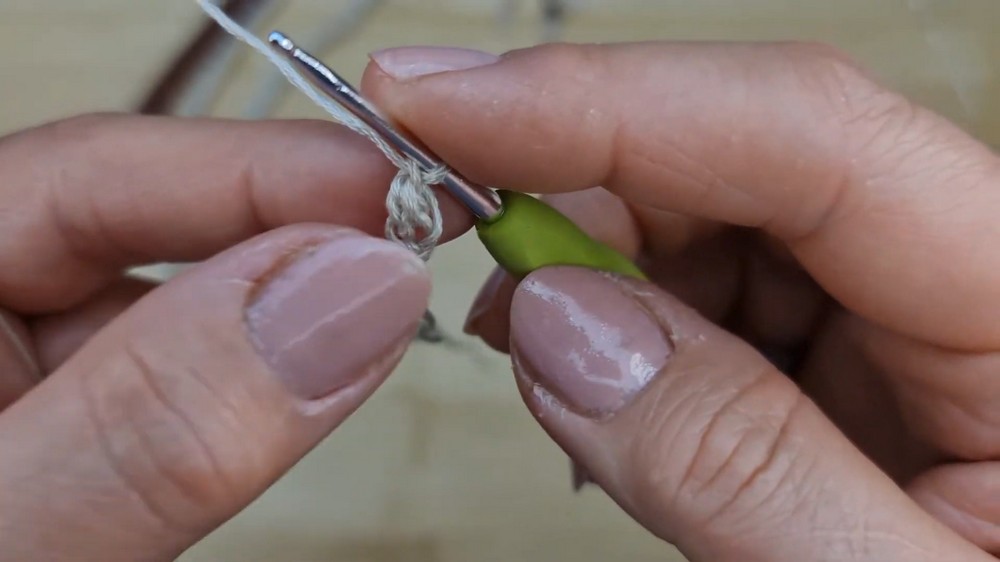
Puff Stitch (for this pattern):
- Pull up a loop (making a slightly loose loop), yo, insert hook into the indicated stitch or chain space, pull up a loop (2 loops on hook).
- Yo, insert hook into same space, pull up a loop (now 3 loops on hook).
- Yo, pull through all 3 loops on hook.
- Ch 1 to secure puff (this closes and locks your puff).
Joining a New Length of Cord:
If your cord runs out, simply knot a new piece onto the old one securely at the edge of your work, and hide the knot in the next puff stitch.
Finished Size
Typical finished chain: 22" (56 cm) long
Easily customized for any length; add or remove puff stitches to change total length.
Getting Started & Stitch Overview
This pattern features a simple, textured “puff chain” stitch, which is ideal for beginners. Begin with a slipknot and two chains, work each subsequent puff stitch into the chain space created by the previous puff, and finish with sturdy ends for your glasses.
The Pattern
Step 1: Begin the Chain
- Leave a 4-5" tail for sewing on the rubber grip later.
- Make a slip knot on your hook.
- Ch 2.
Start with a slip knot and two chains, leaving a generous tail for sewing your glasses grip at the end.
Step 2: Work the Puff Chain
- First Puff:
- Pull up a loop in the 2nd chain from hook (leave this loop slightly loose).
- Yo, insert hook in same chain, pull up another loop (3 loops on hook).
- Yo, pull through all 3 loops.
- Ch 1 to lock the puff.
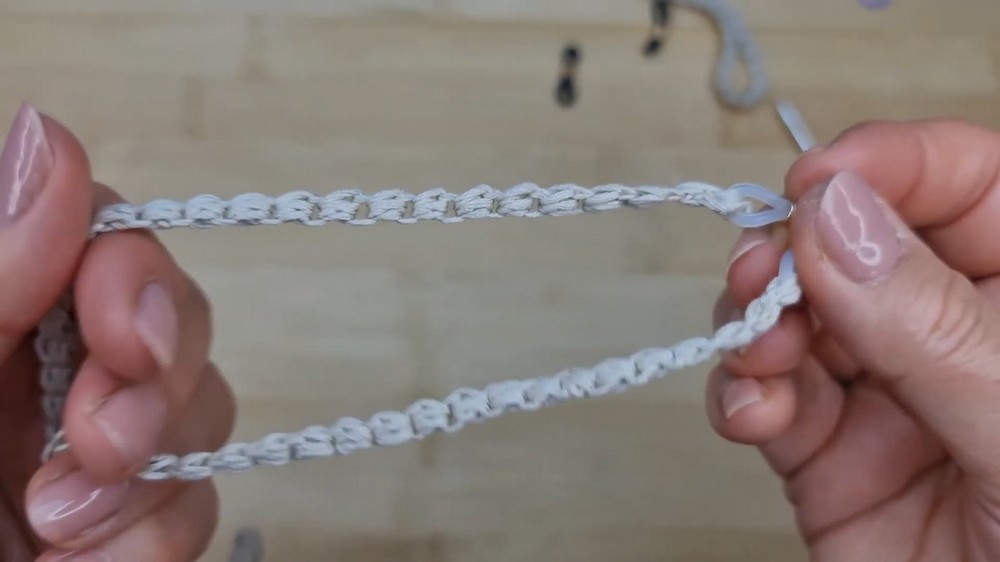
- All Remaining Puffs:
- (Working into previous ch-1 space)
- Pull up a loop, yo, insert hook into chain space, pull up a loop (3 loops on hook).
- Yo, insert hook in same space, pull up a loop (5 loops total).
- Yo, pull through all 5 loops.
- Ch 1 to lock the puff.
- Continue step 2 for each new puff, working into every ch-1 space (on top of each puff), until your chain measures the desired length. (For a standard adult, approx. 88 puffs = 22"/56 cm.)
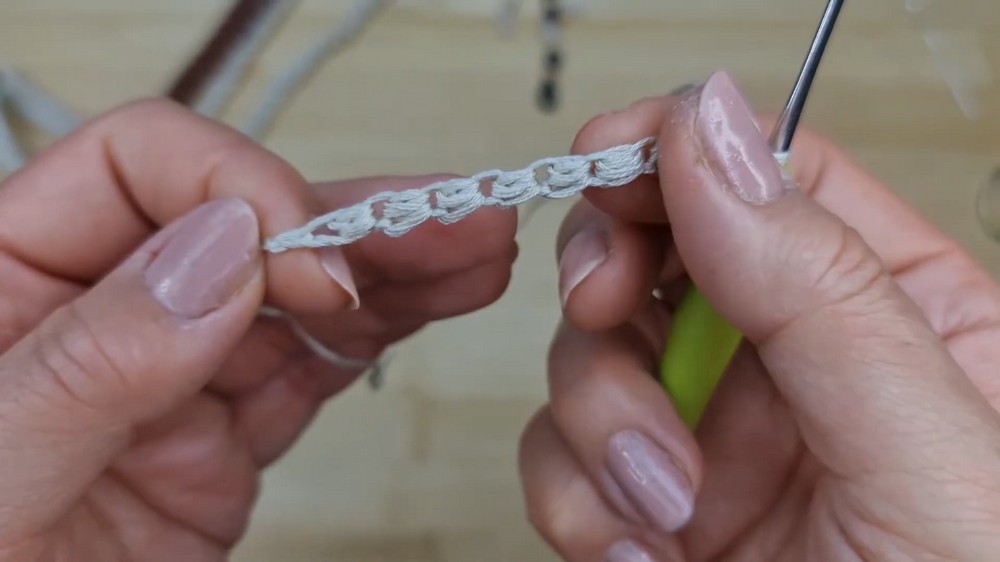
Repeat the puff stitch into each new chain-one space. After every puff, chain one to make the space for the next puff. Continue until your chain is as long as you want.
Step 3: Finish the Chain
- When the chain is your preferred length, chain 2 and cut the yarn, leaving another 4-5" tail at this end.
Once you reach your desired length, chain two and leave a long tail. This tail will be used to attach the rubber grip for your glasses.
Step 4: Join Cord (If Needed)
- If your cord ends before you reach desired length, knot on a new piece.
- Use your needle to thread in and hide any knots within puff stitches, working in and out a few times for a secure join.
If you run out of thread, simply join a new piece and continue. Hide any knots inside the next puff stitch for a seamless look.
Assembly & Finishing
Step 5: Weave in Ends (If New Cord Was Joined)
- With a yarn needle, weave any ends or knots into the center of a puff stitch.
- Thread through a couple more puffs for security, then trim excess.
Use your needle to hide any extra thread ends in the puffs for a neat and sturdy finish.
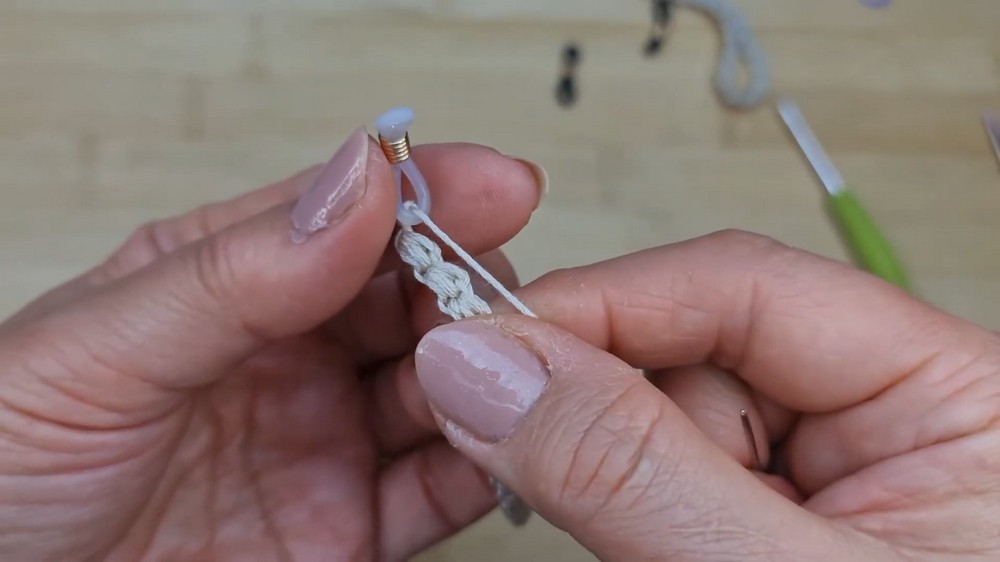
Step 6: Attach Rubber Grips
- Thread an end tail onto your needle.
- Insert the needle through your rubber grip’s loop.
- Attach to the start (or end) of your chain:
- Sew through the end puff stitch several times through the rubber grip loop and the puff for security.
- Pass needle in and out several times, making sure the join is as “puffy” as possible to match the rest.
- When secure, weave needle down into the puff and a few more puffs.
- Trim end close.
- Repeat at the other end for the second rubber grip.
Sew each rubber grip firmly to the ends of your chain, passing the needle through the grip and into the puff at least 4–5 times for a neat, secure join. Hide the remaining thread end in the next puffs.
Pattern Notes & Suggestions
- For a shorter or longer chain, simply adjust the number of puff stitches.
- Silky, cord-like yarn gives best drape, but any DK or lighter yarn will work (thicker yarn = chunkier chain).
- Choose rubber grip colors and hardware (gold, silver, black) to match your style.
- Chain is fully reversible with neat puffs on both sides.
- Great last-minute gift and ideal stash-buster project.
Stitches Used & How to Start
You’ll use only chains and a unique puff stitch for this project. Begin with a slipknot and follow the step-by-step instructions above, working in chain spaces as you go.
All Done!
Your beautiful, custom glasses chain is complete! It’s elegant, secure, lightweight, and perfect for holding your glasses or sunglasses with style. Make them in every color and never lose your glasses again.