
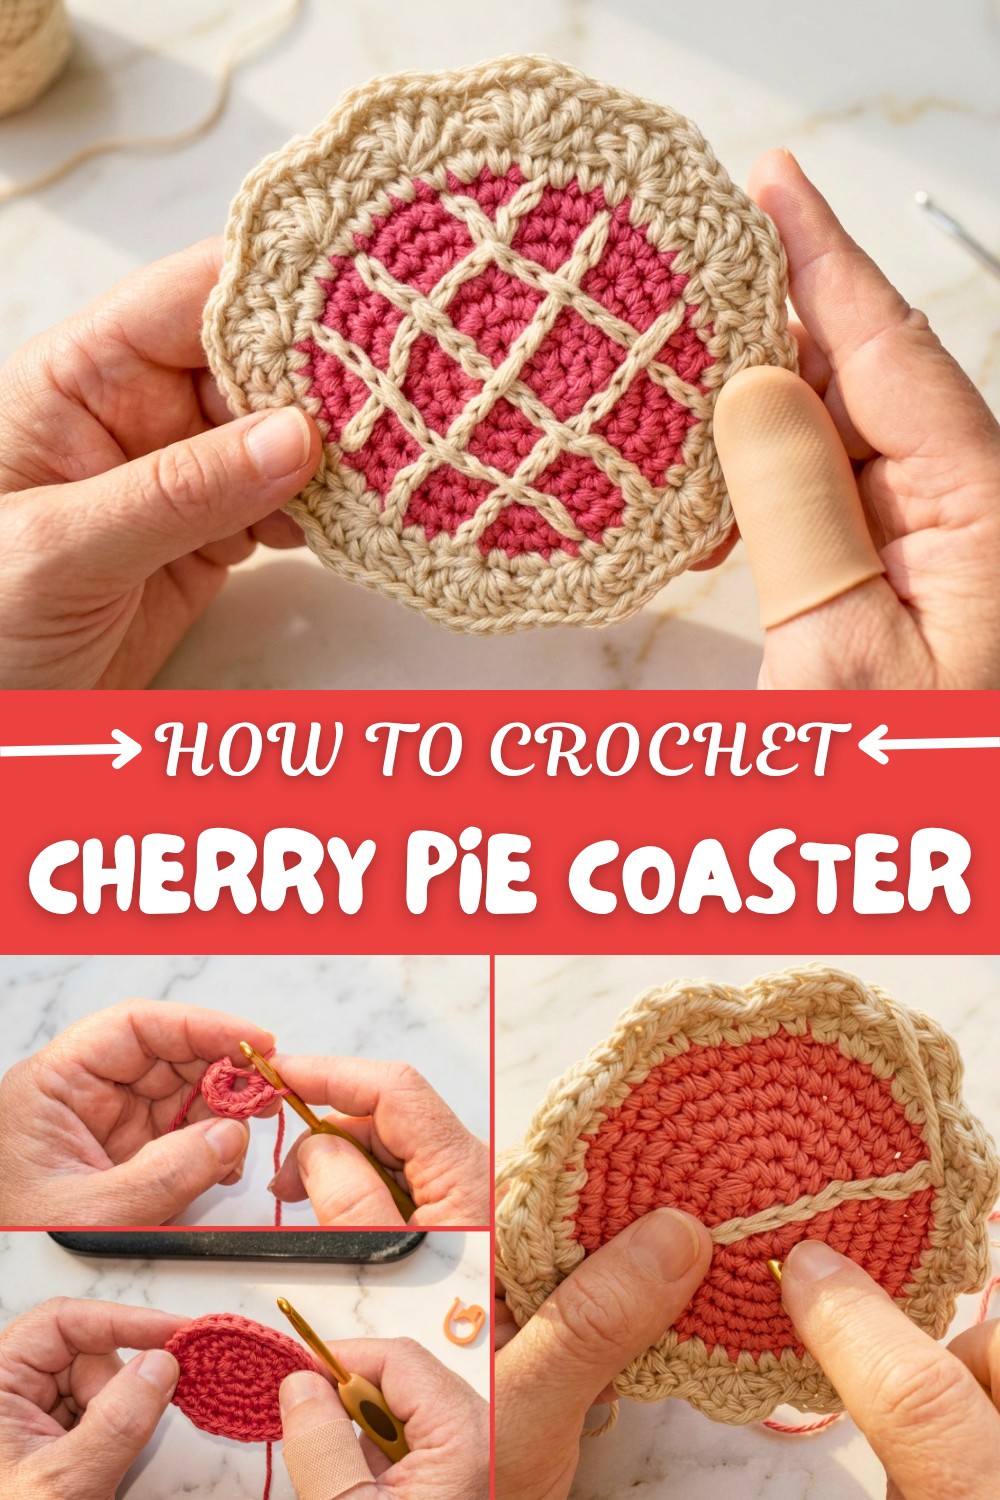
Easy Free Crochet Cherry Pie Coaster Pattern for Festive Tables
Turn your kitchen into a cozy masterpiece with this free crochet cherry pie coaster pattern a simple and charming project that's perfect for all skill levels.
This delightful crochet project brings a touch of whimsy to any kitchen or coffee table. After putting together this playful design, it is clear that the Free Cherry Pie Coaster Pattern blends both creativity and practicality for anyone who loves cozy decor. The pattern centers on cotton yarn for durability and safety, especially for kitchen items, and includes instructions to personalize the filling color for different “pie flavors”—think blueberry, peach, pumpkin, or apple. The tutorial guides crafters through a fast, two-layered process that results in a coaster with a pop of color and a realistic crust edge.
Free Crochet Cherry Pie Coaster Pattern Easy Decor
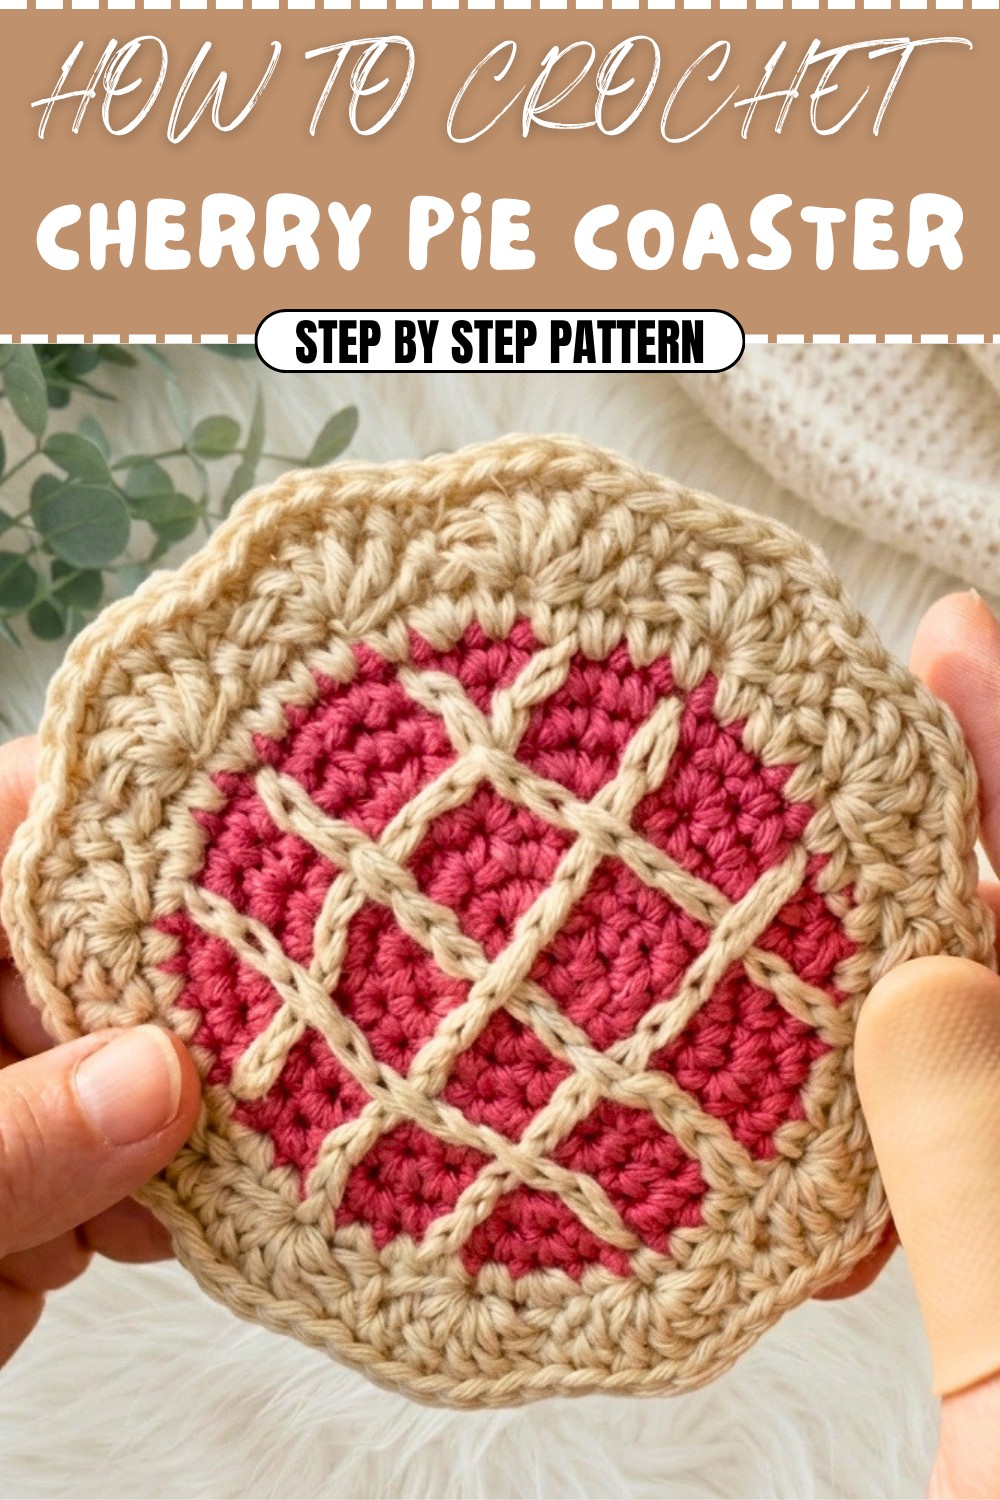
The finished cherry pie coaster stands out with its inviting round shape and realistic lattice top. A bright red “filling” sits beneath scalloped tan edges that mimic a flaky crust, complete with surface-crocheted lattice work for authenticity. Soft yet sturdy texture comes from layers joined together, creating a lightly puffed coaster that helps absorb moisture from drinks.
Colors can be varied for personalized fruit fillings, and the crust shade is up to each crocheter’s taste. Imperfections in the lattice work are actually encouraged, mimicking the appearance of a homemade pie. The project is constructed with increases, single crochet, and half double crochet stitches, along with clever surface slip stitching for the lattice detail. Basic technique is key—starting with a magic ring and working in rounds, changing colors cleanly for a seamless transition.
This coaster is more than a practical accessory; it serves as a conversation starter, a unique handmade gift, and a seasonal decorative piece for fall or Thanksgiving. Its whimsical charm fits perfectly as a collectible, or in a kitchen set for anyone who enjoys playful home decor.
With clear guidance and basic stitches, newcomers and more experienced crocheters alike can take this project on. Those who appreciate cheerful details in their home accessories, and enjoy customizing their makes, will find this pattern a charming addition to their repertoire.
Cherry Pie Coaster Crochet Pattern
The Cherry Pie Coaster is a whimsical, quick, and beginner-friendly kitchen project. The two-layer structure and playful lattice work make it both practical and a cute conversation piece. Below you’ll find a structured and detailed written pattern inspired by the tutorial. Perfect for gifting or brightening up your own home!
Before You Start
- Read through the full pattern before beginning your project.
- Have all materials at hand, especially 100% cotton yarn, for safe, heat-resistant coasters.
- Familiarize yourself with working in rounds and making a magic ring.
- If you’re color-coordinating for different "pie flavors," choose your yarns in advance.
- This project is customizable—experiment with colors for the pie filling!
Pattern Notes
- Coaster is made in two layers, joined at the last step for thickness and absorbency.
- Always use 100% cotton yarn for kitchen/dining use for heat and moisture resistance.
- Top layer uses surface crochet for a lattice crust—you don’t need perfect lines!
- Bottom layer is a plain circle in the “crust” color.
- Increases alternate staggered and standard for a round, even shape.
- Ends are left inside before joining for extra “puff” and absorbency.
- US crochet terminology is used.
How I made the Crochet Pattern?
- Worked two rounds discs (one filling, one crust color) using increasing single crochet.
- Switched color at the last slip stitch for a clean edge.
- Added scalloped border for pie crust effect.
- Used surface crochet to create playful lattice lines (no need for perfect symmetry).
- Joined two pieces with single crochet for a thick, pretty, and practical coaster.
Skill Level
Beginner
Finished Size
Approx. 4.5"–5" (11–13 cm) in diameter
Size may vary with yarn and gauge.
Materials
- Worsted weight 100% cotton yarn (e.g., Loops & Threads "Twine" [crust], "Tomato" [filling])
- 4 mm crochet hook
- Stitch marker
- Scissors
- Darning/yarn needle
Measurements / Sizing
- Each disc: ~4.5” to 5” diameter
- Lattice and border may add slight width
Gauge
- Not critical, but aim for firm, dense stitches.
- Suggested: 5 sc × 6 rows = 1” (2.5 cm)
Stitch Abbreviations
- ch – chain
- sc – single crochet
- hdc – half double crochet
- sl st – slip stitch
- inc – increase (2 sc in one stitch)
- MR – magic ring
Special Stitches
Surface Slip Stitch (for lattice):
Insert hook from front to back through desired stitch, yarn over and pull loop to the front, repeat as needed along the lattice line.
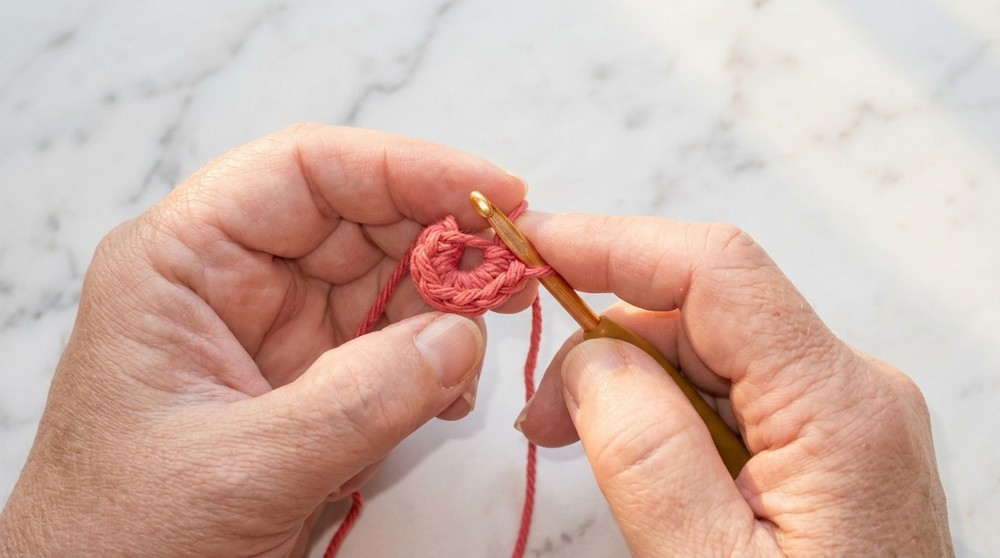
Magic Ring (MR):
Create a loop, work first round of stitches into the center, then pull tight to close the ring.
The Pattern!
You will make two circles:
Bottom (Crust) – all in crust color
Top (Filling + Crust) – begin with filling color, switch to crust color for the edge and lattice
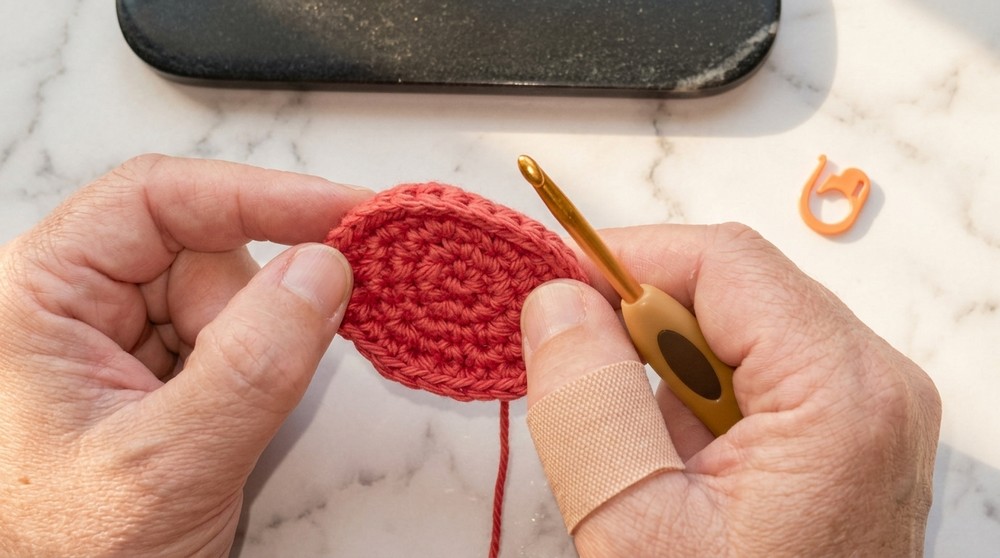
Circle Base (Make 2: one for bottom, one for top)
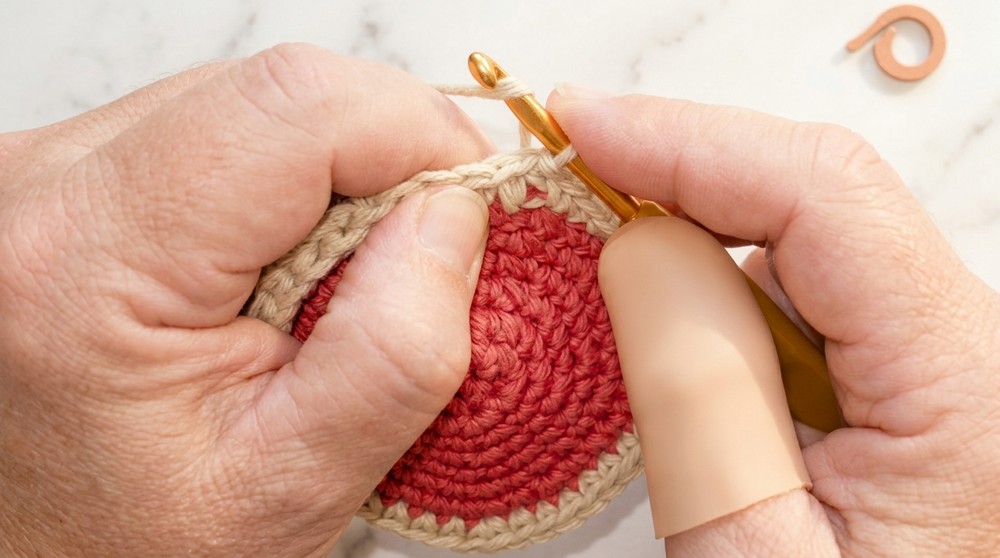
Rnd 1:
- With filling (or crust) color, MR, ch 1, 6 sc in ring. Pull tight, sl st to first sc. (6)
Rnd 2:
- Ch 1, 2 sc in each st around, sl st to first sc. (12)
Rnd 3:
- Ch 1, sc in next st, 2 sc in next st; repeat around, sl st to first sc. (18)
Rnd 4:
- Ch 1, sc in next st, 2 sc in next st, sc in next st; repeat around, sl st to first sc. (24)
Rnd 5:
- Ch 1, sc in next 3 sts, 2 sc in next st; repeat around, sl st to first sc. (30)
Rnd 6:
- Ch 1, sc in next 2 sts, 2 sc in next st, sc in next 2 sts; repeat around, sl st to first sc. (36)
Rnd 7:
- Ch 1, sc in next 5 sts, 2 sc in next st; repeat around, sl st to first sc. (42)
SWITCH TO CRUST COLOR FOR TOP PIECE (see below)
Rnd 8:
- Join crust color in next sl st (see tip below). Sc in next 3 sts, 2 sc in next st, sc in next 3 sts; repeat around, sl st to first sc. (48)
The staggered increase rounds keep your coaster perfectly round and prevent corners.
Crust (Scallop Edge, for top only)
Crust Rnd:
- Skip 1 st, 5 hdc in next st, skip 1 st, sl st in next st; repeat around. You’ll get 12 scallops.
- Fasten off, leaving a long tail for assembly.
Bottom Circle:
- Make as above but work all rows in crust color, ending after Rnd 8. No scallops needed.
Lattice Surface Crochet
- Using crust color (or another “crust” yarn), choose a point on the top piece.
- Pull loop through (front), slip stitch across to form a straight or gently wavy line.
- Repeat 3–4 times vertically and 3–4 times horizontally, weaving under and over for a “real” pie look.
- Leave tails for secure weaving later.
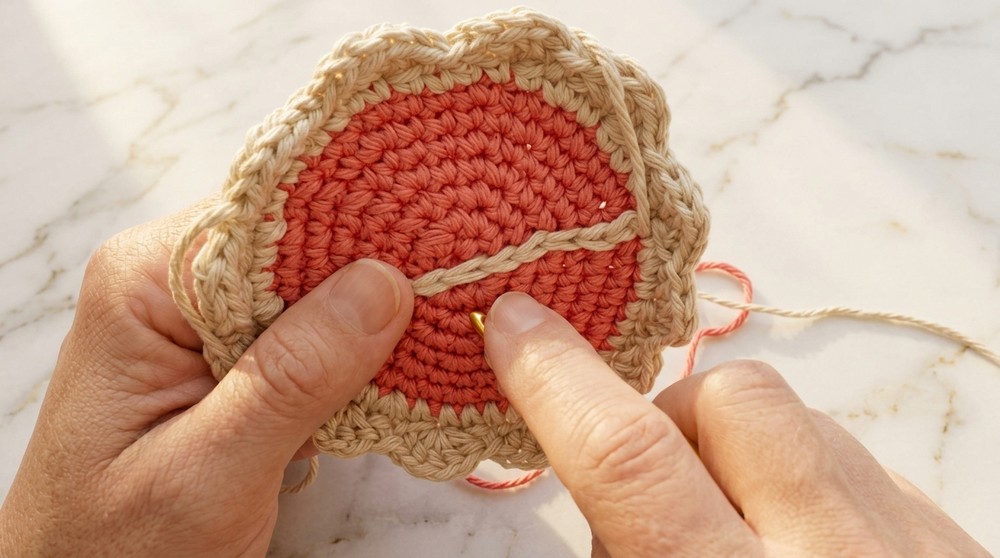
Don’t worry if your lattice isn’t perfect. Pie crust is always a bit rustic!
At the end of this section, you will have a “filling” disc with a scalloped pie crust and a woven, realistic lattice pattern, and a plain crust “back” disc.
Assembly & Finishing
- Lay the pie top and bottom WS together (lattice facing out).
- Use long crust tail to single crochet through both discs around the pie.
- Work into each stitch across both layers for a neat, seamless edge.
- At end, join to first stitch with sl st and complete a clean finish (see Special Stitches above).
- Weave in all yarn ends into the sandwich between layers (they add cushion and won’t show).
- Gently shape your coaster into a smooth circle.
- If needed, lightly steam or block for flatness.
Solution of Problem
- Problem: Coaster won’t lie flat (is wavy/buckled).
Solution: Block or lightly steam flat. Adjust tension or stitch count if needed. - Problem: Lattice work is loose.
Solution: Gently weave lattice ends in on the wrong side, and tighten slip stitches as you go. - Problem: Seam between top/bottom is visible.
Solution: Work through both loops of both discs evenly, keeping a tidy, firm tension.
What you can make by using these stitches
- Realistic fruit-pie coasters in any color ("flavor")
- Play desserts for kids or doll tea sets
- Pie slice garlands for Thanksgiving décor
- Hot pads (make larger, add filling)
- Wall art (frame a whole rainbow pie sampler!)
Now you have a delightful, soft, and practical cherry (or ANY!) pie coaster! Repeat in every "flavor" for a set, or gift to baker friends. Don’t forget: perfection isn’t the point—just like real pie, the beauty is in the handmade details. Happy Crocheting! ☺