
Cute Crochet Panda Earrings Pattern for Insta-Worthy Accessories
Wear pandas and be cheerful with a Free Crochet Cute Panda Earrings Pattern that makes your style as fun as can be.
Searching a charming and beginner-friendly project to make unique animal-themed accessories can sometimes be tricky, but these adorable panda earrings offer a delightful and simple solution. Their soft, rounded shape and classic black-and-white color pattern capture the gentle spirit of pandas perfectly. The use of single crochet stitches along with careful increases and decreases creates a smooth, three-dimensional face detailed with tiny embroidered eyes and a sweet nose. These pattern elements come together to form earrings that are not only cute but also lightweight and comfortable to wear, making them an ideal choice for adding a touch of playful elegance to any outfit.
Learn Joyful Crochet Panda Earrings Pattern for Whimsical Vibes

The panda starts with a magic ring working six single crochets, then grows through rows that increase stitch numbers to create the perfect round base. Changing colors thoughtfully helps to form the panda’s distinctive black patches. After shaping the face, the piece is gently stuffed to give it a soft, three-dimensional feel. Tiny arms are crocheted with slip stitches for a neat finish, and pink accents add a touch of sweetness to the cheeks. Finally, simple embroidery with thin thread brings the panda’s expression to life in a way that’s easy for any crafter to follow.
Other Creative Projects You Can Make with This Pattern
This panda motif is versatile beyond earrings. You can use the same pattern to create keychains, brooches, or small appliqués for hats and bags. Larger versions of the pattern work beautifully as cute decor pieces or charming ornaments for gifts. With just a few adjustments, this pattern can help you crochet a whole collection of panda-inspired accessories and decorations, perfect for fans of cuddly creatures!

Crochet Panda Earring Pattern
These Panda Earrings make delightful additions to your jewelry collection or thoughtful handmade gifts for loved ones. This small yet detailed pattern is beginner-friendly but offers opportunities (like color changes and embroidery) to level up your skills if you’re an intermediate crocheter.
Uses of This Pattern
- Fashionable Jewelry: A charming accessory for panda or animal lovers.
- Handmade Gifts: Perfect for birthdays, holidays, or special occasions.
- Customizable Project: Play with colors and details to personalize your pandas!
Skill Level & Terminology
- Skill Level: Beginner to Intermediate
- Terminology: U.S. Crochet Terms
Materials & Tools
- Yarn/Thread:
- Black thread: For the panda face and arms.
- White thread: For the panda’s body.
- You can also use Pink and yellow contrast thread.
- Tools:
- Crochet hook: 1 mm hook.
- Sewing needle or tapestry needle for embroidery and finishing.
- Scissors: For clean thread cuts.
- Earring hoops/rings and hooks for assembly.
- Pliers for attaching jewelry findings.
- Fabric glue (optional): To secure embroidery details.
Gauge
Gauge is not critical for this project due to its small size, but keeping a consistent tension will ensure an even design.
Abbreviations List
- MR: Magic Ring
- ch: Chain
- sc: Single Crochet
- dc: Double Crochet
- sl st: Slip Stitch
- inc: Increase: Work 2 single crochets into the same stitch.
- dec: Decrease: Work 2 single crochets together.
Special Stitch Instructions
- Magic Ring (MR):
- Create a loop with your thread.
- Insert the hook into the loop, yarn over, and pull up a loop.
- Chain 1 to secure the ring and start crocheting into the loop.
- Decrease (dec):
- Insert hook into the next stitch and pull up a loop (2 loops on the hook).
- Insert hook into the next stitch and pull up another loop (3 loops on the hook).
- Yarn over and pull through all 3 loops on the hook.
- Medium Stitch:
- Yarn over, insert hook into stitch, and pull up a loop (3 loops on the hook).
- Yarn over and pull through all 3 loops on the hook.
Finished Size
Each completed panda earring measures approximately 2 inches (5 cm) in height and 1.5 inches (4 cm) in width.
The Pattern Itself
Part 1: Create the Panda Head
1. Magic Ring and First Round
- Using pink thread, create a magic ring (MR).
- Chain 1 (ch), then work 6 single crochets (sc) into the ring.
- Pull the tail tightly to close the ring.
- Slip stitch (sl st) into the first single crochet to close the round.
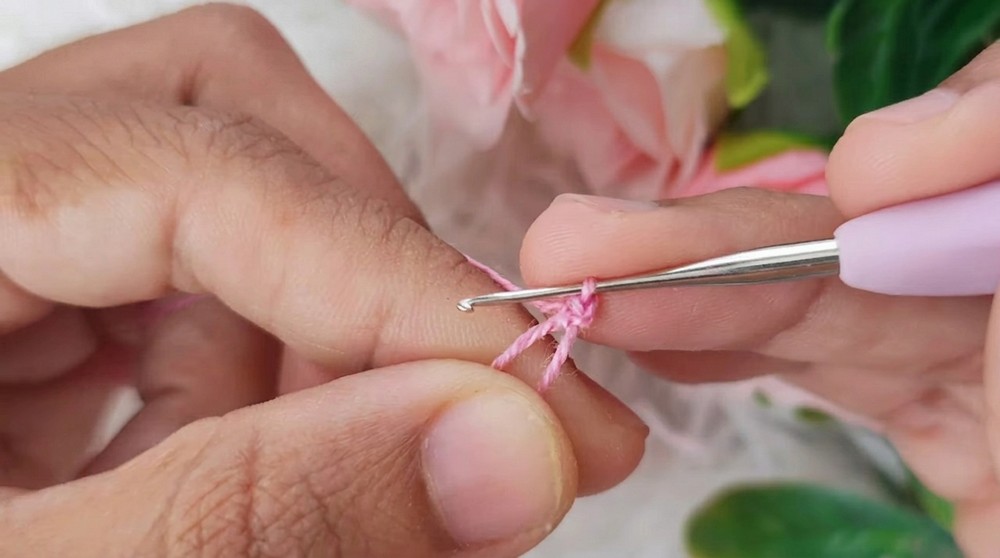
For non-pattern readers: You’ve just created the base circle of the panda head using black thread. This forms the foundation of the design.
2. Second Round (Increase):
- Chain 1 (ch).
- In the first stitch, make an increase (2 single crochets into the same stitch).
- Continue making 2 single crochets in each base stitch around, for a total of 12 stitches. Slip stitch (sl st) to close the round.
For non-pattern readers: This step widens the panda head, forming the round shape.
3. Third Round (Single + Increase):
- Chain 1 (ch).
- Work 1 sc in the first stitch, then do an increase in the next. Repeat this sequence around the circle.
- By the end, you should have 18 stitches total. Slip stitch (sl st) to close.

4. Fourth Round (Stitch by Stitch):
- Chain 1 (ch).
- Work 1 sc into each base stitch around, for a total of 18 stitches.
- Change the thread color to yellow in the last stitch of this round.
Tip: To change colors, pull the new thread through the last loop of the stitch.
For non-pattern readers: The face is complete, and now you’ll start adding layers to create more details.
Part 2: Build the Panda Body
5. Rows 5–6:
- Using the yellow thread, work 2 rows of sc: for each stitch in the base, work 1 single crochet (sc). At the end of row 6, you should have 18 stitches.

6. Rows 7–10:
- In these next four rows, using the yellow thread, continue working 1 single crochet (sc) into each stitch, maintaining 18 stitches per round.
7. Start Decreasing:
- In row 11, work 1 sc, then a decrease (dec) across the next two stitches. Repeat this pattern all the way around. You should have 12 stitches total.
For non-pattern readers: At this point, the panda head is shaped and filled with stuffing to create a three-dimensional look.
8. Final Reduction:
- Stuff the piece with filling.
- In the next row, perform 6 decreases, reducing the stitch count to close the base.
- Use a tapestry needle to weave in the remaining thread and secure.
Part 3: Arms and Cheeks
9. Add Arms (pink Thread):
- Locate the color change on the side of the head.
- Using black thread, tie a knot and crochet 1 medium stitch, removing all loops at once.
- Make another medium stitch in the same spot and finish with a slip stitch (sl st). Repeat this process on the opposite side for the second arm.
10. Add Cheeks (Pink Thread):
- At the bottom of the head, skip 2–3 rows from the base and insert the needle into a stitch.
- Chain 1 (ch), and work 2 single crochets (sc) into the same stitch.
- Close with a slip stitch (sl st).
For non-pattern readers: You’ve just added the panda’s arms and blushing cheeks, giving it a cute personality!
Part 4: Face Embroidery
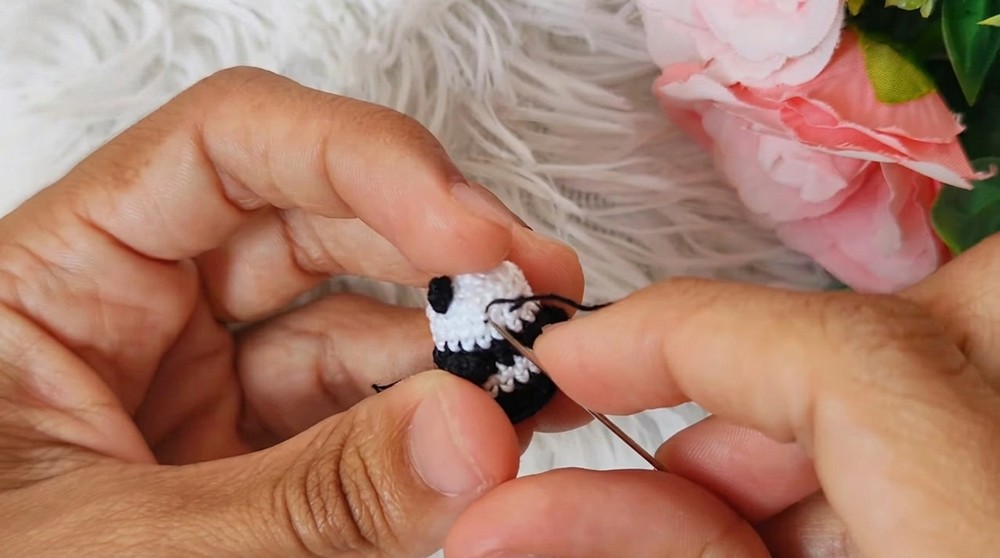
11. Embroider the Eyes and Nose:
- Using fine black thread and a sewing needle, embroider the eyes as small ovals positioned toward the top of the head.
- Create a triangle for the nose and add a horizontal line for the mouth. Customize expressions for added fun.
- Use fabric glue on the back of your embroidery for extra durability.
Part 5: Jewelry Assembly
12. Add Jewelry Findings:
- Attach a jump ring to the top of the panda’s head using pliers.
- Connect an earring hook to the jump ring and secure each ring tightly with pliers.

What You’ll Learn
- Shaping with Increases and Decreases: Learn to control the growth and reduction of stitches to create a 3D design.
- Color Changes: Easily switch colors mid-project to add intricate details.
- Fine Embroidery: Enhance your crochet designs with personalized details like shapes, emotions, and patterns.
- Jewelry Assembly: Develop skills to transform crochet into wearable art.
Difficulties & Their Solutions
Common Challenges
- Loose Magic Ring:
- If pulled too loosely, the ring may unravel.
- Solution: Tug the tail tightly and securely knot the end after completing the first row.
- Uneven Color Changes:
- Visible bumps may form at color transitions.
- Solution: Change colors in the final stitch of the round to create a smooth transition.
- Embroidery Precision:
- Embroidered details may look uneven.
- Solution: Lightly sketch the face onto the crochet base using tailor’s chalk or water-soluble pen to get even stitches.
Why You’ll Love This Pattern
This Crochet Panda Earring Pattern is an adorable, beginner-friendly design that’s also sophisticated enough for more experienced crocheters. Each step allows for creative experimentation, from the choice of thread/mouth patterns to personalized details like embroidery and embellishments. The result is, a tiny panda that’s equal parts quirky and charming.