
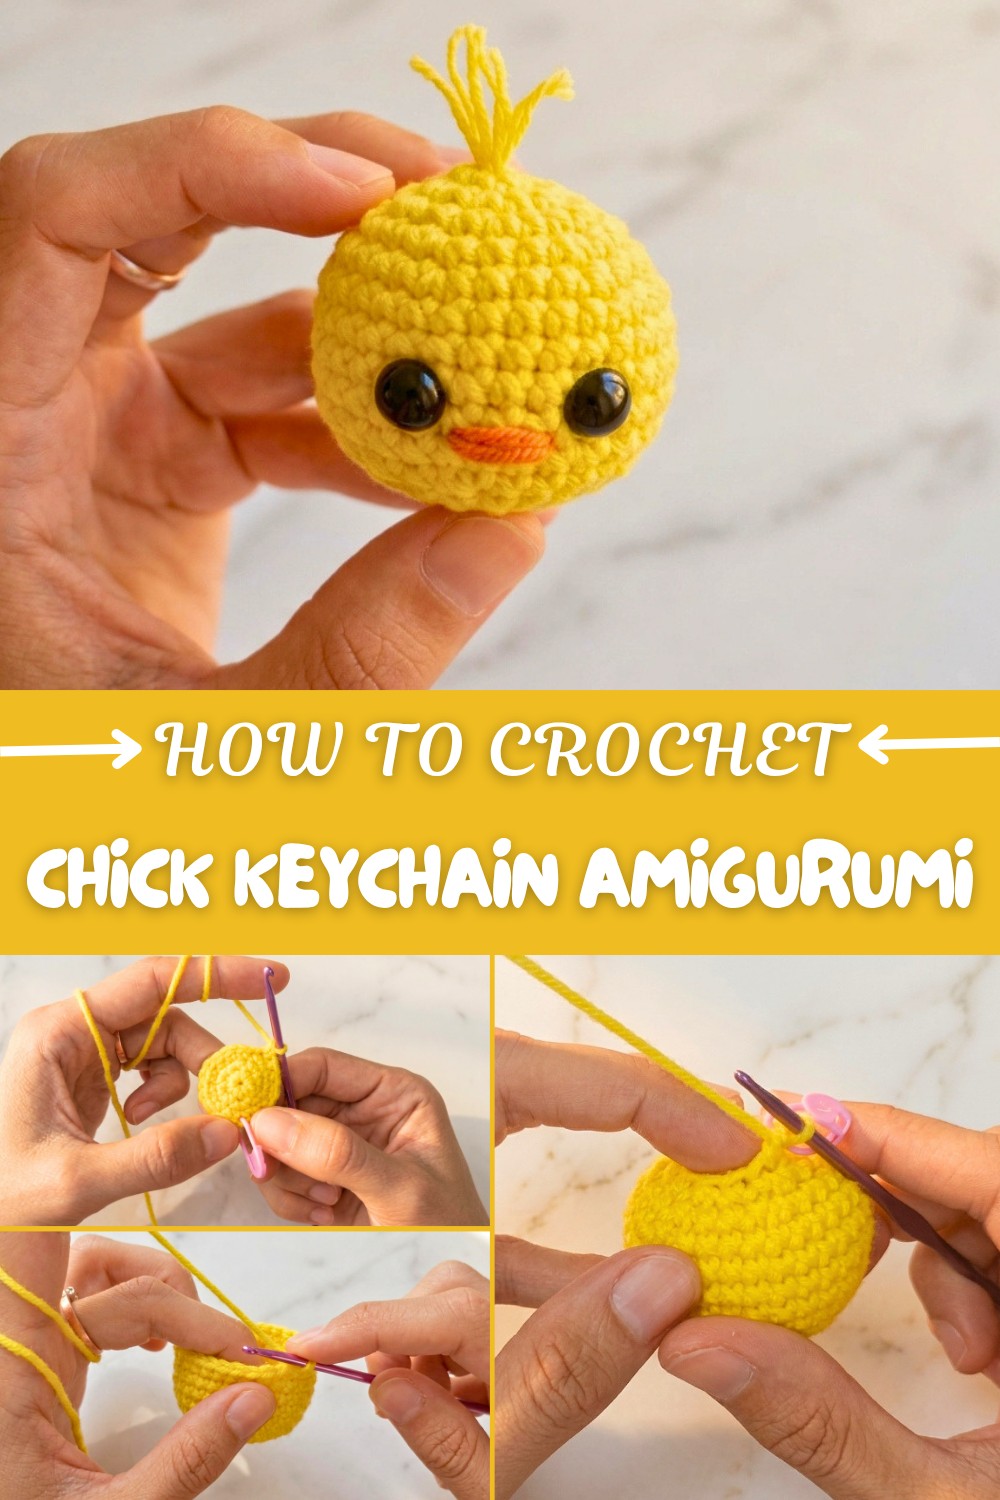
Cute Crochet Chick Keychain Amigurumi Pattern for Bag Charms
Add smiles to your backpack using the Free Crochet Chick Keychain Amigurumi Pattern for a sweet and easy chick friend.
If you’re looking to crochet something adorable and functional in less than an hour, this tiny chick amigurumi keychain pattern is just perfect! Small, colorful, and irresistibly charming, it’s one of those projects that makes you smile every step of the way. With its soft yellow body, delicate orange beak, and playful little “feathers,” this pattern is ideal for beginners, yet fun enough to keep seasoned crocheters entertained. The best part is you can easily personalize it by using different yarns or adding details like tiny bows or blush cheeks. Whether attached to a keychain, bag charm, or gifted as a handmade token, this pattern is sure to bring joy to everyone who sees it.
Crochet Chick Keychain Pattern for Adorable Spring Accessories
The pattern uses basic crochet techniques like magic rings, single crochet, and invisible decreases, so it’s beginner-friendly and helps build confidence in working with amigurumi. It’s also ideal for experimenting with small details, such as attaching safety eyes, forming tiny hair tufts, and shaping the charming round body. You’ll love how quick it is to bring this little buddy to life.
What Else Can You Crochet Using This Pattern:
- Tiny animal charms like frogs, birds, or bees.
- Easter decorations such as mini egg toppers or basket stuffers.
- Bag charms in various themes, like a unicorn or panda!
- Kid-friendly toys you can customize with colors and accessories.
- Festive ornaments for seasonal displays or gifts.
Reasons to Try This Pattern
- Super quick and beginner-friendly.
- Perfect for keychains, gifts, or small collectibles.
- Great for learning and practicing amigurumi techniques.
- Easy to personalize with your choice of yarns and details.
Add a little handmade charm to your life with this lovable chick keychain—quick to make, easy to love, and perfect for gifting!
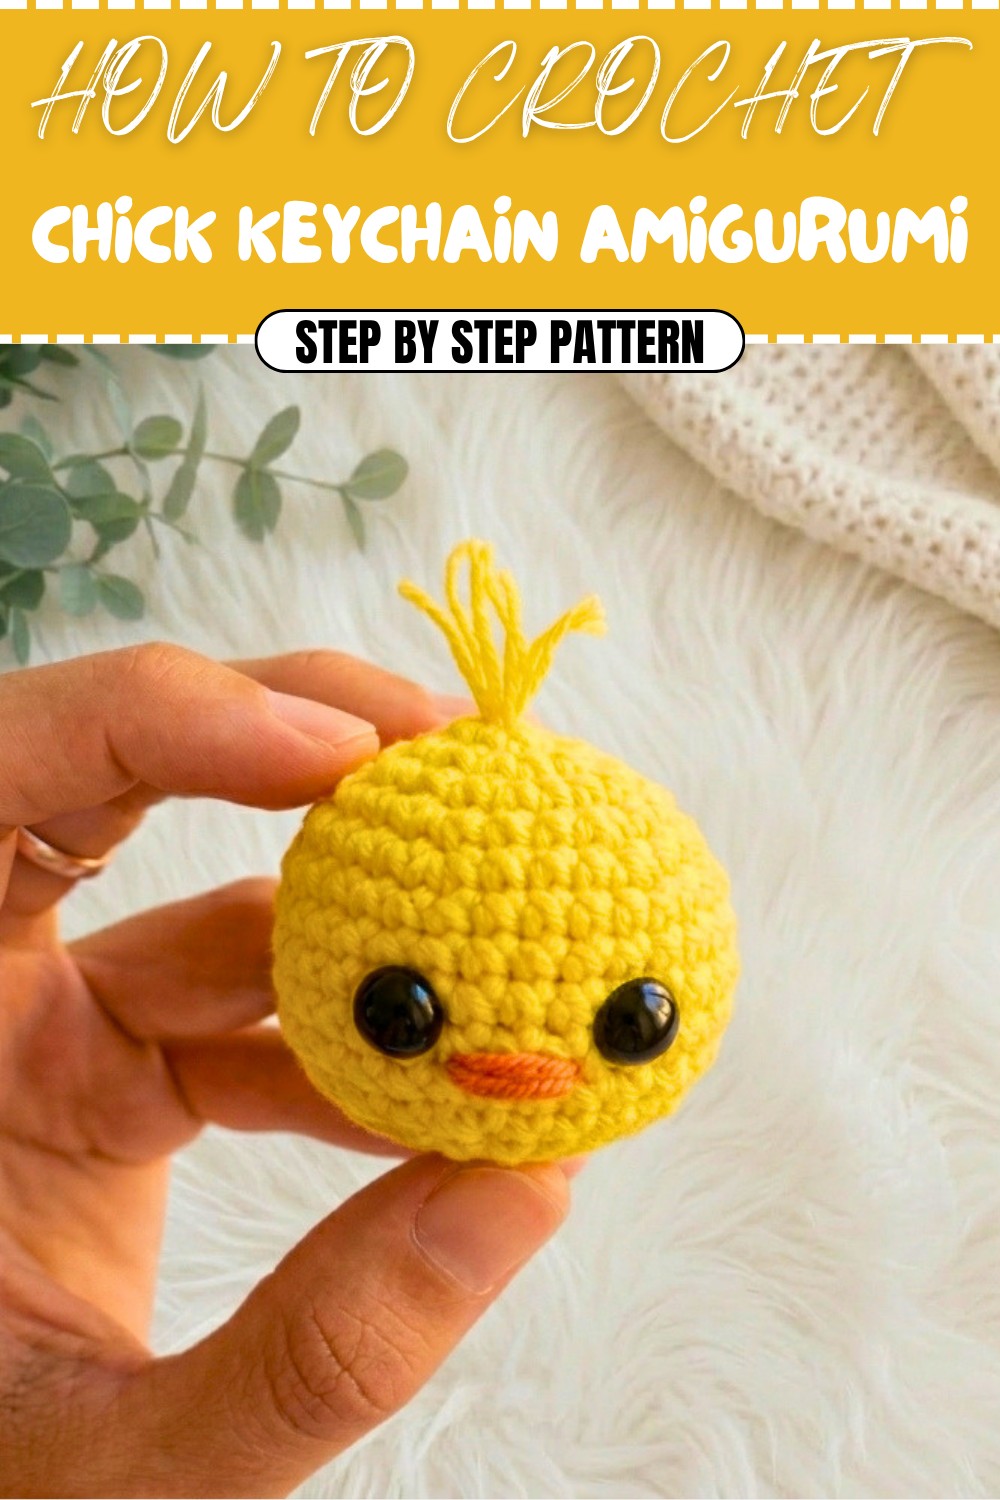
Crochet Tiny Chick Keychain Pattern
Crochet this adorable Tiny Chick Keychain in less than 30 minutes! It’s a beginner-friendly project designed to help you create a small and cute crochet chick that can be used as a keychain or decorative charm. Follow the detailed step-by-step instructions provided to complete this project effortlessly.
This Tiny Chick Keychain is a quick and easy project suitable for beginners. It uses basic stitches such as magic circle, single crochet, increases, and decreases, making it a fun and skill-building pattern. The result is an adorable chick that fits perfectly in your palm. Add a keychain attachment for a perfect gift or personal accessory.
Skill Level & Terminology
- Skill Level: Beginner
- Crochet Terminology: US terms (adjust to UK terms if needed)
This pattern breaks down every stitch and technique, making it beginner-friendly.
Materials & Tools
- Yarn:
- Yellow yarn (Milk cotton or any other soft yarn)
- Small piece of orange yarn or thread (for the beak)
- Hook: 3 mm crochet hook
- Safety Eyes: 8 mm
- Stuffing: Poly-Fil or any soft stuffing material
- Other Tools:
- Scissors
- Stitch marker
- Needle
Gauge
Gauge is not critical for this pattern, as it is a decorative piece. However, tighter stitches are preferred to avoid stuffing from showing through.
Abbreviations
Here are the abbreviations you'll encounter in the pattern:
- MR: Magic Ring
- SC: Single Crochet
- Inc: Increase (2 SC in one stitch)
- Dec: Decrease (Invisible decrease detailed below)
- Sl St: Slip Stitch
Special Stitch Instructions
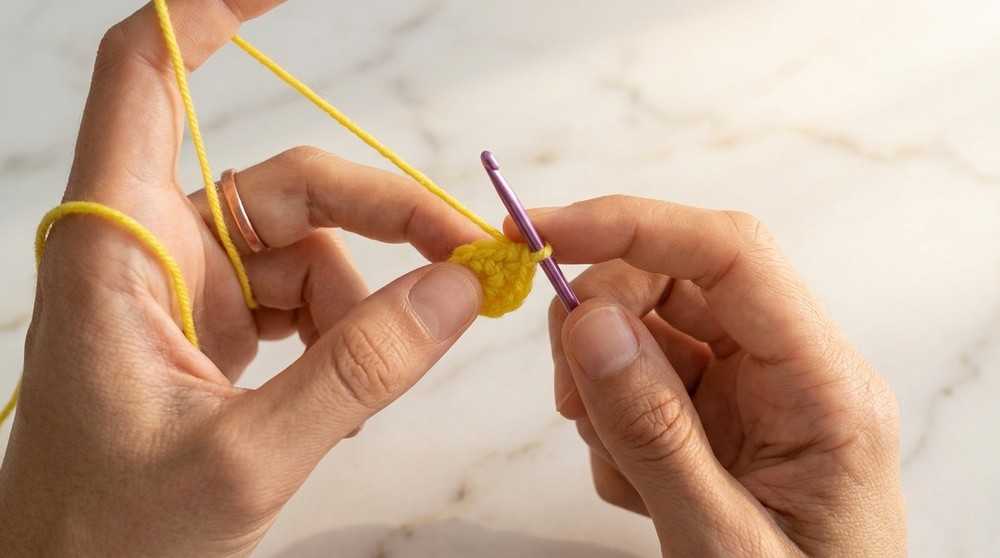
- Magic Ring (MR): Start with a loop where stitches are crocheted into the center, allowing the ring to be pulled tight.
- Invisible Decrease: Insert the hook into the front loop of the next two stitches, yarn over, pull through the loops, yarn over again, and pull through the last two loops. This creates a cleaner appearance than a regular decrease.
Finished Size
- Approximately 2 inches (5 cm) tall, depending on the yarn and hook used.
Pattern Instructions
Body of the Chick
Rounds 1–5: Increasing Size
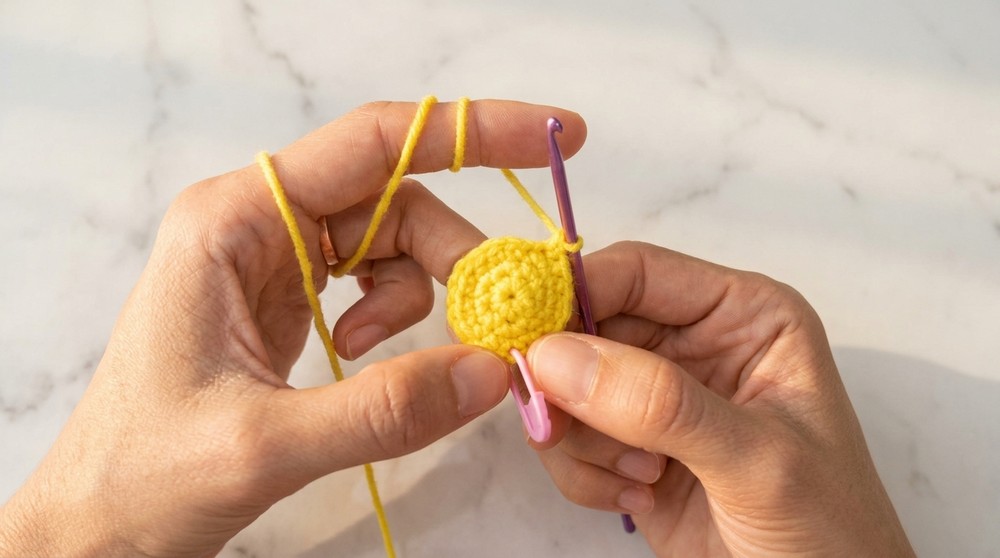
- Round 1: Start with a MR. Work 6 SC into the ring. Pull the ring tight. Place a stitch marker in the last stitch of the round (6 SC total).
- Tip: The magic ring forms the top of the chick. Ensure stitches are even and snug.
- Round 2: Work Inc in each stitch around (12 SC total).
- Round 3: (1 SC, Inc) repeat 6x around (18 SC total).
- Round 4: (2 SC, Inc) repeat 6x around (24 SC total).
- Round 5: (3 SC, Inc) repeat 6x around (30 SC total).
At this point, the body of the chick will start to form a flat circular base.
Rounds 6–10: Maintaining Size
- Rounds 6–10: Work 1 SC in each stitch around (30 SC total for each row).
- Take a break: After these rounds, the chick's body will resemble a short cylinder. You’ll add the safety eyes next.
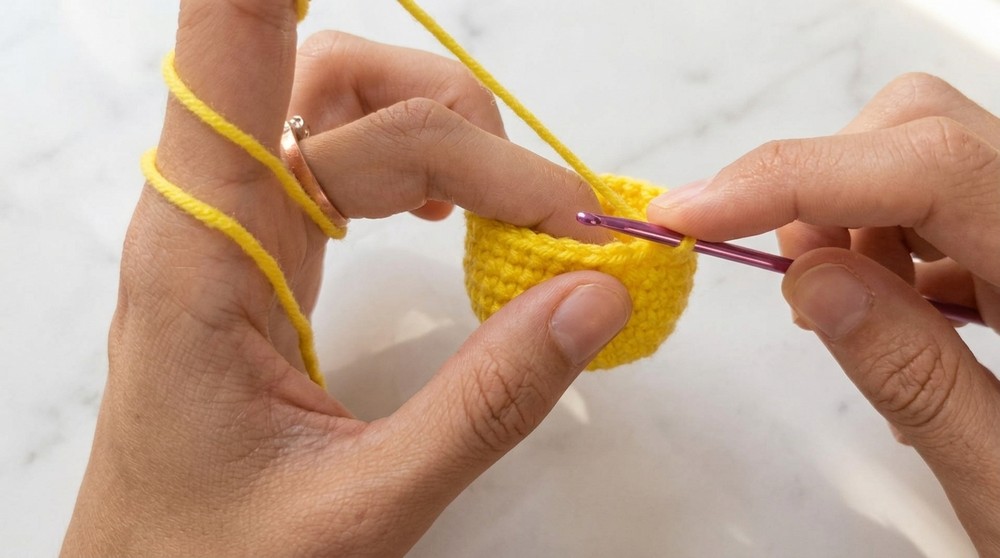
Inserting the Safety Eyes
- Insert the safety eyes between Rounds 8 and 9, spacing them 4 stitches apart.
- Tip: Use your fingers to feel the holes and count the stitches for accurate placement. Once placed, secure with washers.
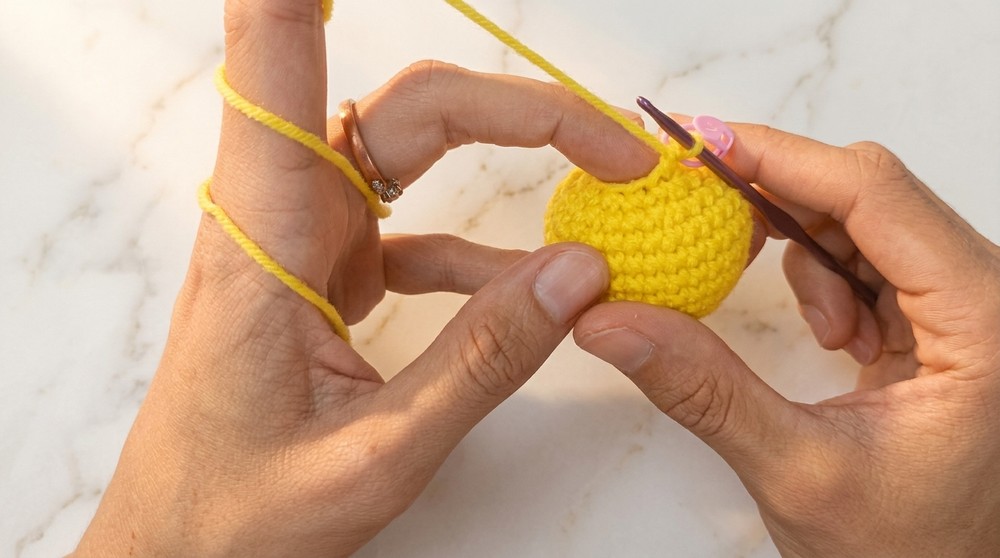
Shaping the Chick Body
Rounds 11–13: Decreasing the Size
- Round 11: (3 SC, Dec) repeat 6x around (24 SC total).
- Round 12: (2 SC, Dec) repeat 6x around (18 SC total). Stuff the chick with poly-fil as you crochet this round. Don’t overstuff to avoid distortion.
- Round 13: (1 SC, Dec) repeat 6x around (12 SC total). Continue stuffing the body to maintain a round form.
Round 14: Closing the Body
- Round 14: Work 6 Dec around. Slip stitch into the next stitch to close off. Fasten off, leaving a long tail for sewing.
Using the long tail, thread a needle and weave through the front loops of the remaining stitches around the opening. Pull tight to close the hole securely.
Attaching the Hair
- Attach one strand of yellow yarn to the top of the chick's head. Secure with a knot inside and trim to the desired height.
- (Optional) Separate the strands of the yarn to create a fluffier "hair" effect.
Embroidering the Beak
- Use orange yarn or thread to create a small triangular beak.
- Insert the needle from the bottom of the chick and go through the middle of the face (between the eyes).
- Embroider a small triangle by stitching between three nearby points.
- Secure the thread with a knot inside the body, and hide the ends by pulling them through the stuffing.

Finishing
- Hide all remaining loose ends by tucking them inside the body of the chick.
- Attach a keychain to the top if desired.
Pattern Summary for Beginners
This crochet chick is made by starting at the top and working in rounds to create the body. After creating the magic ring and expanding through the first few rows, you maintain the size for the middle portion and then decrease to close off. Safety eyes and stuffing are added during the process, and the details like a beak and hair make the chick come to life.
What You'll Learn from this Pattern
- Foundational stitches: Single crochet, increases, and invisible decreases.
- Crocheting amigurumi shapes using 3D crochet techniques.
- Adding decorative elements like safety eyes, hair details, and a beak.
- Understanding how to work with magic rings for seamless circular crochet.
Conclusion
Congratulations—you’ve completed your Tiny Chick Keychain! This adorable companion can be used as a cute keychain or displayed on your desk, and it’s an excellent quick gift idea. Customize it by using different yarn colors or embellishments.
Enjoy your new crochet skill, and feel free to find the possibilities with more creative amigurumi projects.