
Crochet Santa Claus Hat Pattern for Winter Wonderland Fun
Add jolly vibes using the Free Crochet Santa Claus Hat Pattern to whip up a cozy, classic hat perfect for parties, photos, or gifting.
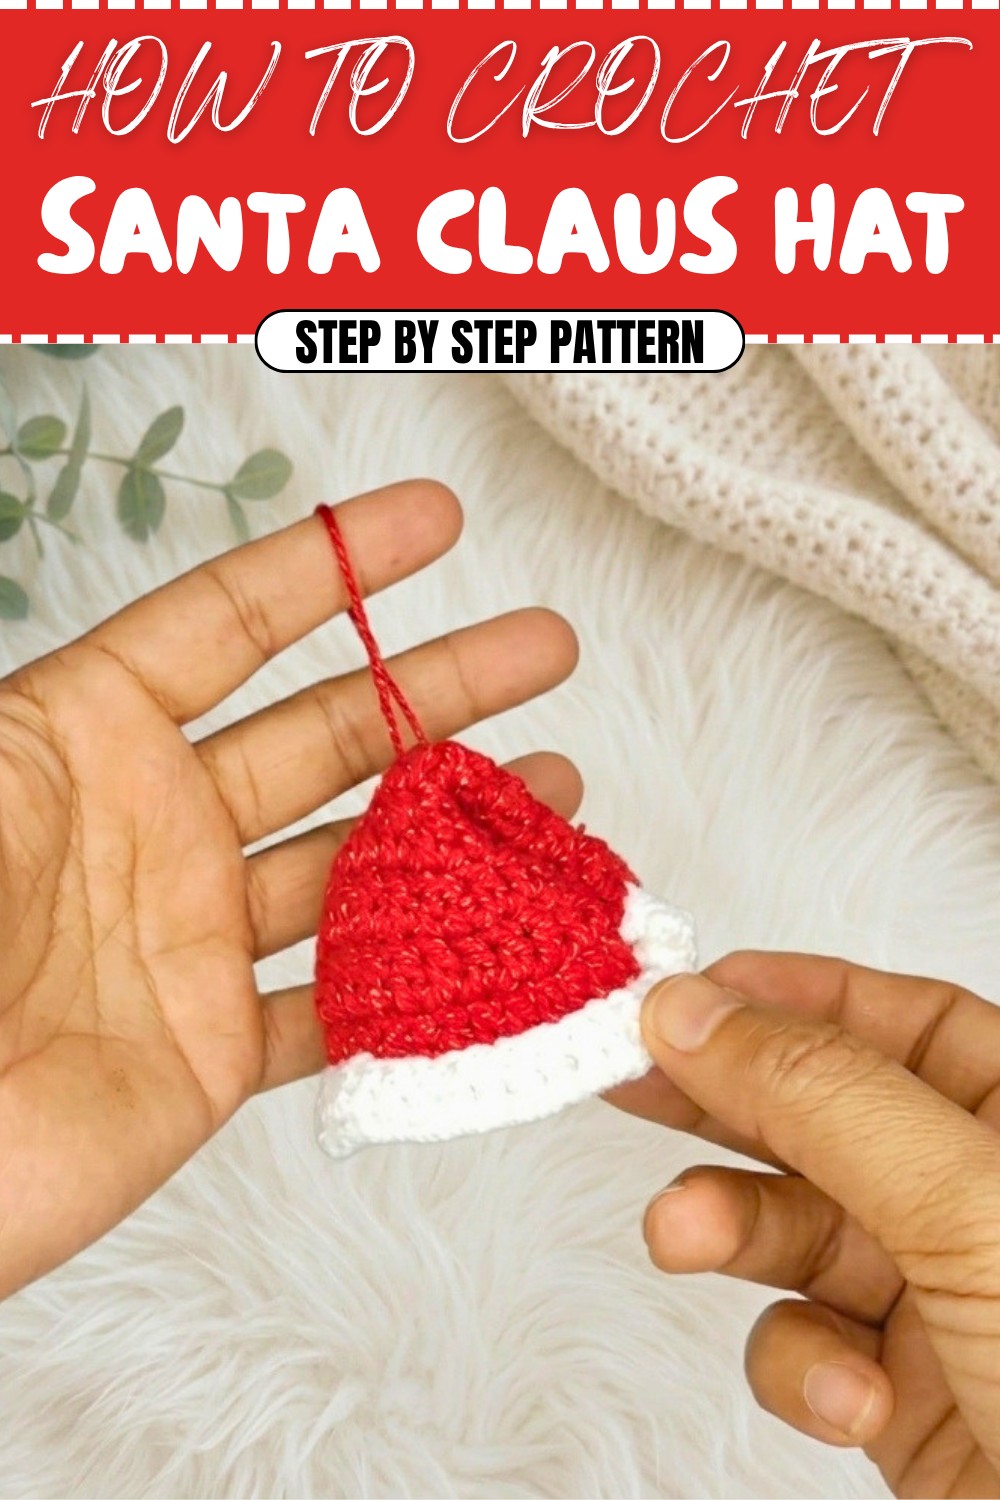
The festive season just isn’t complete without a classic Santa Claus hat, and now, you can crochet one to add a touch of holiday charm to your décor or gift-giving! Perfectly adorable and versatile, this crochet Santa hat pattern showcases the iconic red and white combination, complete with a fluffy pom-pom on top. Its playful style makes it ideal for decorating amigurumi toys, dolls, or even your Christmas dinner table setup. Designed using simple stitches and techniques, this pattern is approachable for beginners while still enjoyable for experienced crocheters looking for a quick and festive project.
Free Crochet Santa Hat Pattern for Christmas Family Joy
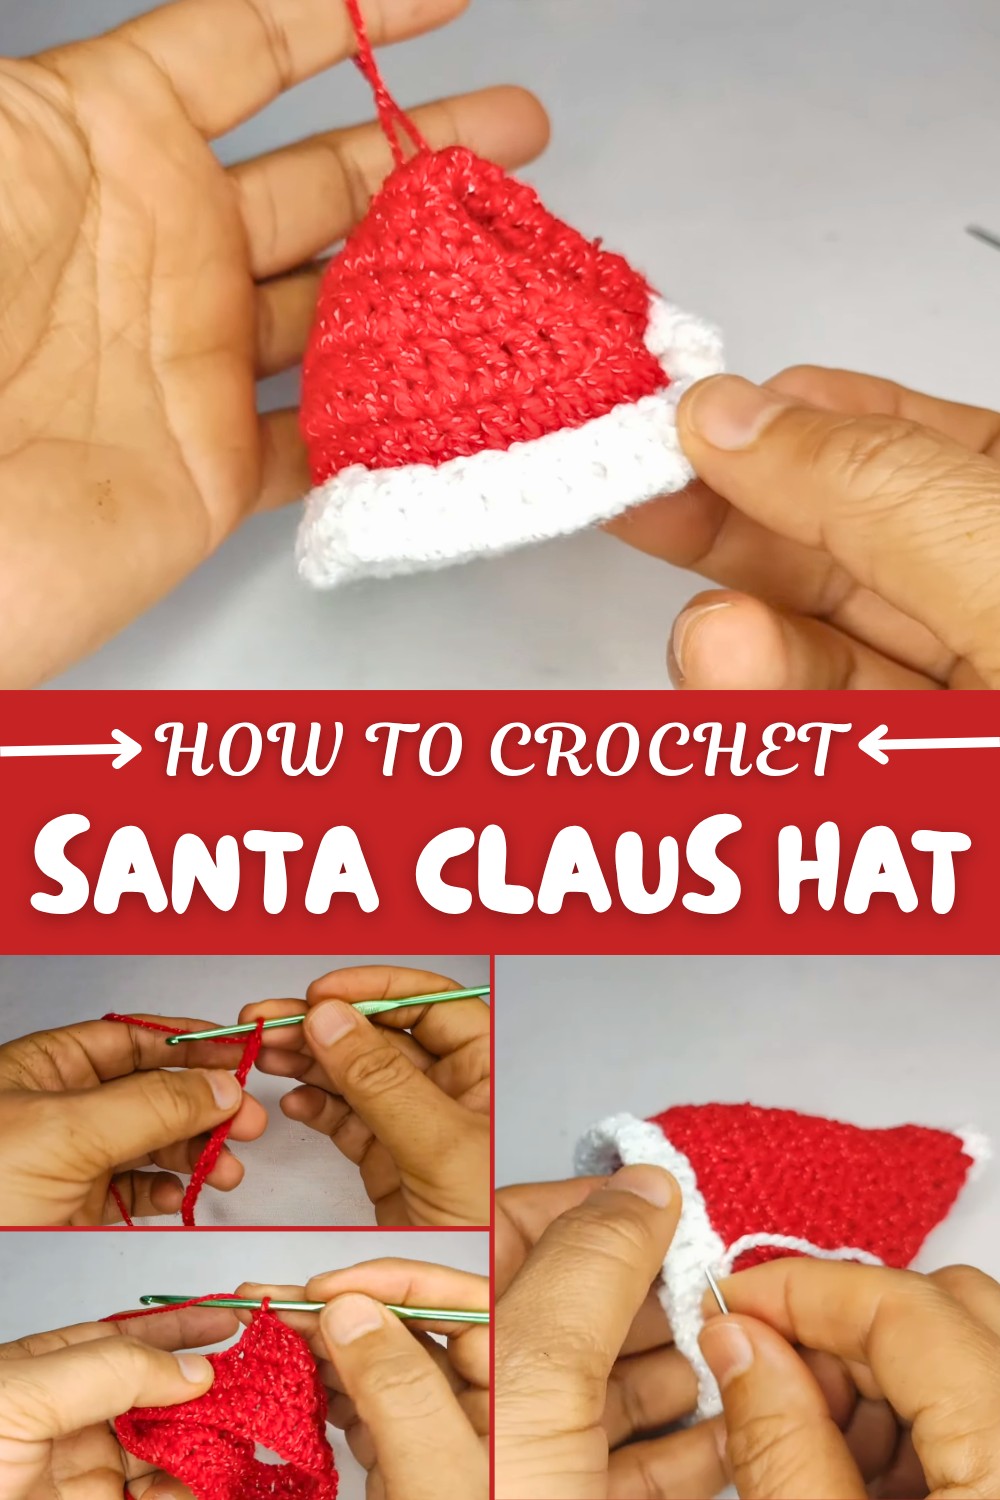
The main structure of the hat is built with chains, double crochet stitches, and decreases, ensuring it tapers beautifully into a neat, pointed peak. You’ll also create a snug fit at the base with a folded brim in white yarn, keeping things clean and classic. The pom-pom is made using a magic ring and more double crochet stitches, bringing just the right amount of fluffiness to complete the look. Whether you want to hang this mini hat as an ornament, display it as a centerpiece, or dress up your favorite handmade toys, its charm will leave everyone smiling.
What Else You Can Create Using This Pattern
This pattern's versatility allows for fun experimentation and creativity:
- Mini hanging ornaments for Christmas trees or garlands.
- Hats for dolls, bears, or other amigurumi toys for added personality.
- Keychains featuring a tiny festive hat.
- Seasonal table settings, such as napkin holders or chair decorations.
Why You’ll Love This Pattern
- Simple yet festive, making it beginner-friendly.
- Quick to complete, perfect for last-minute gifts.
- Customizable with colors or additional accents for unique creations!
Bring your holiday spirit to life with this adorable Santa hat pattern that’s sure to spread joy,
Crochet Santa Hat: Step-by-Step Pattern
This crochet Santa hat pattern is perfect for adding a festive touch to your amigurumi projects or using as a charming Christmas decoration. Follow this step-by-step pattern to create a detailed and beautifully shaped Santa hat with a pom-pom and white trim.
Skill Level & Terminology:
- Skill Level: Beginner to Intermediate
- Terminology: This pattern uses US crochet terms.
Materials & Tools:
- Yarn:
- Red yarn (2 mm thick) – For the main body of the hat.
- White yarn – For the trim and pom-pom.
- Hook Size: 3.0 mm crochet hook.
- Other Tools:
- Scissors.
- Tapestry needle (for sewing and weaving in ends).
Gauge:
Gauge is not crucial for this project. However, to achieve the correct size, ensure your stitches are firm yet flexible. Adjust your hook size if needed to maintain consistent tension.
Abbreviations List:
- ch – Chain
- st – Stitch
- sl st – Slip Stitch
- sc – Single Crochet
- dc – Double Crochet
- tog – Together (for decreases)
- magic ring – Adjustable loop to start crochet in the round
Special Stitch Instructions:
- Magic Ring: Create a small loop, yarn over, and pull through to secure. Work the first round of stitches into this loop. Pull the tail to tighten the ring.
- Decrease (dc2tog):
- Yarn over, insert the hook into the first stitch, yarn over and pull up a loop, yarn over and pull through two loops.
- Yarn over, insert the hook into the next stitch, yarn over and pull up a loop, yarn over and pull through two loops.
- Yarn over and pull through all three loops on the hook.
Finished Size:
The finished Santa hat should be approximately 5–6 inches tall, depending on your tension and the yarn used.
The Crochet Pattern:
Follow these step-by-step detailed instructions to create your Santa hat.
Hat Body (Red Yarn):
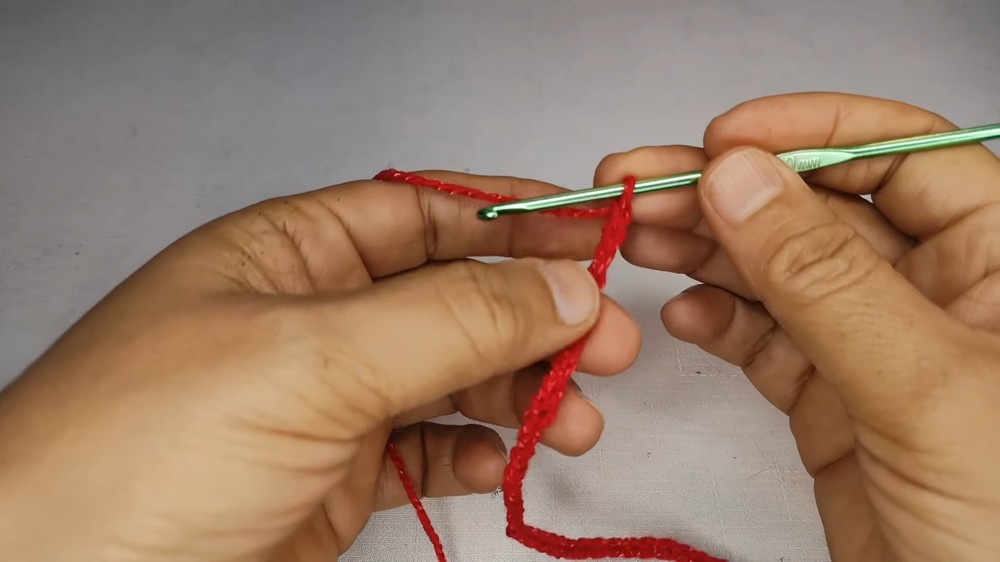
- Foundation Chain and First Round:
- Ch 36.
- Ensure the chain isn’t twisted, then join the ends with a sl st to form a ring.
- Ch 2 (counts as the first dc), and work 1 dc in each ch all the way around.
- Close the round with a sl st to the second ch of the starting chain.
(This forms the base of the Santa hat.)
- Rounds 2–2:
- Ch 2, then make 1 dc in each dc from the previous round.
- Close rounds with a sl st.
(The first two rounds ensure the hat’s base is even and firm.)
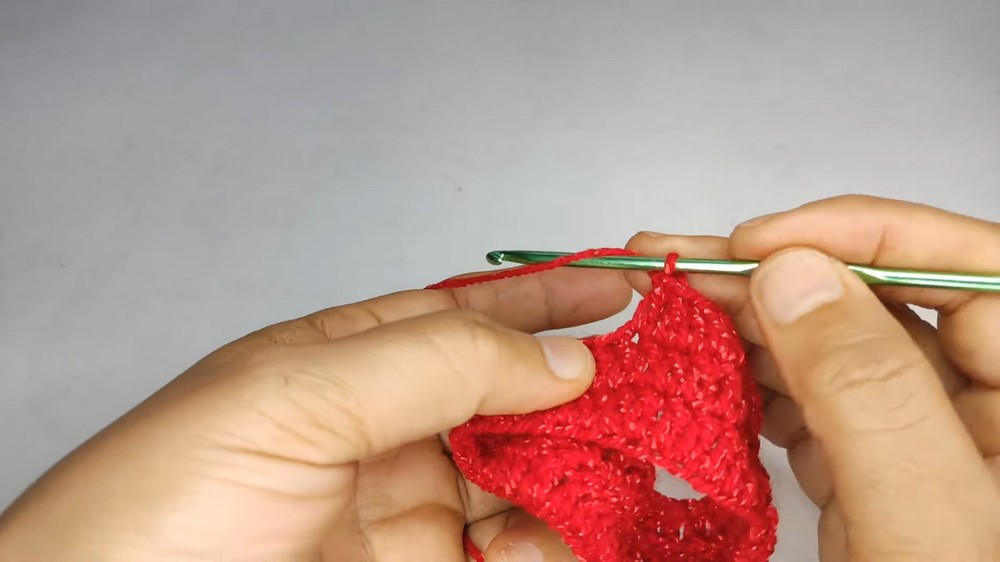
- Rounds 3 and onwards (with decreases):
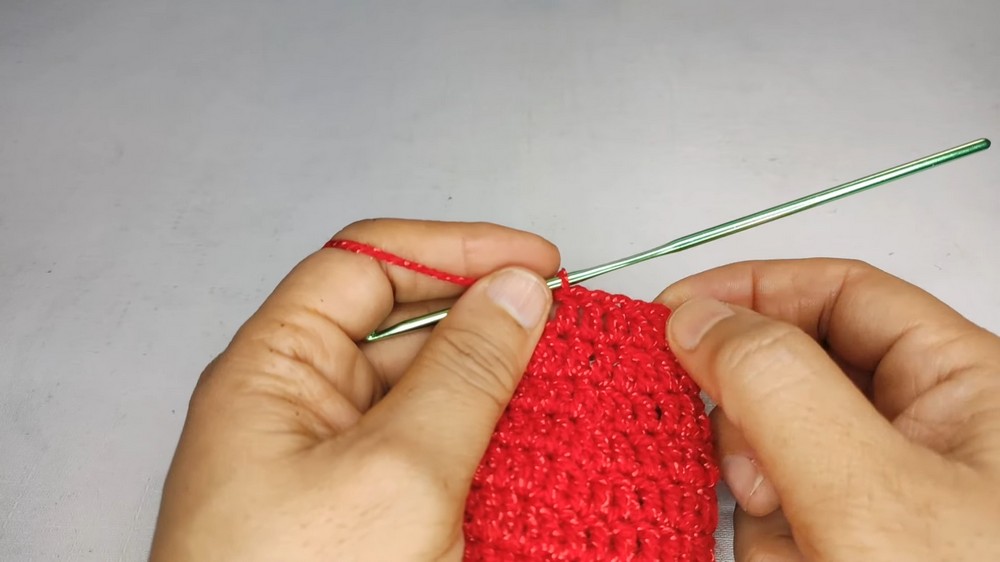
Starting with Round 3, decrease at regular intervals to create the conical shape of the Santa hat.- Round 3: Ch 2, work 5 dc, then dc2tog (decrease). Repeat: 5 dc, 1 dc2tog all the way around. Close with a sl st..
- Round 4: Ch 2, work 4 dc, then dc2tog. Repeat: 4 dc, 1 dc2tog.
- Round 5: Ch 2, work 3 dc, then dc2tog. Repeat: 3 dc, 1 dc2tog.
- Round 6: Ch 2, work 2 dc, then dc2tog. Repeat: 2 dc, 1 dc2tog.
(For those unfamiliar with decreases, this step gradually narrows the hat’s circumference to achieve the signature tapered cone shape.)
- Final Rounds:
As the hat narrows toward the tip:- Rounds 7–8: Continue the pattern, working fewer single dc stitches between each decrease until you only have 1 dc between decreases.
- Round 9: Work 1 dc in each st all around without decreasing to form the narrow top of the hat.
- Fasten off, leaving a long tail of yarn.
Use the tapestry needle to close the small hole at the top of the hat by weaving the thread through the final round. Pull tight and secure with a knot.
Pom-pom (White Yarn):
- Start with a Magic Ring:
- Create a magic ring.
- Ch 3 (counts as the first dc), then work 7 more dc into the ring – for a total of 8 dc.
- Pull the tail to close the ring tightly and join the round with a sl st.
(The pom-pom is quick to make and adds a playful touch to the hat.)
- Fasten Off:
- Leave a long tail of yarn for sewing. Use the tail to securely attach the pom-pom to the tip of the hat.
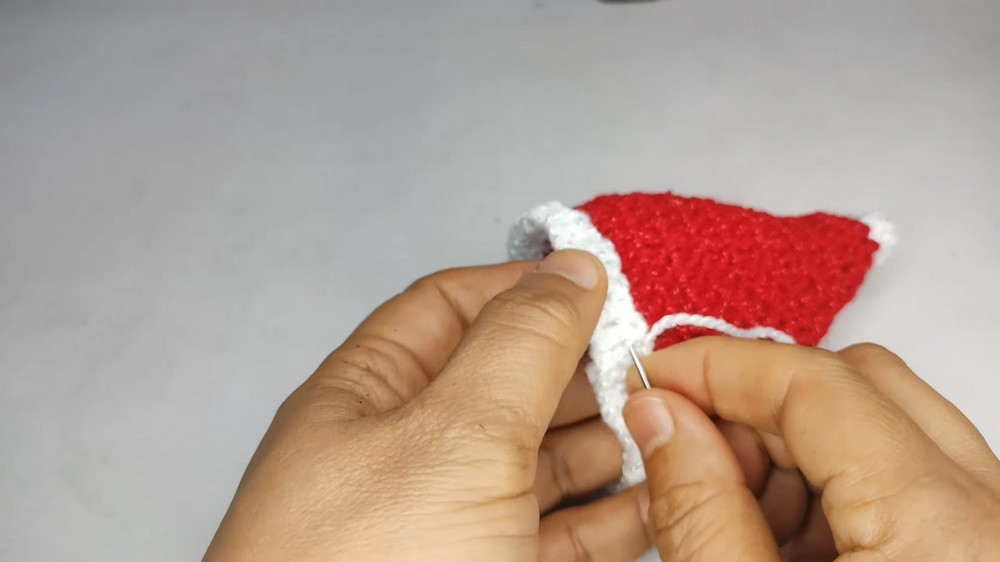
White Trim:
- Attaching White Yarn to the Base:
- Insert the hook into the unused front loops of the foundation chain at the bottom of the hat.
- Attach the white yarn and work 1 sc in each st around.
- Second Round of Trim:
- Ch 1, and continue working 1 sc in each st around. Close the round with a sl st, fasten off, and weave in the ends.
(This creates the fluffy white trim characteristic of Santa hats.)
- Optional Folding:
- Fold the white trim up for a neat, decorative finish. Secure the fold by sewing lightly with white thread and a tapestry needle.
Hanging Loop (Optional):
- With red yarn, form a chain 10–12 stitches long.
- Attach the loop to the back of the hat’s base by sewing it securely.
- Hide the ends and trim excess yarn.(This step allows you to hang the Santa hat as an ornament or decoration.)
Assembly & Finishing:
- After attaching the pom-pom, check that all stitches are secure, and trim any stray threads.
- Adjust the hat for shape and alignment.
- If using this pattern for amigurumi decoration, sew the hat gently onto the figures.
About the Santa Hat Pattern:
This Santa hat pattern uses double crochet, single crochet, and decreases to achieve its classic conical shape. Beginners can practice working in the round and learn gradual decreases, while intermediate crocheters will enjoy this as a fun and festive project.
What You’ll Learn
By working through this pattern, you will:
- Practice creating chains and slip stitches to form a sturdy foundation.
- Master decreases for shaping round objects and tapering ends smoothly.
- Learn how to make a magic ring and complete projects in rounds.
- Refine your skills in adding finishing touches, like attaching the brim and pom-pom.
These techniques provide a solid foundation for a variety of future projects.