
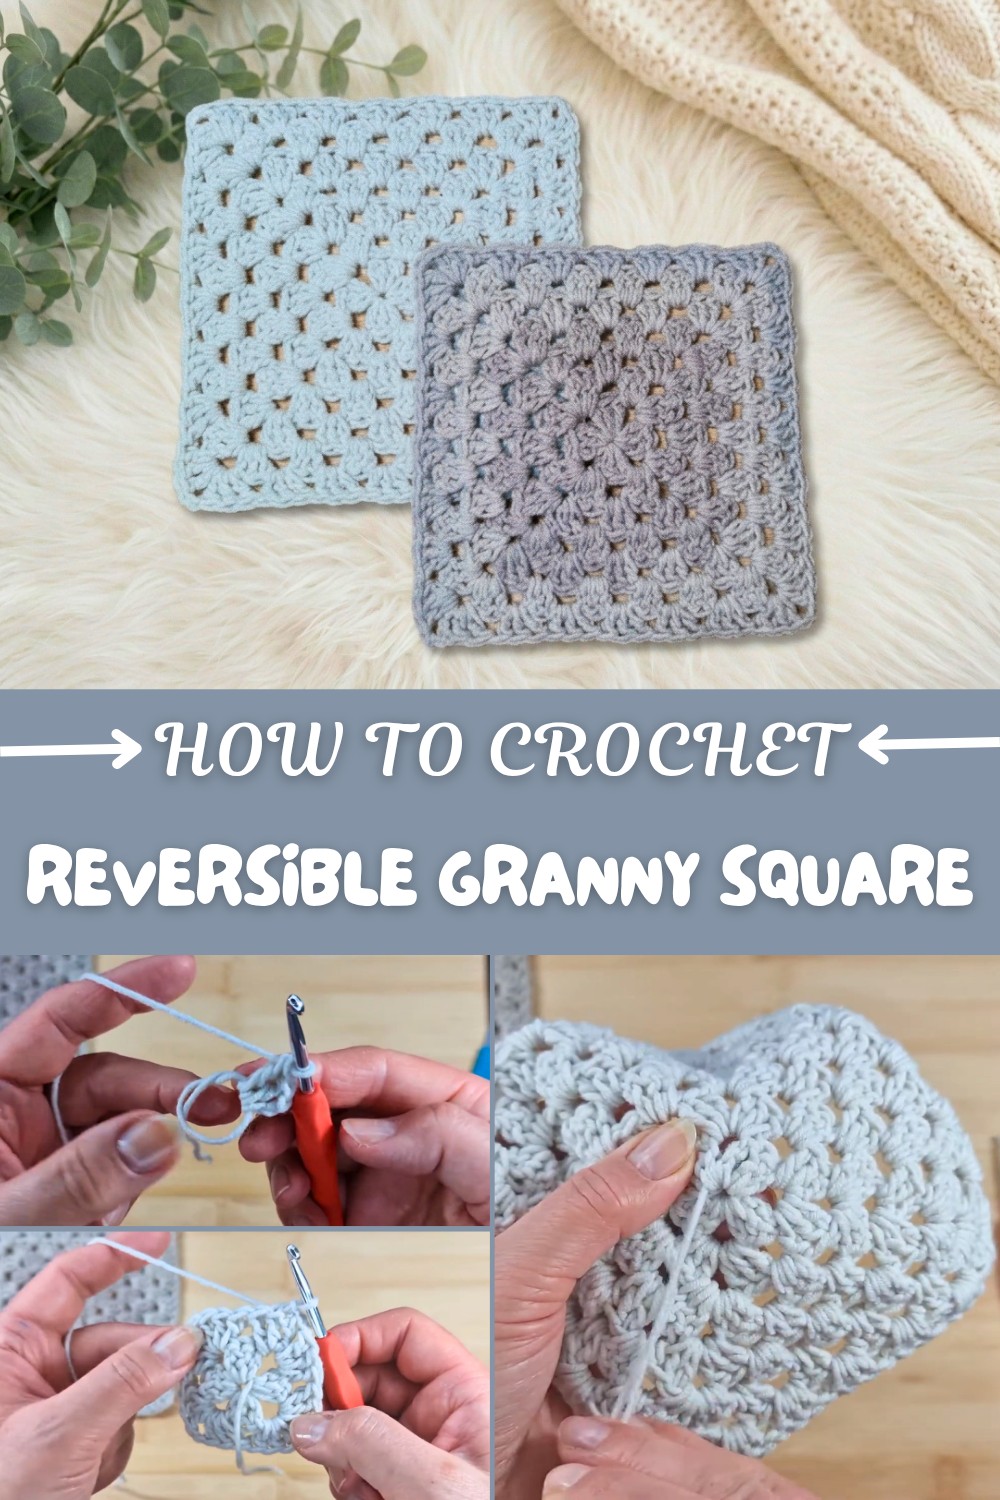
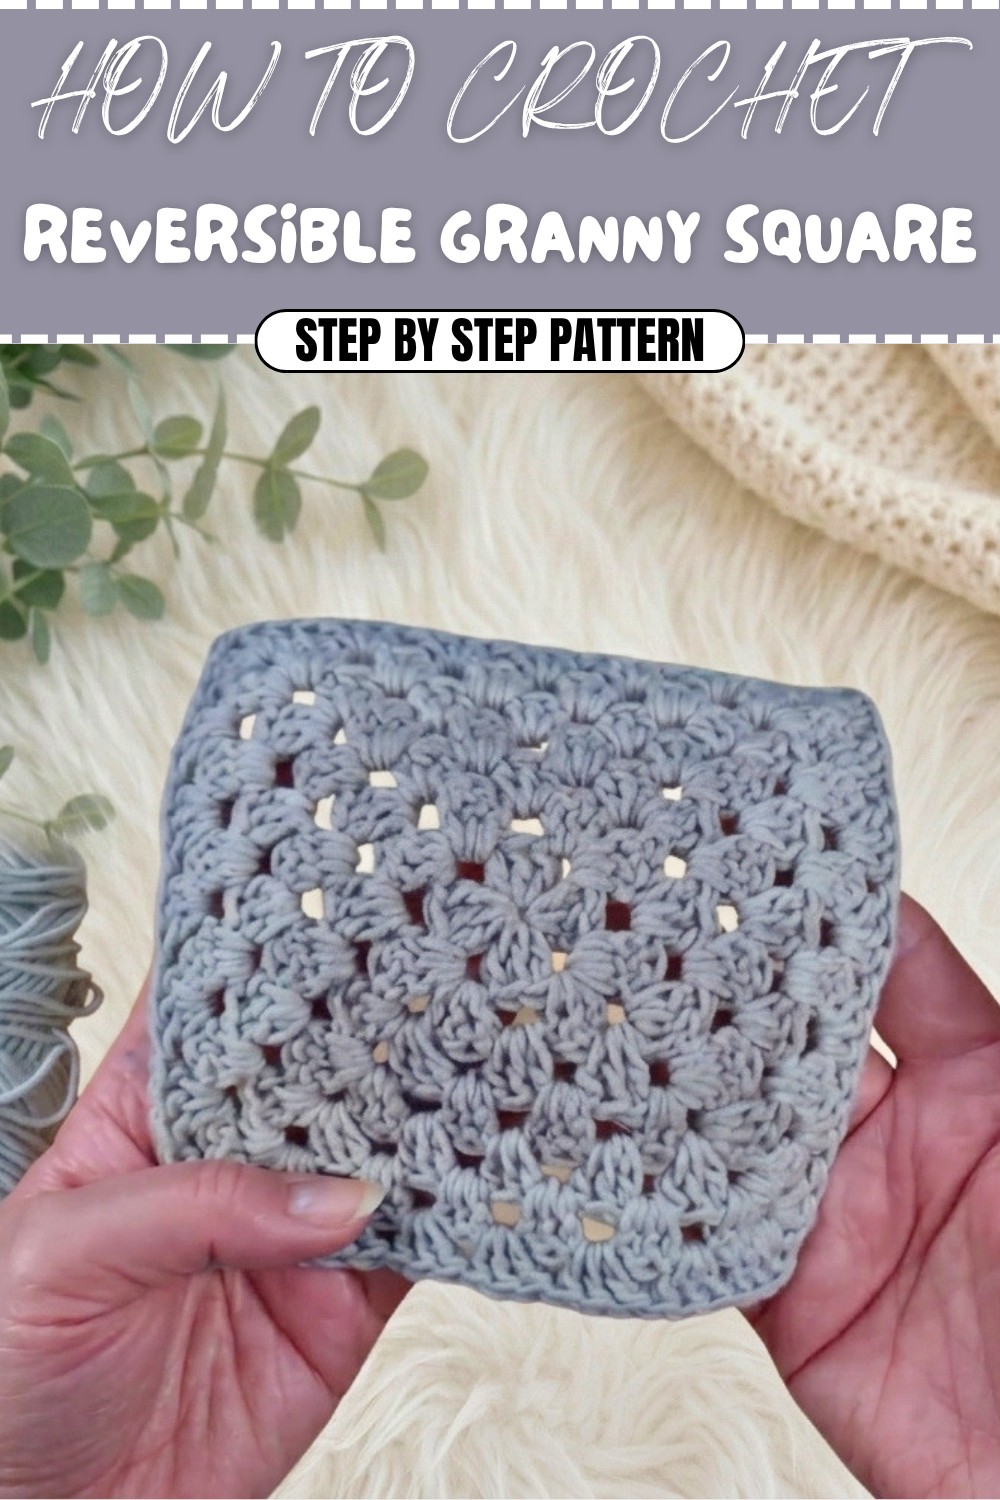
Crochet Reversible Granny Square Free Pattern for Scrap Yarn Projects
Have you ever wondered how one simple crochet square could look beautiful on both sides and open up so many creative possibilities? The free crochet Reversible Granny Square pattern does exactly that, giving you a fun and practical project to enjoy. Classic granny squares are much loved for their vintage charm and lively color choices, and this version brings a delightful twist, both sides look equally polished and neat. That means no matter how your finished item gets used or displayed, it always looks its best. The pattern’s easy rounds and endless color combinations let you add your special touch, making each square unique and personal.
Free Crochet Reversible Granny Square Pattern for Stunning Pieces
What makes this pattern so useful is just how many things you can do with reversible granny squares. They are ideal for projects you want to use every day, like throws, pillows, baby blankets, and coasters, since both sides will be seen and felt. If you’re tidying up your yarn stash, mixing old favorites together, or just looking for a relaxing project, these squares make it simple to turn bits and pieces into something beautiful.
The neat, double-sided finish also means you can confidently gift your creations or show them off in your home without worrying about the back side. You can jump into this pattern with just some basic crochet skills—there’s no need for anything advanced or complicated. It’s a great way to get more comfortable with changing colors and keeping your stitches looking even on both sides.
Along the way, you’ll pick up tips for making tight joins, working in the round, and building squares that are easy to sew together. Once you know the technique, you can use these reversible granny squares for so many crochet projects, from bags and scarves to placemats and bunting. This pattern truly becomes a foundation for all sorts of creative ideas and cozy makes.
Reversible Granny Square – Crochet Pattern
This pattern will teach you to create a perfectly square, reversible granny square. Both sides are identical—no wrong side! Ideal for blankets, cushion covers, bags, or any project where neat edges and double-sided perfection are desired. By working alternate rounds from each face and minimizing chains, you’ll achieve a robust, tight-knit, and truly square motif every time.
Skill Level & Terminology
- Skill Level: Confident Beginner
- Terminology: US Crochet Terms
Materials & Tools
- Yarn: Any weight or fiber; cotton, acrylic, variegated or solid colors all work well. Sample uses DK cotton.
- Hook: 4.5mm (or size recommended for yarn weight)
- Scissors: For trimming yarn ends
- Darning Needle: To weave in ends
Gauge
Gauge is not crucial unless assembling multiples for a blanket; after 7 rounds, a square should lay flat and measure approx. 6–7” (15–18cm) across with DK and 4.5mm hook.
Abbreviations
| Abbreviation | Meaning |
|---|---|
| ch | chain |
| dc | double crochet |
| sl st | slip stitch |
| st(s) | stitch(es) |
| sp | space |
| yo | yarn over |
Special Stitch Instructions
Magic Ring:
Wrap yarn around two fingers, cross yarn, insert hook, pull up loop, ch 1 to secure.
Double Crochet (dc):
Yo, insert hook, yo, pull up loop, yo, pull through 2 loops, yo, pull through remaining 2 loops.
Slip Stitch (sl st):
Insert hook, pull up loop and pull through loop on hook.
Finished Size
Each motif, after 7 rounds in DK weight, measures approx. 6–7” (15–18cm); size varies with yarn and hook.
Pattern Structure
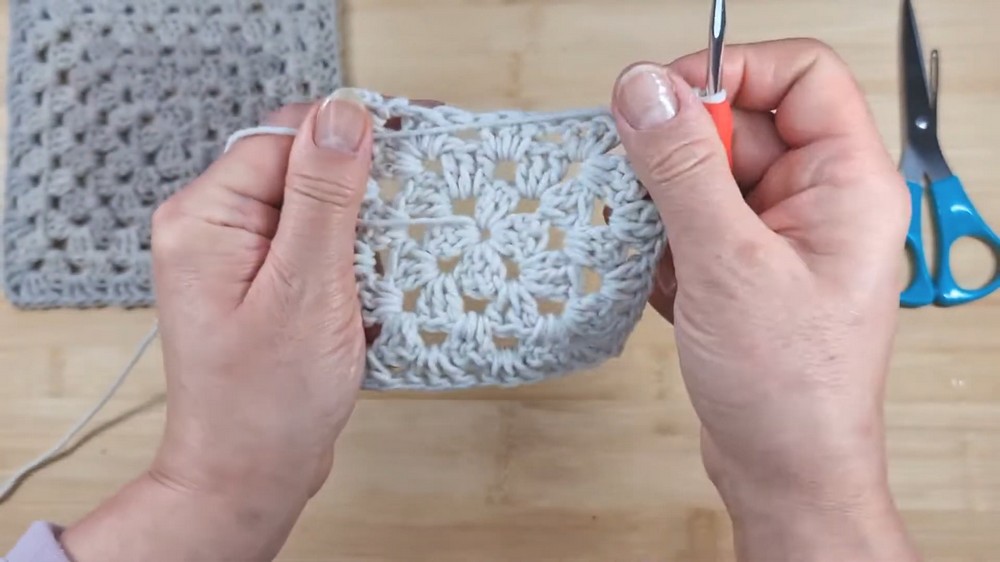
You’ll begin from the center with a magic ring, then alternate working each round from the front and back of the square. Only corners have chain spaces; there are no chains between clusters, achieving the signature "tight" look and perfect shape.
The Pattern
1. Center & Round 1
- Magic ring.
- Ch 3 (counts as 1 dc).
- Work 2 dc into ring (first cluster).
- Ch 2 (corner).
- (3 dc into ring, ch 2) x 3 (three more corners).
- Sl st into top of ch-3 to close.
- Tighten ring gently.
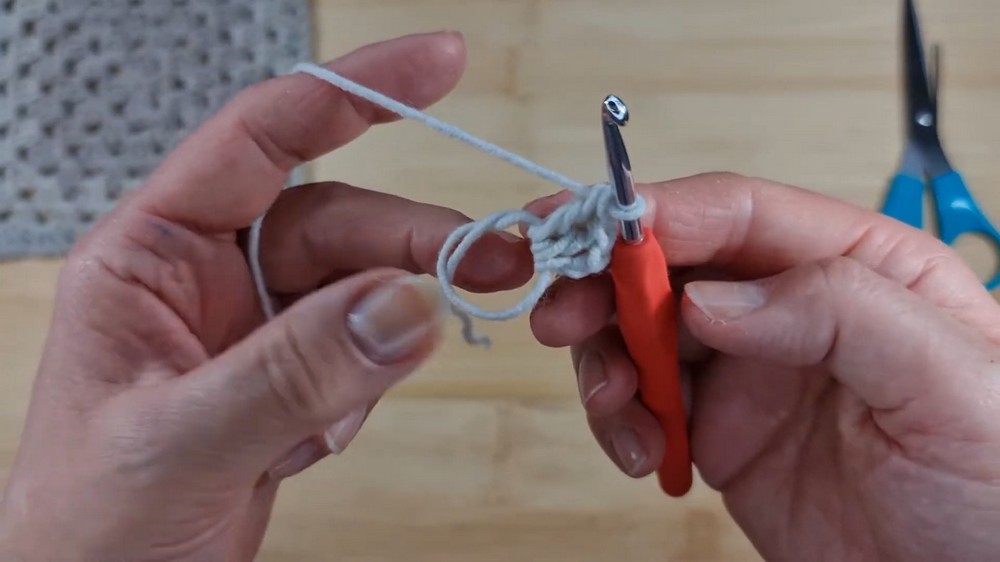
Begin your granny square by crocheting four clusters, separated by chain-2 spaces, into the magic ring. Slip stitch and pull the ring tight.
2. Round 2 (Reverse Side; Alternate Rounds)
- Turn your work to the opposite side.
- Slip stitch into the nearest corner sp.
- Ch 3 (counts as 1 dc), 2 dc in same corner sp.
- Skip any chains between clusters; go straight to next corner sp.
- (3 dc in corner sp, ch 2, 3 dc in same sp) at each corner.
- After last corner, sl st into top of starting ch-3.
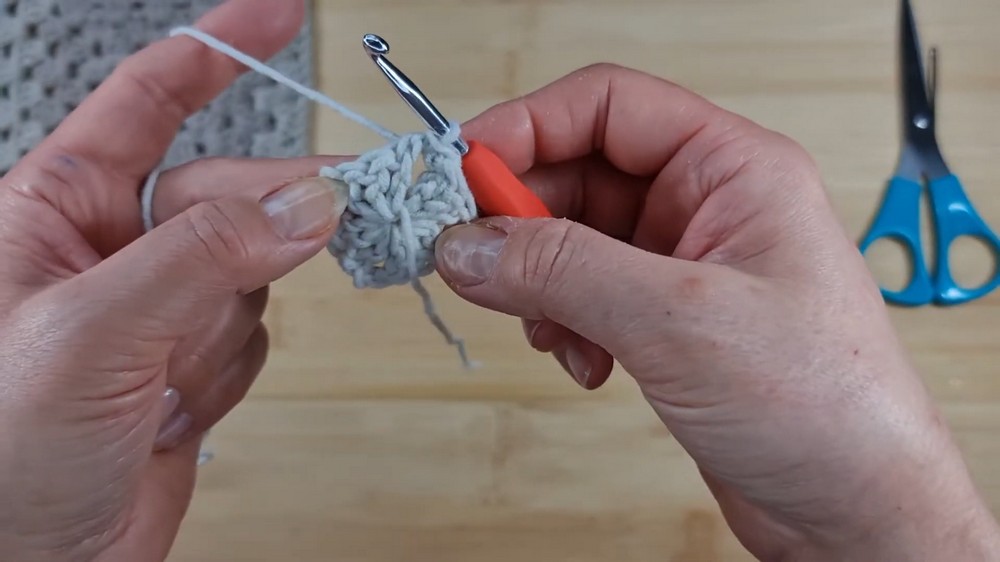
Turn your square and work from the reverse side, placing clusters only in corners, with chain-2 between each. This makes both sides identical and prevents warping.
3. Round 3 (Front Side)
- Turn work again.
- Slip stitch into corner sp.
- Ch 3, 2 dc in same corner sp (first cluster).
- [3 dc in the middle space between clusters (on sides)—no chain before or after!]
- (3 dc in corner sp, ch 2, 3 dc in same sp) at each corner.
- Repeat side and corner clusters around.
- Sl st to close.

Continue building outwards: after turning, slip stitch to corner, chain 3, and work your clusters in corners (with chain-2) and middle spaces (no chain between clusters!).
4. Subsequent Rounds (4–7)
- Turn work after each round.
- Slip stitch into corner sp.
- Ch 3, 2 dc in same corner sp (starting cluster).
- Work the following pattern:
- Corner: (3 dc, ch 2, 3 dc) in corner sp.
- Sides: 3 dc in every open space; do NOT chain between clusters.
- Sl st to close each round.
- Repeat for as many rounds as needed for your desired size.
Alternate working each round from opposite faces, always slip stitching into a corner and working clusters in each corner and space along the sides. Continue without chains between side clusters!
5. Final Round & Finishing
- On your last round, after working three dc into the final corner, ch 2 and sl st into top of starting ch-3.
- To finish neatly: Cut yarn leaving a long tail, remove hook, thread tail on darning needle.
- Insert needle under both loops of first dc, then into the last completed dc, mimicking a “V” shape for seamless join.
- Weave in all ends securely beneath clusters, working as invisibly as possible for a double-sided finish.
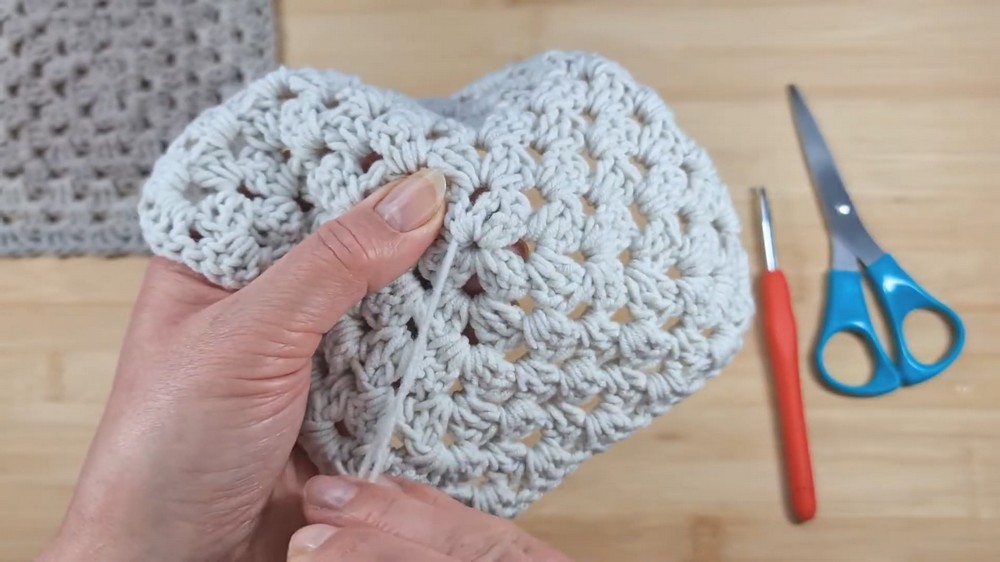
After your last round, use an invisible join for a seamless square edge. Weave in tails with care; keep both sides neat for reversible use.
Assembly & Optional Border
- Crochet as many squares as your project requires; join by sewing or crocheting together at the corners/sides.
- For a crisp border, work a round (or several) of single crochet (sc) or reverse single crochet (crab stitch) evenly spaced around.
Pattern Start & Stitch Summary
How to start:
- Begin with a magic ring and chain-3.
Stitches used: - Chain, double crochet, slip stitch.
- Only corners have chain-2 spaces; NEVER chain between clusters on sides.
- Turn work each round, alternating sides for ideal symmetry.
Tips for Perfect Squares
- Turning each round ensures both sides lie perfectly flat and the shape remains square.
- Not chaining between clusters gives a tight, unwarped fabric.
- Do not add extra chains between side clusters; follow the pattern exactly for best results.
Conclusion
You have now completed a perfectly shaped, reversible granny square! This method produces a neat, robust motif ideal for double-sided projects. Use any yarn, any color, and join as many squares as needed for your blanket or other crochet creation.
Finished product:
- Reversible, tight, square granny motif
- Ideal for multi-motif blankets and accessories
Pattern structure:
- Work from the center, alternate sides, no chains between clusters except corners, slip stitch, turn, and repeat.
Stitches used:
- Magic ring, chain, double crochet, slip stitch