
Free Crochet Handbag Pattern That’s Super Easy to Follow
Try this free crochet handbag pattern to create a personalized, beautiful, and simple project you’ll be proud to carry everywhere.
A stylish handbag doesn’t have to come with a hefty price tag. Sometimes, the most beautiful accessories are those you make yourself, and they hold a lot more meaning too. Adding that personal touch to what you carry every day makes it feel extra special. This free handbag pattern combines elegance with practicality, featuring a unique motif design and a sturdy structure that’s perfect for daily use. It’s especially handy for carrying essentials like your phone, wallet, keys, or even a small notebook. Plus, it’s something you can proudly call your own.
Featured BY Beyzalle CRAFT
This pattern uses the versatile double crochet (DC) stitch, which offers a soft yet strong finish, ideal for durable items like handbags. The magic is in how simple it is to work with, even if you’ve never tried it before. Once you’ve mastered the DC stitch, you’ll have the skills to make a variety of items like placemats, throw pillows, or even a cozy shawl.
The Most Adorable Free Crochet Handbag Pattern Ever
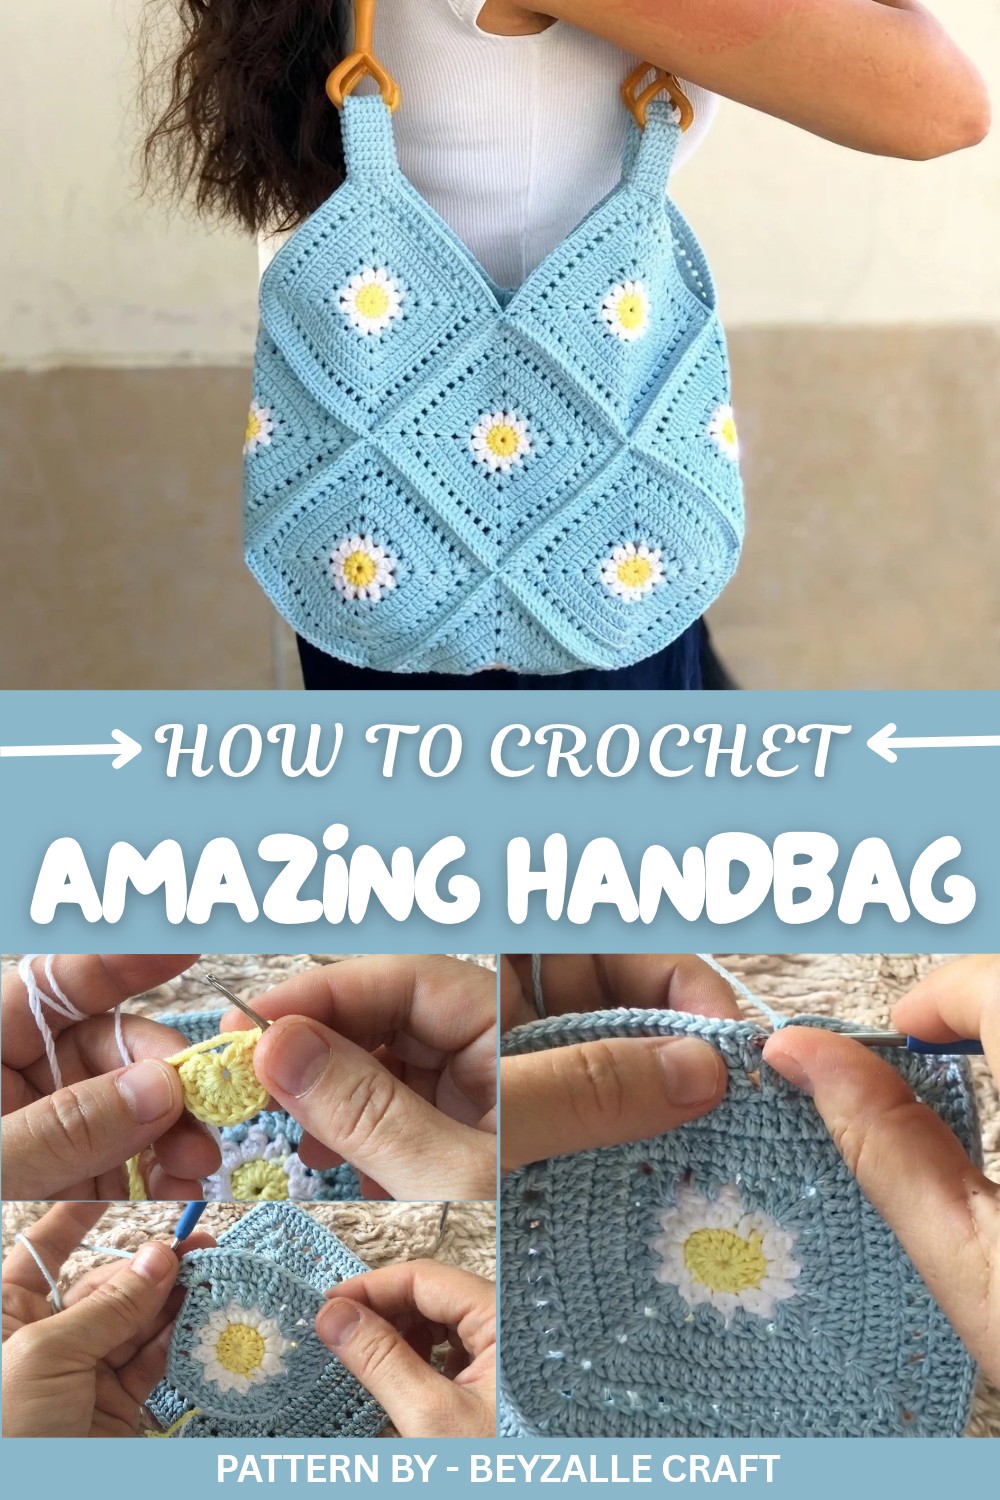
From following this pattern, there’s so much to pick up. You’ll learn the magic ring technique for creating seamless circles, how to stitch neat and consistent motifs, and how to join smaller pieces perfectly to build a polished bag. Not only will you enjoy the process, but you’ll also end up with a functional and fashionable end product.
With these skills, your options expand beyond just handbags. You could make decorative coasters, table runners, or lovely tote bags. A simple change of colors and sizes will give you endless creative variations to try.
Some parts of the pattern might feel tricky at first, for instance, starting with the magic ring or keeping your tension regular. But don’t let that stop you. Simply take it slow, use stitch markers whenever needed, and consult the instructions often. And remember, practice makes it easier and much more fun along the way.
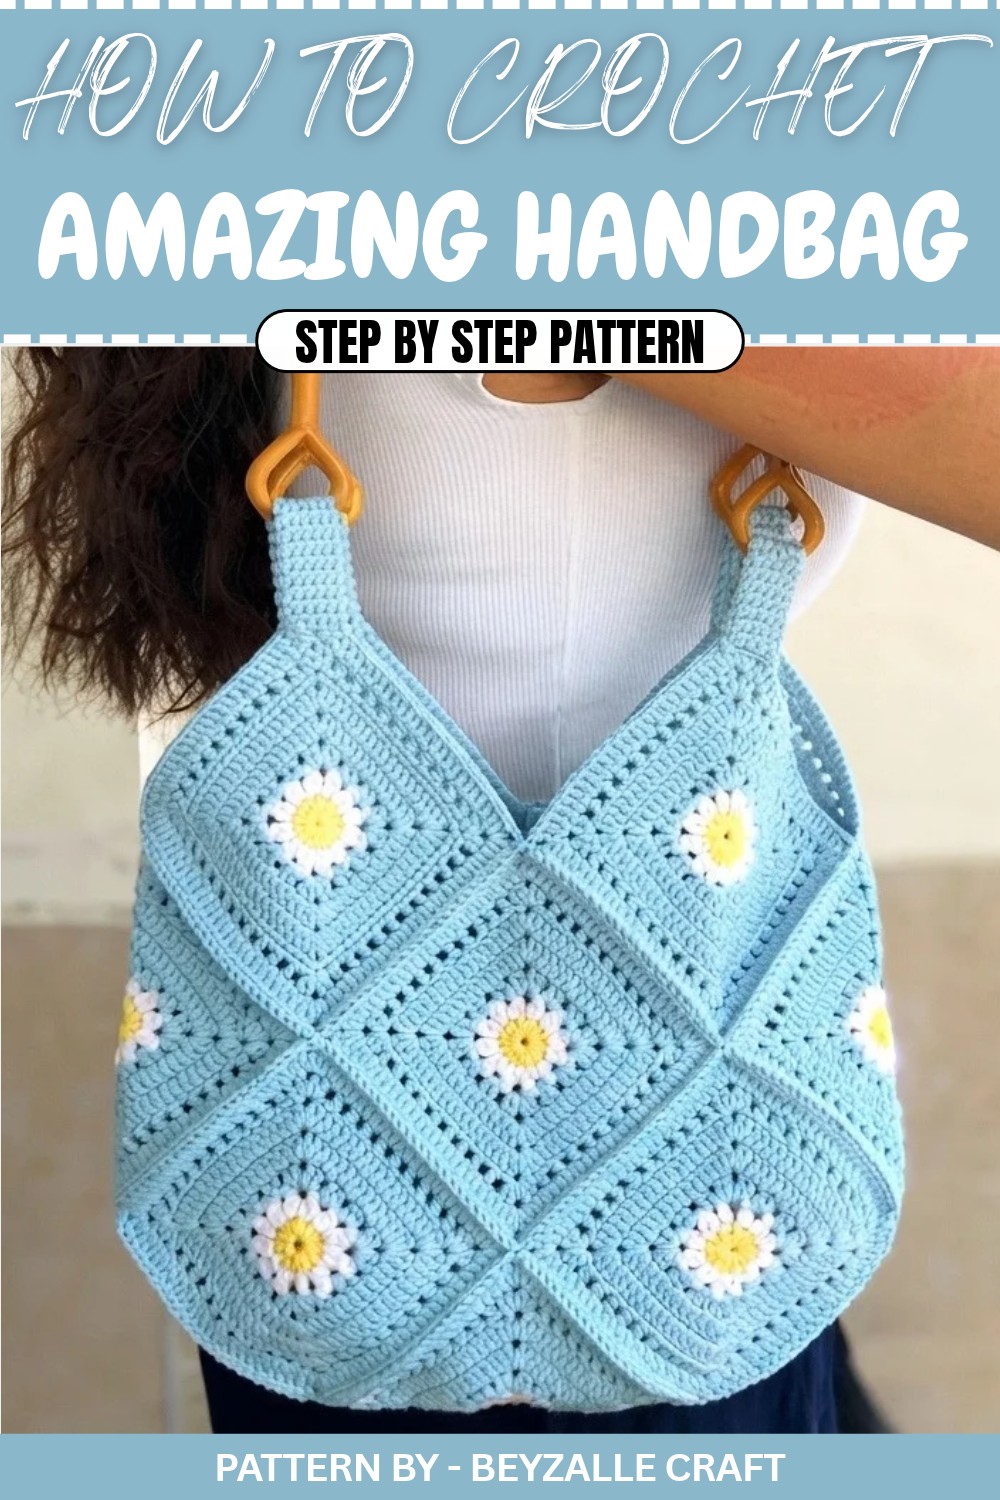
Crochet Motif Bag Pattern
This crochet bag is made using square motifs joined together to create a stylish summer accessory. Follow this detailed guide to accurately construct your bag.
Materials
- Yarn: Thick polyester yarn in contrasting colors (yellow, white, navy blue, or colors of your choice).
- Hook Size: Crochet hook that matches your yarn size (recommended: 4 mm or 5 mm).
- Straps: 2 ready-made bag straps or yarn for crocheting straps.
- Scissors: For clean yarn cuts.
- Darning Needle: To sew pieces and weave in ends.
Stitch Abbreviations
- MR: Magic Ring.
- Ch: Chain.
- DC: Double Crochet.
- SC: Single Crochet.
- Sl St: Slip Stitch.
The Motif Pattern
Foundation:
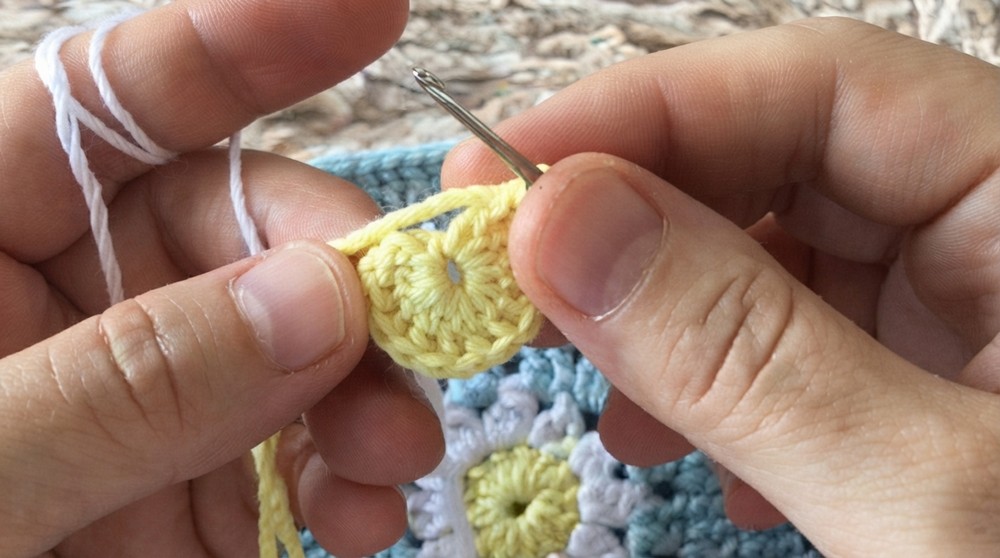
- Start with a magic ring (MR).
- Pull the loop snug but not tight.
Round 1:
- Ch 2 (counts as the first DC).
- Work 11 DC stitches into the MR.
- Pull the yarn tail to tighten the ring and close.
- Sl St into the first DC to close the round.
Round 2:
- Change to a new yarn color (white).
- Join the new yarn with a Sl St at the top of any DC from Round 1.
- Ch 2 (counts as the first part of a DC cluster).
- In the same stitch, make 1 DC but leave the last loop unworked (two loops remain on hook).
- YO and pull through both loops to complete the cluster.
- Ch 1.
- In the next stitch, make a DC cluster (2 incomplete DCs followed by YO to pull through all loops).
- Repeat steps 6–7 in every stitch. You should have 12 clusters separated by Ch 1.
- Sl St to the top of the first cluster to close the round.
Round 3:
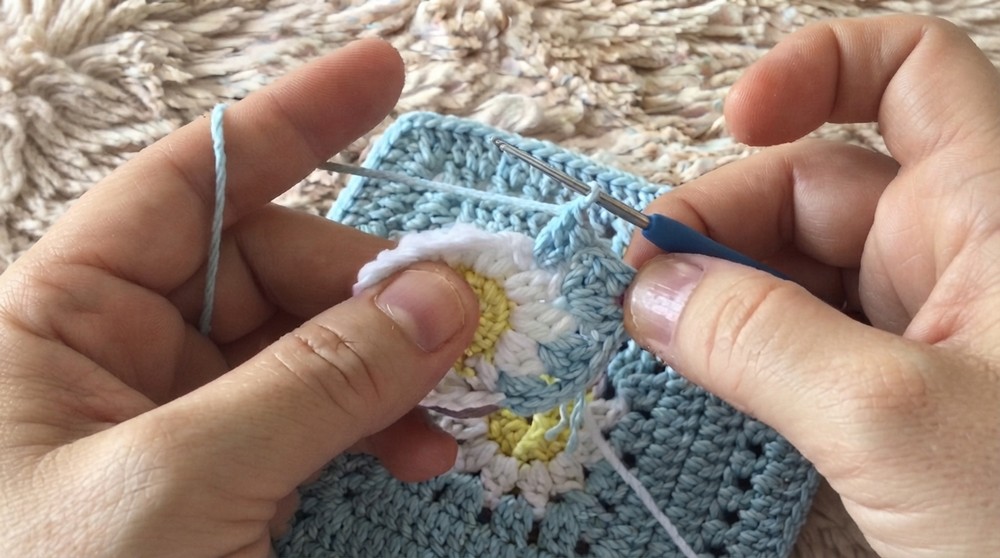
- Change to another new yarn color (navy blue).
- Begin in any Ch 1 space between clusters:
- Ch 2 (counts as the first DC).
- Work 1 DC into the same space.
- Ch 1.
- In the next Ch 1 space, work 2 DC stitches.
- In corner spaces (located every fourth Ch 1 space):
- Work: 2 DC, Ch 2, 2 DC. This forms the corner.
- Continue alternating 2 DC in regular spaces and corners as described.
- Sl St to the first DC to complete the round.
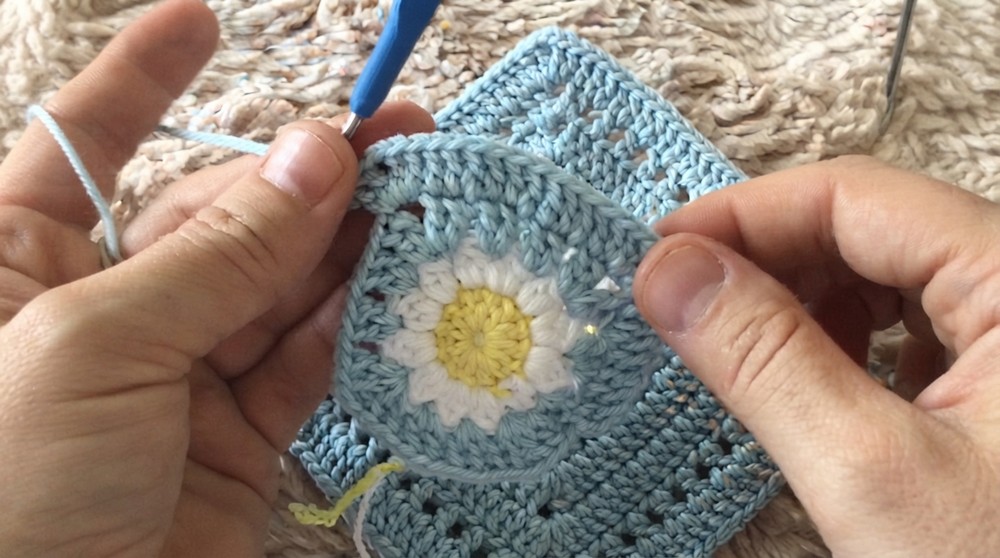
Round 4:
- Work 1 DC into every stitch (both into DC stitches and spaces from the previous round).
- At corners, repeat the corner increase:
- 2 DC, Ch 2, 2 DC in the corner space.
Round 5:
- Repeat the steps from Round 4:
- 1 DC into every stitch.
- Maintain corner increases with 2 DC, Ch 2, 2 DC in the corner spaces.
Round 6:
- Ch 4 (this counts as the first DC and Ch 1).
- Skip the next stitch.
- Work 1 DC into the following stitch.
- Repeat:
- Ch 1, skip 1 stitch, 1 DC in the next stitch.
- Ensure each side of the motif has 10 evenly spaced holes created by Ch-1 spaces.
- At corners:
- Work the corner increase: 2 DC, Ch 2, 2 DC.
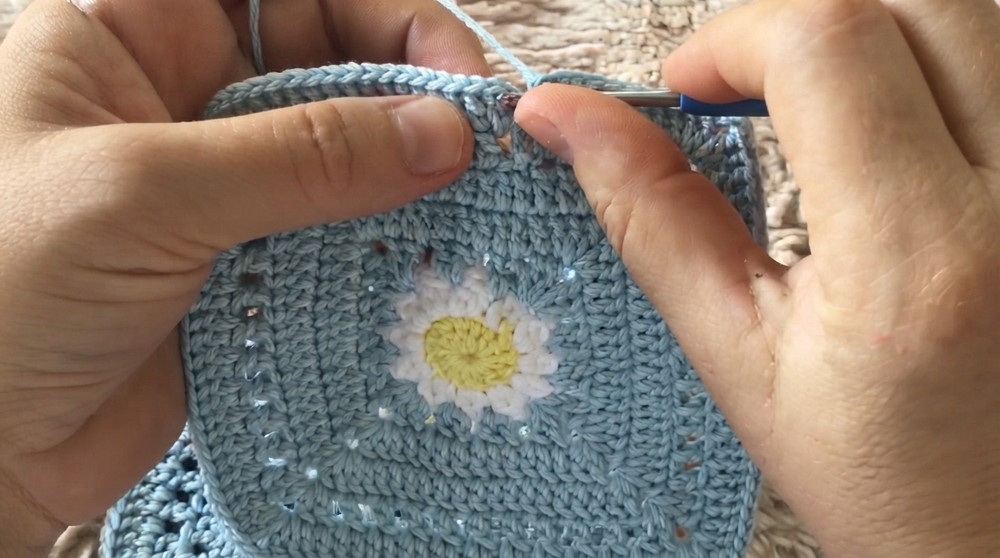
Round 7 (Final Round):
- Work 1 DC into each stitch and Ch 1 space around.
- Maintain the corner increases with 2 DC, Ch 2, 2 DC.
- Close the round with a Sl St into the first DC.
Bag Assembly
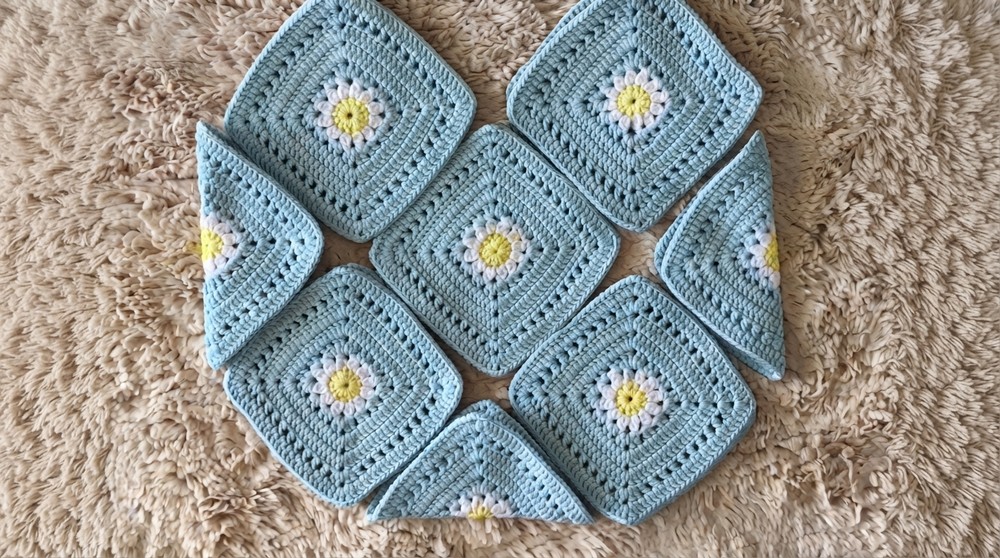
Step 1: Lay Out the Motifs
- Arrange motifs as follows:
- 6 motifs for the front and back panel (3 across and 2 down for each).
- 4 motifs joined into a single strip for the bottom panel.
- 4 motifs for the sides, joined vertically.
Step 2: Joining Motifs
- Use the Slip Stitch Method to join motifs:
- Place two motifs with wrong (back) sides together.
- Insert hook into the back loops of the stitches from both motifs.
- Sl St through both loops to join.
- Start with:
- Front panel: 3 horizontally joined motifs. Repeat for back panel.
- Bottom panel: 4 joined motifs in a row.
- Side panels: 2 motifs tall x 2 strips.
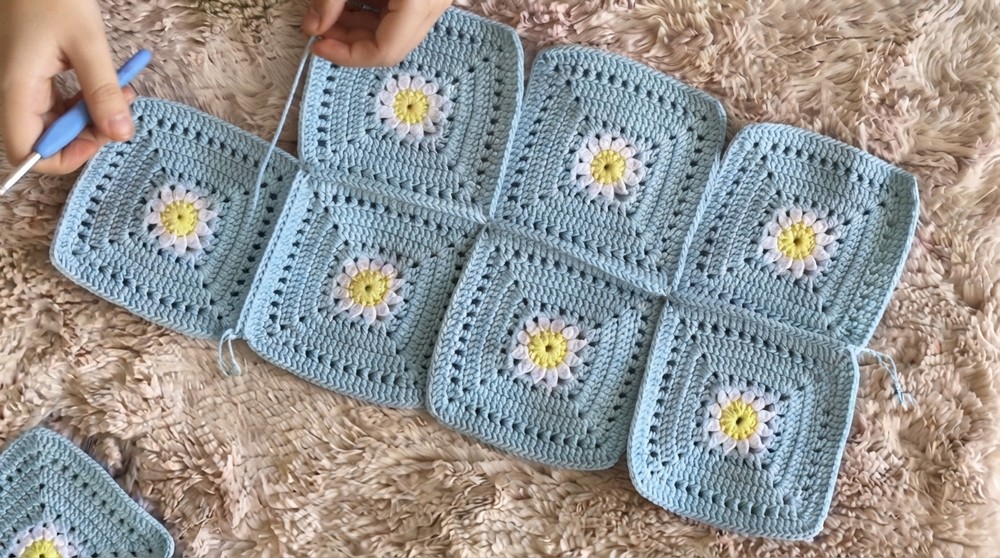
Step 3: Final Assembly
- Attach Front and Back Panels to the Bottom Panel:
- Join using Sl St through the back loops along the bottom edge.
- Attach Side Panels:
- Secure the side panels to the front, back, and bottom edges with Sl St through back loops.
- Ensure all sections line up evenly for a clean finish.
Handle Attachment
Step 1: Create Strap Attachments
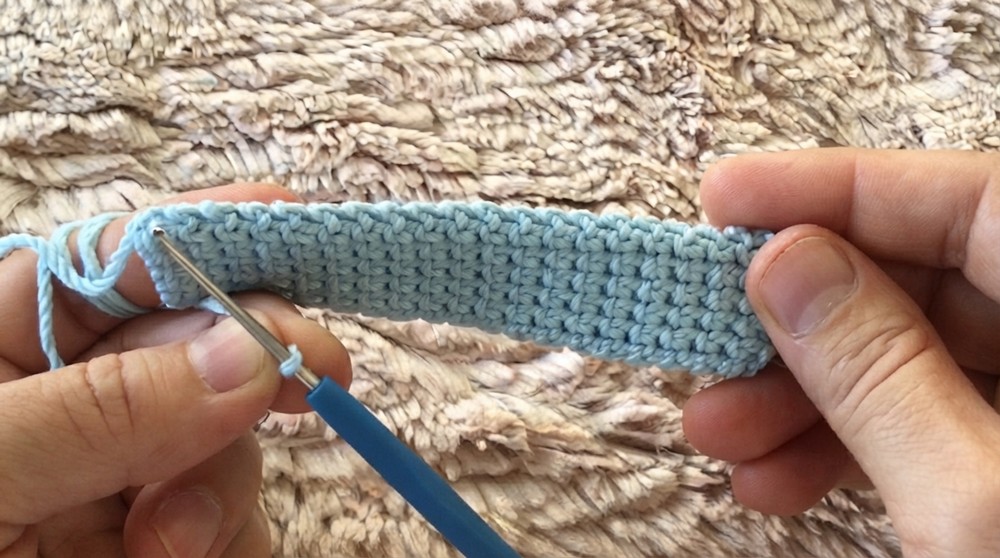
- Chain Foundation:
- Ch 7.
- Row 1:
- Work 6 SC starting from the second chain.
- Row 2 and Beyond:
- Turn (do not Ch up).
- Work 5 SC across into back loops only.
- Repeat rows until the strap attachment measures approximately 10 cm long.
Step 2: Attach Strap Connectors
- Sew the strap connectors to the top corners of the bag using a darning needle.
- Thread straps through the connectors and secure as desired.
Finished Size
- Dimensions: Approximately 30 cm tall x 35 cm wide.
- Clean stitching ensures durability and neatness.
Conclusion
Congratulations—you’ve completed your crochet motif bag. With its modular motif design and durable structure, this bag is a versatile accessory for any occasion. Adjust colors or motifs to suit your personal style and enjoy showing off your handmade creation.