
Free Crochet Granny Square Earrings Pattern for for Every Season
Fast help for cute jewelry comes from the Free Crochet Granny Square Earrings Pattern for happy, colorful looks.
Ever noticed how simple shapes can hold so much charm? The classic granny square pattern is one of those timeless patterns that’s both beautiful and versatile. These crochet granny square earrings capture that cozy, handmade feel with their neat rows of double crochet stitches worked inside a magic ring, creating a small, vibrant square that’s perfect for lightweight accessories. Using two contrasting colors enhances the design, making each earring pop with color and texture. These earrings are ideal for adding a splash of retro flair to casual outfits or for gifting to friends who appreciate crochety jewelry.
Crochet Granny Square Earrings Pattern with a Modern Twist
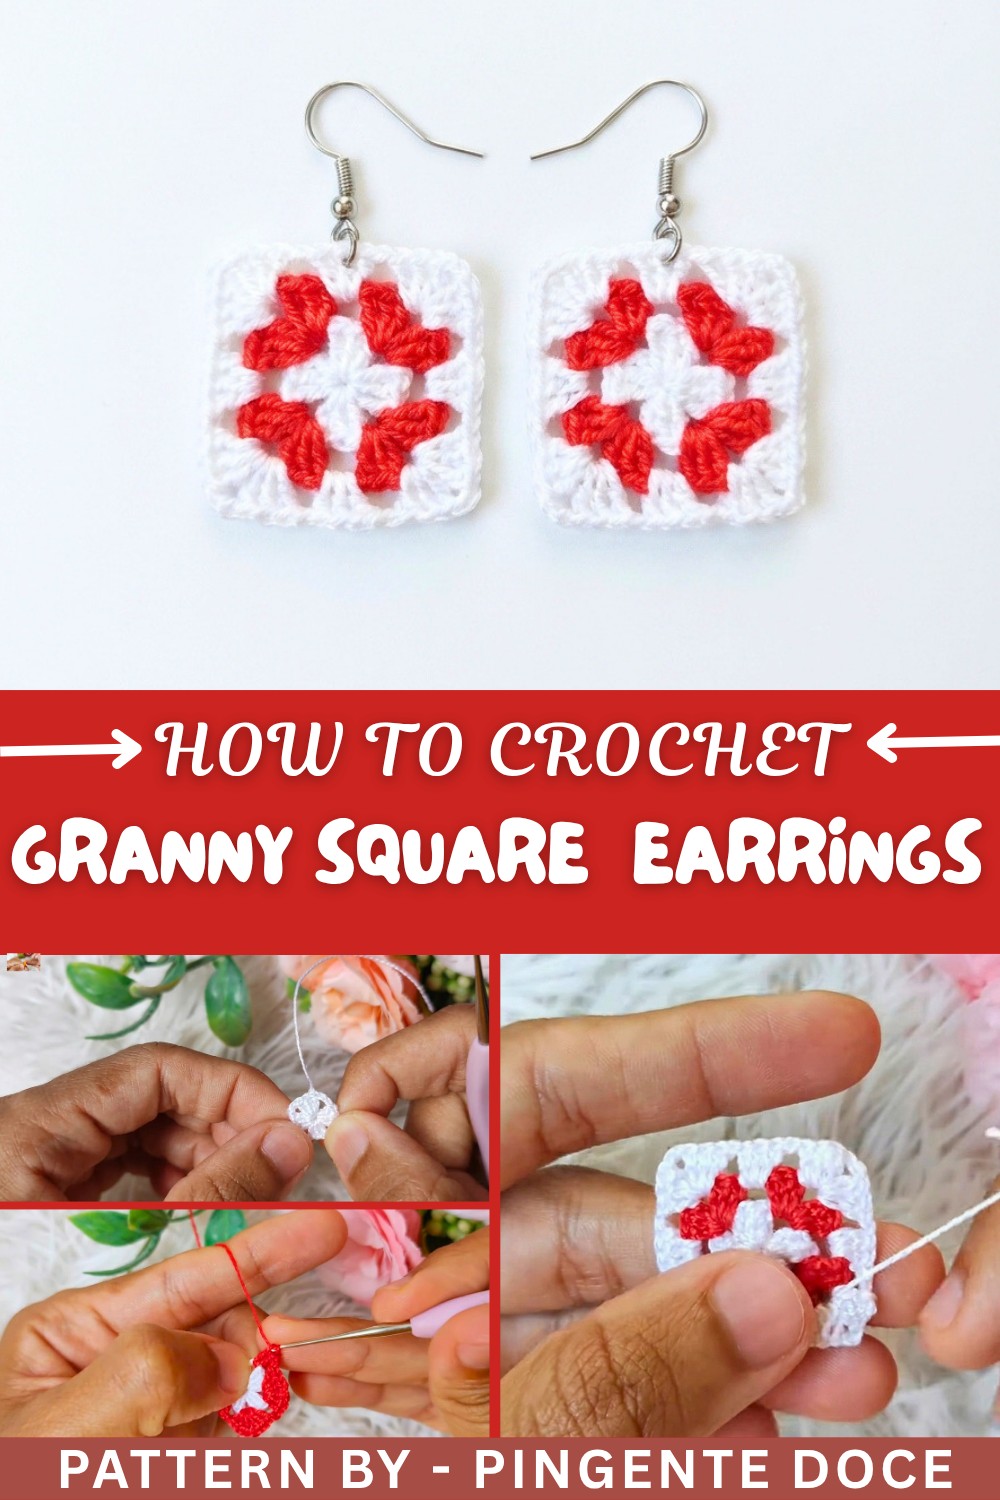
The project begins by creating a magic ring and working clusters of double crochet stitches separated by chains to shape the square. The color changes add interest and depth, while the joining of rounds keeps the pattern simple and approachable. This pattern is beginner-friendly and encourages learning the magic ring technique, double crochet stitches, and how to finish off with clean edges. After crafting the square, fabric glue is used on the back for firmness, and the earrings are completed with hooks and hoops, delivering a polished, wearable accessory that celebrates the charm of granny squares.
More Treasures from This Pattern
Granny squares are incredibly versatile! Beyond earrings, you can crochet larger squares to make blankets, coasters, or cushion covers. Smaller versions can become keychains or embellishments on bags and scarves. Experimenting with yarn types and colors broadens the possibilities, making this pattern a wonderful springboard for crocheting many stylish and cozy projects that show off your crochet skills.
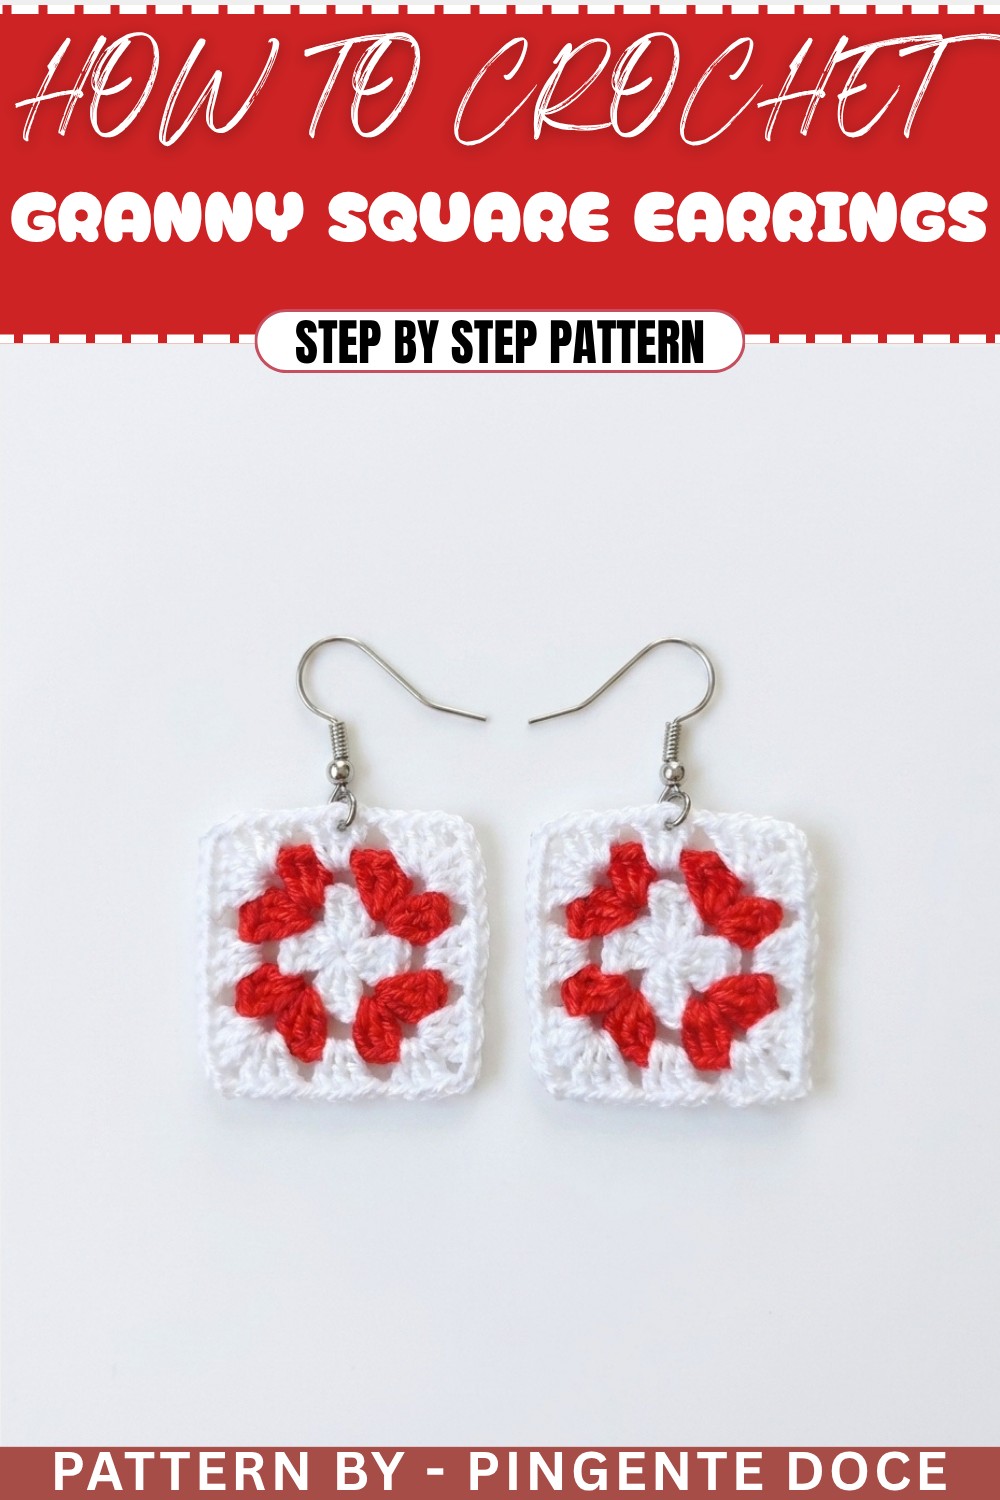
Crochet Square Earrings Pattern
These delightful crochet earrings are a perfect accessory to uplift any outfit, adding a touch of elegance and charm. You can use them as gifts, sell them, or create matching sets to complement your style. This pattern teaches how to make a crochet square featuring alternating colors and lovely fan stitches. Learning this technique may also help you apply it to larger projects like blankets and garments.
Skill Level & Terminology
Skill Level: Beginner-friendly. No prior complex crochet experience is necessary.
Terminology: US crochet terms are used in this pattern (e.g., single crochet = US terminology).
Materials & Tools
- Yarn: Anchor Yarn or any thread with similar Tex.
- Colors: 2 colors required (e.g., white and red).
- Hook: 1mm crochet hook (or any size suitable for selected thread).
- Scissors: For cutting off excess thread.
- Sewing needle: To hide the threads and excess finishing.
- Hoops and hooks: For attaching to your earrings.
Gauge
No specific gauge is required for this project as earrings are a small, decorative project. Adjust hook size if your stitches seem too loose or tight.
Abbreviations List
- Ch – Chain
- Sl st – Slip Stitch
- DC – Double Crochet
- Magic ring – A starting loop used for a crochet circle.
Special Stitch Instructions
- Magic Ring: Form a loop with your yarn, ensure the tail crosses tightly over the working yarn, chain, and pull the yarn through the center of the loop.
Finished Size
Approximately 2 inches × 2 inches square. The final size may vary based on yarn thickness and tension.
What You'll Learn & Why You'll Love This Pattern
- What You'll Learn:
- Creating and using magic rings.
- Working in rounds with DC stitches.
- Changing colors seamlessly.
- Hiding thread tails professionally.
- Why You'll Love It:
This pattern is quick, practical, and allows you to experiment with colors and textures. The skills you gain here can be applied to larger crochet projects, and the finished product is a piece of wearable art.
The Pattern
Foundation & First Round: White Yarn
- Magic Ring: Create a magic ring with white yarn.
- Chain stitches: Work 3 chains (counts as first DC).
- DC in magic ring:
- 3 DC inside the magic ring.
- Create separation chains: 2 chains.
- Repeat: (3 DC, 2 Chains) inside the magic ring 3 more times.
- Close the magic ring: Pull the starting thread taut.
- Join round: Make a Sl st into the 3rd chain from the start.
- Fasten off by making a chain. Cut yarn and leave a tail.
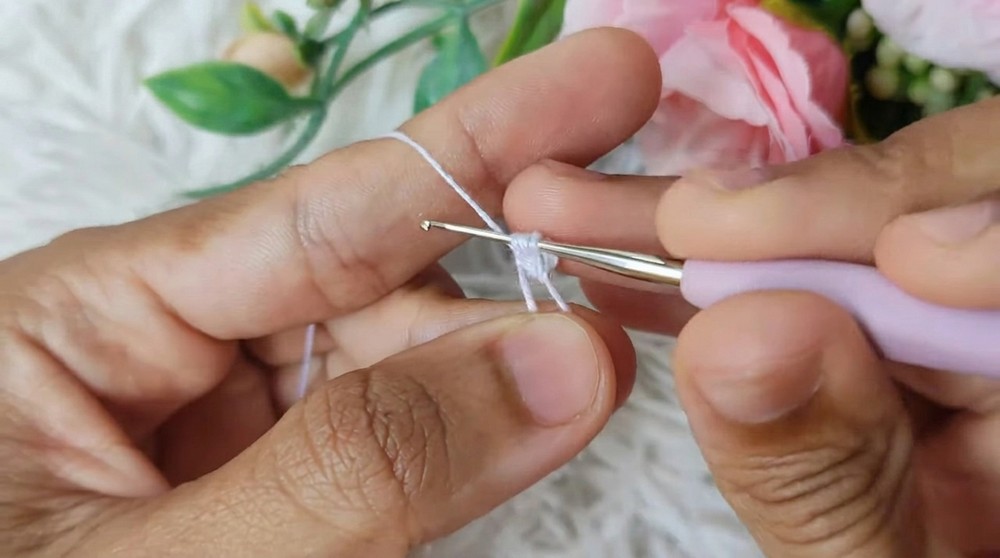
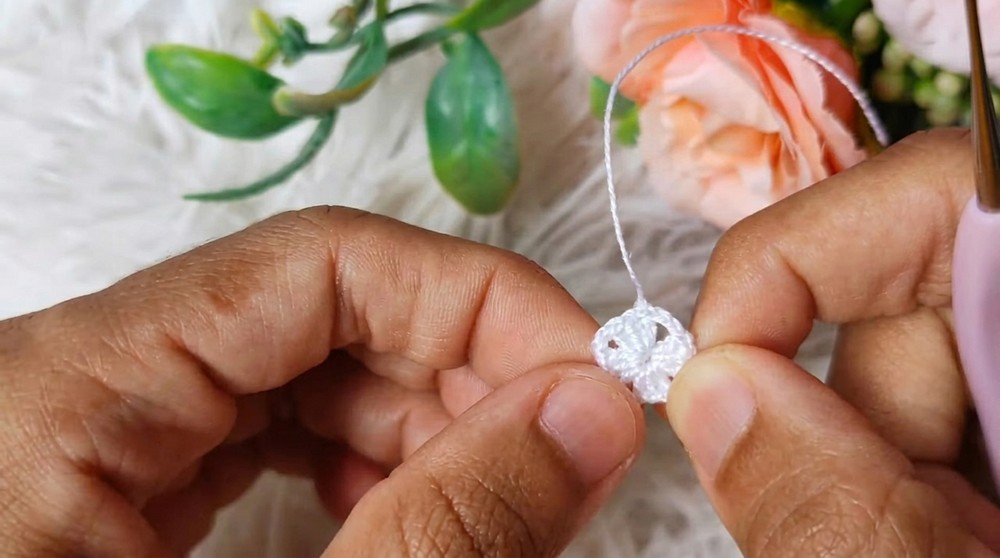
Notes for Beginners: The magic ring forms the base for your square. Keep your stitches neat and evenly spaced, building the foundation for the pattern.
Second Round: Red Yarn
- Attach yarn: With a slip knot, insert the red thread into any 2-chain space.
- Begin with DC:
- Work 3 DC into the space.
- 2 chains.
- Work 3 DC again into the same space to form the first fan stitch.
- Move to the next space:
- 1 chain for transition.
- 3 DC, 2 chains, 3 DC into the next space. Repeat this fan stitch pattern in all spaces.
- At the final fan, create 1 chain and connect with a Sl st to the first DC of the round.
- Fasten off as before, leave a tail, and cut excess.
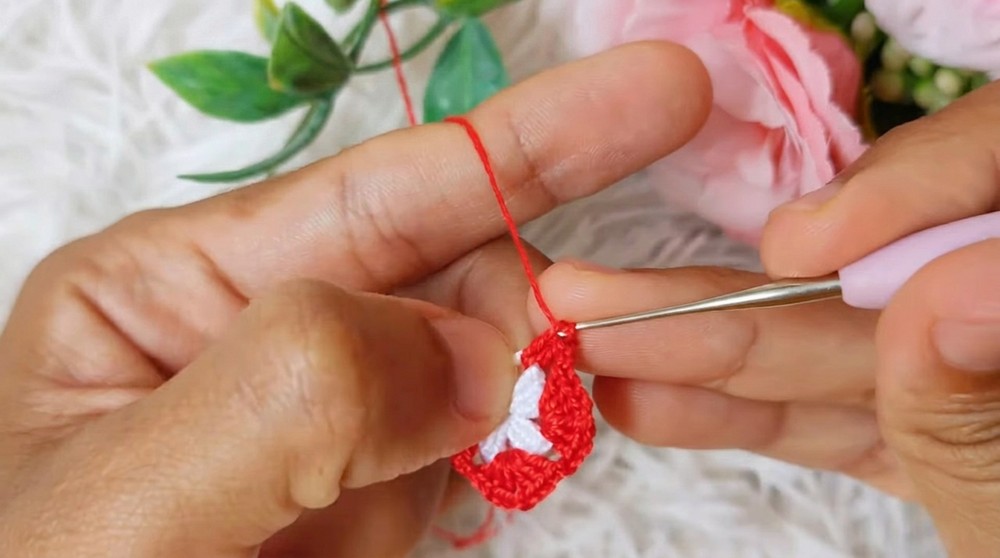
Notes for Beginners: This round adds dimension and texture, creating the iconic fan stitch. Keep your tension even to ensure the fans stay uniform.
Third Round: White Yarn
- Attach yarn: Slip knot and join white thread in any 2-chain space from the previous round.
- Repeat fan pattern:
- 3 DC, 2 chains, 3 DC inside the same space.
- 1 chain to move to the next space.
- Work the above fan stitch sequence all around the square until no spaces are left.
- Join final round with a Sl st to the first DC.
- Fasten off completely, leaving a surplus tail for sewing.
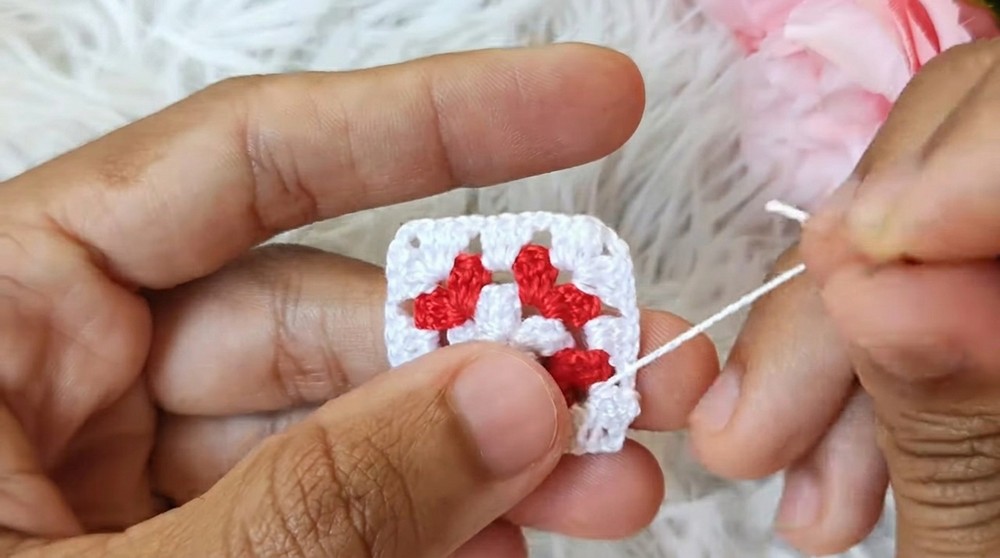
Notes for Beginners: Congratulations! Your square is complete, and it's time for final finishing and assembly.
Assembly & Finishing
- Hide tails: Use a sewing needle to thread all loose ends.
- Turn the piece to the back and hide the thread within the stitches.
- Tidy up edges: Use a small amount of water and fabric glue along the back to secure loose ends further.
- Attach your hoops and hooks to form an earring.
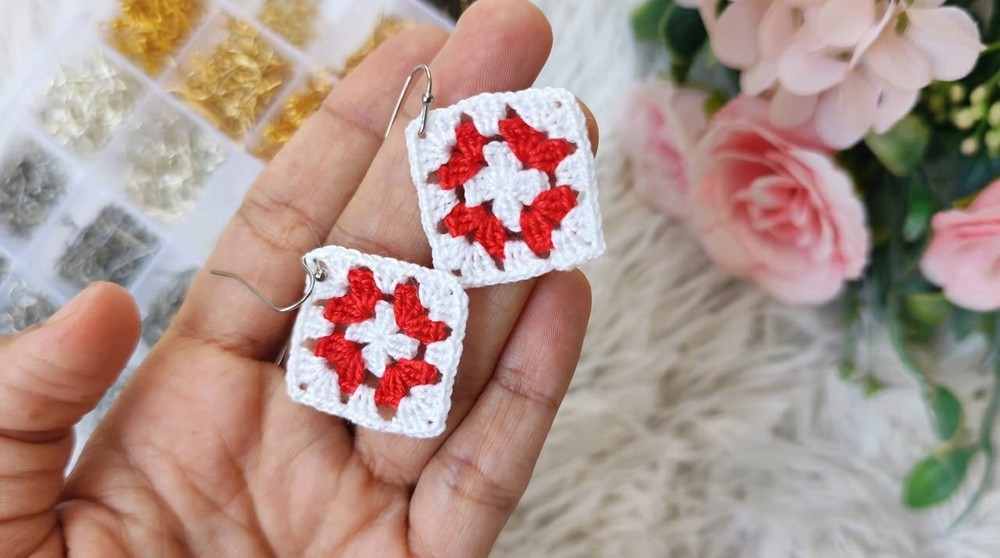
Notes for Beginners: Patience is key in finishing. A well-hidden thread enhances the professional look of your piece.
Difficulties & Solutions
Difficulty: Uneven stitches or loose magic rings can result in a lopsided square.
- Solution: Make sure your tension is even while creating the stitches. Ensure the magic ring is tightly closed after the first round. For beginners, practicing on scrap yarn before starting your final project helps.
Difficulty: Changing colors seamlessly without gaps.
- Solution: Keep the tail of the new color taut and overlap the thread gently while stitching to create a clean finish. Secure threads promptly.
Pattern Summary
Start this pattern by learning basic stitches like DC and working in rounds using a magic ring. Each subsequent round uses fan stitches combined with chain spaces to form a beautiful square. Changing colors adds visual depth and texture to the piece. Once complete, the final finishing step ensures the professional look of the earrings. Assemble with hoops and hooks for a polished look.