
Free Crochet Bandana Pattern You Will Love
Open up new ideas with this free crochet bandana pattern guide that takes you step by step to make a cool and useful accessory easily.
Looking for a stylish and practical accessory that’s fun to make? This free crochet bandana pattern is a lovely project for anyone who enjoys creating with their hands. The bandana features a smooth triangle shape, which sits nicely on your head or ties easily around your neck. The stitch pattern is neat and even, giving the bandana a soft texture that feels comfortable and looks elegant at the same time.
Easy Free Crochet Bandana Pattern for Any Season
One of the most attractive details is the finished border, which makes the bandana look tidy and polished. The yarn creates a lightweight, airy feel, perfect for all seasons. The bandana keeps its shape well, so it drapes beautifully when worn as a headscarf, neck scarf, or even tied onto a bag as a cute accessory.
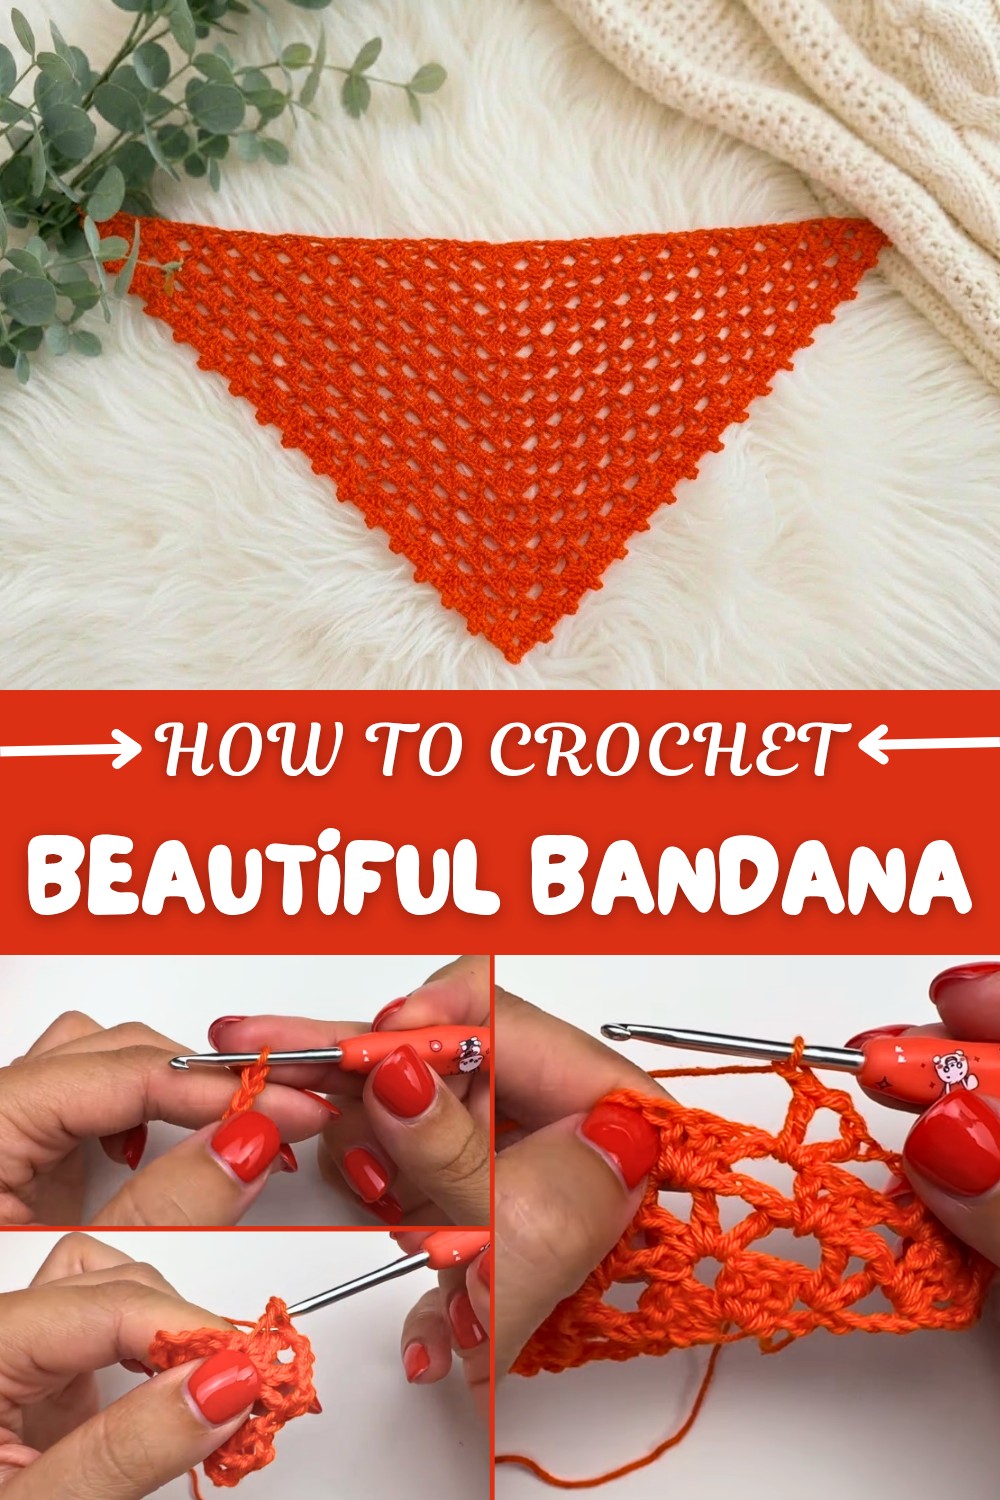
Crocheters will enjoy making this pattern because it uses simple stitches and grows quickly row by row. The satisfaction of watching the triangle come together makes the project enjoyable from start to finish. Small tweaks can turn this pattern into other fun items, a mini bandana for a pet, a slim hair band, or even a bigger version for a breezy summer shawl. Adding a little fringe or small beads at the points can give it a special personal touch.
This bandana is so easy to use in everyday life. Keep your hair in place, add a pop of color to your outfit, or wrap it around your neck for a bit of extra warmth. It’s a beautiful accessory you can make in your favorite colors and wear with pride, knowing it’s handmade with care. There’s just something special about creating something useful and pretty that can brighten up any day.
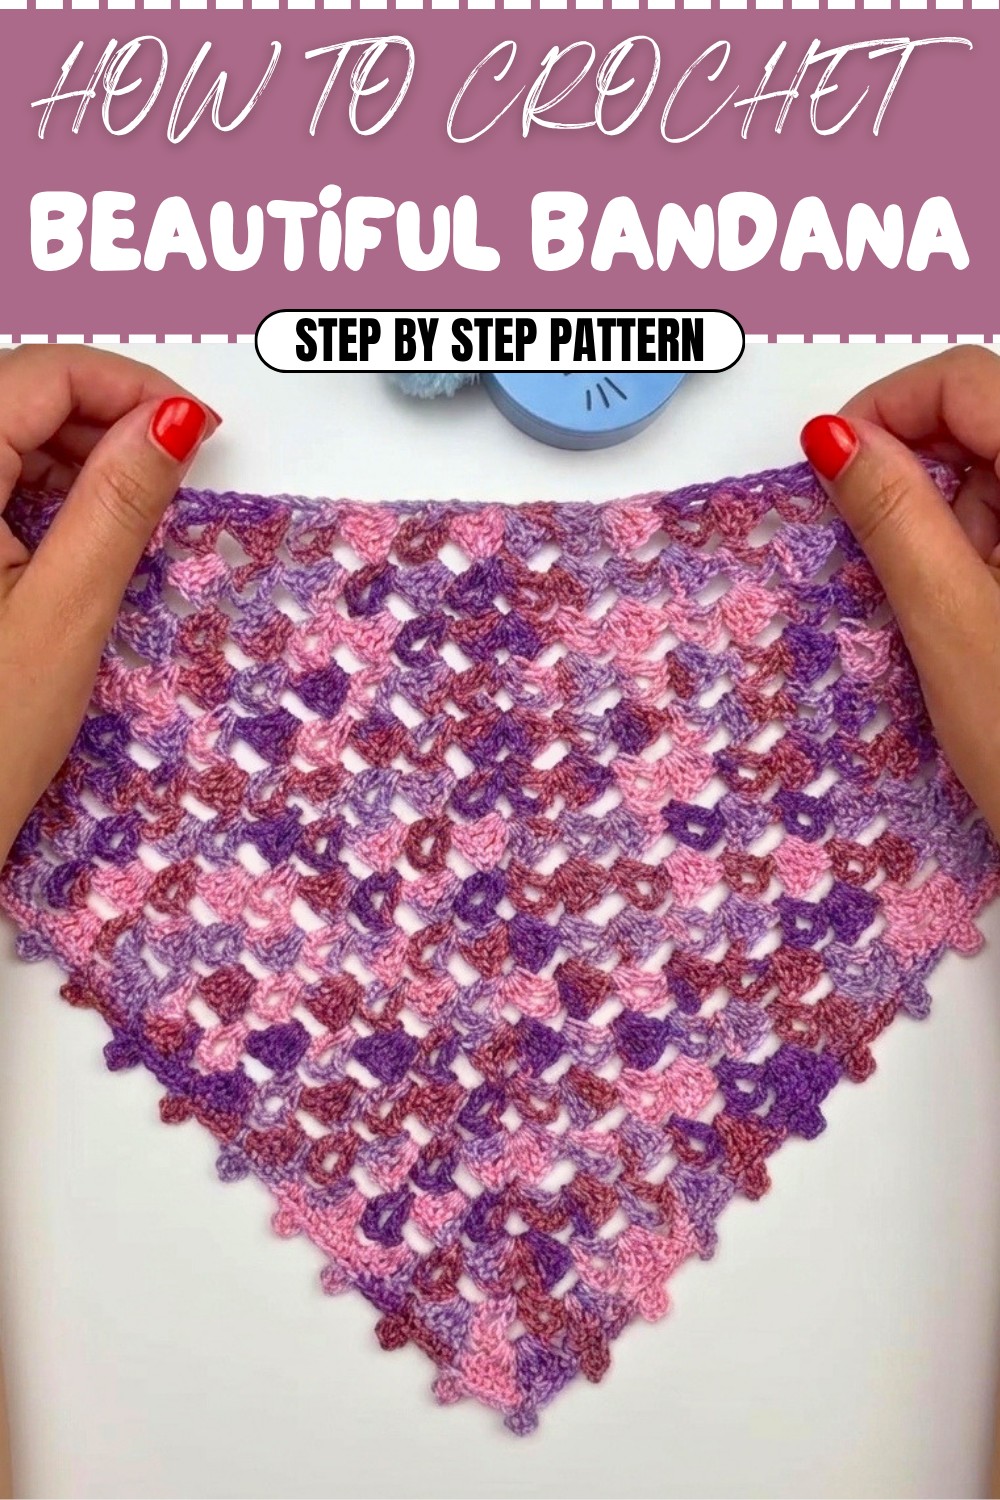
Modern Crochet Bandana Pattern (Adult Woman Size)
Welcome to this stylish, lightweight crochet bandana pattern! Designed for adult women, but easily customizable for any size, this bandana uses just a little yarn and basic stitches to create a delicate, modern accessory. The pattern features alternating rows of “V” fans and closed rows of double crochet, giving it texture and drape.
You’ll also finish the bandana with picot edging and ties, making it ready for the beach, festivals, or casual elegance. This project is perfect for using up leftover yarn and is suitable for beginners and experienced crocheters alike. Step-by-step instructions and beginner explanations are included after each section.
Skill Level & Terminology
Skill Level: Confident Beginner
Terminology: Standard US Crochet terms
Materials & Tools
- Yarn: Fingering/2-ply cotton yarn (such as Cléa or similar), 35g (any color you like!)
- Hook: 3mm crochet hook
- Notions: Scissors, tapestry needle for weaving in ends
Gauge
Gauge is not strictly required; aim for a light, open fabric.
- Sample Dimensions: 45 cm wide x 22 cm deep (adult woman)
- Adjust hook, yarn, or row count for your preferred size.
Abbreviations List
| Abbreviation | Meaning |
|---|---|
| ch | chain |
| dc | double crochet |
| sc | single crochet |
| sl st | slip stitch |
| sp | space (chain space) |
| picot | picot (ch 3, sl st in first ch) |
| FO | fasten off |
| rep | repeat |
Special Stitch Instructions
- V-stitch: (dc, ch 2, dc) in the same space/stitch.
- Picot: ch 3, sl st in first ch made.
- Magic Ring (optional): Create a loop, crochet stitches into the loop, then pull tight.
- Double Crochet (dc): YO, insert hook, YO, pull up loop, YO, pull through 2 loops, YO, pull through 2 remaining loops.
Finished Size
Approximate:
- Width: 45 cm (across top edge)
- Depth: 22 cm (from top edge to tip)
- Ties: Each ~18–20 cm (customizable)
How to Start & Stitches Used
You may start with either a chain or magic ring. The main bandana alternates rows of double crochet and V-stitch fans. The finishing edge uses single crochet and picot. Ties are made in chains with slip stitch return.
The Pattern
A. Starting the Bandana (Foundation)
Option 1 (Magic Ring):
- Make a magic ring, ch 3 (counts as first dc), ch 1, dc in ring, ch 2, dc in ring, ch 1, dc in ring.
- Pull ring tight.
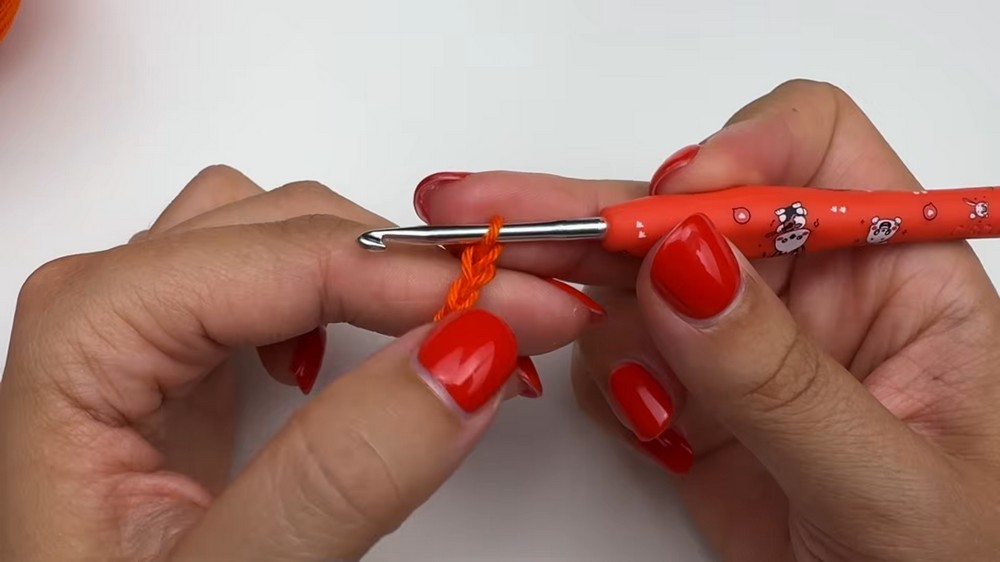
Option 2 (Chain Start):
- Ch 4, join with sl st to form a ring.
- Ch 3 (first dc), ch 1, dc in ring, ch 2, dc in ring, ch 1, dc in ring.
Explanation: Begin with either a magic ring or chain loop. Work double crochets and chains into the ring to form the base triangle.
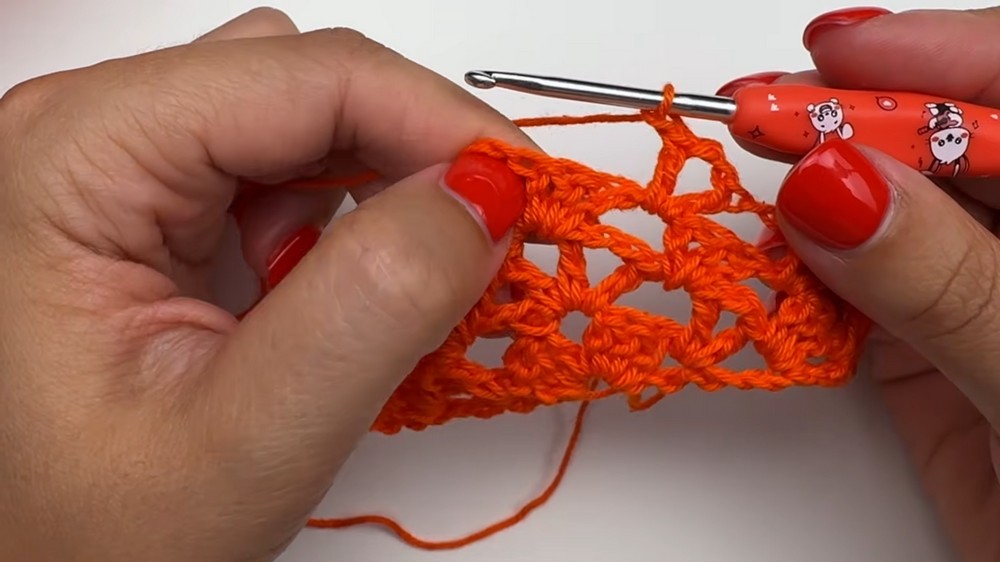
B. Row 1 (V-stitch Row):
- Turn, ch 4 (counts as dc + ch 1).
- In next sp, work V-stitch (dc, ch 2, dc).
- Ch 1, dc in tip space (last dc of previous row).

Beginner tip: Always start rows with ch 4 and work the V-stitch into chain spaces. Finish with dc at the edge.
C. Row 2 (Closed Row):
- Turn, ch 4 (dc + ch 1).
- 3 dc in first sp before V-stitch.
- Ch 1, 3 dc in next sp after V-stitch.
- Ch 1, in tip (center point), 3 dc, ch 2, 3 dc—all in tip space.
- Ch 1, 3 dc in next sp.
- Ch 1, 3 dc in final sp, ch 1, dc in last dc.
Closed rows use clusters of 3 dc separated by ch 1, with extra stitches at the tip for shaping.
D. Row 3 (V-stitch Row):
- Turn, ch 4.
- In first sp, V-stitch (dc, ch 2, dc).
- Ch 1, V-stitch in next sp.
- Continue to tip, working four V-stitches separated by ch 1.
- In tip, work four dc, each separated by ch 2, ending in three spaces.
- Mirror the previous side: ch 1, V-stitch in next sp until edge.
- Dc in final dc; ch 1.
Keep alternating between V-stitch and closed rows!
E. Repeat Pattern
Repeat Rows 2 and 3 for a total of 17 rows, always ending with a closed row of dc clusters for an even finish.
- Adjust row count for desired depth (children: fewer rows, adult: as above).
For each new row, always ch 4 to start and mirror stitches at both ends. After a few rows, pattern repeats become simple!
F. Ties
Without cutting yarn, at top corner:
- Ch 41 (or make a chain for 18–20 cm; adjust for comfortable tie length).
- Turn, sl st in each chain back to base.
Beginner tip: Ties are just chains with slip stitches. Don’t work into the very first chain but into the next chain for stability.
Repeat for both corners.
- When finished, next step is the edging.
G. Edging and Picot Border
- Work sc all along the two sides (not along top/ties) of triangle, placing sc in each dc and space.
- Every fourth sc, work picot: ch 3, sl st into previous sc.
- At tip: work 1 sc, 1 picot, 1 sc in same spot for accent.
Picots are tiny decorative points; make them as described for a pretty finish.
Beginner Tips After Each Section
- Start: Begin with your preferred method (magic ring or chain ring). All stitches worked into the center.
- Pattern: Rows alternate between fans/V-stitches and solid dc rows. Use chains to keep pattern open and light.
- Ties: Chains and slip stitches create strong ties.
- Edging: Single crochet and picot for a neat, decorative border. Place picots regularly for best results.
Assembly & Finishing
- Weave in all yarn tails with tapestry needle.
- Lightly block bandana if desired for straight edges.
- Try on and adjust ties for secure fit.
- Enjoy your colorful, modern crochet bandana!
With minimal finishing, your bandana is ready: just weave in ends, adjust ties and enjoy!
Conclusion
You’ve completed a beautiful, modern crochet bandana! Using only simple stitches—double crochet, chain, single crochet, slip stitch, and picot—you’ve made a lightweight accessory perfect for any season. This bandana is quick, customizable, and uses up small amounts of yarn. Adjust colors or sizing as you wish to create the perfect fit for women, men, children, or babies.