
Easy Free Crochet Cup Warmer Pattern with Flower Motif
A handmade cup warmer is both charming and practical, bringing your crochet creativity right to your table. With this free crochet cup warmer pattern, you get a project that’s fun and useful. The cup cozy slips easily over your mug, keeping your tea or coffee warm longer while protecting your hands from the heat. Its ridged and puffed stitches make a lovely textured look that stands out, giving any cup or mug a cozy, dressed-up feeling.
Adorable Crochet Cup Warmer Pattern for Kitchen Accessories
You might notice the delightful twist added by working into the third loop and the sideways puff stitch, which gives this cup warmer its one-of-a-kind appearance. Along with keeping drinks insulated, the cup warmer is versatile enough to use around a container for pens and pencils, crochet hooks, or even small flowerpots, making it as decorative as it is functional.
This crochet cup warmer pattern is friendly to all skill levels, especially beginners who want to try new techniques. As you follow along, you’ll practice chaining, joining to work in the round, half-double crochet, single crochet, double crochet, and how to create a sideways puff stitch. The instructions break things down in a way that’s clear and not overwhelming, so you never have to worry about getting lost.

Stitch markers are suggested to help you track your progress, giving you more confidence as you work. Not only do you end up with a cup warmer that’s perfect for gifting or personal use, but you also build a handful of new skills as you go. This pattern uses a 4.5 mm hook and worsted weight yarn for a sturdy and cozy finish, and the finished piece features a flower motif that measures about 2 inches across.
Once you feel comfortable with this pattern, there are lots of directions you can take your creativity. Try sizing the cozy for different mugs, or use the regular texture as a sleeve on small baskets, jars, or handmade containers. This cup warmer can inspire you to make matching sets for a kitchen accent or as special handmade gifts for friends and family. As you practice, each new project helps you get more familiar with stitches and pattern reading, opening the door to more advanced projects down the road.

Cozy Cup Warmer Pattern
Enjoy your favorite hot drink in style with this cozy cup warmer! Not only does it protect your hands from hot mugs, but it also adds a charming texture to your table setting. Simple sideways puff stitches create a beautiful plaited ridge, and the stretchy fit suits mugs and small containers alike. This pattern is beginner-friendly, uses basic stitches with easy-to-follow details, and is perfect for quick gifts or home organizing.
Skill Level & Terminology
- Skill Level: Beginner and up
- Terminology: US Crochet Terms
Materials & Tools
- Yarn: DK weight yarn (any smooth acrylic or cotton blend)
- Hook: 5.0 mm crochet hook
- Other Tools:
- Scissors
- Yarn/tapestry needle
- Two stitch markers (optional, help track your rounds and loops)
Gauge
Gauge is not critical, but for reference:
- 6 half double crochets x 4 rows ≈ 1"/2.5cm, unstretched.
Check your fit after the first round—your circle should comfortably slide over your mug.
Abbreviations List
- ch: chain
- sl st: slip stitch
- sc: single crochet
- hdc: half double crochet
- dc: double crochet
- st(s): stitch(es)
- yo: yarn over
Special Stitch Instructions
- Half Double Crochet (hdc): Yo, insert hook, yo, pull up a loop (3 loops). Yo, pull through all 3 loops.
- Third Loop: On hdc, after working front and back loops, the “third loop” is found under the “V” of the stitch, on the reverse side—working here creates ridges.
- Sideways Puff Stitch:
- Yo, insert hook into base of first dc, yo, pull up a loop (do this 4 times; each time, stretch loop a little), until 9 loops are on hook.
- Yo, pull through 8 loops; yo, pull through final two.
- Skip one st before and after each puff.
- Slip Stitch (sl st): Insert hook, yo, pull through everything.
Finished Size
- Flat width: Approx. 3–3½" across
- Circumference: Approx. 6–7"
- Height: Approx. 3½–4"
Adjust the starting chain for larger/smaller mugs as needed.
How To Start & Stitches Used
Start: Foundation chain in multiples of 32 for standard cup circumference. The project is worked in the round, starting with basic half double crochet, then alternating rounds of sideways puff stitch and single crochet in the third loop, finished with hdc and ridge rounds.
Stitches Used: ch, sl st, hdc, sc, dc, sideways puff stitch.
The Pattern Itself
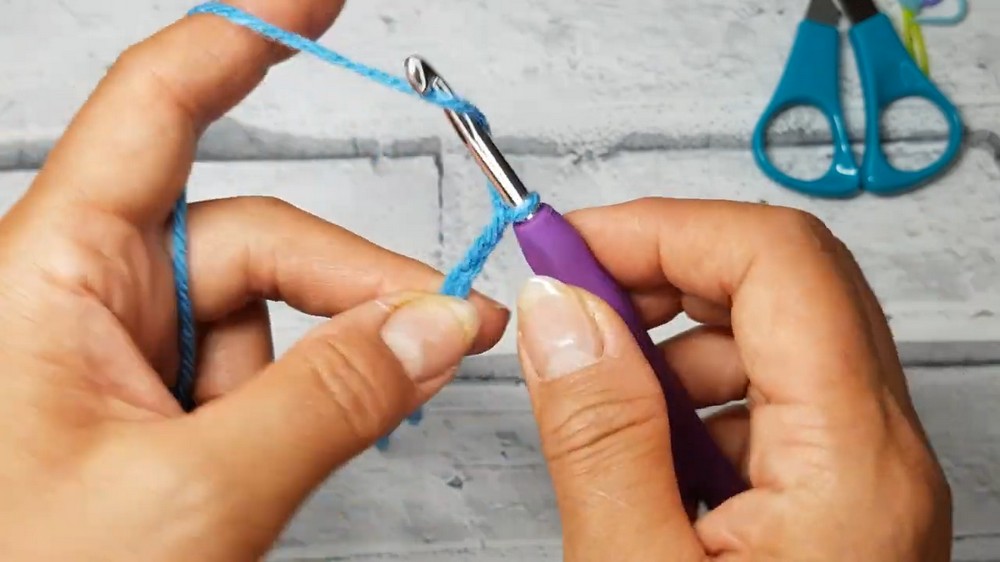
1. Foundation Chain & Joining
- Make a slip knot, leave tail for weaving in.
- Ch 32 (adjust for mug size, but ensure it’s a multiple of the pattern repeat).
- Sl st into first ch (to form a ring).
You begin by chaining 32 stitches and joining to create a circle—the base for your cup cozy.
2. Round 1: Half Double Crochet
- Ch 1.
- Hdc in same st and around.
- Place a stitch marker in the first hdc and another in its third loop for reference.
- You should have 32 hdc at the end.
- Sl st into marked hdc to finish the round.
This round provides a solid foundation and stretchy fit—place markers to help locate your first hdc and the third loop for the next round.
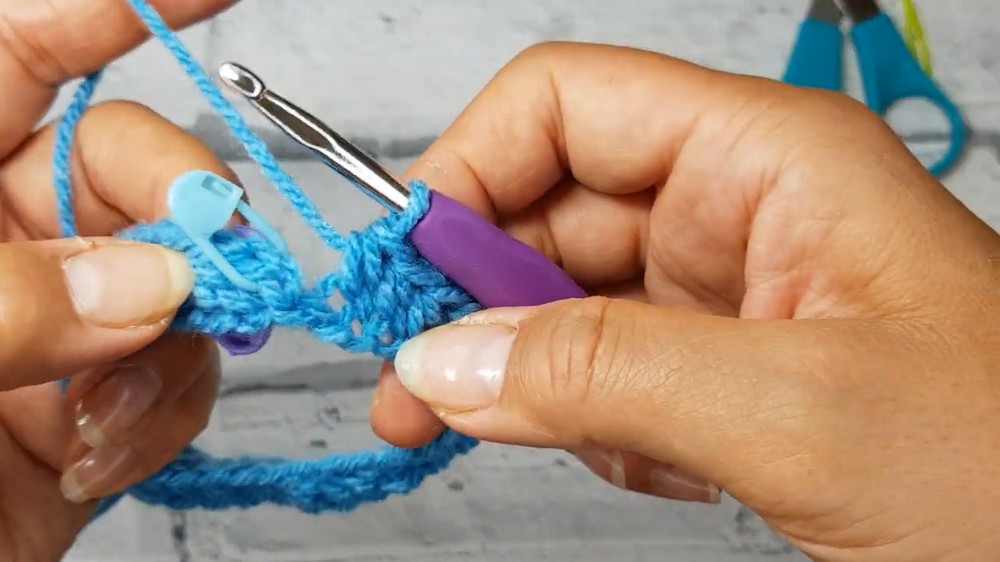
3. Round 2: Single Crochet in Third Loop (Ridge)
- Ch 1.
- Sc in the third loop of each st: Turn work so you see the ridge under the “V” of each hdc; insert into third loop, sc.
- Place a marker in the first sc.
- Sc in each third loop around (32 sc).
- Sl st into first sc to join.
Working into the third loop will create a visible ridge, giving nice texture and stretch. This round forms the plaited effect at the bottom.
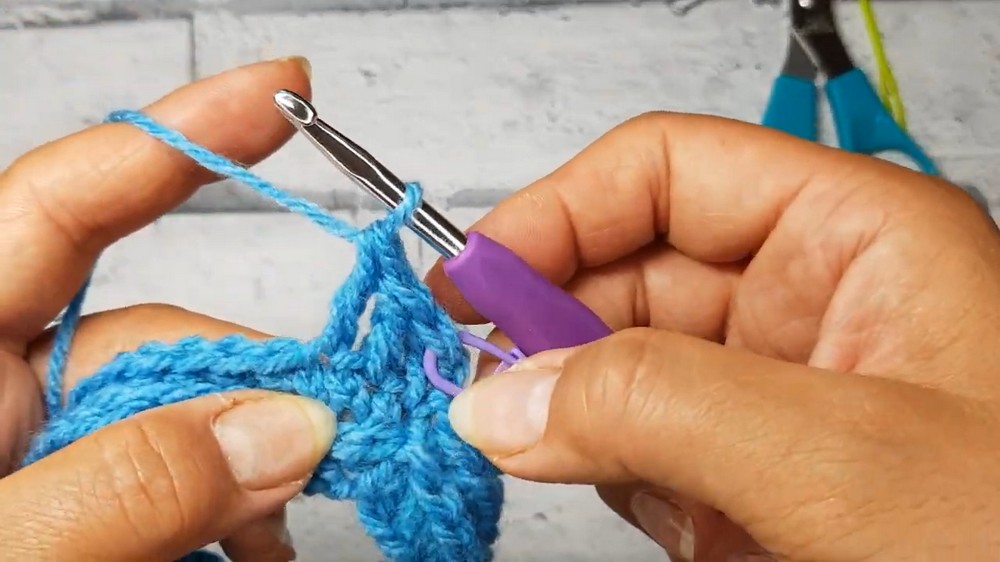
4. Round 3: Double Crochet and First Sideways Puff Stitch
- Ch 2 (does not count as a stitch).
- Dc in same st (place marker in first dc).
- Dc in next two sts.
- Sideways Puff Stitch: Yo, insert hook into base of first dc you just made. Yo, pull up loop—repeat 4 times (total 9 loops). Yo, pull through 8; yo, pull through remaining 2.
- Skip one stitch, dc in next three, puff stitch as above.
- Repeat pattern: skip one, dc in three, puff stitch all the way around.
- At end, skip one, sl st into marked dc to finish.
The sideways puff stitch forms a bold, raised ridge. You always skip a stitch before and after the puff. Repeat this set for three rounds of puff stitches.
5. Round 4: Single Crochet Ridge
- Ch 1.
- Sc in same st (place marker), sc in all stitches (single crochet in each stitch, including puffs).
- Sl st to first sc to join.
This round smooths the texture and sets up for the next puff round. Work into each stitch evenly.
6. Round 5: Puff Stitch Repeat
- Sl st into next stitch to move starting point.
- Ch 2, dc in same st (place marker), dc in next two.
- Work sideways puff stitch in base of first dc.
- Continue pattern: skip one st, dc in three, puff stitch in base of first dc of group; repeat around.
- Sl st to marked dc to join.
Each puff round must start with the correct stitch placement, so use slip stitches to adjust your beginning point. Repeat puff pattern as before.
7. Round 6: Single Crochet Ridge
- Ch 1, sc in same st, sc in all stitches around.
- Sl st to first sc.
This round provides balance and highlights the texture between puff rounds.
8. Round 7: Puff Stitch Repeat
- Sl st into next stitch, Ch 2, dc in same st, dc in next two.
- Puff stitch as in previous rounds.
- Repeat pattern all the way around.
- Sl st to first dc; fasten off.
You will now have three puff rounds and alternating ridges. Adjust length by adding or removing rounds as desired.
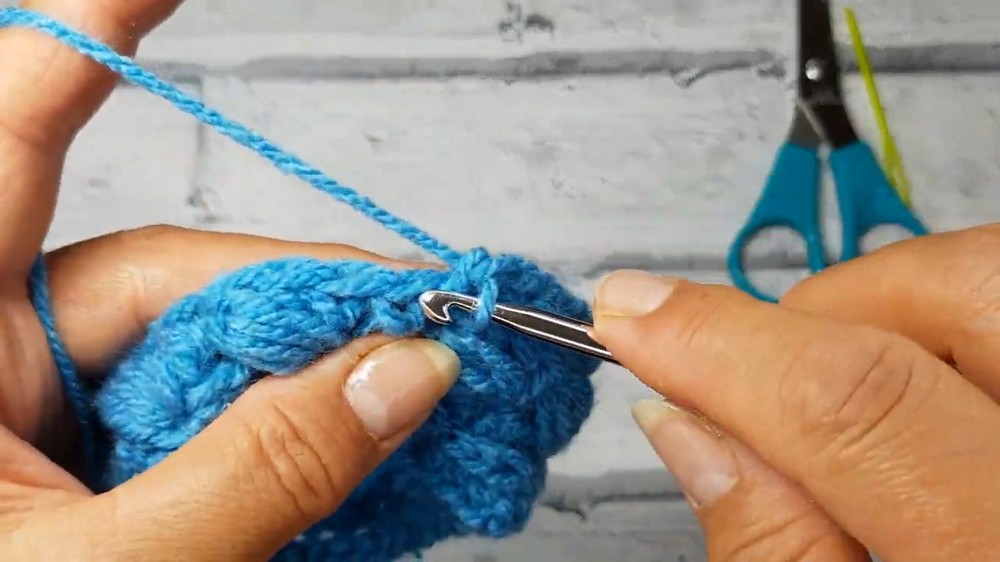
9. Round 8: Final Half Double Crochet Round
- Ch 1, hdc in same st, hdc in every stitch around.
- Sl st to first hdc.
This closes the top edge, mimicking the stretchy base created at the beginning. The cup warmer is nearly finished!
10. Round 9: Final Ridge (Single Crochet in Third Loop)
- Ch 1, sc in the third loop of each hdc as before.
- Work all the way around.
- Sl st to first sc; fasten off.
A plaited ridge finishes the cozy, giving both structure and visual detail. This also increases stretchiness.
Assembly & Finishing
- Weave in all ends neatly using a yarn/tapestry needle—run through the inside of the cozy to hide extra yarn.
- Trim excess tails.
- Gently shape and slip the cozy on your cup, container, or mug.
Finishing includes weaving in all yarn ends—hide them inside for a neat appearance. Adjust your cozy’s shape before sliding it onto your favorite cup.
Pattern Recap & Tips
How to Start & Stitches Used:
Begin with a foundation chain, join into a ring, and alternate rounds of half double crochet, single crochet (in third loop), double crochet clusters (sideways puff), and ridges. Place stitch markers for guidance.
Tips:
- Adjust chain count for larger or smaller mugs.
- Sideways puff stitches create raised texture—keep your loops a bit loose for easier work.
- Use contrasting yarns for bold effect.
Conclusion
Your cup warmer is ready for use or gifting! This pattern uses easy stitches and creates a practical, attractive item for everyday living. Adjust the length or circumference for containers, pots, or pencils. If you make more, stack or store cozy cup holders for instant style.