
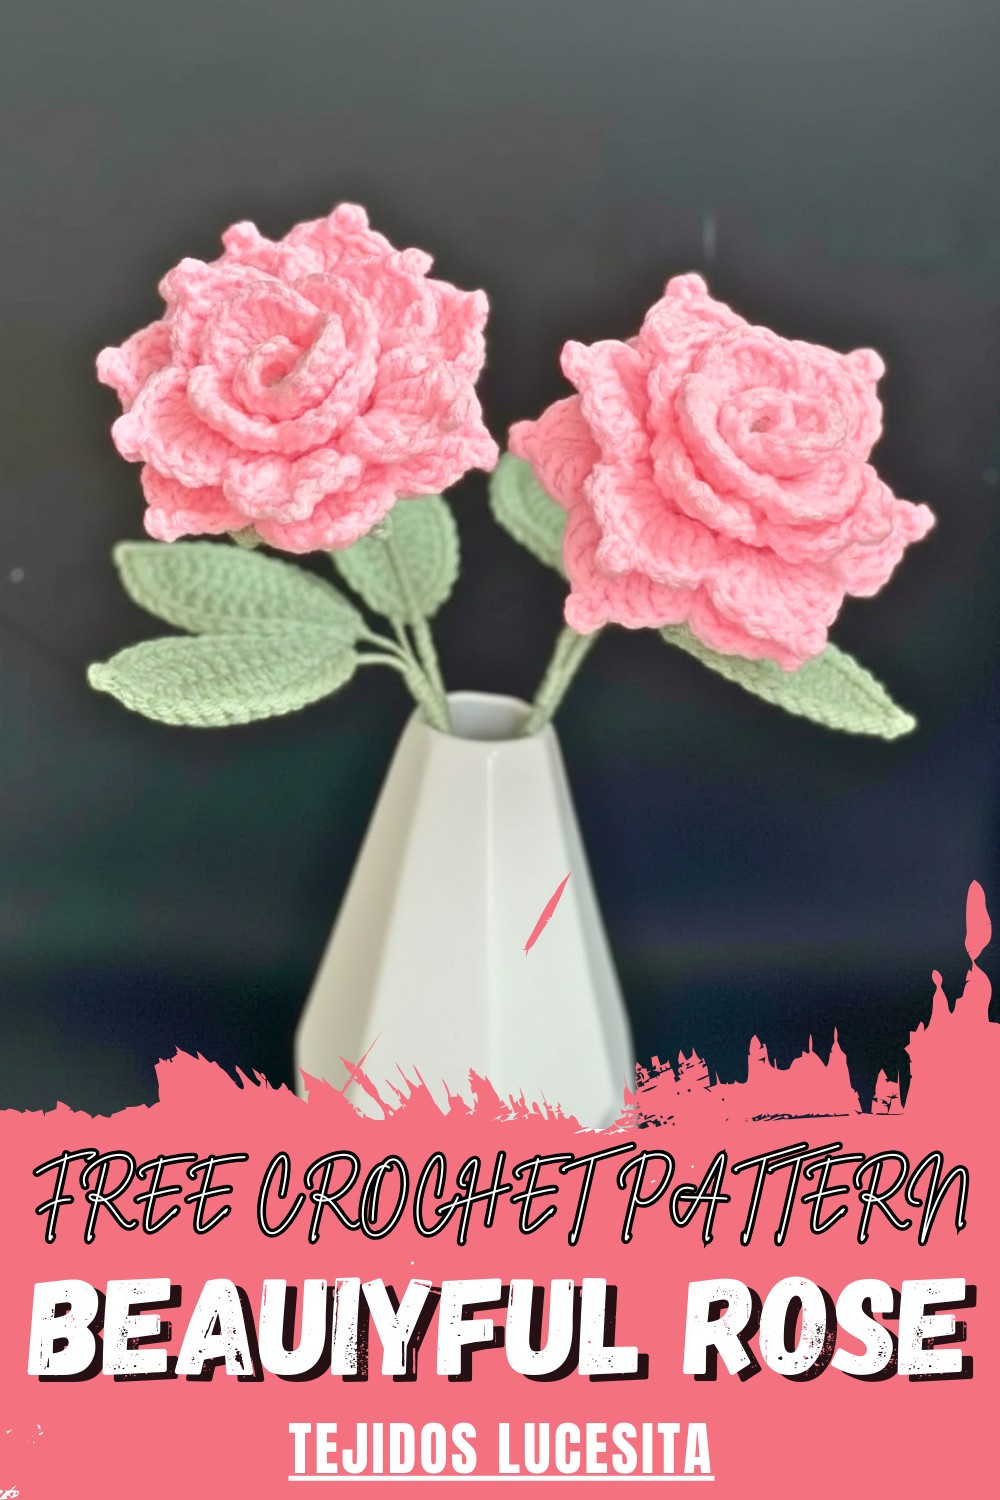
Timeless Crochet Rose Pattern That Never Fades
Admire lasting floral appeal with this Crochet Rose Pattern with refined petal detail perfect for accents, keepsakes, and displays.
A classic flower shape made with yarn brings warmth and beauty to many decorative ideas, and roses are especially admired for their elegant form. A Crochet Rose pattern stands out because of its layered, spiral design that closely resembles a real rose while remaining soft and long-lasting. This type of flower adds a delicate touch to accessories, clothing details, and home décor items. It is lightweight, customizable in size and color, and ideal for turning simple pieces into eye-catching designs.
Simple Crochet Rose Pattern With Stunning Results
With a Crochet Rose pattern, the finished flower becomes a versatile decorative piece rather than just an ornament. It can highlight everyday items, enhance special gifts, or be grouped with other roses to create larger decorative arrangements. The soft structure and detailed shape help elevate simple projects, making them feel more personal and visually appealing.
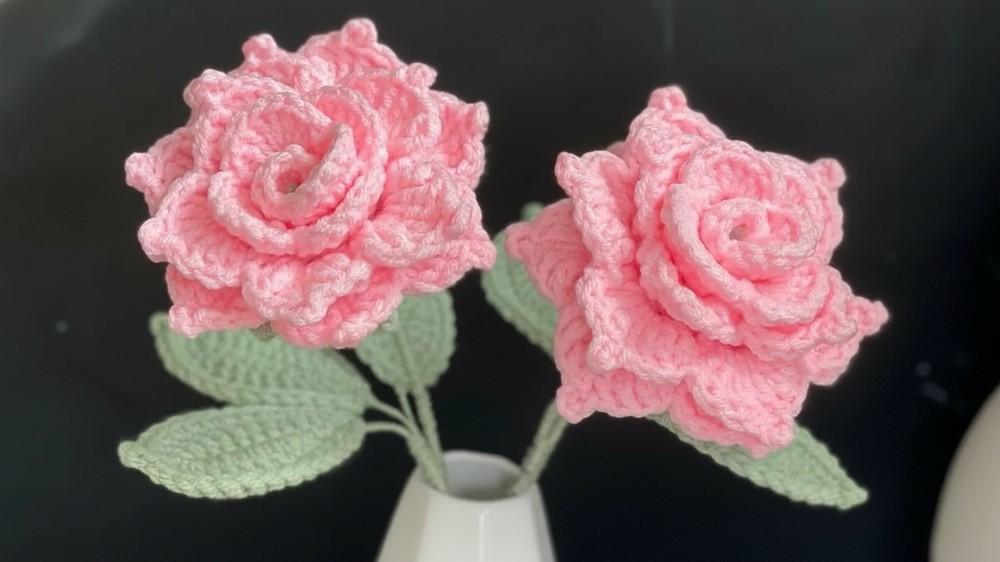
This pattern is a great way to add floral charm and lasting beauty to many creative ideas. Because it does not require complex techniques, it suits both beginners and experienced makers who want a quick yet attractive result.
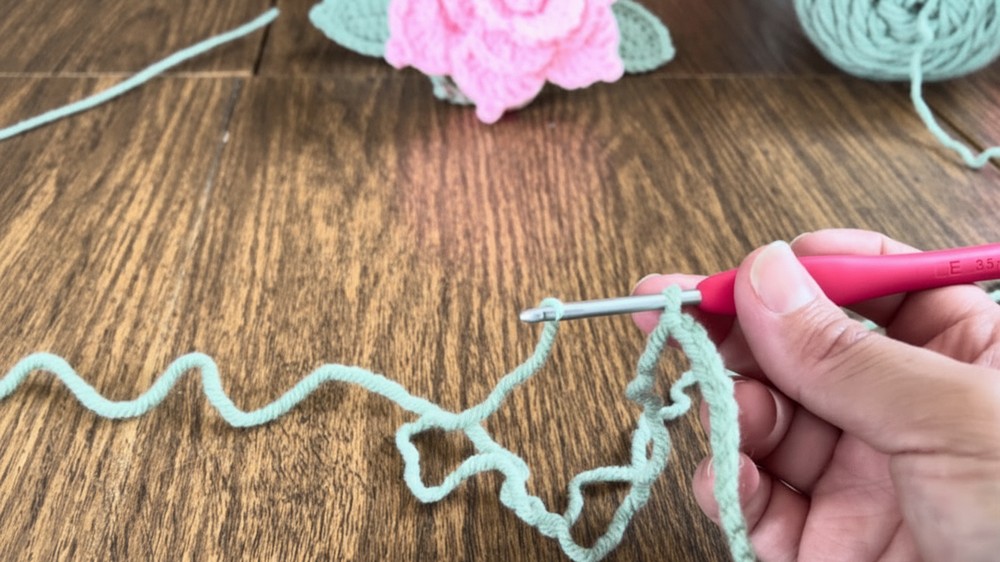
To follow this pattern, you usually begin by creating a long foundation chain that determines the width of the petals.
Stitches are worked into the chain using a mix of shorter and taller stitches to form gentle waves along the edge.
These waves naturally shape the petals as the strip grows. Once the strip is complete, it is rolled tightly from one end to form the rose center, then gradually loosened to shape the outer petals.
The base is secured with yarn or a needle, and loose ends are neatly tucked away to keep the rose firm.
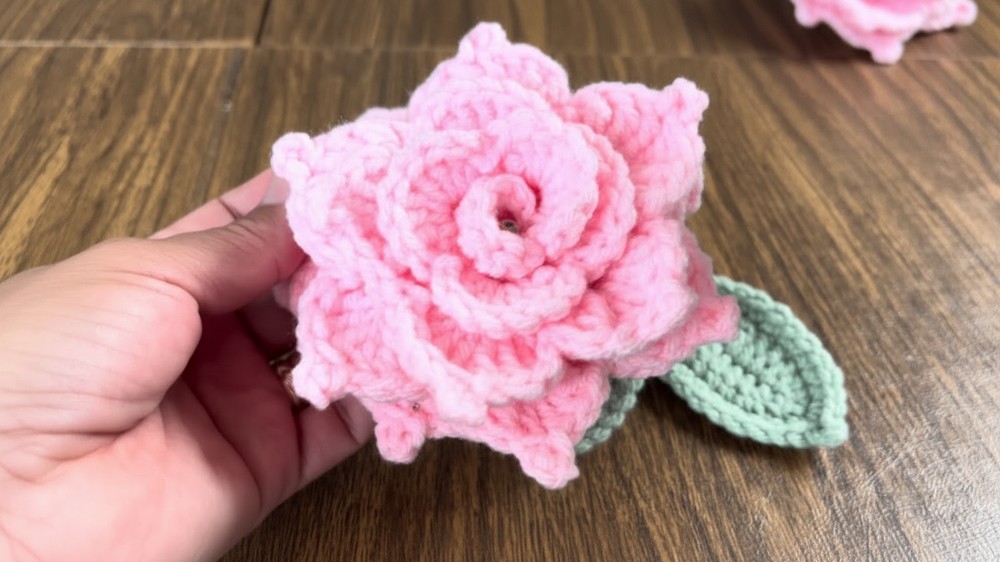
This tutorial provides a detailed walkthrough for creating a beautiful, realistic Crochet Rose. It's a perfect project for floral arrangements, gifts, or home decor.
Introduction
In this video, tutor Lucesita demonstrates how to crochet a vibrant pink rose, complete with leaves and a calyx. She focuses on a technique that creates a professional, multi-layered look that is surprisingly easy to achieve, even for those new to floral crochet.
Materials
-
Yarn: 100% Acrylic yarn (Weight #4/Medium) in Rose Pink and Green.
-
Hook: 3.5 mm crochet hook.
-
Support: Galvanized wire (Caliber 24) for leaves and a thicker wire (or wooden skewer) for the main stem.
-
Tools: Hot glue gun, scissors, tapestry needle, and pliers (optional for wire).
Step-by-Step Details
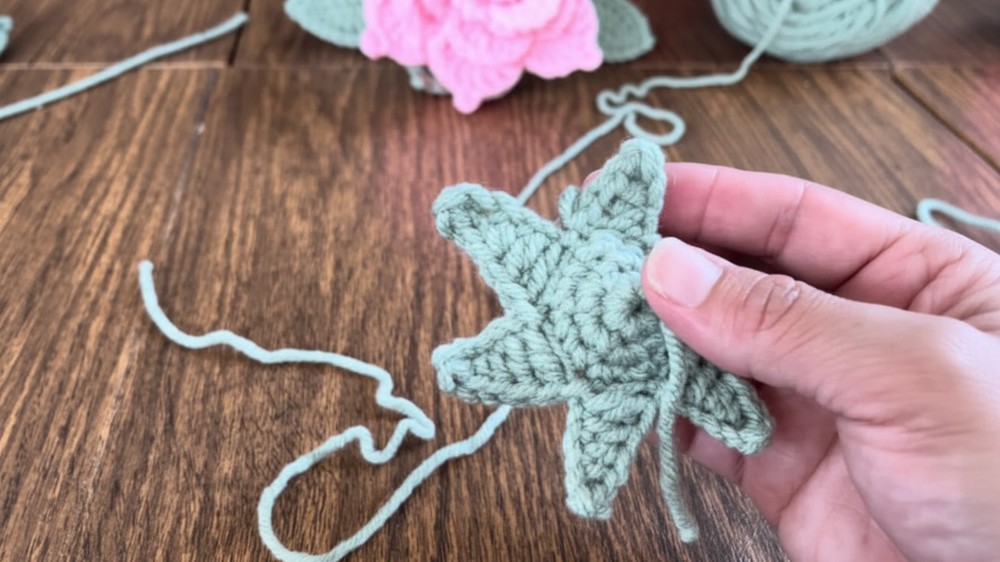
1. The Leaves (Make 3)
-
Start with 12 chains.
-
Work a sequence of stitches along the chain: 1 sc, 2 hdc, 6 dc, 1 hdc, and 3 sc in the last stitch to turn.
-
Work back down the other side: 1 hdc, 6 dc, 2 hdc, and 1 sc.
-
Wire Attachment: Place the wire along the edge and crochet a round of single crochets over it to secure it. At the tip, work a "picot" stitch (2 sc, 2 ch, slip stitch, 2 sc) for a sharp point.
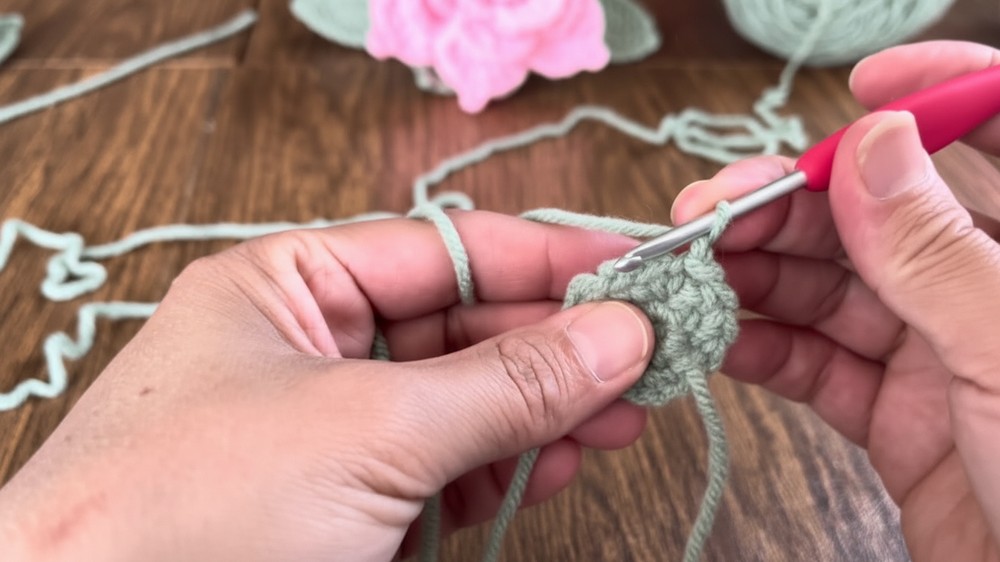
2. The Calyx (Green Base)
-
Start with a magic ring and 6 sc.
-
Round 2: Increase in every stitch (12 sc).
-
Round 3: Work 12 sc around.
-
Sepals: Chain 6. Work 2 sc, 1 hdc, and 2 dc down the chain. Slip stitch into the base to secure. Repeat this until you have 6 sepals.
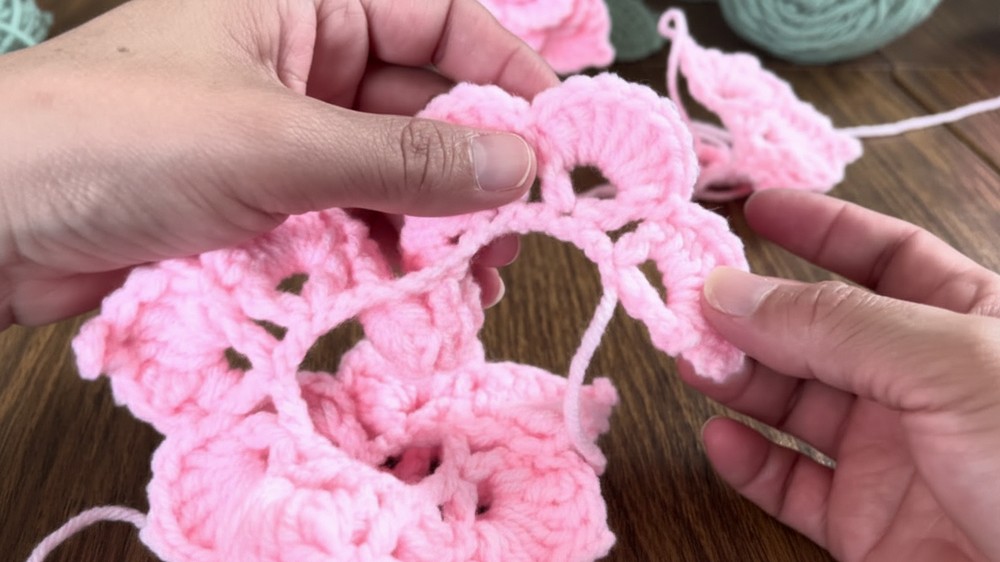
3. The Rose Petals
-
Foundation: Chain 63.
-
Row 1 (V-Stitch): Skip 6 chains, dc in the 7th. Then, skip 2, [1 dc, 3 ch, 1 dc in same stitch]. Repeat until you have 20 "V" groups.
-
Row 2 (Small Petals): In the first 6 "V" spaces, work 8 dc per space, followed by a slip stitch in the gap between groups.
-
Row 3 (Large Petals): In the remaining 14 "V" spaces, work Double Crochets. The pattern is: 4 double dc, 3 ch (picot), 4 double dc in each space. This creates the pointed, realistic look of outer petals.
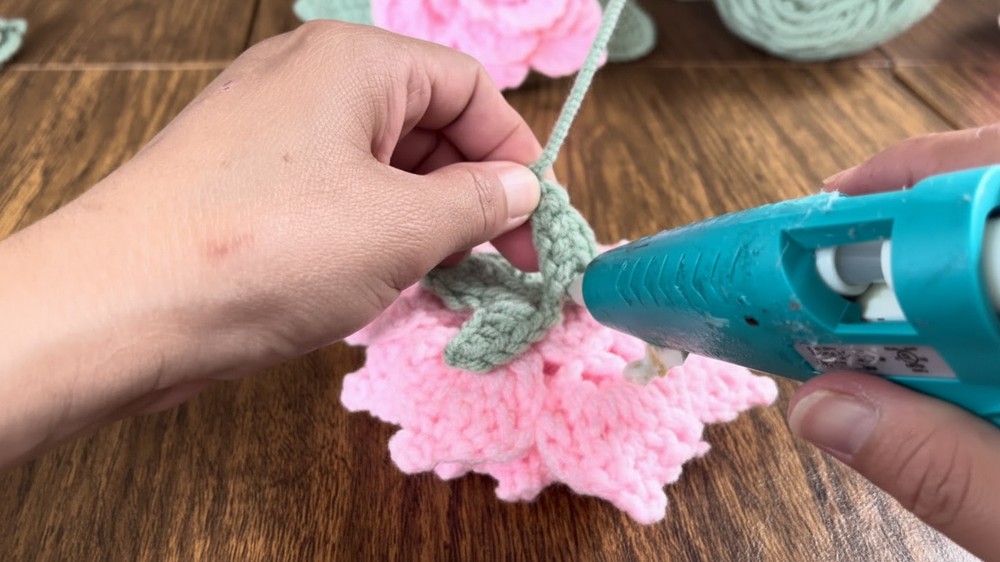
4. Assembly
-
Rolling the Rose: Apply hot glue to the end of the stem wire. Start rolling the strip of petals around the wire, beginning with the small petals (the center) and moving outward to the large petals.
-
Applying the Calyx: Slide the green calyx up the stem and glue it to the base of the rose.
-
The Stem: Wrap the main wire tightly with green yarn, gluing the leaves into place as you move down the stem.
Special Features & Key Information
-
Special Features: The use of wire in the leaves allows you to shape them realistically. The petal strip uses two different stitch heights (dc for the center and double dc for the exterior) to mimic the natural opening of a rose.
-
Level of Difficulty: Easy to Intermediate. While the stitches are basic, the assembly and wire work require some patience.
-
Uses: Ideal for Mother's Day bouquets, wedding decor, or long-lasting floral gifts.
-
Tutor’s Suggestions:
-
Use acrylic yarn for a sturdy shape that doesn't wilt.
-
Be very careful with the hot glue while rolling the rose to avoid burns.
-
If you don't have wire, a wooden skewer works perfectly for the main stem.
-
Pro-Tip
When rolling the rose, don't roll it too tightly. Keeping the outer "Double Crochet" petals slightly loose allows them to flare out, giving the rose a "blooming" appearance rather than a closed-bud look.
Conclusion
This crochet rose project combines simple geometry with creative assembly to produce a stunning result. By following Lucesita's step-by-step guide, you can create a personalized bouquet that will never fade and serves as a heartfelt, handmade gift for any occasion.