
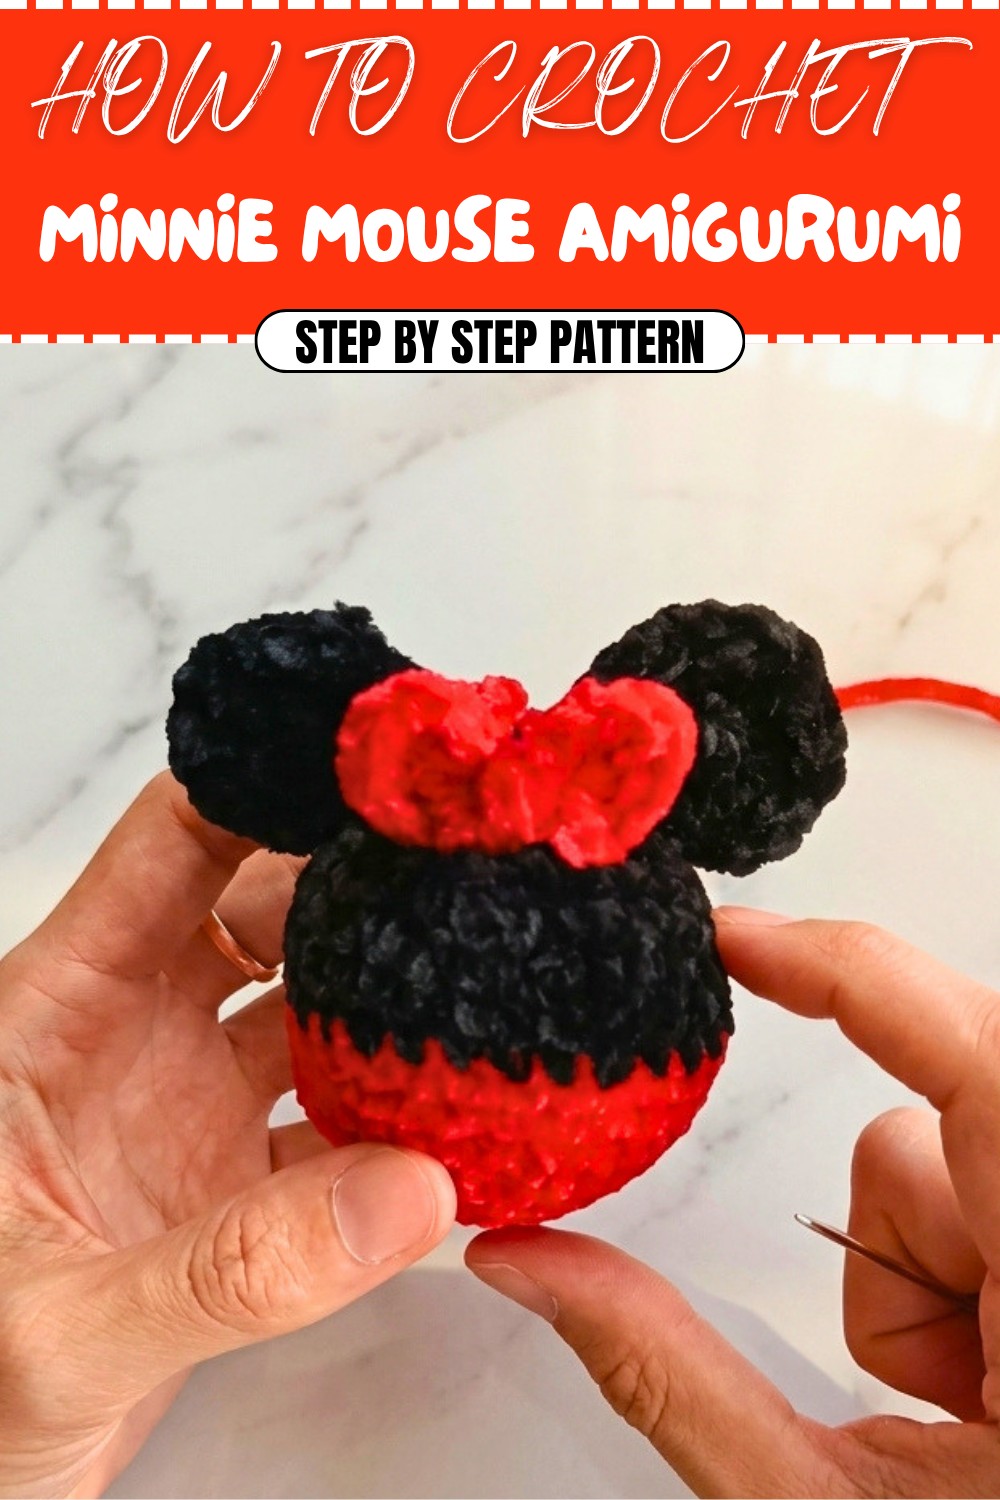
Minnie Mouse Amigurumi Free Crochet Pattern for Keychains
Create an adorable Minnie Mouse with this Free Crochet Minnie Mouse Amigurumi Pattern, perfect for beginners seeking a fun keychain or gift-making project.
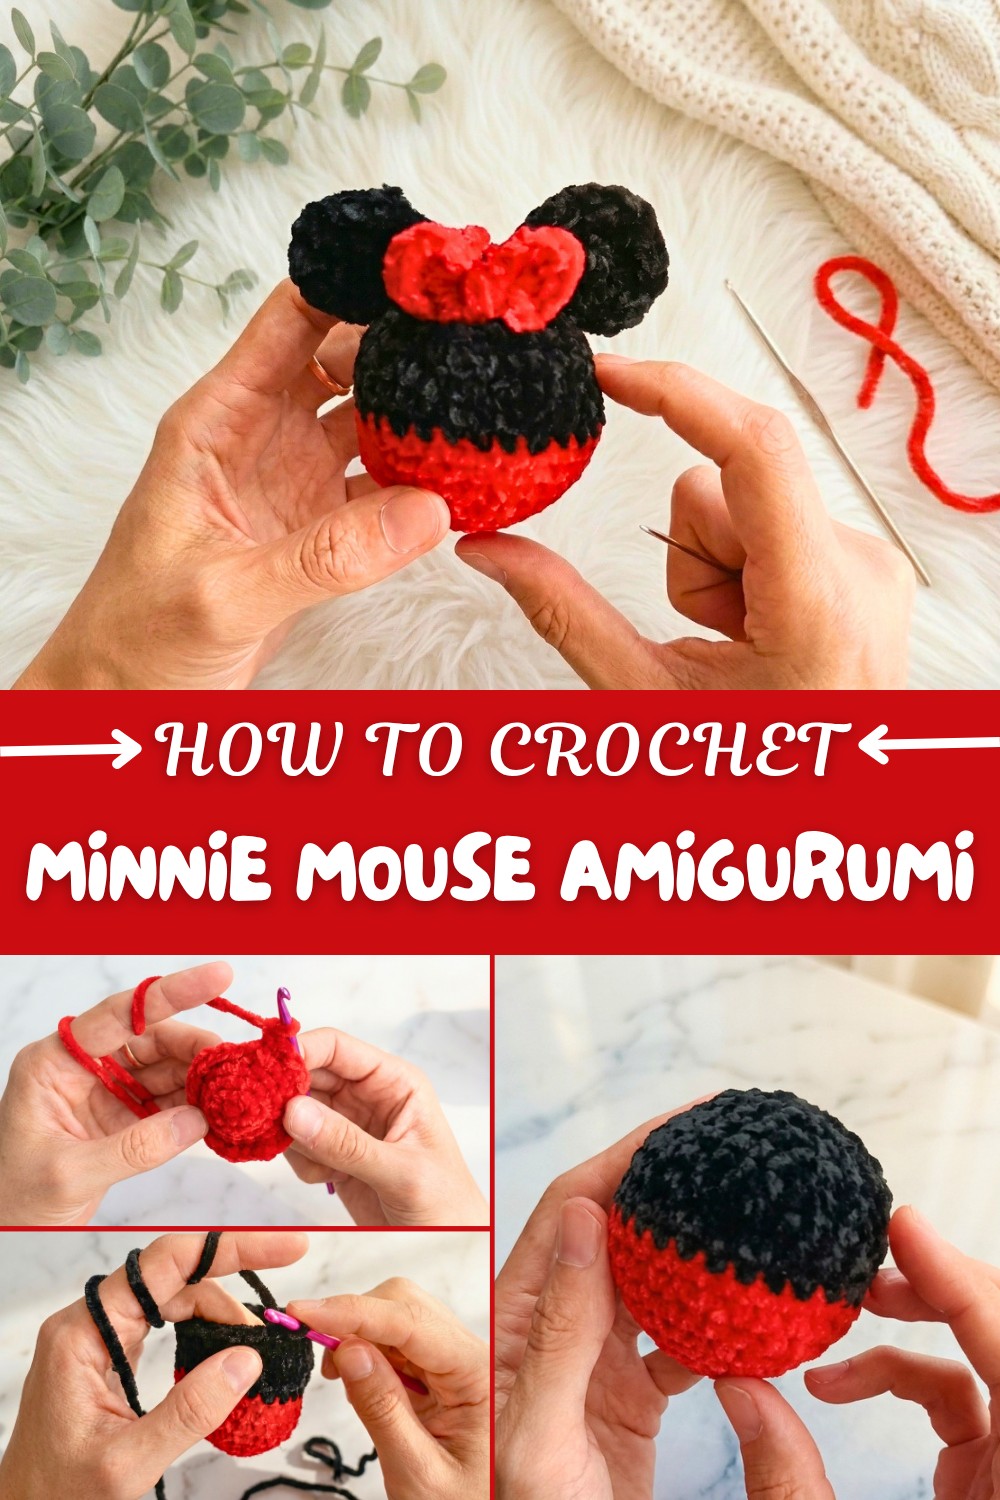
Turning yarn into adorable Disney magic, this project is sure to enchant anyone who appreciates iconic characters. The Free Crochet Minnie Mouse Amigurumi Pattern is a wonderful way to create a tiny, charming Minnie Mouse plush—perfect as a keychain, decorative accent, or thoughtful gift for fans of all ages. The completed Minnie features a classic round head and body, plush texture, and vibrant black and red colors, capturing her unmistakable style. Standout design elements include her bold mouse ears, signature red bow, and cute, cuddly proportions that make the character instantly recognizable and appealing.
Fast Free Crochet Minnie Mouse Amigurumi Pattern for Gifts
Minnie’s construction highlights single crochet worked in the round, shaping her body and head seamlessly with skillful increases and decreases. The pattern introduces color changes, creating her bright dress and ears, while assembling the parts requires sewing and placement techniques for her bow and ears. The red bow is crocheted with a combination of chains and treble stitches, wrapped tightly in the center for that perfect Minnie look. Filling fiber gives the plush a squishy, huggable feel, and sewing the ears and bow securely ensures a durable, finished piece.
Designed to be approachable for beginners, yet still engaging for experienced crafters, this pattern guides you in working magic circles, mastering color changes, neat decreases, and assembling multi-part amigurumi. The small size and quick build make it ideal for those wanting to practice shaping and finishing in amigurumi, or for anyone seeking a fast, satisfying crochet project.
This Minnie Mouse amigurumi is incredibly versatile as a keychain, bag charm, or cute shelf display. It makes a delightful handmade gift, or a treasured keepsake for Disney collectors. Crocheters of any skill level will enhance their shaping and assembly skills while enjoying a project that’s both playful and rewarding. The Free Crochet Minnie Mouse Amigurumi Pattern is a cheerful and accessible choice for anyone wishing to add a touch of fun to their crochet repertoire.
Tiny Minnie Mouse Amigurumi Crochet Pattern
Before You Start
- Read through the entire pattern before you begin.
- Work in continuous rounds (spiral); do not join unless stated.
- Use a stitch marker to mark the last stitch of each round.
- Adjust yarn or hook if you want your Minnie Mouse larger or smaller.
- Keep stuffing handy and add as you progress, especially before decreasing rounds.
Pattern Notes
- Main body is worked from bottom (dress) up in one piece, with simple increases and color changes.
- Ears and bow are made separately; sewn onto the head after stuffing and closing.
- All stitches are single crochet unless specified.
- Stuff carefully; overstuffing can distort shape and under-stuffing can cause limp structure.
How I Made the Crochet Pattern
- Started with red magic ring for dress, increased evenly for a spherical body.
- Changed to black yarn for head, worked even rounds for shape.
- Used gradual decreases for tapered head closure.
- Created flat ear circles and a bow using magic ring, trebles, chains, and slip stitches.
- Sewed parts for classic Minnie shape, adjusted with hand-stitching and finishing.
Skill Level
Beginner to Advanced Beginner:
Simple amigurumi construction, basic stitches, minimal sewing, easy color changes.
Finished Size
Height: Approx. 8–10 cm (3–4 inches), depending on yarn and hook.
Materials
- 4.5 mm crochet hook
- Red yarn (approx. 130 meters per 400 grams)
- Black yarn (same weight as red)
- Filling fiber for stuffing
- Yarn or tapestry needle
- Scissors
Measurements / Sizing
- Body (including head): 8–10 cm tall, 4–5 cm diameter at widest.
- Ears: 3–4 cm diameter
- Bow: 3–4 cm across
Gauge
Gauge is less important; tight stitches prevent stuffing from showing.
Example: 8 sc x 8 rounds ≈ 2” (5 cm).
Stitch Abbreviations
- MR = Magic Ring
- sc = single crochet
- inc = increase (2 sc in same st)
- dec = decrease (sc2tog)
- sl st = slip stitch
- tr = treble crochet
- ch = chain
- st(s) = stitch(es)
Special Stitches
- Magic Ring: Loop yarn, crochet into ring, pull tight.
- Treble (tr): Yarn over twice, insert hook, yarn over and pull through, yarn over and pull through 2 loops three times.
- Color change: On the last yarn over of a stitch, pull through with new color.
The Pattern!
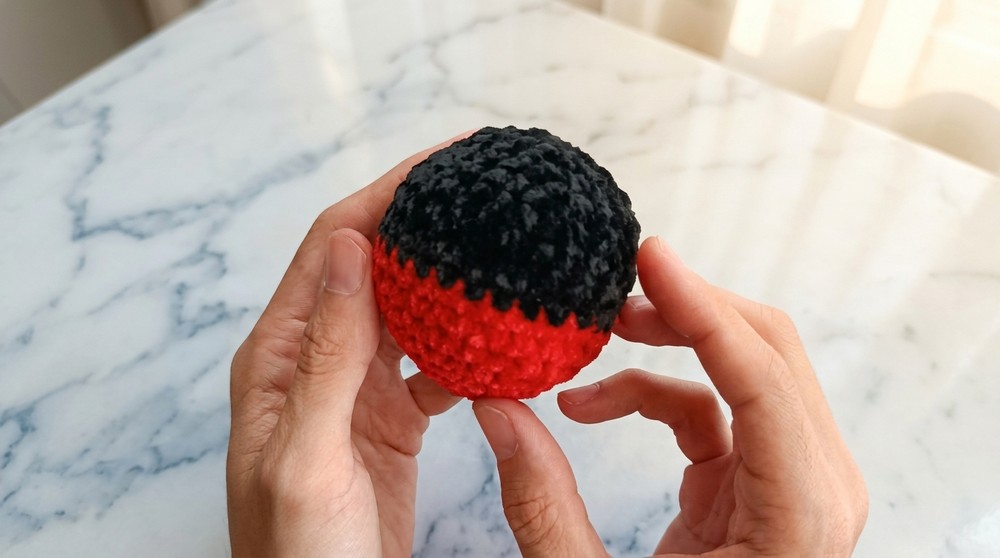
BODY + HEAD
Red Yarn (Dress Skirt):
- MR, 6 sc in ring. (6)
- Round 2: 6 inc (2 sc in each st) (12)
- Round 3: [1 sc, inc] x6 (18)
- Round 4: [2 sc, inc] x6 (24)
- Round 5: [3 sc, inc] x6 (30)
- Rounds 6–8: 30 sc (one in each st) for 3 rounds.
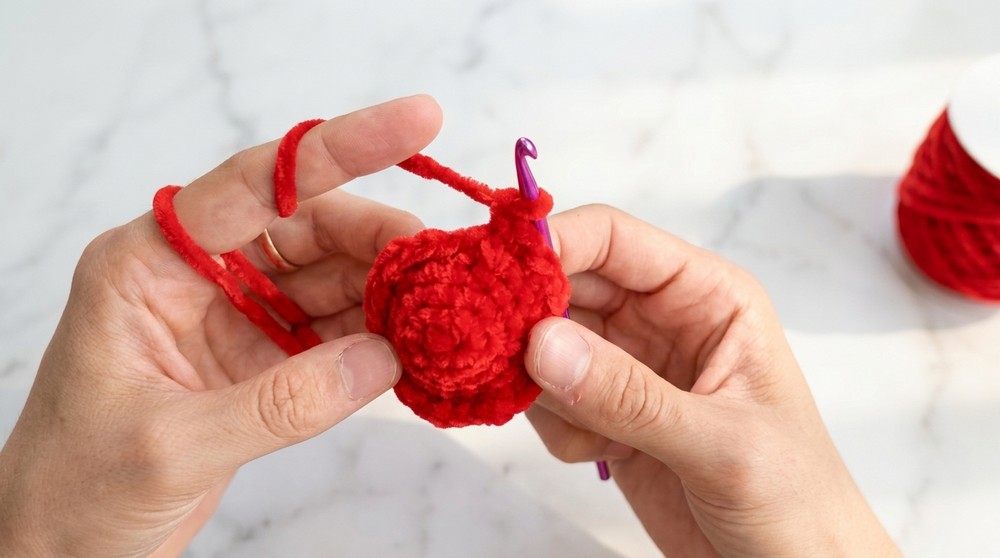
Paragraph:
Begin by crocheting a magic ring with red yarn for Minnie’s dress. Work evenly spaced increases until you reach 30 stitches, forming a flat circle. Continue three rounds without increases to create the fullness of the skirt.
Change to Black Yarn (Head):
- On last sc, leave 2 loops on hook, pull new color through and tighten.
- Cut red, knot ends together to secure.
- Rounds 9–12 (Black): 30 sc per round (4 rounds).
- Round 13: [3 sc, dec] x6 (24)
- Round 14: [2 sc, dec] x6 (18)
- Round 15: [1 sc, dec] x6 (12)
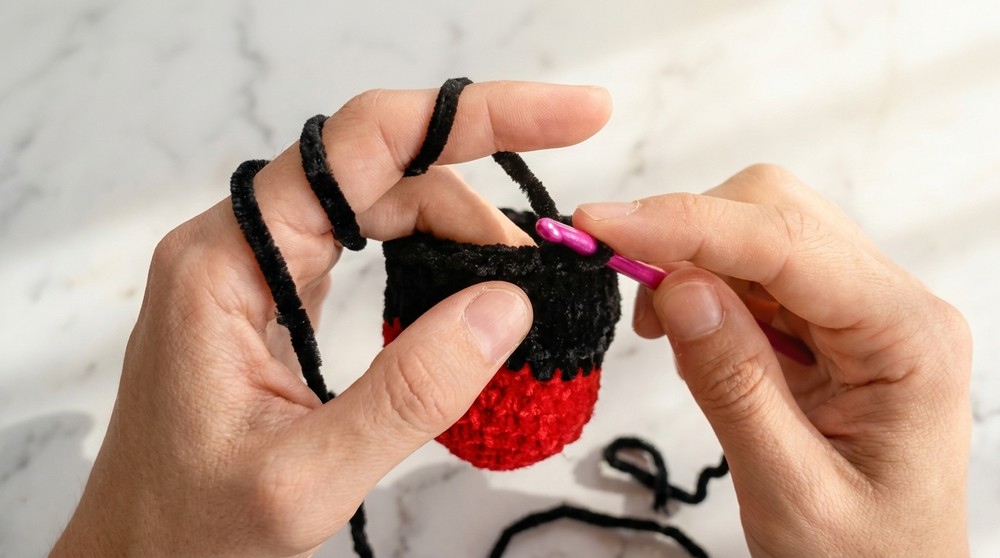
Stuff firmly, shaping the head as you go; do not overstuff!
- Round 16: [dec] x6 (6)
- Sl st, ch 1, fasten off. Leave tail for closing.
Paragraph:
Switch to black to create Minnie’s head; work even rounds then begin decreases to shape. Be sure to stuff the head before the opening becomes too small. Fasten off and close the opening securely.
EARS (make 2)
Black Yarn:
- MR, 6 sc in ring. (6)
- Round 2: 6 inc (12)
- Round 3: [1 sc, inc] x6 (18)
- Sl st to join, fasten off with long tail for sewing.
Paragraph:
Each ear is a flat circle, made by increasing smoothly. Fasten off; leave tail for assembly.
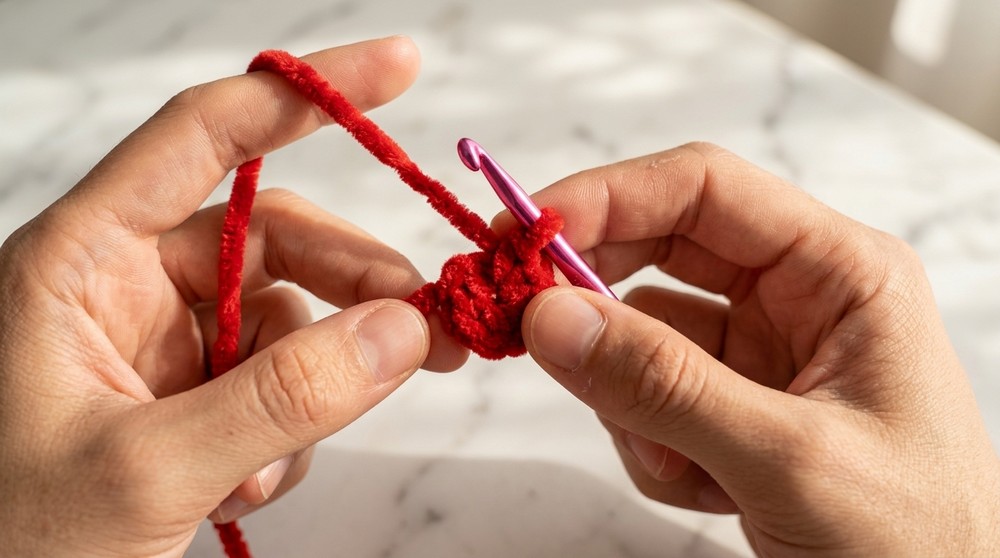
BOW
Red Yarn:
- MR, ch 3.
- 3 tr into MR.
- Ch 3, sl st into MR.
- Ch 3, 3 tr into MR.
- Ch 3, sl st into MR.
- Pull yarn tight to close bow.
- Chain 1, fasten off with long tail for sewing.
- Wrap tail several times around bow center for definition; secure with stitches.
Paragraph:
The bow is formed by working clusters of treble crochets and chains into one magic ring. Pull tight, wrap yarn around the center to cinch, and secure. The bow gives Minnie her signature look.
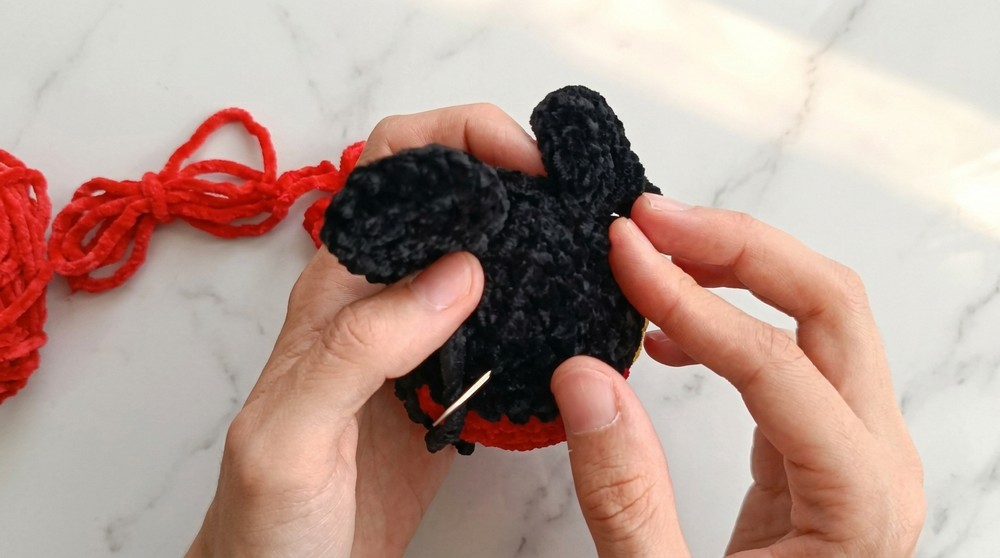
Assembly & Finishing
- Close the head opening with needle, weaving tail through last round’s stitches.
- Sew ears to the head, equally spaced (centered on either side, slightly toward the top).
- Attach bow between ears, wrapping and stitching until secure.
- Hide all yarn tails inside the head/body.
- Adjust ears and bow placement for symmetry.
Solution of Problem
Possible Problem:
If the ears or bow droop or fall off after sewing, they may need tighter stitches or more wrapping for stability.
Solution:
Use extra yarn wraps and several stitches to anchor the bow’s center. Attach ears securely with whip stitches, hiding the ends inside. Repeat sewing if needed for firmness.
What You Can Make Using These Stitches
- Tiny Minnie Mouse plush
- Minnie Mouse keychain or bag charm
- Custom dolls with different color bows and skirts
- Mickey Mouse adaptation (change bow placement/color)
- Simple sphere and disk shapes for easy amigurumi
For Non-Pattern Readers
You start by crocheting a round red skirt, then switch to black for the head, decreasing to close and stuffing as you go. Make two flat circles for the ears, a bow with treble stitches and chains, then sew everything together. Ears attach to the top sides, the bow goes in between, and tails are hidden inside for a neat look.