
How to Crochet Butterfly Earrings Pattern for Summer Looks
Spark creativity and update your jewelry with a Free Crochet Butterfly Earrings Pattern perfect for bold, trendy statements.
Finding the perfect lightweight and charming accessory can be a challenge, especially when you want something unique and handmade. Creating these beautiful crochet butterflies solves that problem beautifully. The pattern uses double crochet and chain stitches, which come together to form graceful, airy wings that flutter with elegance. This open, lacy texture gives the earrings a lightness that makes them comfortable to wear all day, while adding a splash of nature-inspired charm to any outfit.
What Else Can You Crochet from This Pattern?
This butterfly pattern isn’t limited to earrings. By scaling up or adjusting the pattern, you can create brooches, hair clips, or even decorative garlands perfect for brightening your home. Different yarn textures and colors give you room to play, turning butterflies into a variety of whimsical decorations or accessories. The skills you gain with the stitches in this project make tackling more intricate crochet lacework an exciting next step.
Crochet Butterfly Earrings Pattern for Handmade Glam

These butterflies are not only stunning but also versatile accessories. They make wonderful gifts or delightful treats for yourself, adding a playful yet sophisticated touch to casual or dressy looks. The step-by-step instructions are clear and beginner-friendly, walking you through each wing and body section before finishing with simple sewing and adding earring hooks. Plus, you can personalize the colors and size to match your style.

Crochet Butterfly Earring Pattern
This beginner-friendly pattern walks you through step-by-step instructions to create a charming butterfly-shaped earring using simple crochet stitches. Perfect for accessorizing outfits, gifting, or creating colorful, lightweight jewelry.
Transform thread into wearable art with this delightful butterfly crochet earring pattern. Whether you're preparing for a springtime party or looking for a whimsical handmade project, these earrings make the perfect accessory. Adding your personal touch with different thread colors and hook sizes, this creation is versatile and ideal for all occasions.
Uses of This Pattern
- Fashion Accessory: Create stunning earrings to match any outfit.
- Gifts: Perfect for birthdays, baby showers, or holiday presents.
- Home Décor: Use butterflies for decorations, keychains, or even as embellishments for greeting cards.
- Selling Handmade Items: These earrings are great additions to your crochet business inventory.
Skill Level & Terminology
- Skill Level: Beginner-friendly. Requires basic knowledge of crochet stitches such as magic ring, single crochet, double crochet, chain stitch, slip stitch, and picot stitch.
- Terminology: U.S. crochet terms.
Materials & Tools
- Thread: Any thread of your choice (medium cotton thread recommended).
- Crochet Hook: 1 mm hook or appropriate size for your chosen thread.
- Additional Tools: Scissors, sewing needle, pliers, earring rings, hook, fabric glue mixed with water, resin (optional).
Gauge
Gauge is not critical for this pattern. Use a hook size and thread combination to achieve the desired firmness for your butterfly.
Abbreviations List
- MR: Magic Ring
- ch: Chain
- sc: Single crochet
- sl st: Slip stitch
- dc: Double crochet
- lp: Loop
Special Stitch Instructions
- Magic Ring (MR): Wrap the yarn around two fingers or create a loop. Insert the hook into the loop, pull through yarn, and start working stitches into the center of the loop. Pull the tail to close the ring.
- Picot Stitch: Chain 3, skip two stitches, and place a slip stitch in the third chain to form the picot.
Finished Size
The completed butterfly earrings measure approximately 1.5 to 2 inches — lightweight, colorful, and wearable.
Pattern Overview
This butterfly crochet pattern uses a magic ring as the foundation. The body of the butterfly is created in rounds with double crochets, single crochets, and chains. Wings are created with decorative stitches like picots and loops, creating intricate details.
The Pattern Itself
Part 1: Creating the Body of the Butterfly (Round 1)
- Magic Ring: Start with a MR.
- Single Crochets: Make 5 sc inside the ring.
- Closing the Ring: Pull the ring tightly and hold the excess thread.
- Slip Stitch: Insert the needle into the first stitch and make a sl st to close.
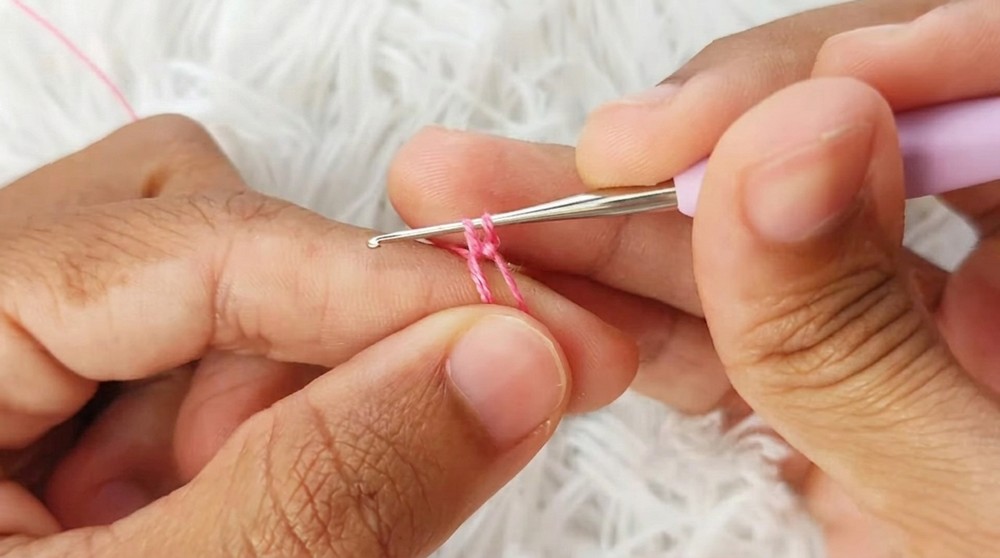
Note for Beginners: This step forms the central body of the butterfly while practicing basic stitches.
Part 2: Creating the First Layer of Wings (Round 2)
- Starting Chains: ch 3, yarn over.
- Double Crochet in Same Chain: Make dc in the same point where chains were created.
- Three Chains: ch 3.
- Double Crochets:
- In the next stitch, make 2 dc in the same base point.
- Repeat the sequence of ch 3, 2 dc in same points for all remaining stitches.
- Final Stitch: In the last single crochet, ch 3 and make 2 dc.
Note for Beginners: This step establishes the butterfly's wing structure by increasing stitches. Focus on creating even wings.
Part 3: Building Larger Wings (Round 3)
- Turning Work: ch 1 and turn your work.
- Double Crochets in Chain Spaces:
- In the first chain space, make 2 dc.
- ch 7, return to the same chain space and make another 2 dc.
- Next Chain Spaces: Work in the following manner:
- Make 2 dc, ch 5, and another 2 dc.
- Slip stitch between the two dc stitches.
- Repeating Across: Continue the steps above for all chain spaces. Ensure that each wing space is symmetrical.

Note for Beginners: This step relies heavily on chain spaces for shaping. Be consistent with your stitch count in each space to avoid uneven wings.
Part 4: Adding Fine Details to Wings (Round 4)
- Slip Stitch Placement: Turn your work and make sl st into the second dc.
- Decorative Details:
- In each chain space, add alternating dc and pico stitches (ch 3, skip 2 chains, sl st in 3rd chain).
- Repeat for a total of 5 dc stitches, adding a chain between each dc.
- Small Loops for Wings: Add sl sts and ch 5 loops evenly across wing edges for added texture.
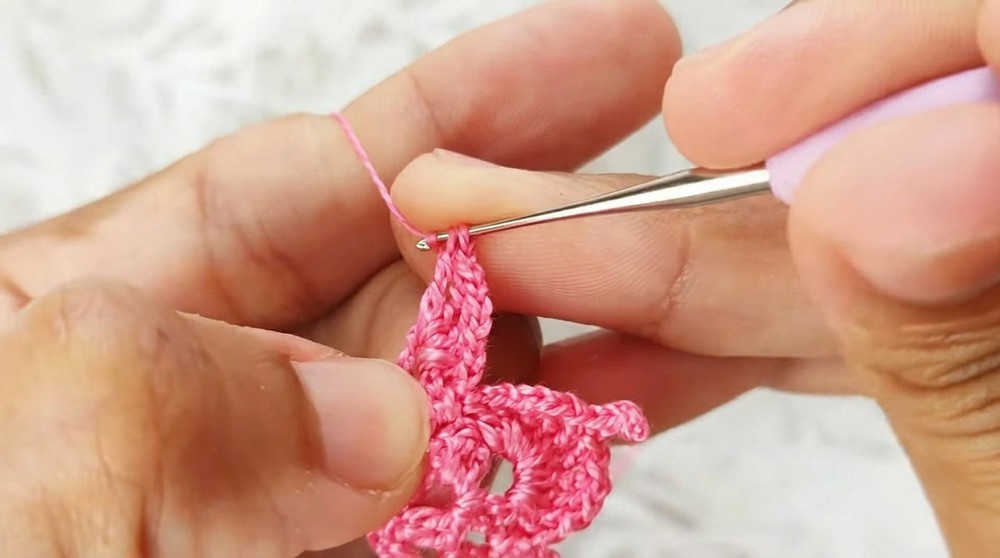
Note for Beginners: Adding picot stitches and decorative loops elevates the design. Follow stitch counts closely to ensure clean details.
Part 5: Closing the Butterfly Shape
- Final Chains: Add dc and chain stitches (as outlined above) in the last chain space.
- Slip Stitch and Cut Thread: Close the work with a sl st in the final stitch. Cut the thread and use a sewing needle to hide it on the wrong side.
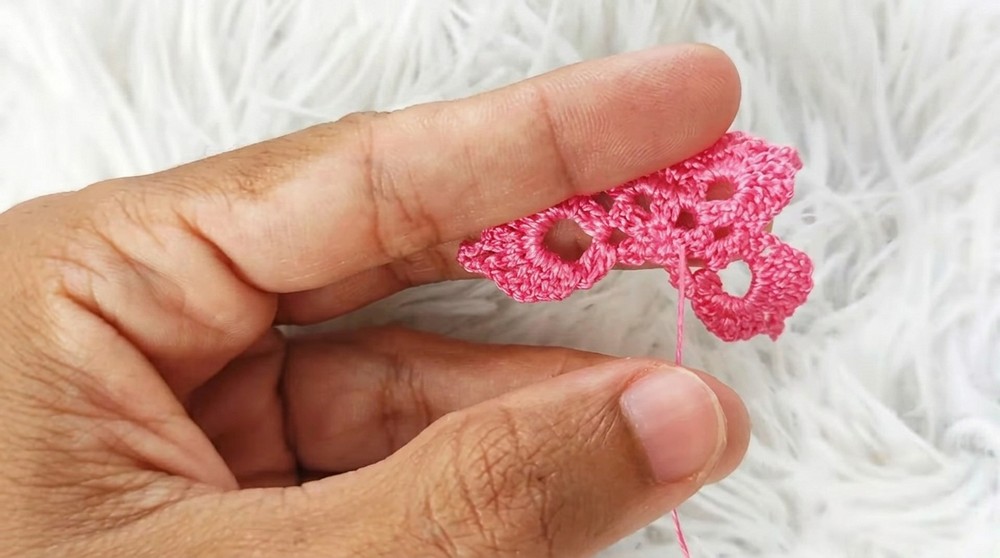
Note for Beginners: At this point, the butterfly shape is complete. Ensure all loose threads are neatly hidden to maintain a clean finish.
Assembly & Finishing
- Shaping: Apply a mixture of water and fabric glue (or resin) to the back to stiffen the butterfly.
- Adding Earring Hooks: Shape the wings with pliers, attach earring rings and hooks securely.

What You'll Learn
- Magic Ring Usage: Start projects with a neat, compact base.
- Detailed Wing Crochet: Practice double crochets, slip stitches, and picots to create stunning wing patterns.
- Project Assembly: Learn how to attach earring hooks for wearable crochet.
Difficulties and Solutions
Challenges:
- Managing small thread sizes may be difficult for beginners.
- Tightening the magic ring and hiding excess thread neatly can be tricky.
- Symmetry in wing details requires careful attention.
Solutions:
- Use slightly thicker thread and practice magic rings separately before starting.
- Mark stitch positions with stitch markers to maintain symmetry.
- Slow down and use magnification if needed to see small details clearly.
Why You'll Love This Pattern
Crocheting butterfly earrings is a delightful way to infuse creativity into your jewelry. The dynamic stitches and decorative accents provide fun challenges and allow endless customization by experimenting with thread colors and variations. These earrings are quick to make, charming, and perfect for gifts, personal use, or selling as handmade items.