
Free Keyhole Top Crochet Pattern That’s Beginner Friendly
Refine your casual street style haul with a Free Cute Crochet Keyhole Top Pattern since a sleek cutout shirt pairs effortlessly with high waist skirts.
Pattern By passtschon
Crochet your dream wardrobe addition with this Keyhole Top, an adaptable and stylish design perfect for all seasons. Designed with comfort, versatility, and elegance in mind, this keyhole top Crochet Pattern is a staple piece that you’ll love creating and wearing. Whether you aim for a breezy summer outfit or a cozy layered look for cooler months, this top can do it all. Pair it with jeans for casual outings, a flowy skirt for boho vibes, or wear it over a fitted dress for a creative, layered style.
Free Cute Crochet Keyhole Top Perfect for Any Wardrobe
Featuring a flattering keyhole design, this top strikes an impeccable balance between chic and playful. The keyhole openings enhance its aesthetic and give you the perfect opportunity to personalize with buttons, charms, or even creative lacing. Its body skimming fit emphasizes your natural curves while maintaining a comfortable level of coverage.
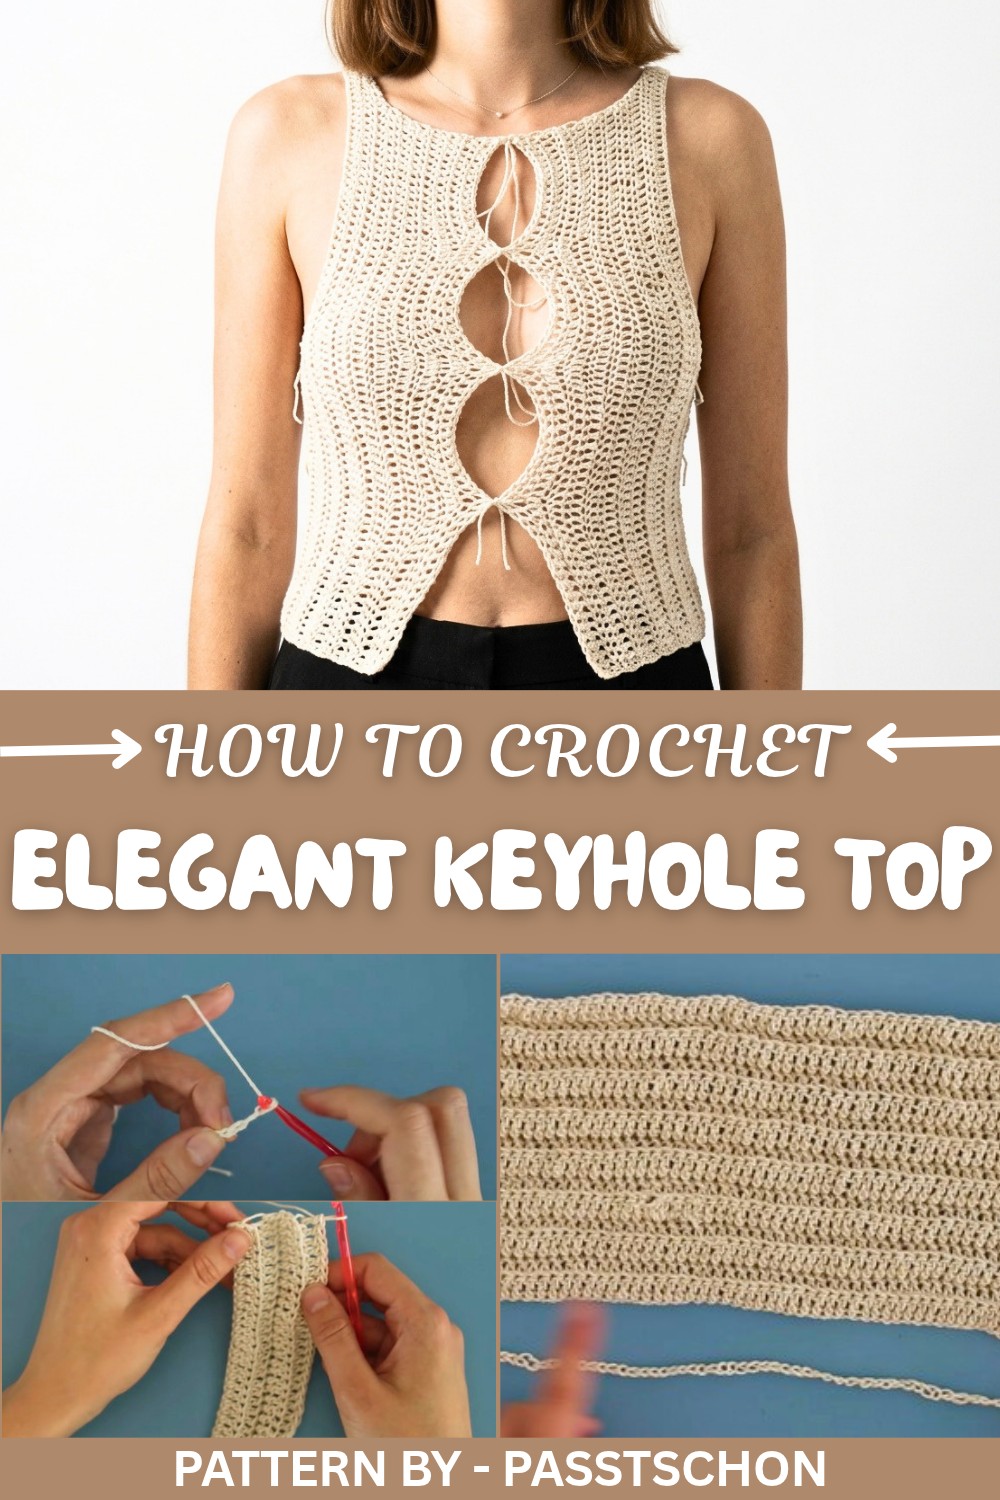
In terms of texture, the Free Keyhole Top Crochet Pattern relies on a beautifully ribbed design created using double crochet stitches in the back loops. The result is a lightweight, stretchable fabric that feels soft against the skin but can also be customized to be less see-through by adjusting your hook size or stitch density. The seamless construction eliminates bulk while offering an elegant finish.
Get ready to showcase your creativity with this attractive design, perfect for crocheters of all skill levels. Dive into the free pattern to start your journey toward creating this one of a kind piece you’ll cherish for years to come.
Crochet Pattern: Keyhole Top
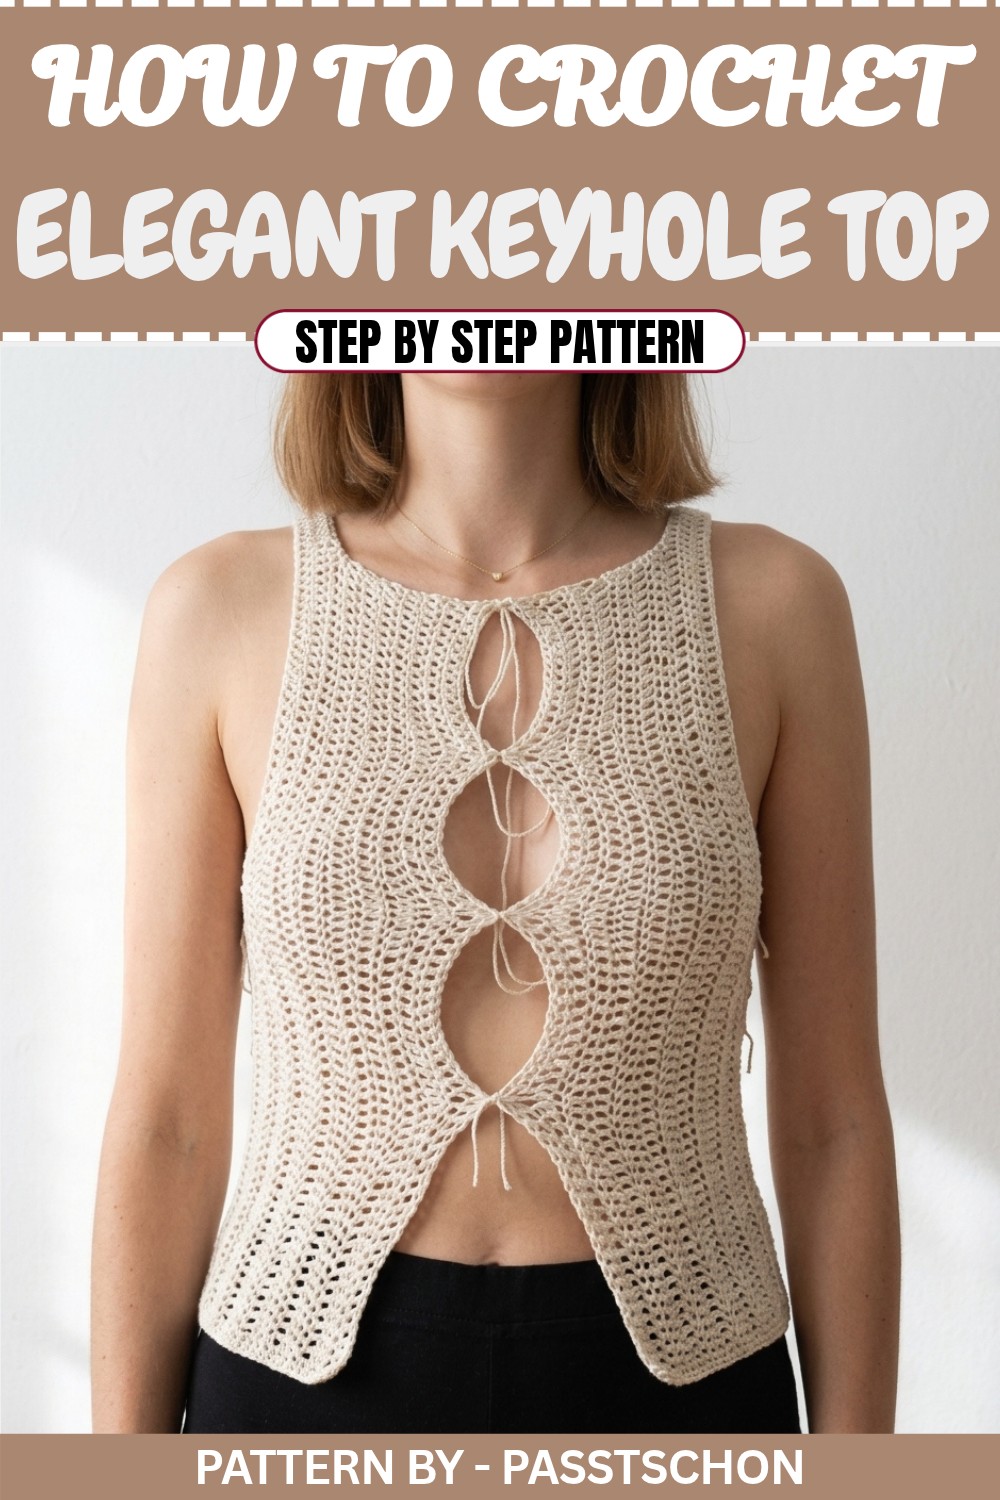
This pattern guides you step by step through the construction of a keyhole top that is designed to be made to measure. It features ribbing textures, keyhole details, and seamless assembly for a polished look. Follow the instructions outlined below to create your personalized piece.
Materials Needed
- Yarn: Cotton blend or soft acrylic (or any yarn that provides a comfortable, breathable texture).
- Hook: 5 mm crochet hook (adjust hook size based on preferred density).
- Scissors: For trimming ends.
- Tapestry Needle: For sewing panels and weaving in ends.
- Measuring Tape: For customization.
Stitch Abbreviations
- Ch: Chain.
- Dc: Double crochet.
- Dc bp: Double crochet worked in the back loop.
- Sl st: Slip stitch.
- St: Stitch.
Gauge
Gauge is flexible as this is a made to measure project. Use a swatch of 15 chains with 5 rows of double crochet to reference tension.
Pattern Construction
Small Panels (Make 2)
Create Foundation Chain
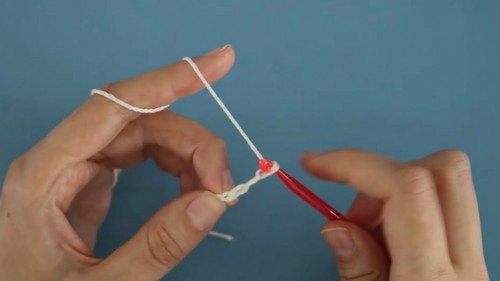
- Create slip knot and insert hook:
- Chain 63 (or your custom length from the underarm to hem).
- Add 2 chains for the turning chain.
Row 1:
- Yarn over (to prepare for Dc).
- Insert hook into the third chain from the hook.
- Work double crochet (Dc) into the chain.
- Continue working Dc into each chain across the row.
- Total stitches: 63 Dc (adjust this according to your foundation chain length).
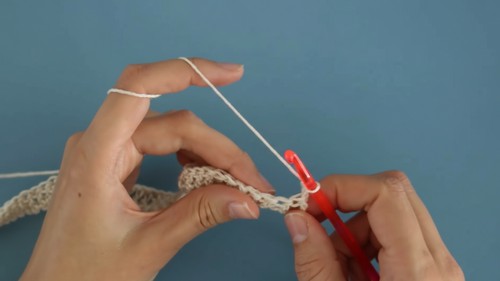
Rows 2–4 (Double Crochet in Back Loops):
- At the start of each row: Ch 2 (counts as turning chain).
- Turn your work.
- Yarn over and insert hook into the back loop of each stitch from the row below.
- Continue working Dc bp across the row.
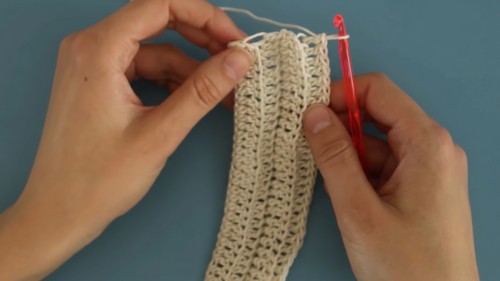
Create the Strap Section:
- At the end of Row 4, Ch 36 (or custom length from the underarm to shoulder).
- Add 2 turning chains.
- Row 5: Dc into each chain of the strap and then continue working Dc bp across the previously completed rows.
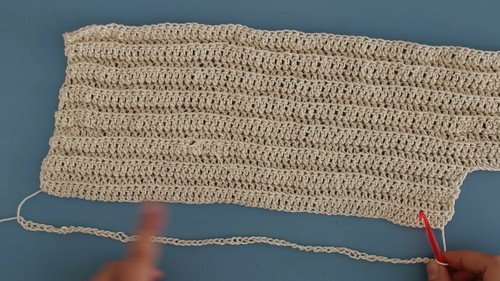
Strap Width:
- Continue working back and forth with Dc bp across straps and the panel until the strap reaches your desired width.
- Example: Repeat for 7 rows to create a thick strap.
Form the Neckline:
- Stop 8 stitches short of the end in your final row to create a neckline gap.
- Work up and down within these stitches until the narrower neckline area matches a custom width.
- Example: Neckline section = 7 rows of Dc bp = 8 cm wide (~3 inches).
Finish Panel:
- At the end of the neckline rows, Ch 1, cut your yarn, pull through, and secure. Leave a tail for assembly later.
Large Panel
Foundation Chain:
- Create slip knot. Insert hook.
- Chain 63 (custom length) to create the underarm section of the large panel.
- Add 2 chains for turning chain.
Rows 1–4 (Underarm Section):
- Row 1: Work Dc into the third chain from hook and across the row.
- Rows 2–4: Chain 2, turn the work, and work Dc bp across each row.
Add Shoulder Straps:
- At the end of Row 4, Chain 36 (to form a strap) + 2 turning chains.
- Work Dc across the new chain and transition seamlessly to the remainder of the panel.
Main Body Section:
- Continue working rows of Dc bp across the entire width (from one shoulder midpoint to the other).
- Stop when the panel spans the desired width between both shoulders.
Create Second Underarm Section:
- Reduce stitch count by the same number used for the shoulder straps (e.g., 36 stitches reduced).
- Work 4 rows of Dc bp to create the second underarm panel.
Assembly Instructions
Seaming Panels Together:
- Lay the large panel flat and position the two small panels on either side.
- The straps from each smaller panel should align with the shoulder edges of the large panel.
- Join panels using slip stitches or sewing:
- For slip stitch, use a 5 mm hook and create a sc or sl st seam.
- Insert hook into corresponding stitches on adjoining panels, pull yarn through, and continue along the seam.
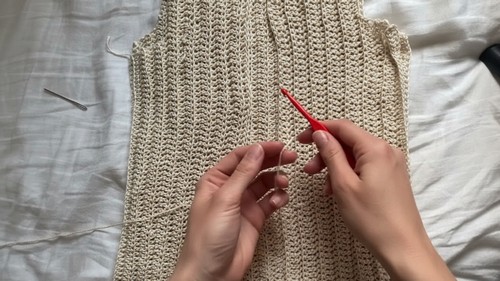
Keyhole Formation:
- To create front keyholes:
- Attach the outer edges of the smaller panels at strategic points with thread, buttons, or safety pins.
- Position keyholes near the neckline and lower hem based on personal taste.
- Optional: Experiment with charms or embellishments where openings are created.
Finishing Touches:
- After assembling, weave in all loose ends using a tapestry needle.
- Trim any excess thread or yarn.
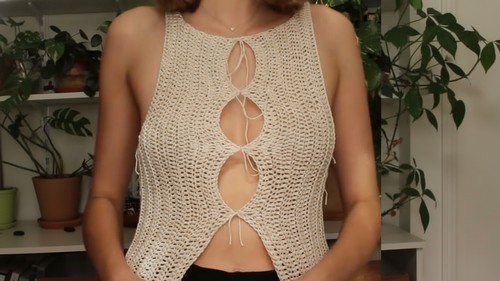
Finished Piece
Once assembled, the poncho dress will sit comfortably under the arms and flow to the hem. The keyhole details create a flattering, customizable look. This stylish piece is perfect for casual outings, festivals, or as a thoughtful handmade gift.
Ending Words
Your crochet keyhole top is complete, With this customizable, straightforward pattern, you can incorporate colorful yarn choices and fun embellishments to make the design truly your own.