
Free Crochet Wreath Ornament Pattern With an Adorable Finish
Enjoy the joy of crocheting with this free crochet wreath ornament pattern, a simple and fun guide to creating a delightful piece that will beautifully enhance the charm of your Christmas tree.
Pattern By K Rod Crochet
Holiday decorations always feel extra special when they’re handmade, and this free crochet wreath ornament is no exception. The project combines a timeless circular shape with textured stitches that mimic the fullness of a classic wreath. It’s the perfect addition to your tree or a thoughtful handmade gift for loved ones.
This ornament features a base that’s sturdy yet lightweight, ensuring it holds its shape while hanging. The textured stitches, such as clusters or popcorns, bring depth and give the piece a lush and layered appearance, similar to evergreen branches. You can enhance its charm by adding ribbons, bell, or metallic accents for a festive touch.
Free Crochet Wreath Ornament Pattern That’s Pure Holiday Joy
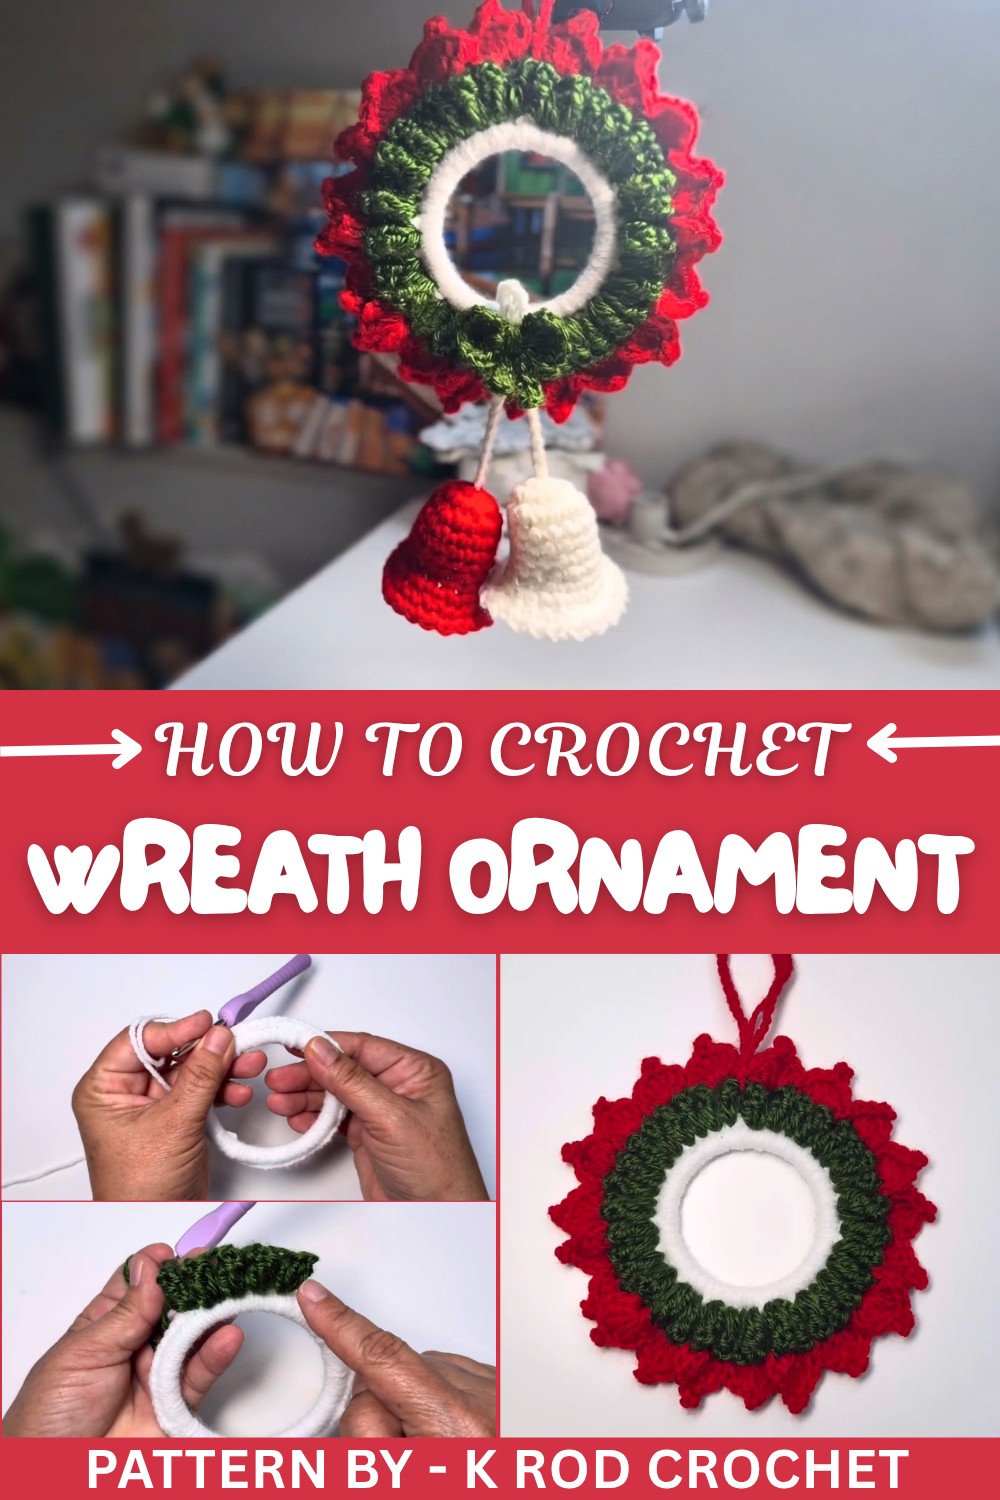
The construction process is simple and approachable, even for those newer to crochet. It begins with a solid circular foundation, which serves as the starting point for the textured outer layers. One helpful tip is to use a soft yet slightly structured yarn with a bit of sheen, as it highlights the stitch work while keeping the ornament neat. A medium weight yarn works beautifully, allowing the stitches to stand out without becoming too bulky.
Inspired by traditional holiday decor, this project brings a bit of nostalgia to your home. Whether you choose classic green yarn to mimic foliage or experiment with bold colors and sparkle, the end result is a charming and cozy piece that will bring warmth to your holiday celebrations.
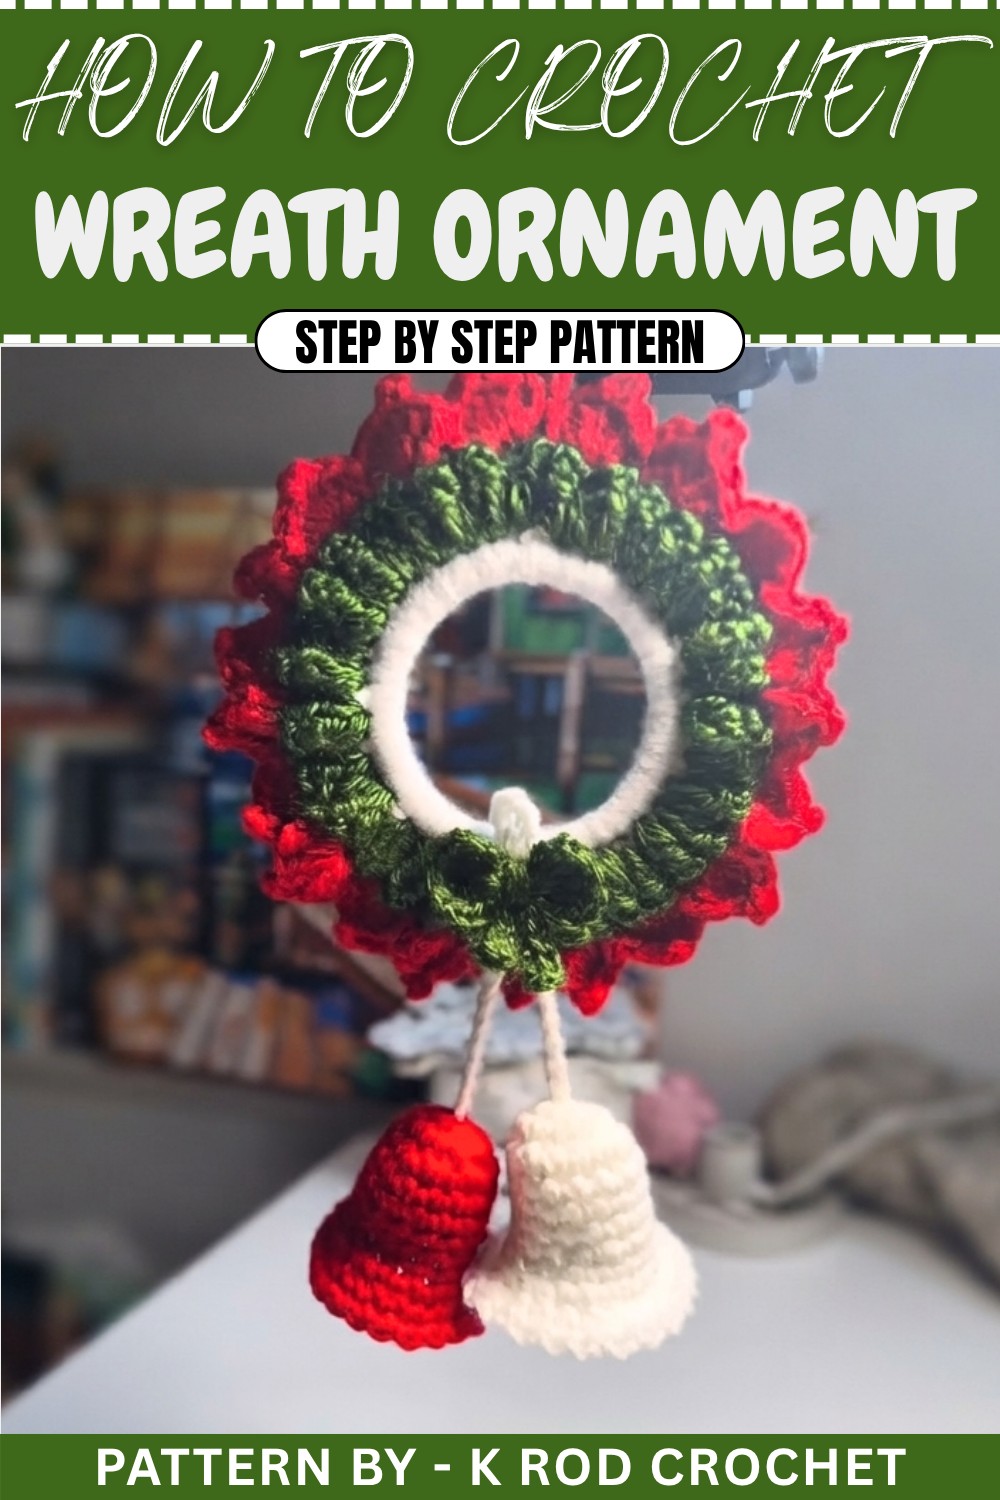
Free Crochet Wreath Ornament Pattern
In this step by step guide, you’ll learn how to crochet decorative Wreath that can be used for holiday decor, gifts, or keychains. Follow along to master this fun and festive crochet.
Quick Overview of Pattern
- Project: Crochet decorative Wreath.
- Rounds: Worked in spiral rounds with increases and decorative accents.
- Stitches: Single crochet, chain, slip stitch, popcorn stitch, and double crochet.
- Final Touch: Wreath is secured with a chain string or key holder.
Notes
- Yarn colors are flexible—use what you have or pick festive combinations.
- Ensure even tension for uniform stitches and structure.
- Use stitch markers during the spiral rounds to keep track of progress.
Skill Level
Intermediate: Knowledge of basic crochet stitches and stitch increases is required. This tutorial also introduces popcorn stitch for added texture.
Materials
- Yarn: Green, white, red yarn.
- Hook: 3.75 mm crochet hook.
- Scissors: For trimming ends.
- Yarning needle: To weave in loose ends and secure your work.
- Stitch markers: Optional, but helpful for tracking.
- Hoop or key holder: For decorative or functional use.
Gauge
Gauge is not critical for this project, though consistent tension is recommended for aesthetic results.
Stitch Abbreviations
- ch: Chain
- sc: Single Crochet
- dc: Double Crochet
- sl st: Slip Stitch
- pc: Popcorn Stitch
Special Stitches
Popcorn Stitch (pc)
- Work 5 double crochets into the same stitch.
- Remove hook from the working loop and insert it into the first double crochet of the group.
- Grab the working loop and pull it through.
- Chain one to secure the popcorn stitch.
Magic Circle
Create a starting loop by wrapping yarn around your fingers, insert the hook into the loop, yarn over, pull through, and chain one to lock.
The Crochet Pattern
Step 1: Creating the Hoop Base
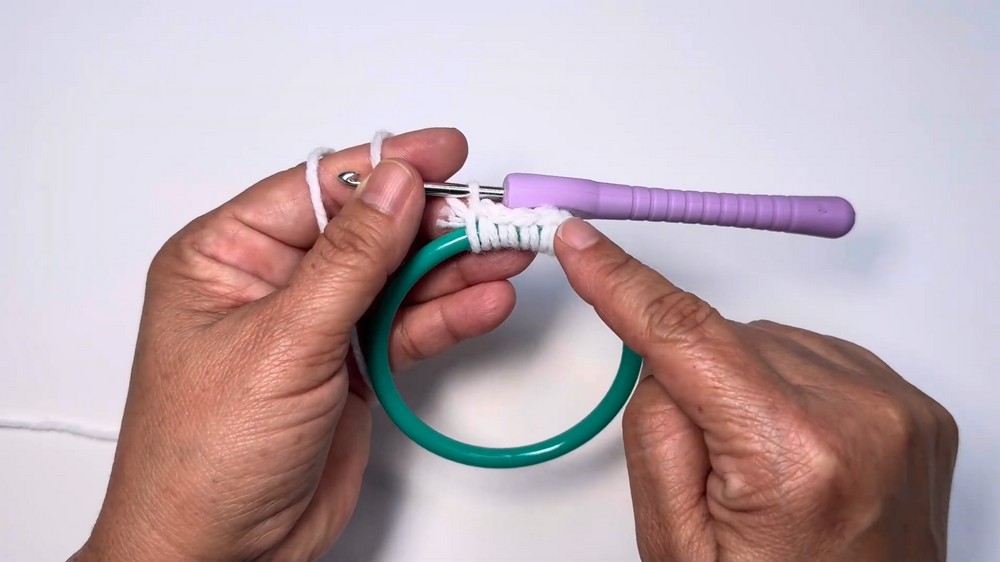
- Attach the yarn to the hoop.
- Place the yarn through the hoop and secure with a slip knot.
- Work 81 sc all around, starting from the first stitch.
- Ensure that the single crochets completely cover the hoop.
- Join with a sl st into the first sc.
- Slip knot, cut the yarn, and weave in the tail.

Step 2: Adding the Popcorn Texture
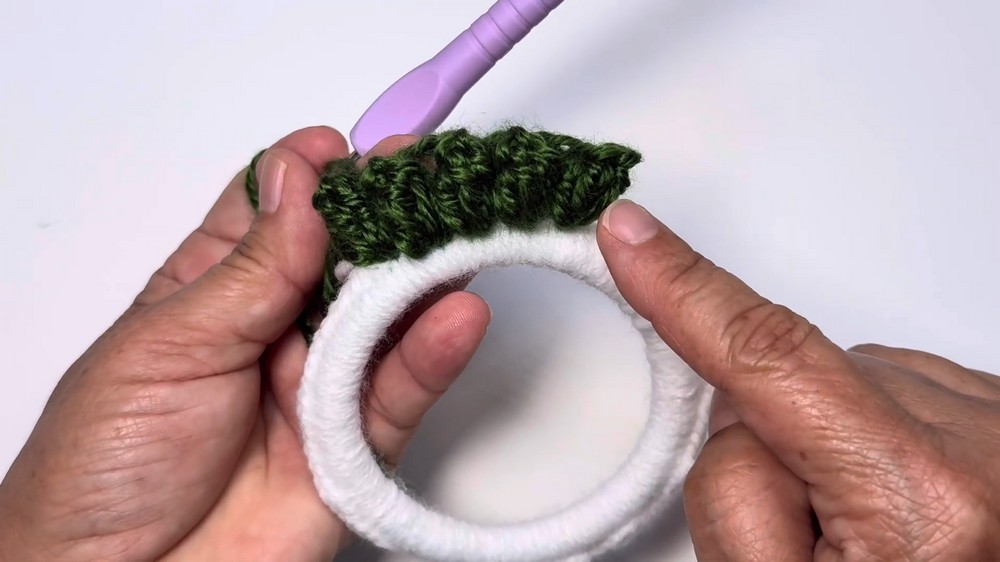
- Change to green yarn by attaching it to the first sc.
- Chain 3 (counts as the first dc).
- Work 4 more dc into the same stitch.
- Form the popcorn stitch:
- Insert the hook into the first dc, pull up the yarn, and ch 1 to secure.
- Ch 3, then skip 1 stitch and repeat:
- Work 5 dc into the next stitch, form the popcorn stitch, and alternate ch 3 and ch 1 between stitches.
- Continue this alternating pattern around the hoop—popcorn, chain 3, chain 1, skipping one stitch between each popcorn stitch.
- Join with a sl st into the first popcorn stitch.
- Slip knot, cut the yarn.
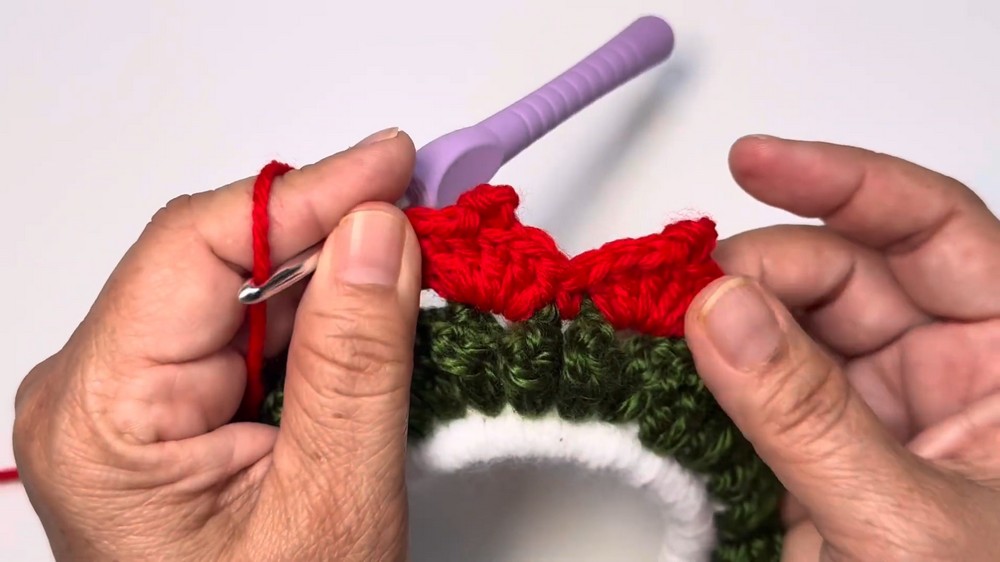
Step 3: Adding Red Yarn Details
- Attach red yarn to any chain 3 space from the previous round.
- Chain 3, then work 2 dc into the same space.
- Chain 3, sl st back into the top of the last dc to form a picot stitch.
- Work 3 more dc into the same chain space.
- Skip the next chain 1 space and sc into the next chain 3 space.
- Repeat the pattern:
- [3 dc, chain 3, sl st for picot, 3 dc], skip the chain 1 space, sc in the next chain 3 space.
- Continue working this pattern all around.
- Slip stitch into the last chain 1 space.
Step 4: Adding a Decorative Chain
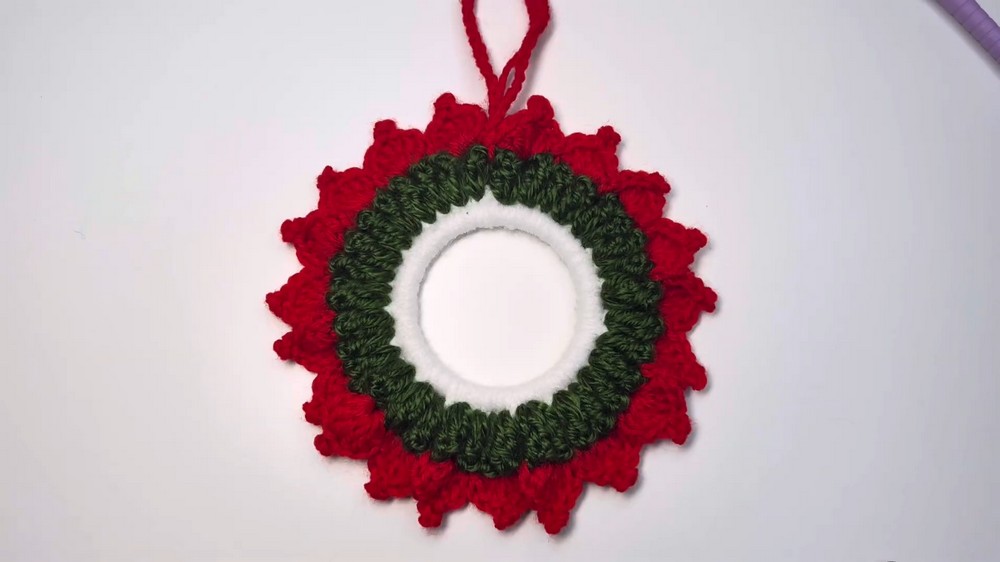
- Chain 40 (or adjust length as desired for hanging or attaching).
- Slip stitch into the first stitch of the chain or any nearby sc.
- Slip knot, cut the yarn, and weave in the tail.
Step 5: Making the Bell
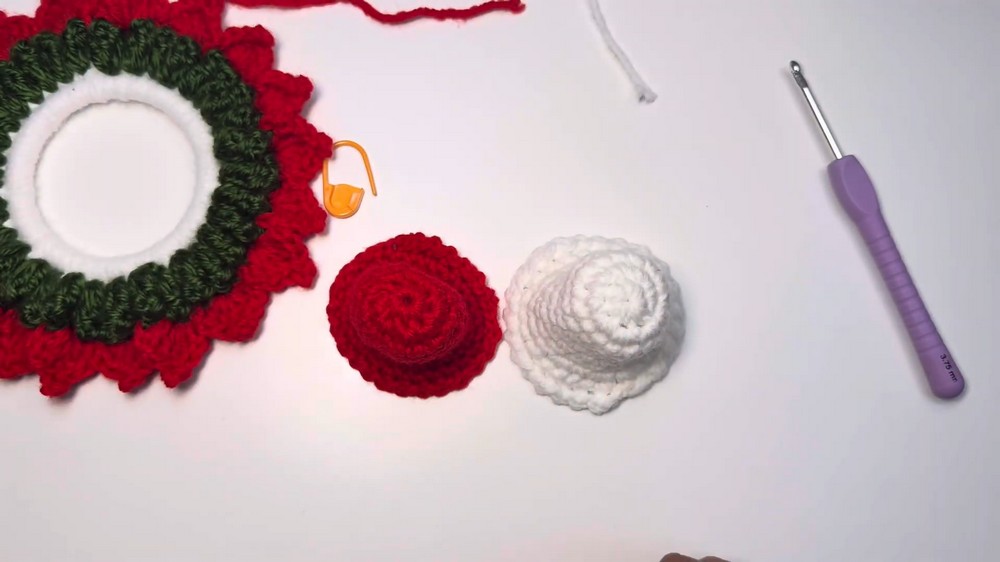
- Begin with a magic circle.
- Ch 1, then work 8 sc into the circle.
- Tighten the magic circle.
- Start working in spirals:
- Work 2 sc into each stitch (increase in every stitch). You'll have 16 sc at the end of this row.
- Use a stitch marker and continue working:
- Sc into each stitch all around for a total of 8 rows.
- After completing 8 rows:
- Work [1 sc, 2 sc in the next stitch] to create increases.
- Repeat [1 sc, 2 sc in the next stitch] all around.
- Finish with a round of sc into each stitch all around without increases.
- Slip stitch, chain 1, and repeat [sl st, ch 1] for the decorative edge.
- Slip knot and cut the yarn.
Step 6: Assembling the Bells
- Create a second bell using a different yarn color (optional).
- Attach both bells with a chain string:
- Chain 40 or as desired, pull the chain through the center of both bells, and tie a secure knot.
- Add decorative details such as a bow (optional).
Assembly & Finished Size
Attach your decorative bells to your hoop, keychain holder, or desired project. The size of the bells and their decorations can be customized by adjusting the chain and color combinations.
Conclusion
Congratulations, You’ve completed your crochet festive Wreath. Whether used for seasonal holiday decor or personalized gifts, this project is sure to bring joy and beauty to any setting.