
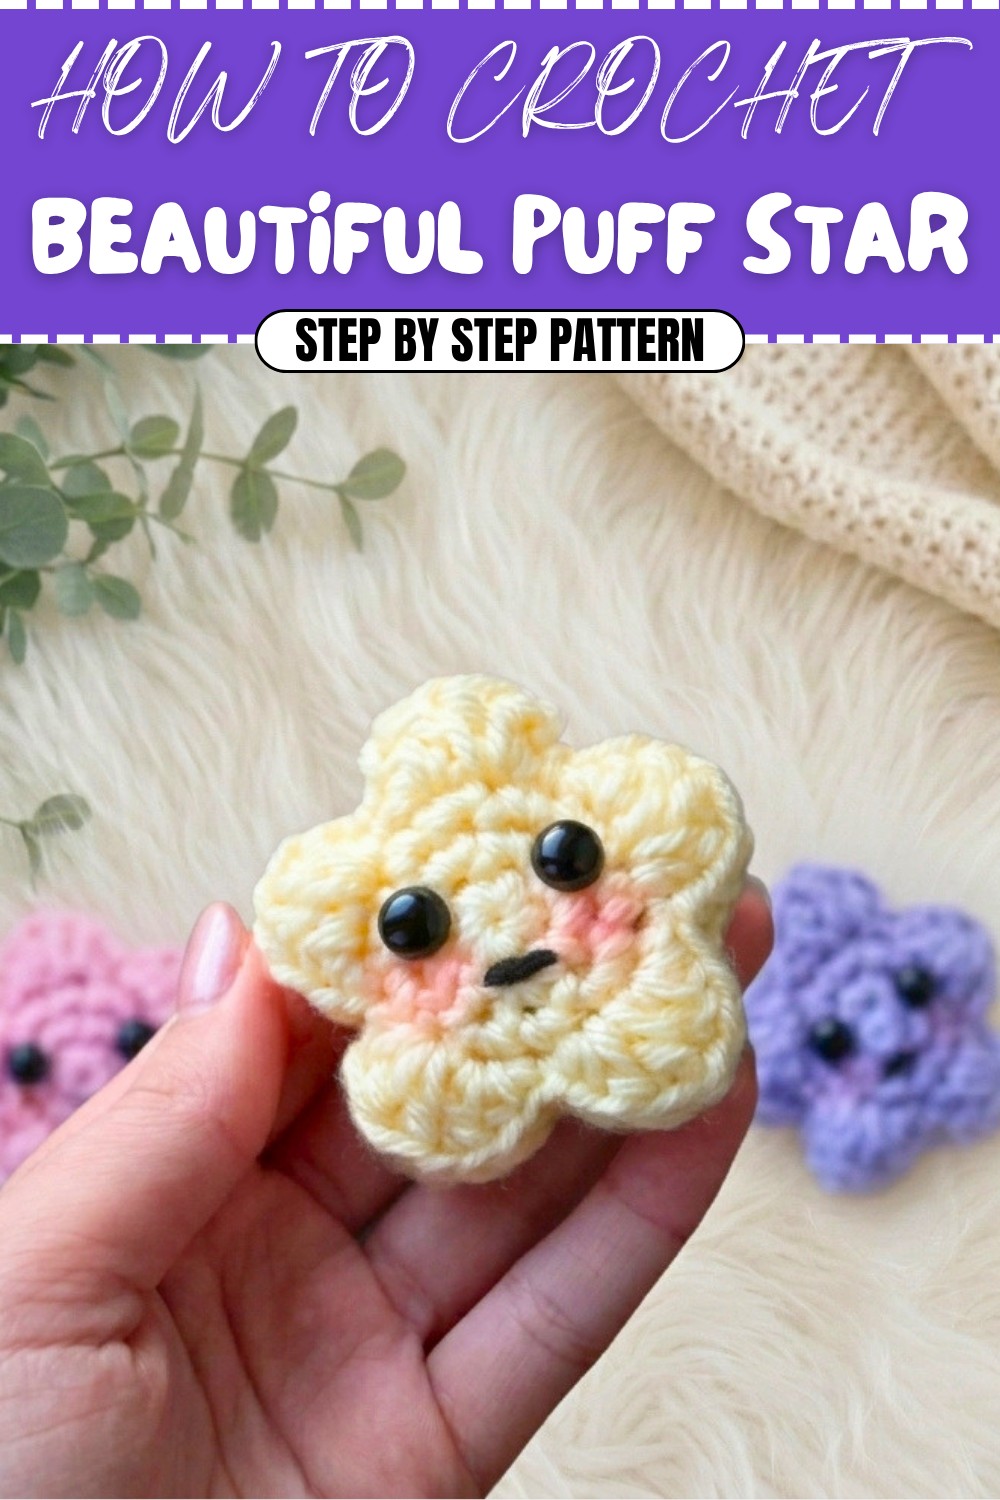
Free Crochet Puff Star Pattern for Quick & Cute Keychains
Create something beautiful with a free crochet puff star pattern that's for adding charm to your projects and bringing a unique touch to your designs.
Stitching up a storm to empty out your scrap basket is an absolute blast, especially when you end up with a whole army of tiny celestial friends. Working your way through this free crochet puff star pattern is an exceptionally fast method for turning extra bits of string into a plump, squishy little shape that fits right in the palm of your hand. The true beauty of this piece is how chunky and bouncy it feels, giving it a playful, dimensional look that is way more exciting than a flat cutout.
Free Crochet Puff Star Pattern Using Acrylic Yarn

The secret to building up that awesome, three-dimensional volume is working a series of decreasing stitches right into the tips of the star points. To get this specific plump shape, you wrap your loops using acrylic yarn and a 5mm hook, which keeps the tension perfectly balanced so the fluffy pillow stuffing stays completely hidden inside. A neat aspect of this design is that you stitch two identical flat sides and sandwich them together, leaving a tiny flower-like center that measures about 5 centimeters across before you fill it up.
These tiny plush shapes are incredibly useful for brightening up your everyday accessories. You can easily add a metal ring to the top point to make a personalized star keychain, string a dozen of them onto a long cord for a whimsical nursery garland, or hang them up as soft holiday ornaments. Color customization is completely wide open, meaning you can whip up a classic golden sun look, use pastel pinks for a dreamy vibe, or try multi-colored strands. Since you can finish one in about thirty minutes, it is an awesome way to make a whole army of cute gifts for friends.
Puffy Crochet Star Pattern
This project includes detailed guidance for each step, and thoughtful tips to ensure even intermediate or advanced crocheters enjoy the construction and finish of their amigurumi star. The pattern is written in US crochet terms, with key stitches highlighted, a full abbreviations list, and additional notes to optimize your crafting experience.
Skill Level
Intermediate to Advanced
You should be comfortable with the magic ring, basic stitches (sc, hdc, dc), working in rounds, and simple sewing for assembly. The project includes assembly and embellishment steps that are best tackled with a solid foundation in crochet.
Materials
- Yarn:
- Medium weight (worsted, acrylic recommended for shape retention)
- Example: “I Love This Yarn” from Hobby Lobby, but any soft acrylic in your chosen color is suitable.
- Hook:
- 5.0mm (H-8) crochet hook or size recommended for your yarn
- Stuffing:
- Polyfill/fiberfill or stuffing from an old pillow
- Notions:
- Yarn needle
- Scissors
- Stitch marker (optional but helpful)
- Plastic/safety eyes or black yarn for embroidery (for facial features)
- Blush or fabric paint for cheeks (optional)
- Hot glue (if using non-sew eyes)
Key Abbreviations (US Terminology)
- MR: Magic Ring
- sc: Single Crochet
- hdc: Half Double Crochet
- dc: Double Crochet
- sl st: Slip Stitch
- ch: Chain
- st(s): Stitch(es)
- inc: Increase (2 sc in same stitch)
- rep: Repeat
Special Notes:
- Pattern is worked in joined rounds.
- Make two identical stars and seam them together.
- Gauge is not critical but keep stitches tight for puffiness and avoid stuffing showing.
- Add facial details before joining the two stars for best results.
Step-by-Step Pattern
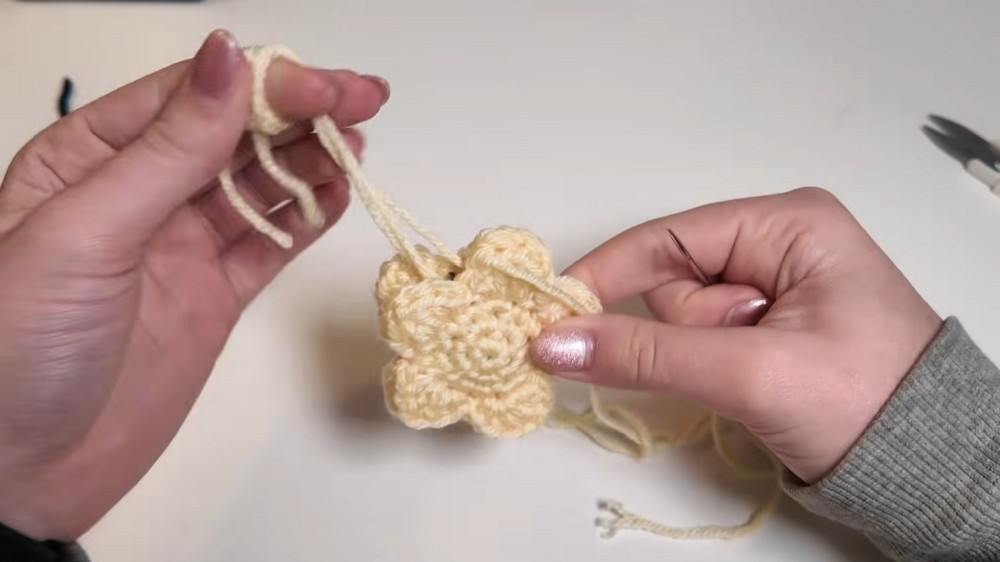
PART ONE: Creating the Star (Make 2)
Round 1: Foundation
- Form a MR.
- Work 5 sc into the MR.
- Tighten ring and sl st to the first sc to join. (5 sts)
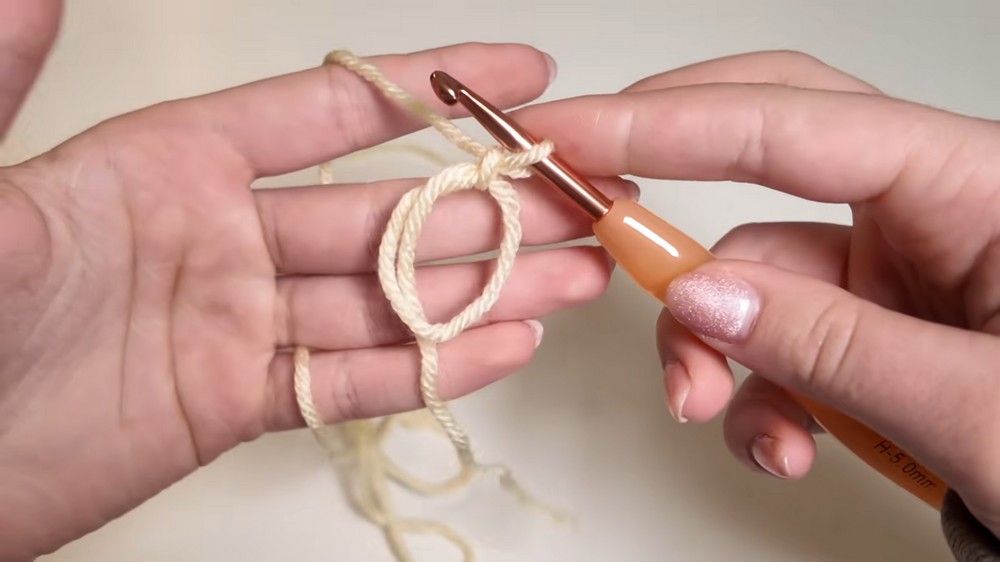
Explanation:
You’re starting with a magic ring, a closed center essential for neat amigurumi. Work 5 single crochets into the ring and join with a slip stitch. Pull the tail end to close the center tightly.
Round 2: Increasing
- In each st around: 2 sc (inc) (10 sts)
- Sl st to first sc to join.

Explanation:
This round doubles your stitch count. Place 2 single crochets into every stitch from the previous round, then join to complete your circle’s base.
Round 3: Building the Base
- (2 sc in next st, 1 sc in next st); rep around (15 sts)
- Sl st to first sc to join.
Explanation:
Each sequence of 2 in one, then 1 in next, gradually increases the circle. Complete the round and join—your star’s foundational shape is laid.
Round 4: Shaping Star Points
For each of the 5 points, repeat the following around:
- In next st: (1 sc, 1 hdc, 1 dc)
- Ch 1
- In next st: (1 dc, 1 hdc, 1 sc)
- Sl st in next st
Repeat sequence a total of 5 times around to form all points.
Detailed Row instructions for 1 point:
- Insert hook in next st, sc, hdc, dc all in the same st.
- Ch 1.
- Next st: dc, hdc, sc all in the same st.
- Sl st in the following st (to “anchor” the point).
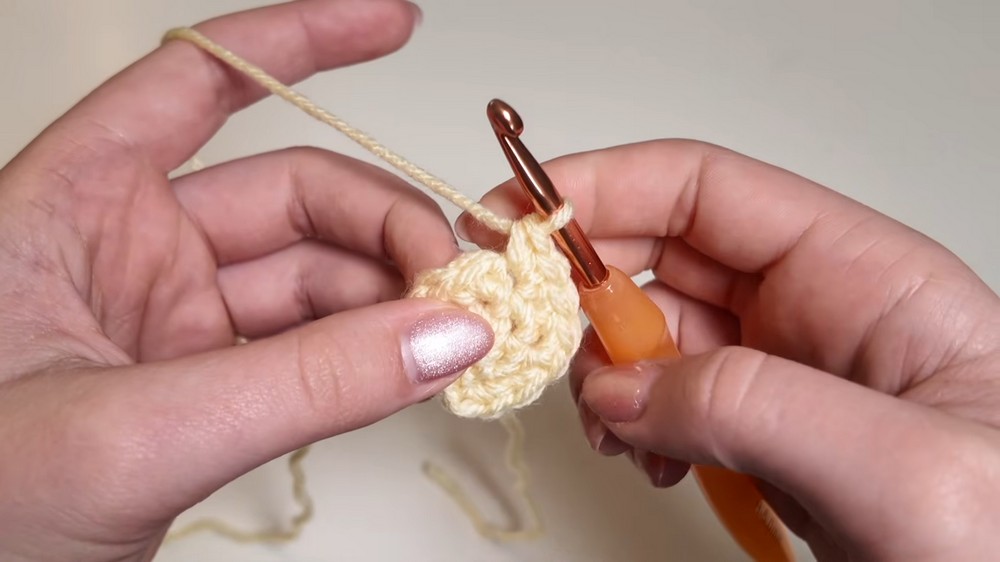
Explanation:
Each point consists of carefully placed stitches increasing in height, then decreasing, with a chain at the peak for a crisp edge. The slip stitch anchors and separates the points. Complete all 5 points to finish the round.
Fasten Off
- For the first star, cut the yarn and leave a short tail.
- For the second star, leave a long tail (12–18 inches) for seaming.
Explanation:
You need two stars—one side will have a long tail for sewing the two parts together. Secure your work with a tight fasten-off.
PART TWO: Face Embellishment (Optional but recommended)
- With black yarn and a yarn needle, sew a simple smile or mouth on one star, just beneath the first row of stitches.
- (Optional) Attach plastic safety eyes or embroider small eyes with black yarn above the mouth.
- Securely knot ends at the back and trim excess yarn.

Explanation:
Adding the face now ensures your stitches go cleanly through only one layer—much easier than after assembly!
PART THREE: Assembly
- Place the two star pieces together with right sides facing out.
- Thread the long yarn tail from one star onto a yarn needle.
- With whip stitch or preferred joining method, sew around the edge, matching points and valleys neatly.
- When you are nearly finished (leave 1–2 points open), stuff firmly with polyfill, ensuring each point is puffy.
- Sew the remaining points closed.
Explanation:
Carefully align and seam the two stars for a symmetrical finished piece. Stuff as you go, using a finger or blunt object to get filling into each star point before closing off.
PART FOUR: Finishing Touches
- Secure and weave in all yarn tails.
- Add additional features (such as glued or sew-on eyes).
- For extra cuteness, use blush, fabric paint, or a colored pencil to tint cheeks.
Explanation:
Finish by securing your yarn securely inside the star and adding final facial touches. Blush can be carefully dabbed on using a cotton swab.
Conclusion
Congratulations, you have completed your puffy crochet star! This project results in a charming, plush star ideal for desk décor, festive ornaments, keychains, or gifts. With its simple yet well-structured build, it is a perfect opportunity to practice joined rounds, forming shapes, invisible increases, and basic amigurumi assembly.
Pattern Notes & Corrections
- Ensure tight stitches throughout to avoid stuffing poking through.
- When sewing the two star parts together, make sure points align for a crisp silhouette.
- If your star lays a bit flat, add extra stuffing or gently tug the points after finishing to emphasize the shape.
Tips
- Use a stitch marker to track the first stitch of each round if needed.
- Choose bright, contrasting colors for maximal cuteness and fun.
- Practice the magic ring technique; it’s crucial for neat amigurumi.
- For attachment (keychains, mobiles), insert ribbon or jump ring before final stitching of the last star point.
Final Thoughts
Mastering this puffy star project will improve your confidence in round-building, joining techniques, and finishing details. You can easily adapt the size with different yarn weights or add personality with creative facial embroidery and embellishments.