
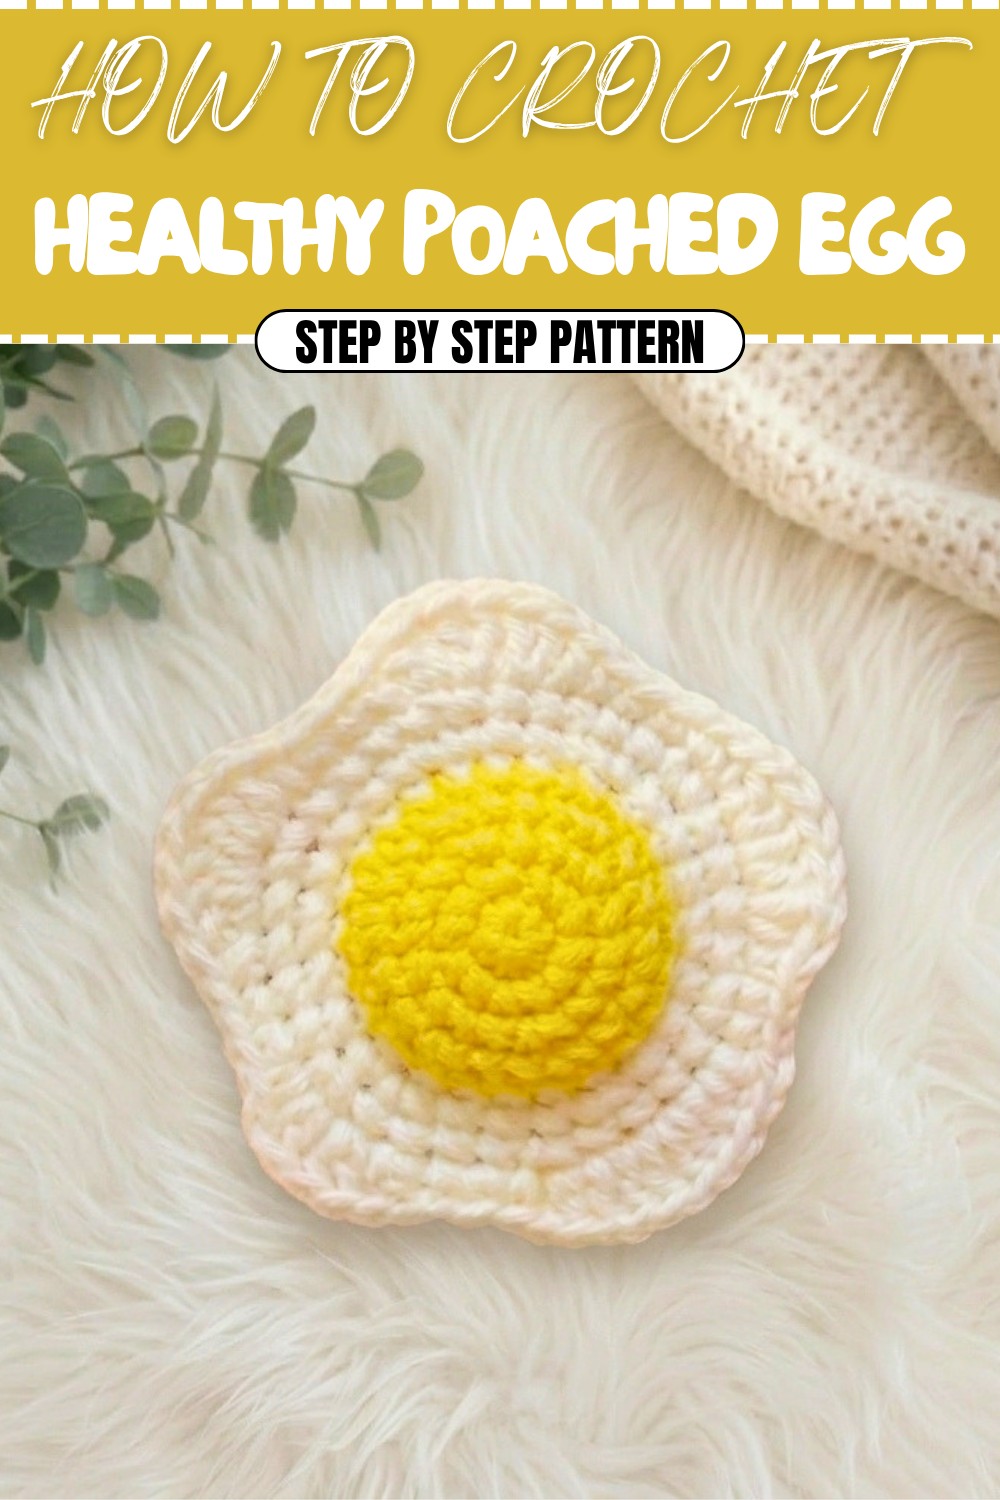
Free Crochet Poached Egg Pattern for Beginner Friendly Fun
Solve your quirky décor needs instantly with this free crochet poached egg pattern that's both fun and irresistibly adorable.
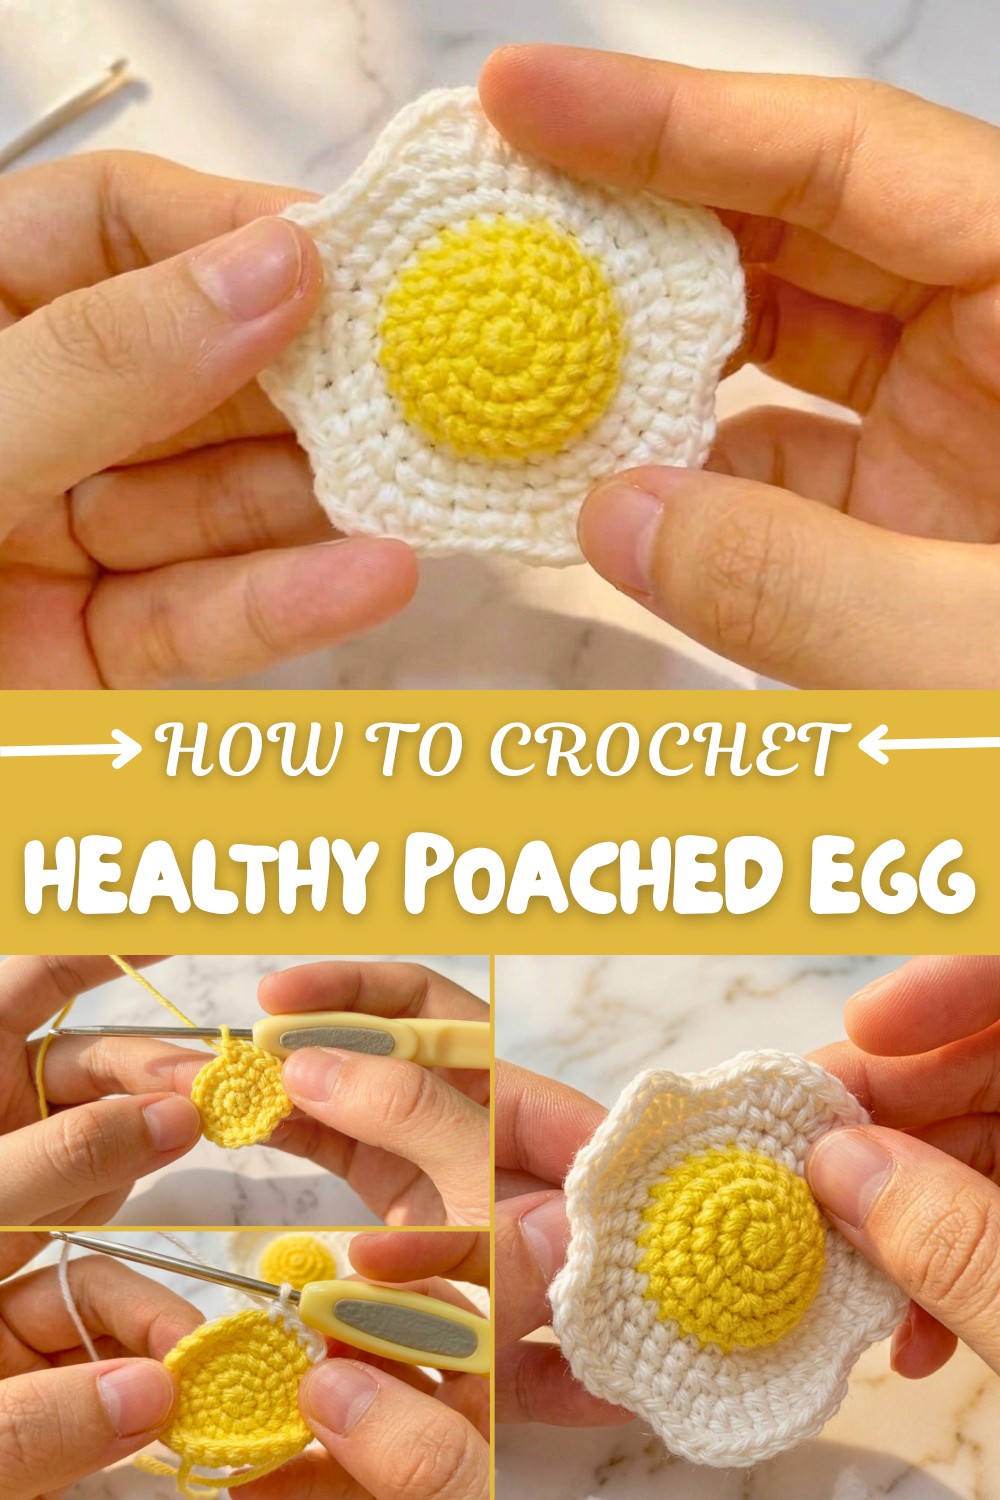
Who knew something as simple as a poached egg could turn into an adorable crochet creation? This free crochet poached egg pattern is perfect for adding a playful touch to your handmade collection. The bright yellow yolk paired with crisp white egg whites is a fantastic combination that mimics the real thing, but with a cozy, textured charm. It’s a wonderful project for beginners who want to fall into circular crochet techniques like the magic ring and crossed single crochet stitches, while still keeping the process simple and fun. Whether you're making pendants, magnets, or cute kitchen décor, this pattern is versatile, quick, and surprisingly satisfying to complete.
Cute Crochet Poached Egg Pattern Step by Step Guide
The pattern stands out for its attention to detail. The yolk features smooth, seamless rounds, while the egg whites introduce a soft, textured finish that gives it character. By practicing with basic stitches and increases, you'll gain confidence crocheting neat circles and combining pieces into polished shapes. What makes this pattern even better is its adaptability—adjust the size, change the colors, or add some stuffing to customize the egg for any purpose.
Other Projects You Can Create from This Pattern
- Crochet fried eggs or mini omelet designs.
- Fruit appliqués, such as lemons or oranges, using similar techniques.
- Coasters and placemats for kitchen accessories.
- Keychains or pins for gifting or personal use.
Why You’ll Fall in Love with This Pattern
- Beginner-friendly with easy stitches and clear instructions.
- Quick and adaptable project suitable for small gifts or household accents.
- Customizable finish for endless creativity and personalization!
Detailed Crochet Poached Egg Pattern
This delightful crochet Poached Egg Candy pattern can be used as pendants, refrigerator magnets, or decorative gifts. The pattern features two main parts: the egg yolk and egg white, crocheted separately and then combined seamlessly. The pattern uses fundamental stitches like single crochet, double crochet, slip stitch, and the magic ring technique, making it suitable for beginners. You’ll enjoy crocheting this simple yet creative food-inspired design.
Skill Level & Terminology
- Skill Level: Beginner
- Terminology: US Terminology
Materials & Tools
- Yarn:
- Yellow yarn (for egg yolk) – Worsted weight.
- White yarn (for egg white) – Worsted weight.
- Hook Size: 3.5mm (E/4) or suitable size for tight stitches.
- Accessories:
- Tapestry needle (for sewing and finishing).
- Scissors.
- Fiber fill or magnet (optional, depending on use).
Gauge
Exact gauge is not required. Ensure your stitches are tight enough for the finished piece to retain its shape without the stuffing showing.
Abbreviations List
- ch: Chain
- sc: Single Crochet
- sl st: Slip Stitch
- dc: Double Crochet
- hdc: Half-Double Crochet
- inc: Increase (2 sc or dc in the same stitch)
- st(s): Stitch(es)
- MR: Magic Ring
Special Stitch Instructions
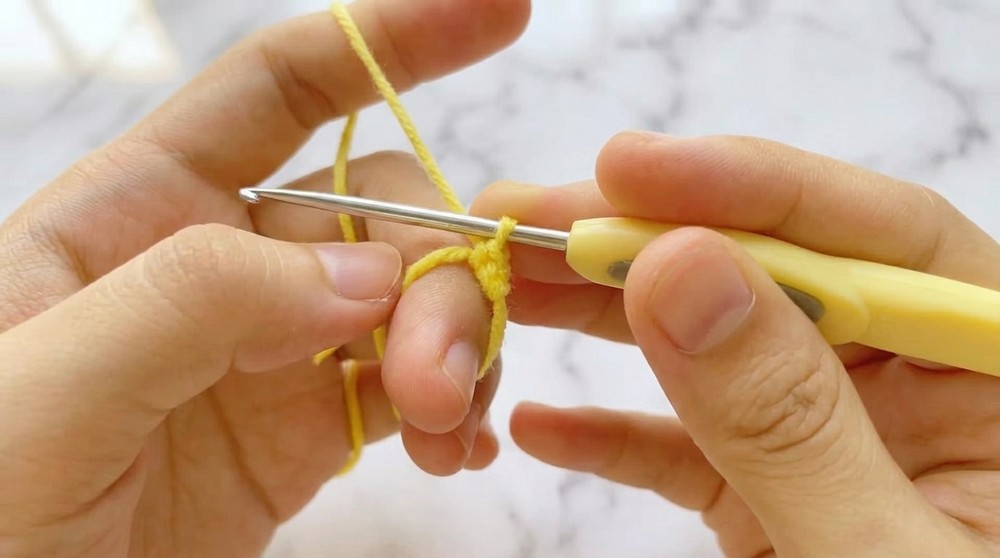
- Magic Ring (MR): Create a loop with the yarn, insert your hook, yarn over, pull through the loop, and secure with a chain stitch. Begin crocheting inside the ring.
- Cross Single Crochet (Optional): Insert the hook, wind the yarn on the right side of the hook (instead of the usual left), pull through the loop, yarn over, and pull through two loops to complete the stitch. This creates a textured look but is optional for the project.
Finished Size
- Finished Poached Egg Dimensions: Approximately 3-4 inches in diameter when complete.
What You’ll Learn from This Pattern
- Starting a crochet project using a magic ring for a clean circular base.
- Exploring crossed single crochet stitches to add texture.
- Crocheting with increases to create defined shapes.
- How to join pieces seamlessly for professional-looking finishes.
- Optional tips for stuffing or adding magnets to turn your egg into décor or gifts.
Detailed Pattern
Egg Yolk
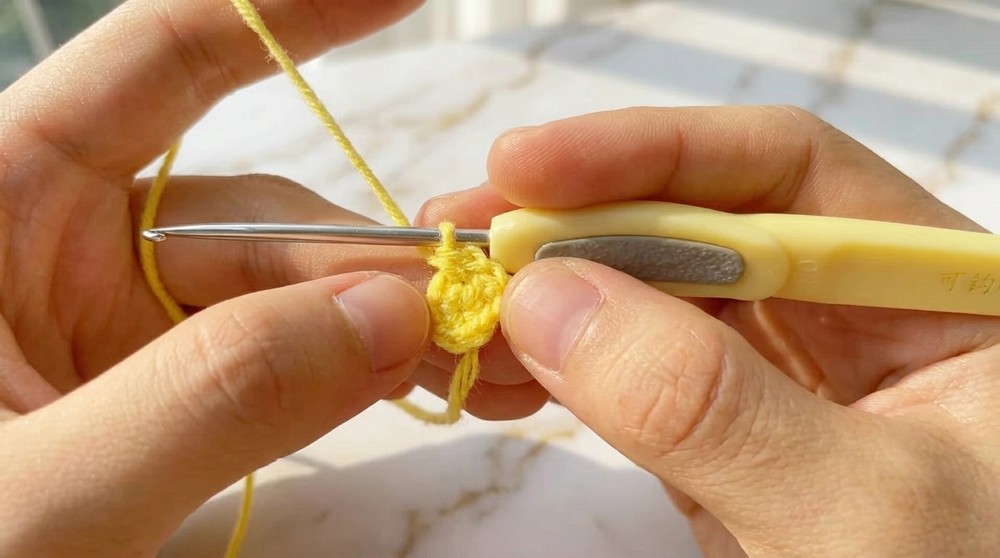
- Round 1:
- Begin with a Magic Ring (MR) and crochet 6 single crochets (sc) inside the ring.
- Tighten the ring and join to the first stitch with a sl st. (6 sts)
- Round 2:
- Ch 1, then crochet 2 sc in each st (inc) around. (12 sts)
- Join to the first stitch with a sl st.
- Round 3:
- Ch 1, then work 1 sc, 1 inc; repeat from * to complete the round. (18 sts)
- Join to the first stitch with a sl st.
- Round 4:
- Ch 1, then work 2 sc, 1 inc; repeat from * to complete the round. (24 sts)
- Join to the first stitch with a sl st.
- Round 5:
- Ch 1, then sc evenly across all stitches. (24 sts)
- Join to the first stitch with a sl st, then fasten off.

Completion Insight: This completes the egg yolk portion of the poached egg. If you want a larger yolk, simply add additional rounds following the increasing pattern.
Egg White
- Rounds 1-4: Repeat the first 4 rounds of the Egg Yolk pattern using white yarn.
- Round 5:
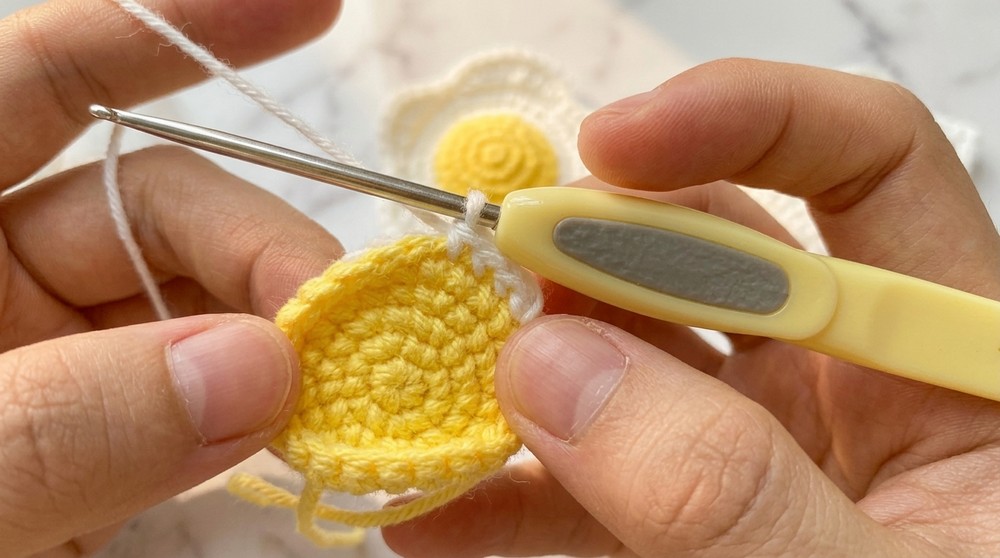
- Align the egg yolk to the center of the egg white. Insert your hook through both the yolk and white layers. Crochet 24 sc around both layers simultaneously, joining them together.
Optional Step: Add fiber fill or a small magnet to the middle during this round if you’re using the egg as a refrigerator magnet.
Edging (Egg White Details)
- Round 6:
- Sc evenly around the edge. Adjust tension to maintain a smooth border.
- Round 7:
- Ch 3, then work 4 dc in each st across the edge (increase) for a decorative "ruffled" texture on the egg white.
- Fasten off and weave in any loose threads using a tapestry needle.
Completion Insight: The egg white creates a beautiful base for the egg candy, complete with a ruffled, soft texture.
Assembly
- Connecting Layers: Ensure your yolk and white are securely joined during the sc round (egg white Round 5). If necessary, sew any remaining gaps for seamless bonding.
- Adding the Magnet: For refrigerator use, insert the flat magnet during assembly and sew around it to secure.
- Final Touches: Weave in any remaining tails and trim excess yarn.
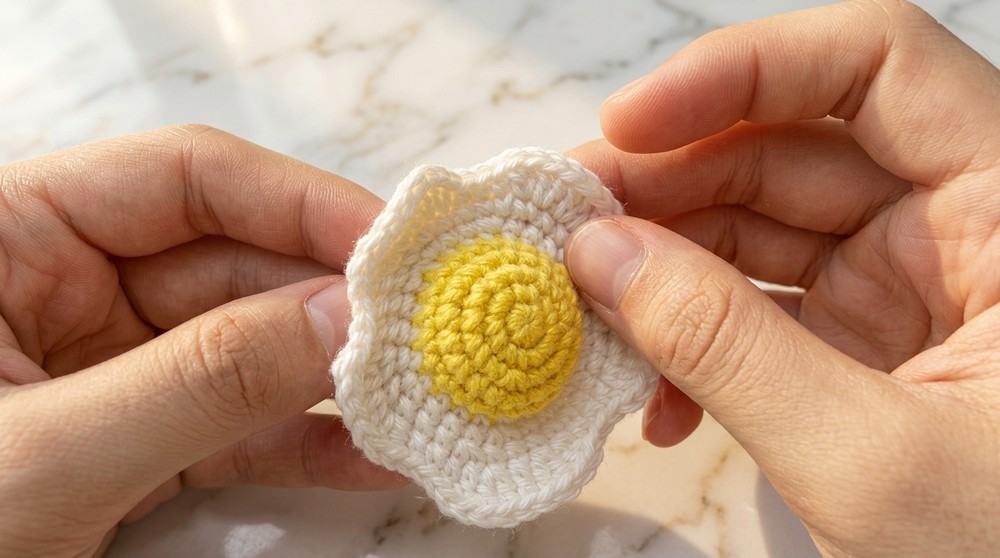
Enjoy Your Poached Egg Candy!
Your crochet poached egg is now complete! Use it as a charming decorative piece, keychain, or refrigerator magnet. You can experiment with yarn colors and create "egg variations," like adding speckles for seasoning or a sunny-side-up egg alternative.
Beginner Tips for Success
- Use stitch markers to track your rounds and prevent losing count during increases.
- If using crossed single crochet stitches, practice until you’re comfortable with winding yarn on the right side of the hook.
- Take your time with assembly to ensure clean and seamless joins between the egg yolk and white.
This pattern uses single crochets, increases, and double crochets, providing a satisfying project for beginners while creating a realistic playful design!
Overcoming Difficulties & Solutions
While this pattern is beginner-friendly, you might encounter a few challenges along the way, such as maintaining an even tension when working in rounds or mastering the magic ring technique. Uneven stitches can cause the yolk or whites to look lumpy, and the magic ring may feel tricky at first.
The solution is simple, take your time and practice. If the magic ring feels challenging, you can substitute it with a small chain loop of 4-6 chains joined with a slip stitch. Additionally, using a stitch marker can help keep track of rounds, ensuring your increases are placed correctly for a smooth, circular shape. Remember, patience and persistence go a long way in perfecting your crochet skills!