
Free Crochet Headband Pattern With a Stylish Twist
Give every stitch its purpose using this free crochet pattern to make a versatile and adorable headband that’s great for all seasons.
Crochet is more than a hobby; it’s a creative expression woven into practical beauty. One delightful project that showcases this essence is a headband, tailored for any age group and perfect for everyday use or as a personalized gift. The YouTube channel Pembe Düğme offers an incredible guide to making a hairband that is not only functional but also stunningly elegant. This headband pattern is yet another gem, combining timeless style and simplicity to create a design anyone can cherish.
Free Crochet Headband Pattern for Fun Handmade Style
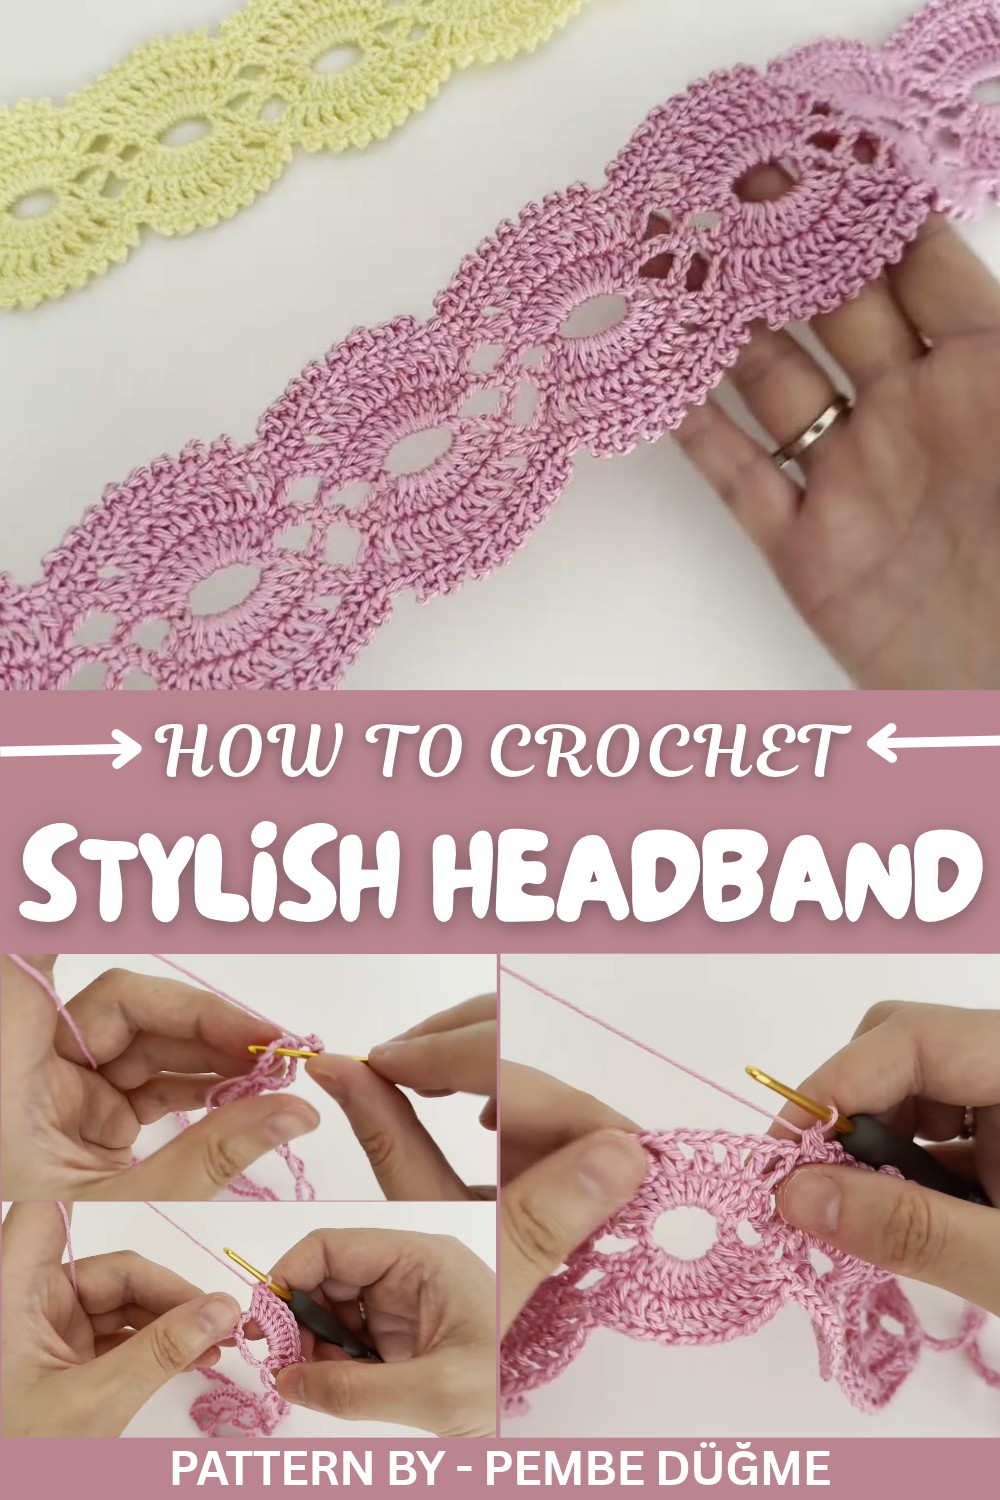
This adjustable headband is loved for its delicate yet structured look. The piece begins with a graceful mesh like foundation followed by beautifully shaped motifs that are joined together in rows, adding depth and texture. The subtle width of 6 cm makes it ideal for styling, while the total length can be customized. Whether you need an adult size (43 cm) or a child’s version (30 cm), adjusting the chain count helps achieve the perfect fit for all ages.
What makes this headband special is its versatility and charm. The striking lace like sections, crafted from alternating double crochets and chains, offer a light and airy feel while maintaining a strong and stable structure. The addition of picot stitch accents adds a delicate finishing touch, reminiscent of tiny buds blooming along the edges. Whether used as a stylish everyday accessory or a thoughtful handmade gift, this headband will make anyone wearing it feel unique and beautiful.
From detailed chains and intricate motifs to creative ways of adjusting size, this headband is a great project for beginners and experienced crocheters alike. Take your time, enjoy every stitch, and embrace the satisfaction of making something meaningful with your own hands.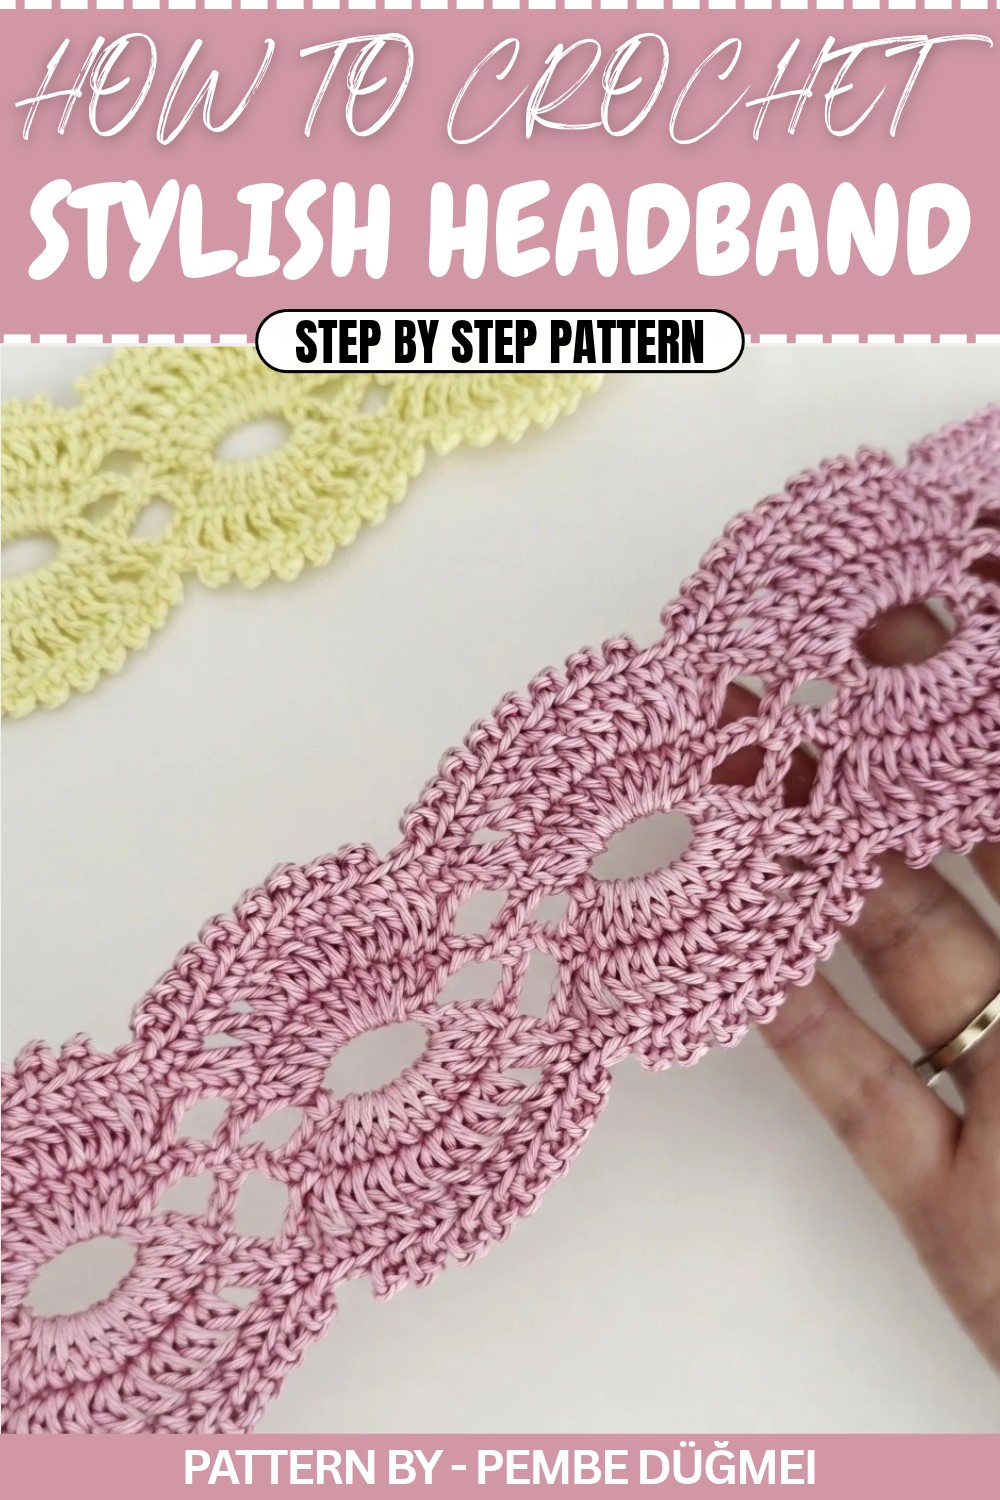
Crochet Adjustable Headband Pattern
The headband is made using mercerized cotton yarn and a 2.2 mm crochet hook. The length is adaptable, with the standard adult size measuring approximately 43 cm. If you want to make it for younger users, you can adjust the number of chains at the beginning as this detail will be discussed further in the pattern. For smaller versions suitable for children, the length would generally be about 30 cm while maintaining a consistent width of 6 cm.
Quick Overview of Pattern
- Skill Level: Intermediate
- Pattern Type: Crochet headband with adjustable ties.
- Techniques Used: Slip stitch, single crochet, double crochet, chain spacing.
- Customizable for sizes: Details on how to alter chain counts for other sizes are included.
- Final Assembly Notes: Steam blocking recommended for a polished finish.
Notes
- The pattern works with chains formed in multiples of 18. Adjust the starting chain count based on the desired length.
- Ensure even tension while working with mercerized cotton to prevent overly tight stitches.
- Chain counts vary depending on the desired size (adult or children).
Skill Level
Intermediate – Familiarity with foundation chain, single crochet (SC), double crochet (DC), and creating picots using chains is recommended.
Materials
- Yarn: Mercerized cotton yarn (brand mentioned in video notes).
- Hook: Size 2.2 mm crochet hook.
- Scissors: For cutting yarn.
- Tapestry needle: To weave in ends.
- Iron/Steamer: To lightly block the headband.
Measurements / Sizing
- Adult Size: 43 cm in length (excluding ties) and 6 cm in width.
- Child Size: 30 cm in length (excluding ties); width remains the same.
Sizing Adjustments:
- Adult size requires 150 chains (8 motifs).
- Child size requires 132 chains (7 motifs).
- Smaller child size requires 114 chains (6 motifs).
Gauge
There’s no strict gauge for this project as it’s adjustable by chain count. However, follow the video instructions for a consistent and neat finish.
Stitch Abbreviations
- CH: Chain
- SC: Single Crochet
- DC: Double Crochet
- SL ST: Slip Stitch
- Picot: 3 chains, slip stitch back into the same stitch
Special Stitches
Double Crochet Cluster:
- Yarn over, insert hook, pull up a loop, yarn over and pull through first two loops on hook. Repeat in the same stitch, creating clusters of DCs. Finish by pulling through all remaining loops together.
Picot Stitch:
- After completing a SC, chain 3. Insert hook back into the SC and SL ST to create a small decorative knot.
Pattern Instructions
1. Foundation Chain
- For an adult size (approximately 43 cm and 8 motifs):
- Chain 150.
- For smaller sizes:
- Chain 132 for 7 motifs or chain 114 for 6 motifs.
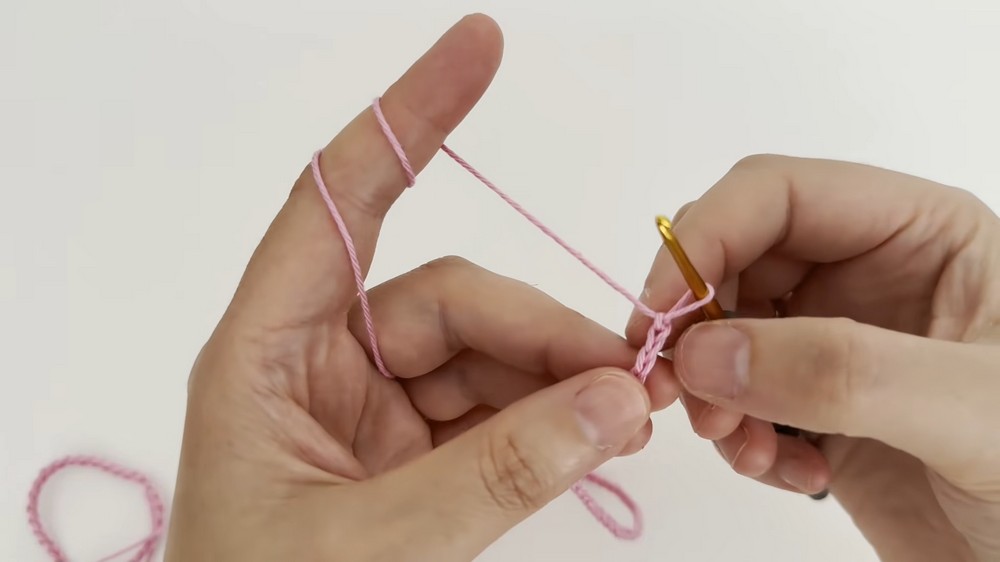
2. Base Setup Row
- Skip the first 11 chains and work 1 single crochet (SC) into the 12th chain (ensure you catch both loops for a sturdy foundation).
- Chain 5, skip 5 chains, and work a single crochet into the 6th chain.
- Repeat: CH 5 → Skip 5 chains → SC into the 6th chain across the entire row to create a series of base loops.
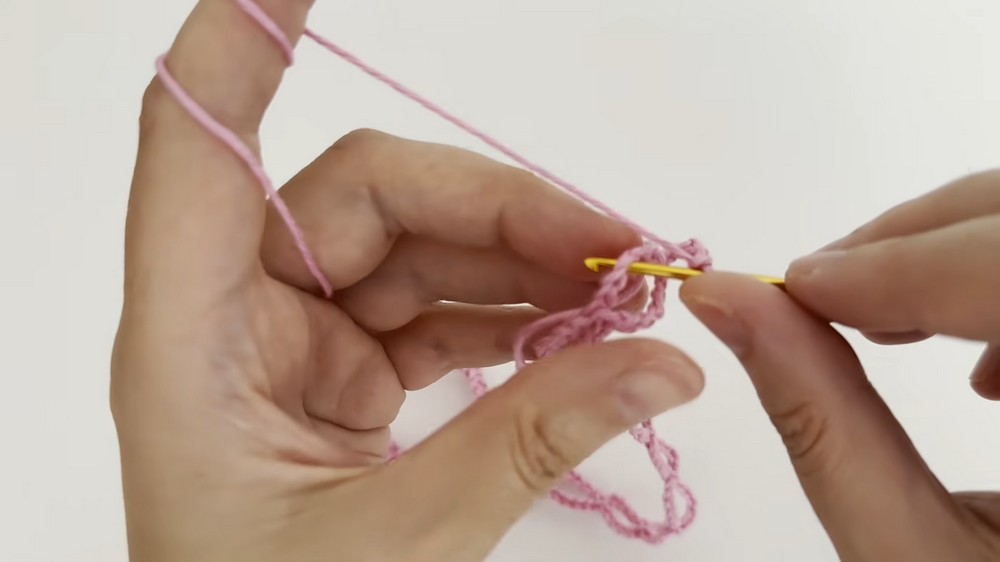
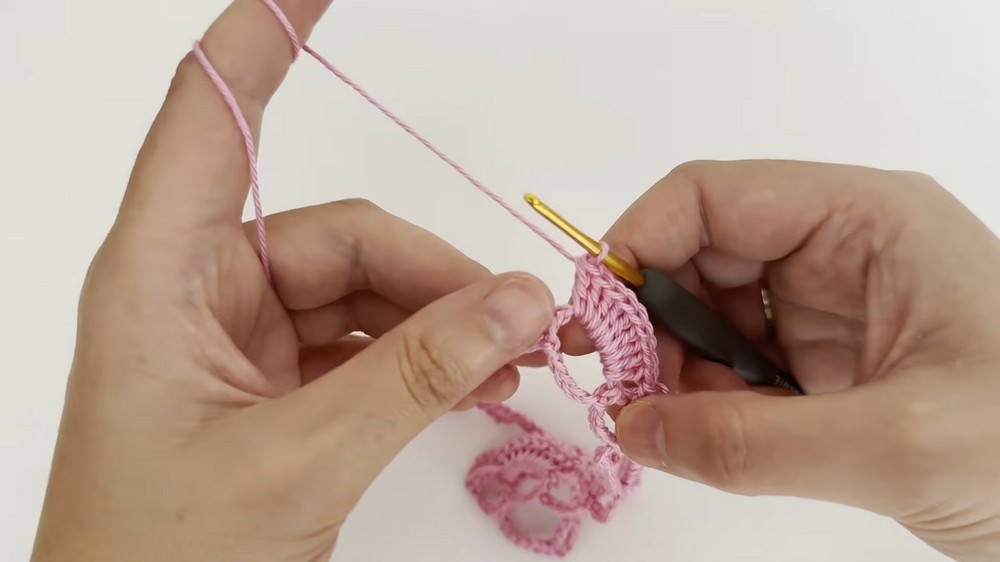
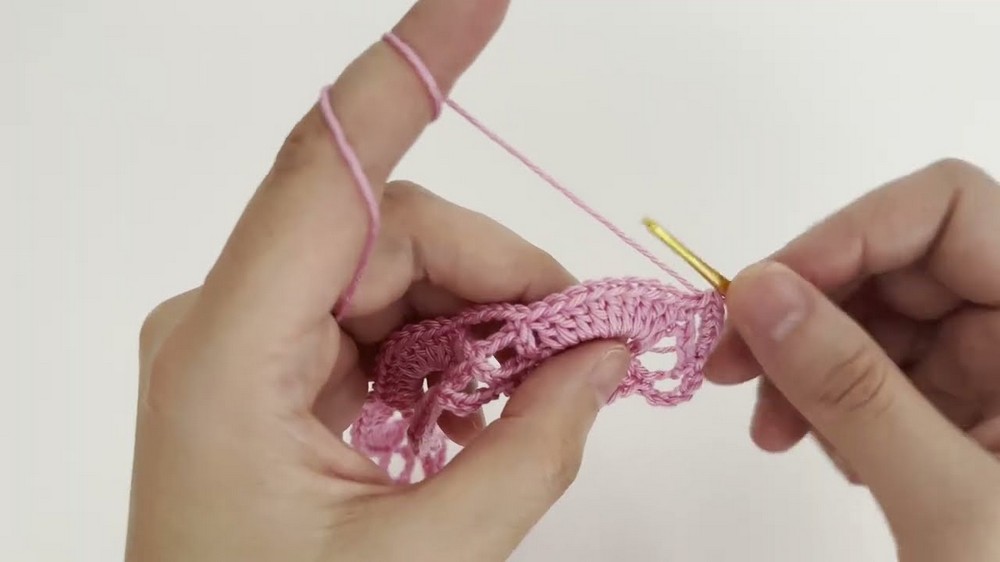
3. Motif Row 1 (9 Double Crochet Shells)
- At the end of the base row, chain 5 and turn your work.
- Single crochet into the 3rd chain of the first base loop.
- In the next chain 5 space, work 9 double crochets (DC), keeping your stitches even and well spaced.
- Single crochet into the 3rd chain of the next base loop.
- Repeat the motif pattern:
- Chain 5 → Single crochet into the next loop → 9 doubles crochets in the following loop, until you reach the end of the row.
4. Motif Row 2 (Joining/Connecting)
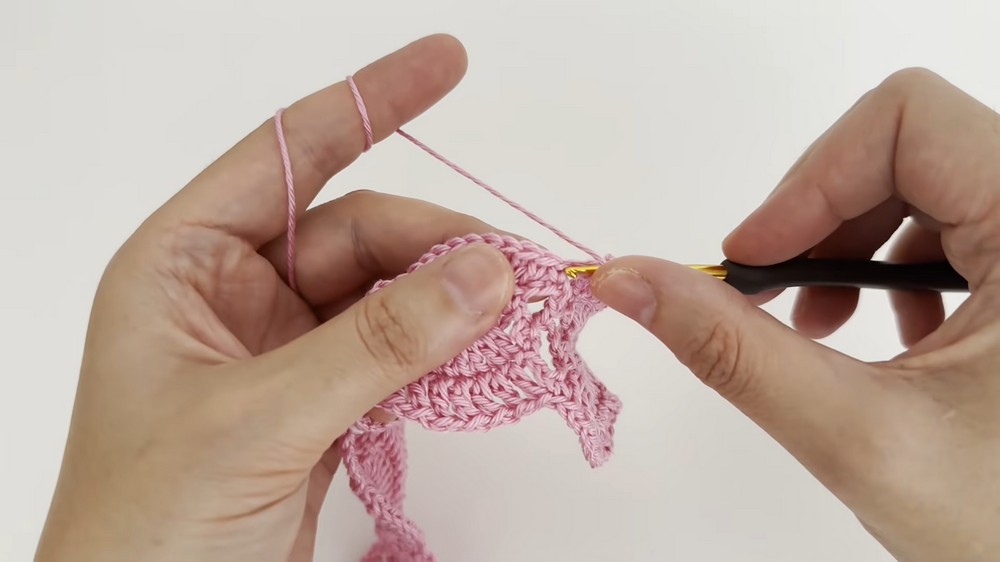
- After completing the previous row, chain 5 and turn your work.
- Single crochet into the middle of the next loop created in the previous row.
- Work the shell pattern again by creating 9 double crochets into the chain 5 gaps created by the previous row.
- Continue across the row, ensuring alignment with the base loops as you repeat the chain 5 → single crochet → 9 double crochets pattern.
5. Detail Row (T Stitches with Chain 1 Spaces)
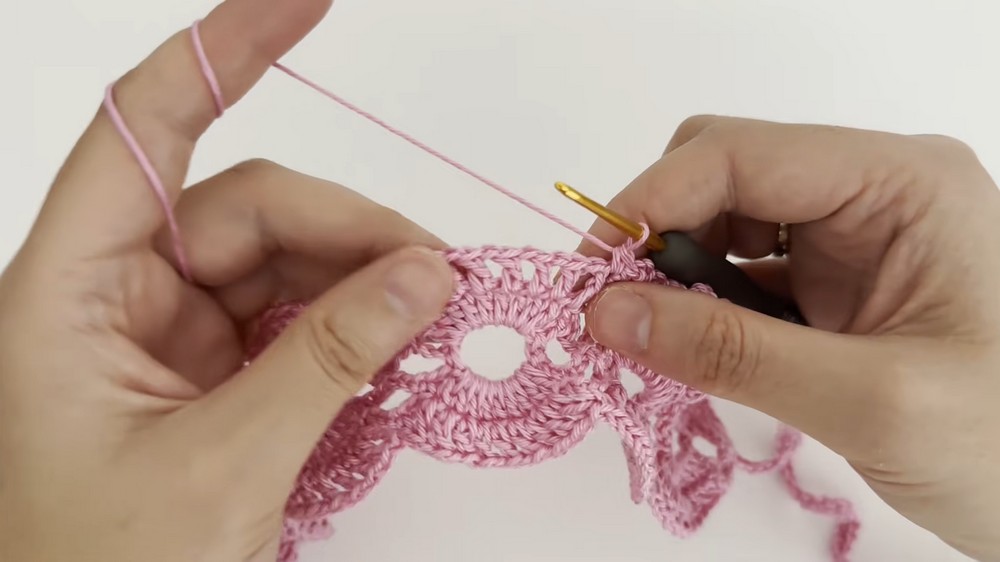
- After completing the motif row, chain 1 and work 3 single crochets into the nearest loop.
- Add 1 single crochet into the stitch directly next to the loop.
- Into each of the 9 double crochets of the shell, work:
- 1 double crochet, chain 1.
- Once you finish the shell, join with a single crochet in the center of the chain 5 space.
- Repeat the above steps across the row for each shell and chain-5 section.
6. Finishing and Edging
6.1 Side Ties
- To create the ties:
- At each end of the band, chain 41.
- Work single crochets into every chain along the tie as you make your way back toward the band.
6.2 Picot Edging
- In the edging row, work 1 single crochet into the chain 1 space, followed by a picot (chain 3, then slip stitch into the base stitch).
- Continue this single crochet + picot pattern along the top of the shells:
- Add 1 single crochet and 1 picot into each chain 1 space.
Final Steps:
- After completing the edging, fasten off the yarn and weave in all loose ends securely.
- Lightly block your hairband with a steam iron to smooth the stitches and ensure the shape holds well.
Finished Size
- Adult Size: Approximately 43 cm in length (excluding the ties) and 6 cm in width.
- Child Size: Approximately 30 cm in length with the same width of 6 cm.
Conclusion
Congratulations on completing your beautiful, customizable crochet hairband. Whether you made this for yourself or a loved one, this handmade hairband is a delightful and practical accessory. Play around with yarn colors, tie lengths, or add embellishments like beads for a personalized touch.