
Free Crochet Evil Eye Pouch Pattern to Store Your Jewelry
Tidy up your bag with the Free Crochet Evil Eye Pattern, a cheerful design to store hair clips or small essentials that often get lost at the bottom.
When I first came up with the idea for this project, I wanted to create something practical yet steeped in meaning. The Free Crochet Evil Eye Pouch Pattern brings together a touch of tradition and modern charm in a simple, functional design. The striking evil eye motif, with its concentric layers of contrasting colors like blue, white, and black, is the centerpiece of this circular pouch. It embodies protection and positivity, something I find inspiring and worth sharing with others.
Free Crochet Evil Eye Pouch Pattern That Keeps Keys Together
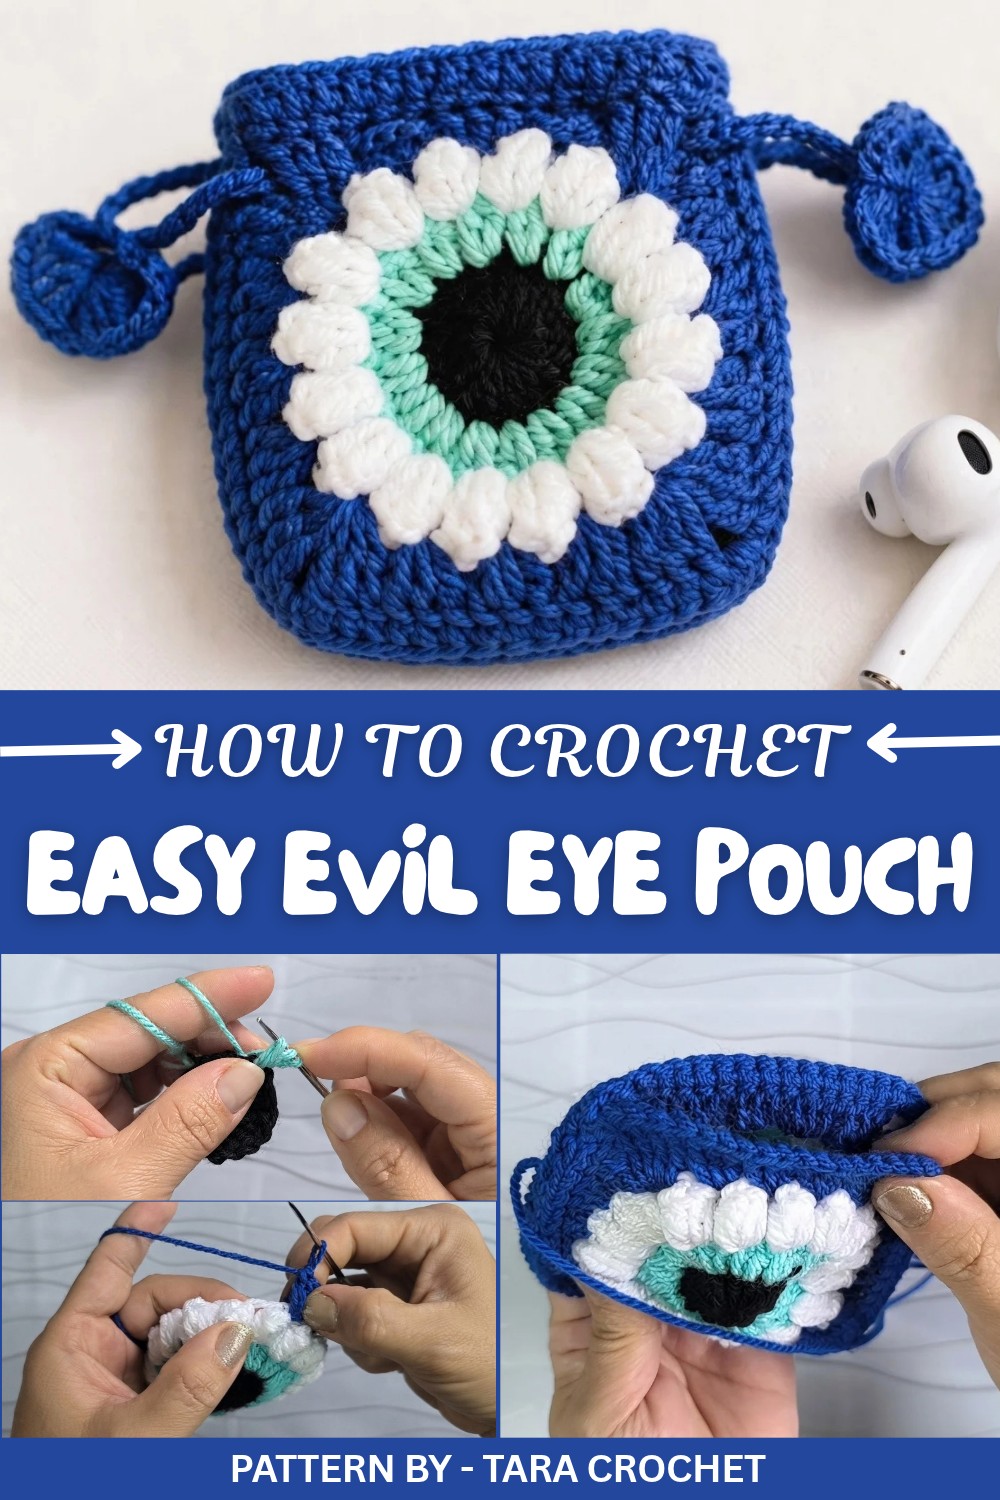
This pouch is compact but incredibly versatile, making it suitable for holding coins, small trinkets, or earbuds. Its rounded shape and textured stitch details give it personality, while the drawstring closure adds function and security. Plus, it’s customizable. You can adjust the number of rounds to scale it up or down, or even experiment with different color combinations to tailor it to your style.
The construction uses simple rounds worked in different shades of yarn, making it an approachable project for adventurous beginners or a fun, quick make for more experienced crocheters. For best results, I like to work with smooth cotton or acrylic yarn, as these fibers highlight the crisp stitch details and provide durability. A medium weight yarn works beautifully to keep the pouch lightweight while holding its shape.
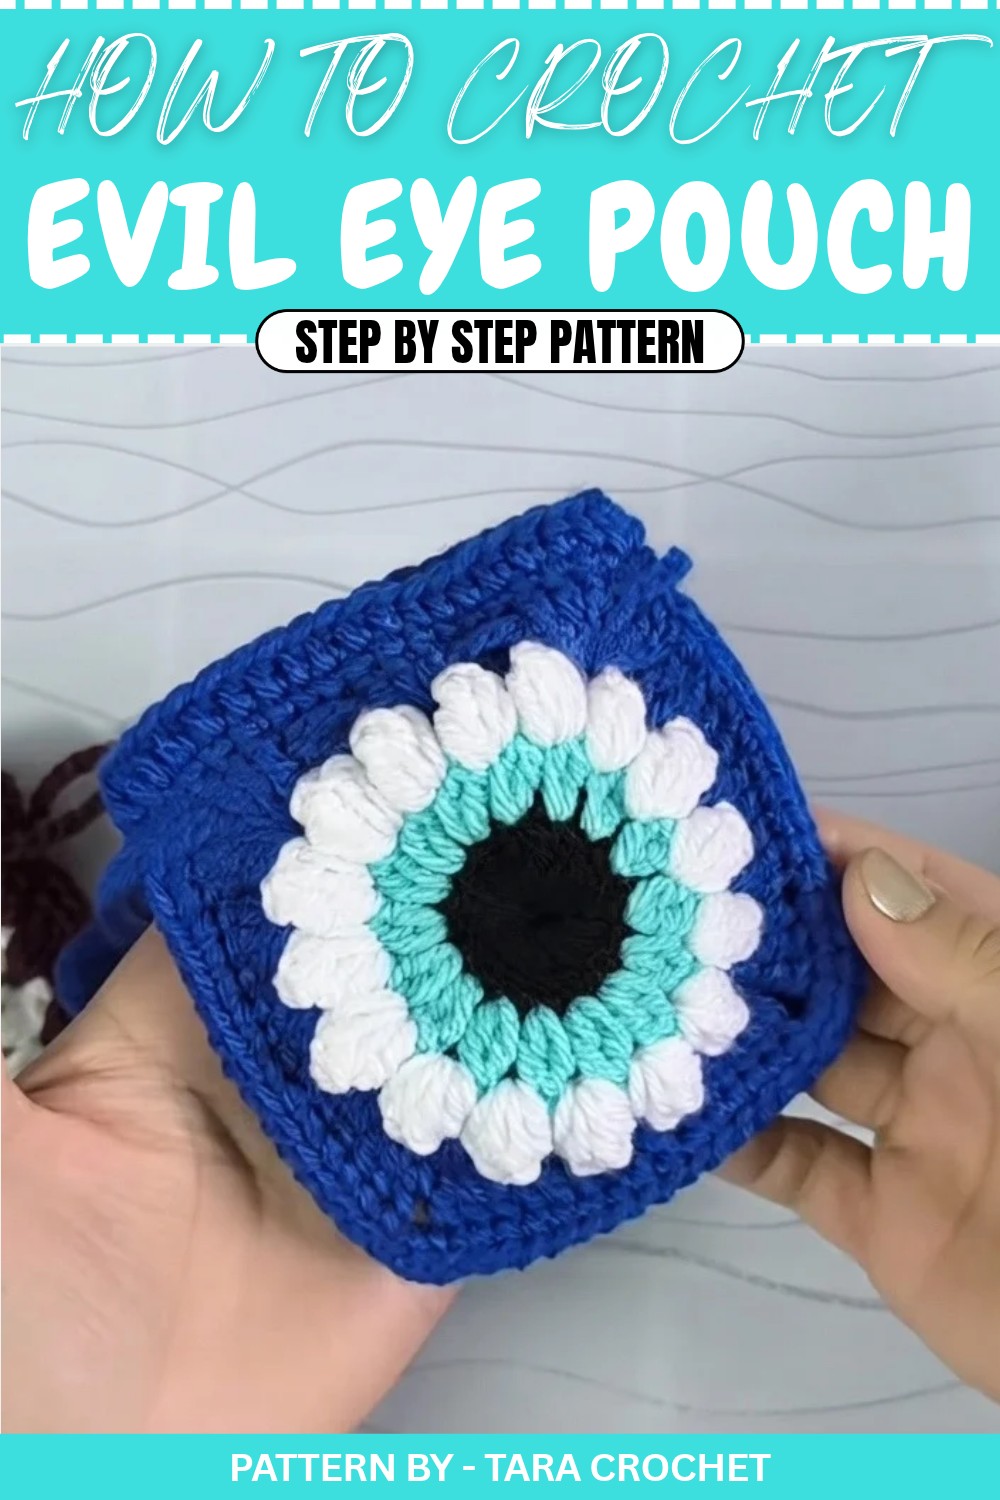
Pattern By Tara crochet
I’ve always loved the symbolism of the evil eye, so designing this pouch was a joy. It makes for a meaningful handmade gift, especially for someone who appreciates thoughtful gestures or enjoys cultural symbols. Whether you stick with traditional hues or go bold with a splash of creativity, this pouch is a small project packed with charm and personality. I can’t wait to see how you make it your own.
Crochet Evil Eye Pouch Pattern
Quick Overview of Pattern
- Type: Crochet Evil Eye Pouch combining functional design and stylish appearance.
- Purpose: Convenient pouch for small items with a symbolic evil eye pattern for protection.
- Difficulty: Beginner friendly with some intermediate techniques.
- Techniques Used: Magic ring, single crochet (Sc), half double crochet (Hdc), double crochet (Dc), triple crochet (Tc), and slip stitch (Sl St).
- Focus: Shaping the Evil Eye design, creating the pouch structure, and decorative detailing.
Notes
- Use contrasting yarn colors, such as black, white, and blue, to enhance the visual appeal of the Evil Eye pattern.
- Maintain consistent tension for neat stitches throughout the project.
- Optional: Customize the strap length or add embellishments to personalize your pouch.
Skill Level
Beginner to Intermediate.
Materials
- Yarn:
- Black yarn for the base of the pouch.
- Sky Blue yarn for the outer layer of the Evil Eye.
- White yarn for the eye detailing.
- Hook: 2.5 mm crochet hook.
- Stitch Marker: To mark rounds and stitches.
- Tapestry Needle: For weaving in ends and joining pieces.
- Scissors: For trimming excess yarn.
Measurements / Sizing
- Final Size: Approximately 10 cm in width and height, depending on yarn and stitch tension.
- Strap Length: Adjustable, roughly 60 chains recommended.
Gauge
Gauge is not critical for this project, but ensure consistent tension throughout to achieve uniform shapes.
Stitch Abbreviations
- Ch: Chain.
- Sc: Single Crochet.
- Hdc: Half Double Crochet.
- Dc: Double Crochet.
- Tc: Triple Crochet.
- Sl St: Slip Stitch.
- MR: Magic Ring.
Special Stitches
- Magic Ring (MR): Used for starting circles and creating tightly closed bases.
- Triple Crochet (Tc): Longer decorative stitch used in the Evil Eye design.
Crochet Pattern
Step 1: Black Center (Magic Ring)
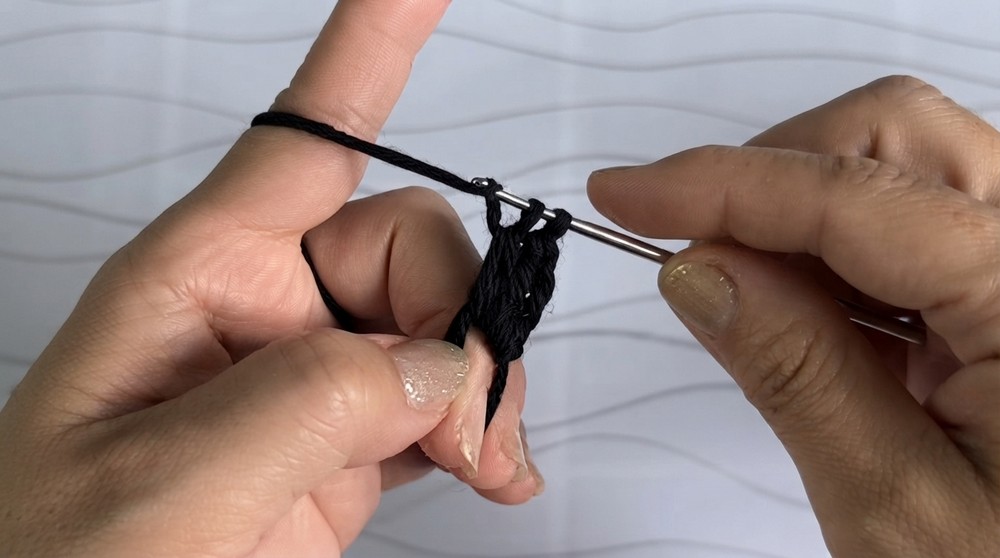
- Create the Magic Ring with black yarn:
- Wrap the yarn around your finger to form one loop.
- Insert hook into the loop, grab working yarn, pull through, and secure with a slip knot.
- Work Round 1:
- Chain 3 (counts as 1 double crochet) into the ring.
- Make 15 more double crochets (Dc) into the ring for a total of 16 stitches.
- Close the Magic Ring:
- Pull the yarn tail tightly to close the center.
- Slip Stitch (Sl St) into the top of the starting chain-3 to complete the round.
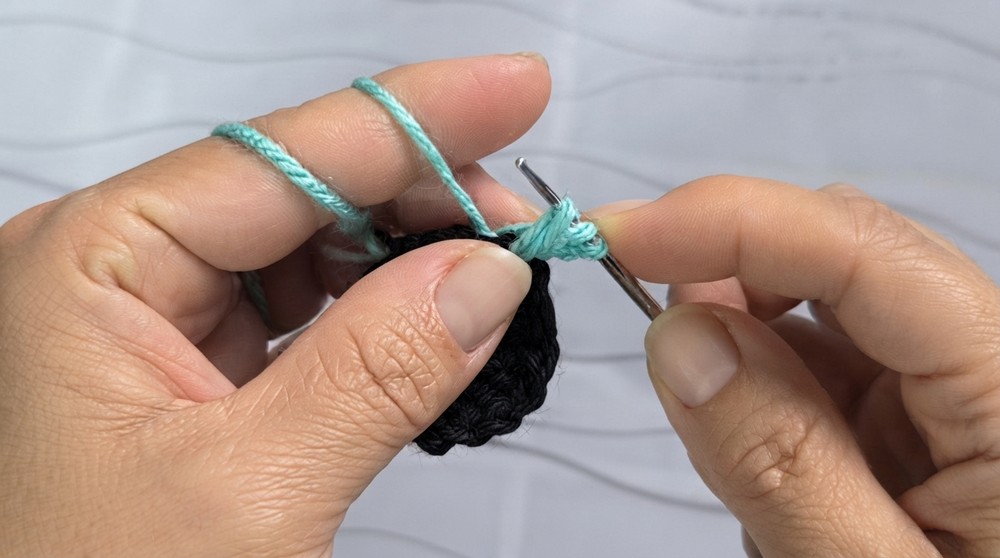
Step 2: Sky Blue Round
- Join sky blue yarn:
- Insert hook into any stitch from Round 1, secure blue yarn with a slip knot.
- Work Modified Cluster Stitch in every stitch:
- Chain 3 (acts as first stitch).
- Cluster stitch: Begin a double crochet (leave 2 loops on hook), begin another double crochet (leave 3 loops on hook), yarn over and pull through all loops on the hook.
- Chain 2 (separate clusters).
- Repeat Cluster Stitch and 2 chains around the entire round. Slip Stitch to close the round.
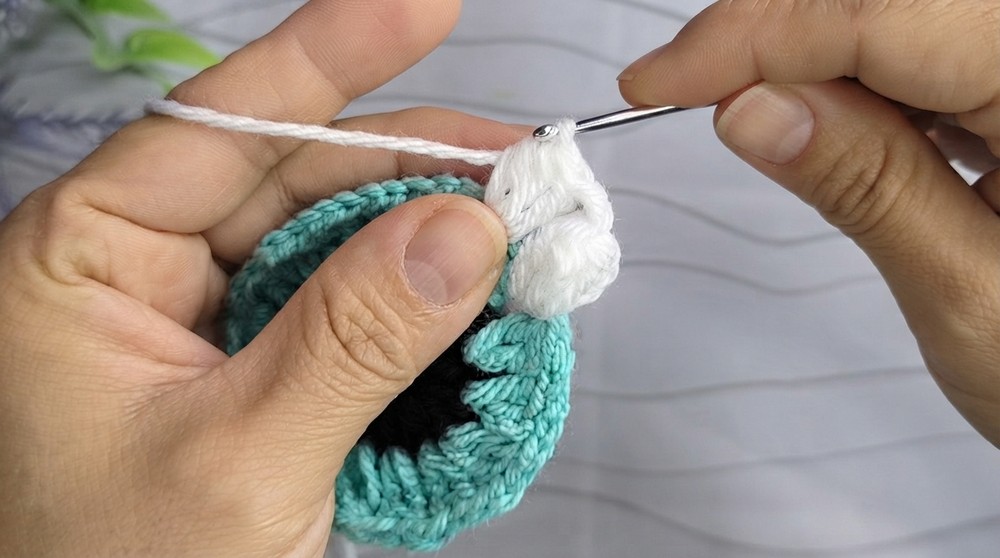
Step 3: White Puff/Flower Round
- Attach white yarn to any chain-space:
- Insert hook, secure the white yarn with a slip knot.
- Create Flower Clusters:
- Chain 3 (counts as first stitch).
- Work 5 double crochets (Dc) into the same space.
- Remove the hook from the active loop, insert hook into the first stitch of the cluster, grab the last loop and pull through to form a puff stitch.
- Chain 2 to separate flower clusters.
- Repeat Flower Puff Clusters around each space. Slip Stitch to close the round.
Step 4: Blue Border & Shaping
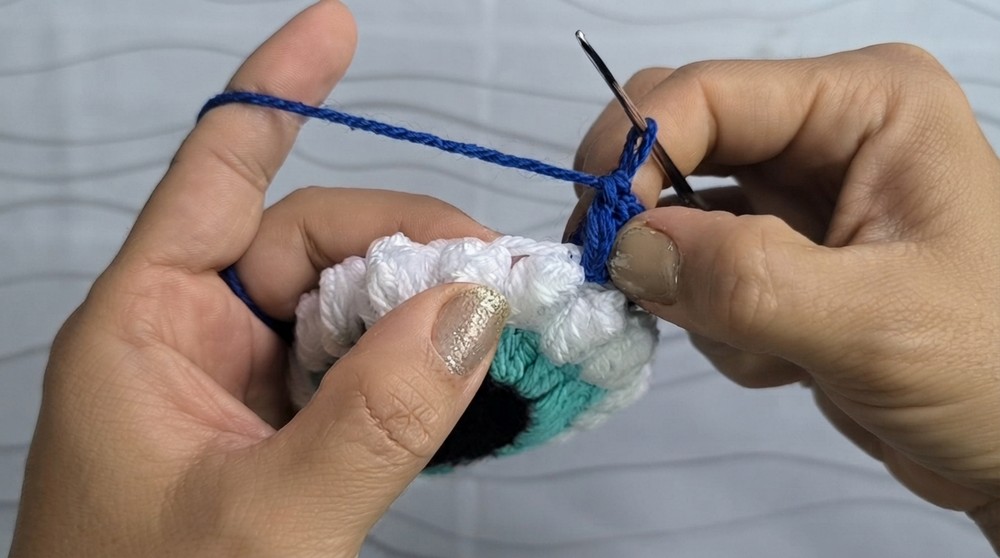
- Attach blue yarn to any cluster space.
- Create Corners:
- Work 3 triple crochets (Tc) into the space, then chain 2 to form corner points.
- Make another 3 triple crochets (Tc) into the same space.
- Fill Remaining Spaces:
- Work 3 double crochets (Dc) into each non-corner space.
- Continue this pattern around the whole round.
- Optional Final Round:
- Add single crochet (Sc) into every stitch to clean and smooth the edges.
Step 5: Assembly & Finishing
- Make Two Identical Pieces:
- Repeat the pattern for the second pouch panel.
- Join Panels Together:
- Align them with wrong sides facing each other.
- Use black yarn to stitch three sides together using front loops only for a clean seam.
- Leave the top side open to form the pouch’s opening.
- Edge Cleanup:
- Work a row of half double crochet (Hdc) around the top opening to tidy and reinforce edges.
Step 6: Drawstring Creation
- Create a Decorative Heart Stopper:
- Start with blue yarn and a Magic Ring.
- Chain 3 (counts as the center circle).
- Work 3 triple crochets (Tc), 4 double crochets (Dc), and 1 triple crochet (Tc) into the ring.
- Mirror the stitches on the opposite side (1 triple crochet, 4 double crochets, 3 triple crochets).
- Make the Straps:
- Chain 60 (adjustable length).
- Weave the Drawstring:
- Insert the ends of the drawstring into the pouch’s top opening. Alternate weaving the strap through each gap (one up, one down).
- Secure the heart stopper at the ends of the drawstring for a decorative and functional finish.
Finished Pouch Size
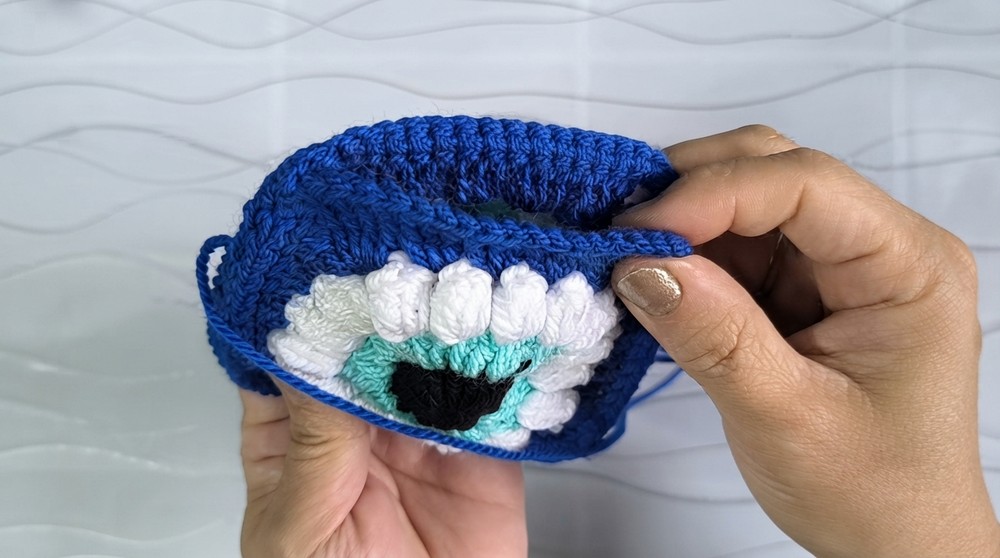
Your completed Crochet Evil Eye Pouch should measure approximately 10 cm wide and 10 cm tall, with a functional drawstring closure and an intricate Evil Eye design.
Conclusion
Congratulations, You’ve successfully completed the Evil Eye Pouch. This eye-catching and functional crochet accessory is perfect for storing small items or gifting as a handmade good-luck charm. Customize it further by altering yarn colors or embellishments.