
Free Crochet Beanie Hat Pattern You’ll Want to Make
Check out free crochet pattern to make cute and comfy beanie hat for cold days, a perfect project for kids and adults to enjoy.
Nothing beats the charm of a snug and stylish beanie, especially when it’s handmade just for you. Free crochet beanie hat pattern can turn simple yarn into a statement piece that’s both functional and fashionable. With their soft texture and cozy fit, beanies is perfect for keeping you warm on brisk mornings or adding a trendy touch to a laid back outfit. Whether it’s a slouchy, relaxed style or a classic, fitted look, beanies effortlessly combine practicality with a touch of personality.
Featured By Trang Lam Crochet - Left Handed
A beanie is perfect for anyone, making it an excellent choice for all sizes. With a few simple adjustments — like adding extra stitches or rows — you can customize it for any head size. Textures come into play here as well; ribbing adds a polished touch to the brim, while playful details like bobbles or a pom pom take it to the next level. For those who love minimalist charm, a straightforward stitch makes it sleek and simple.
Free Crochet Beanie Hat Patterns for a Cozy Handmade Look
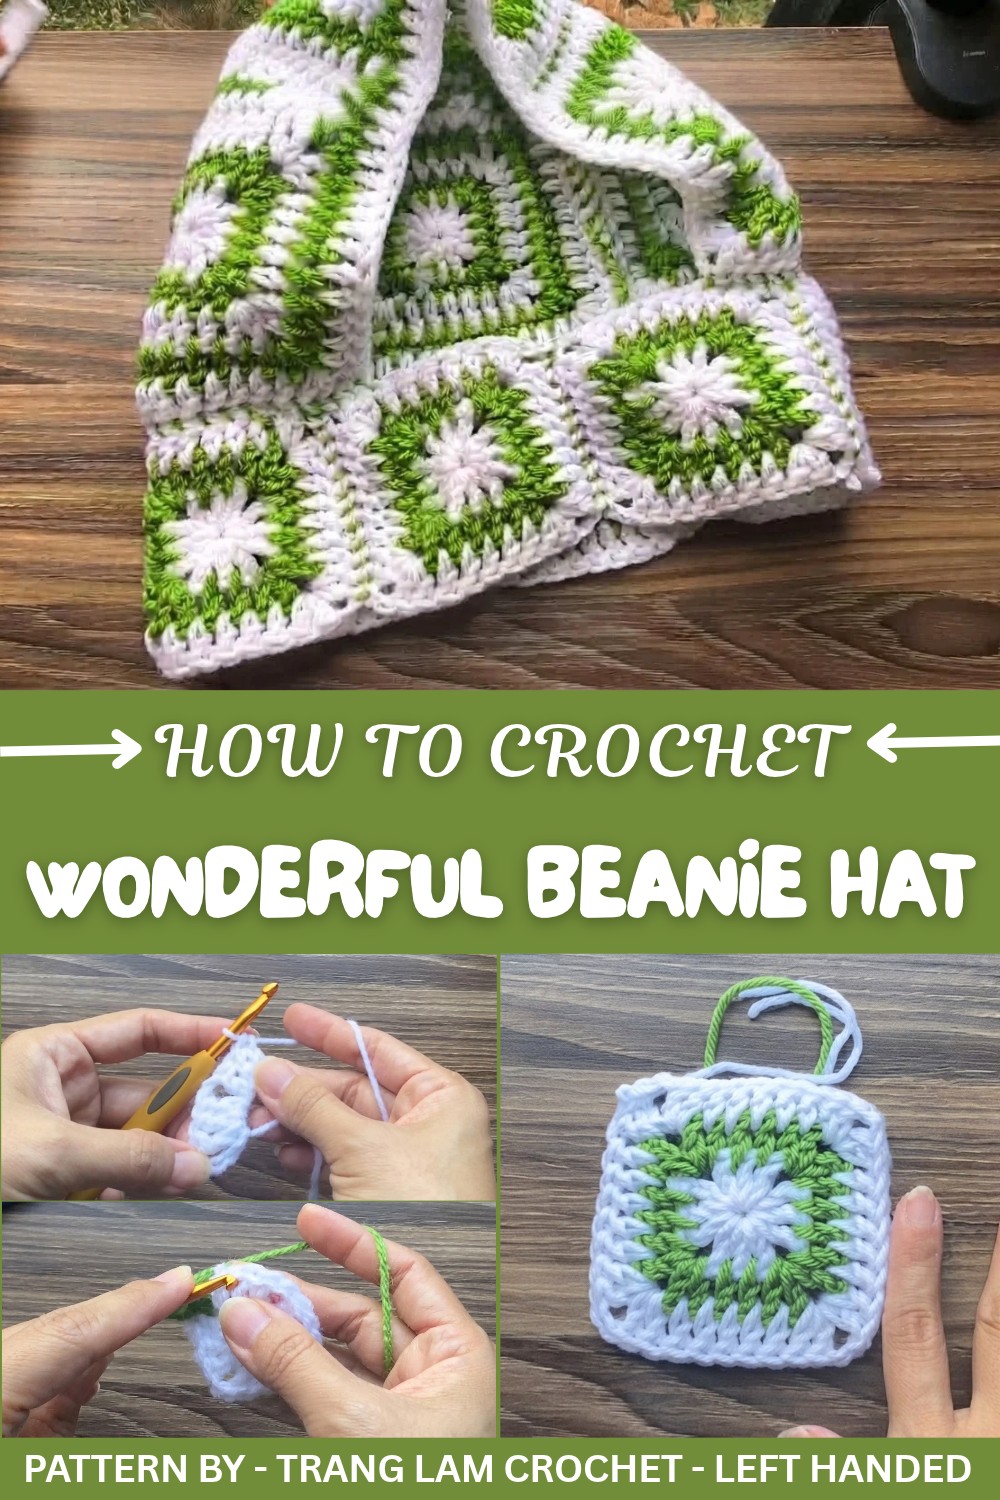
The inspiration for this design comes from the comforts of crisp mornings and cozy evenings, where a warm hat is both practical and endearing. Using soft, easy to work with yarns like acrylic blends or wool can make the texture stand out while keeping your project lightweight but warm. Yarn with delicate color variations or flecks adds an extra layer of character without requiring complicated techniques.
Whether you’re looking for a thoughtful handmade gift or a quick, personalized addition to your own wardrobe, a beanie is always a winning choice. Add a pop of color or leave it understated, the beauty lies in its simplicity and endless custom options. It’s a one of a kind accessory that comes from the heart, sure to be cherished for years to come.
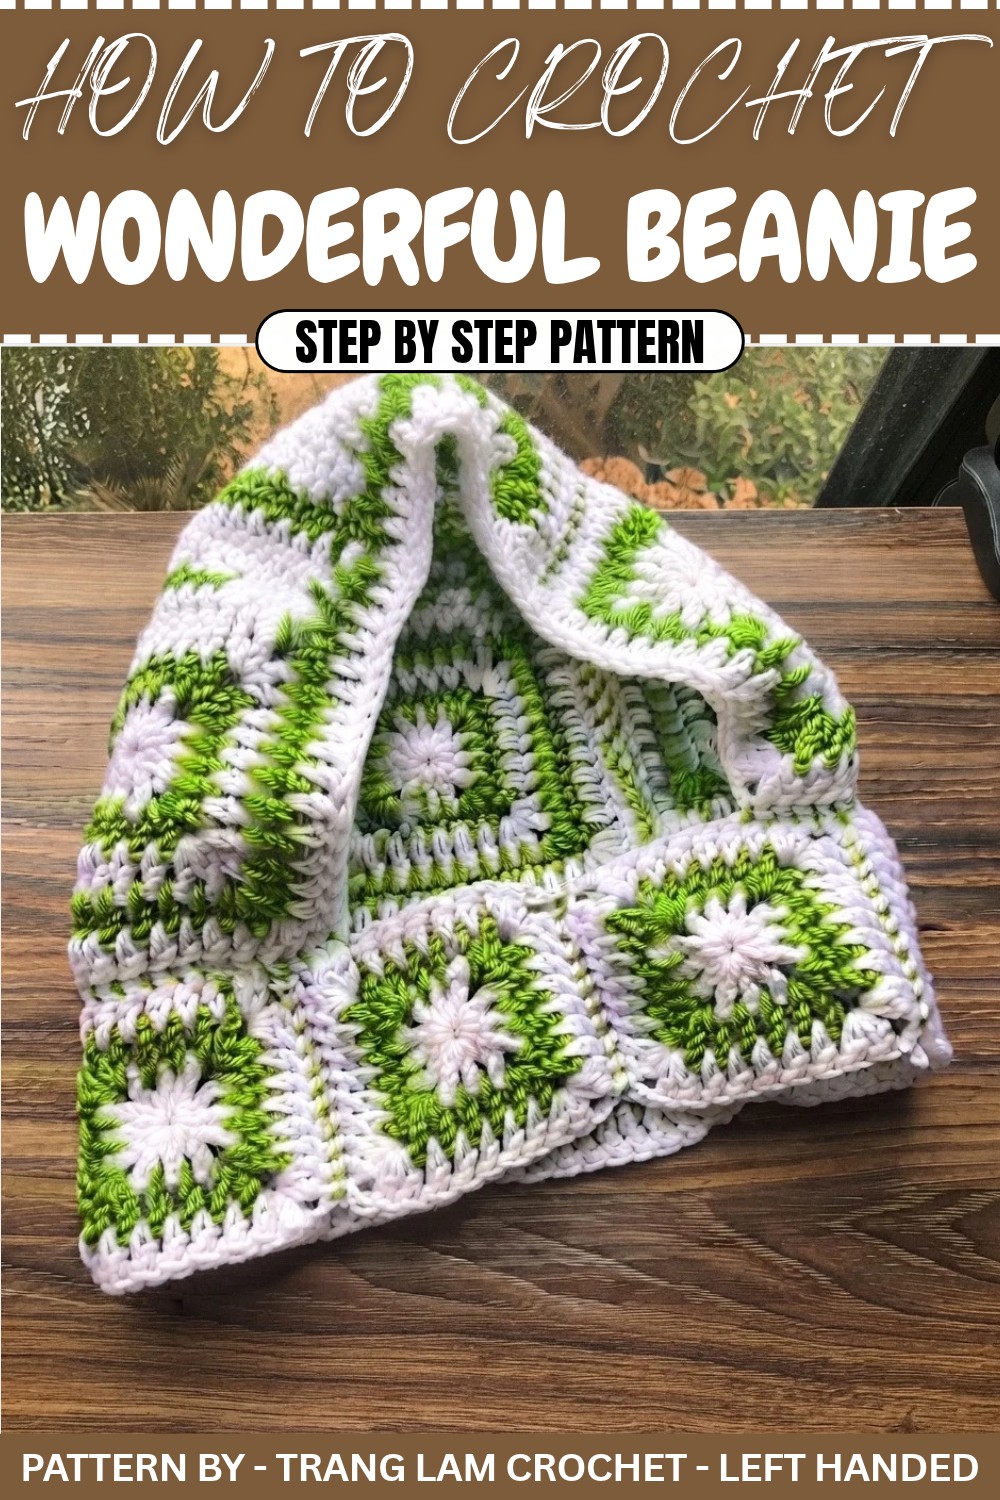
Crochet Beanie Hat Pattern
In this tutorial, we will learn how to crochet beautiful square motifs to create a hat. This project uses small and large square motifs, which are later joined together to form a functional and stylish accessory. With clear guidance, this pattern is perfect for beginners and intermediate crocheters alike. The squares feature elegant corner structures using magic rings, chains, and double crochet stitches to ensure the final product is clean and precise.
Quick Overview of the Pattern:
- Project: Crochet squares for a hat.
- Design: Includes 6 small squares (with three rounds each) and 4 larger squares (with five rounds each).
- Techniques Used: Magic ring, double crochet stitches, joining with slip stitches.
- Final Assembly: Squares are joined seamlessly to create a hat.
Notes:
- Squares can be customized with color combinations based on personal preference.
- Adjust hook size for different head sizes. For larger sizes, consider using 5.5 mm or 6 mm hooks.
- Use contrasting yarn for stitching to highlight the design.
Skill Level:
Beginner to Intermediate
Materials:
- Crochet Hook: 5.0 mm hook (or larger for bigger sizes).
- Yarn: Two colors of yarn. You can use Milk Cotton or Line yarn.
- Scissors: For cutting yarn.
- Tapestry Needle: To weave in ends and join squares.
Measurements/Sizing:
- Small Squares: 3 rounds per square, 6 squares needed for the hat.
- Large Squares: 5 rounds per square, 4 squares needed for the hat.
- Final Hat Size: Approximately 52–54 cm circumference.
Gauge:
- Maintain consistent tension for neat stitches.
- Adjust hook size if needed to match the desired dimensions.
Stitch Abbreviations:
- CH: Chain
- SC: Single Crochet
- DC: Double Crochet
- SL ST: Slip Stitch
- Magic Ring: A looped starting method used for creating circular bases.
Special Techniques:
- Magic Ring: Wrap the yarn around your fingers to form a loop, secure with working yarn, insert hook, and chain stitches to start the base.
- Slip Stitch: Used to join ends or connect squares neatly.
The Crochet Pattern:
Small Square (3 rounds)
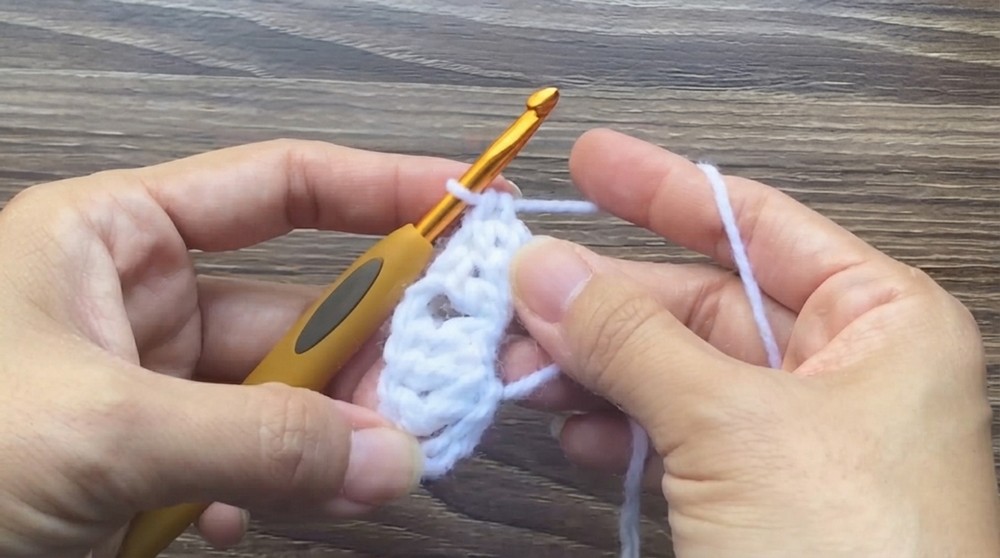
Round 1:
- Start with a magic ring.
- CH 5 (acts as 1 DC and 2 CH).
- In the magic ring, work:
- DC x 3.
- CH 2.
- Repeat the 3 DC → CH 2 sequence 2 more times.
- For the last space:
- DC x 2, then with the initial CH as the third DC.
- Tighten the loop of the magic ring by pulling the yarn tail.
- Close the round with SL ST into the third chain of the starting chain (CH).
- CH 1, cut the yarn, leaving a tail, and secure the end.
Round 2:
- Attach the second yarn color (e.g., green) to any corner of the square.
- CH 5 at the corner (acts as 1 DC and 2 CH).
- In the corner gap (CH 2 space):
- DC x 2.
- In the gaps between the 3 DC group from the previous round:
- DC → DC → skip next chain → DC x 2 (work DC stitches between gaps, not into the chains).
- For the next corner:
- DC x 2 → CH 2 → DC x 2 in the corner gap.
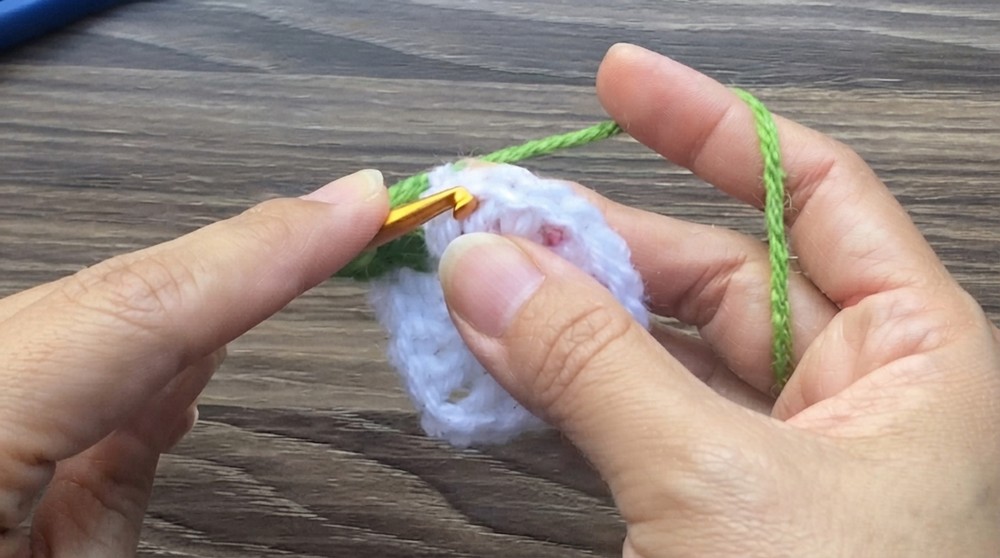
Repeat this sequence around the square: Corner spaces get (2 DC → CH 2 → 2 DC), and gaps between DC clusters from the previous round get DC → DC.
Close the round with a SL ST into the third chain of starting chain.
Round 3 (Final for Small Squares):
- Attach the white yarn and repeat CH 5 at any corner (acts as 1 DC and 2 CH).
- Work DC x 2 → CH 2 → DC x 2 in all corner spaces.
- Work DC → DC → DC → DC → DC → DC between DC clusters from the previous round.
- Continue this pattern around.
- Close with SL ST into the third chain, and cut the yarn.
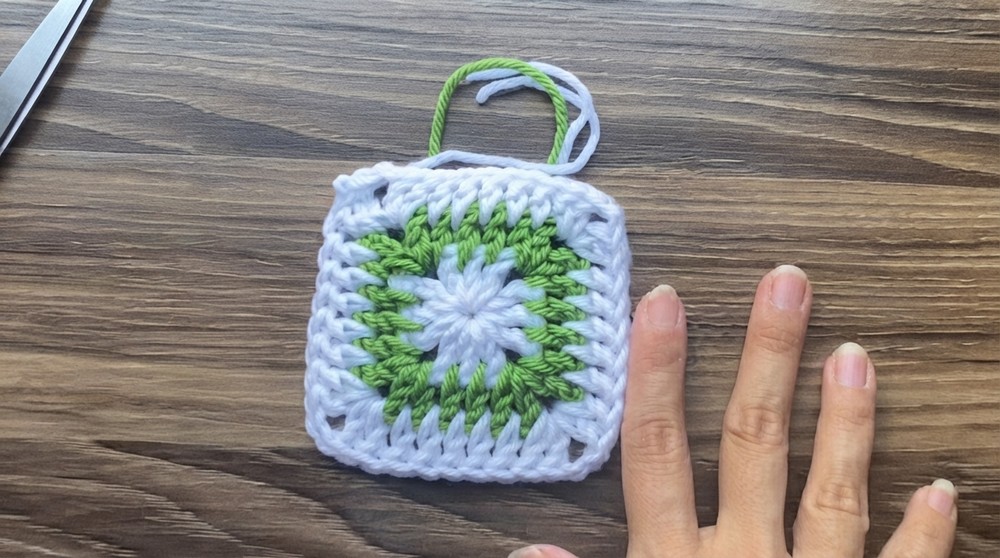
Repeat these steps to create a total of 6 small squares.
Large Square (5 rounds):
To create large squares, follow the pattern for small squares, but continue working Round 4 and Round 5 similarly to Round 3:
Repeat for Round 4 & Round 5:
- Attach the second yarn color (e.g. white or alternate).
- In the corner gaps work DC x 2 → CH 2 → DC x 2.
- Work DC stitches into the gaps, following the same technique as previous rounds.
Create 4 large squares, ensuring each has 5 completed rounds.
Assembly & Joining Squares:
Joining Small Squares (6 pieces):
- Place two small squares together, with right sides facing inward.
- Position the squares so the edges align.
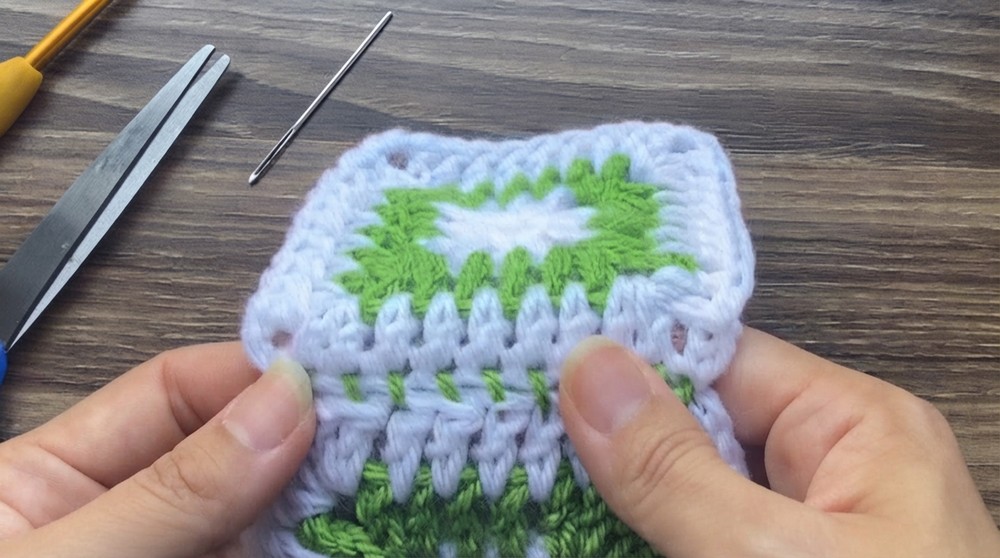
- Thread contrasting yarn (e.g., green) into a tapestry needle.
- Starting at a corner, hand sew through one loop of each edge (CH), leaving the outer loops free for a decorative finish.
- Continue sewing along the edges, ensuring alignment with corner stitches.
- Repeat for all six small squares, joining them into a strip to form the base outline.
Joining Large Squares (4 pieces):
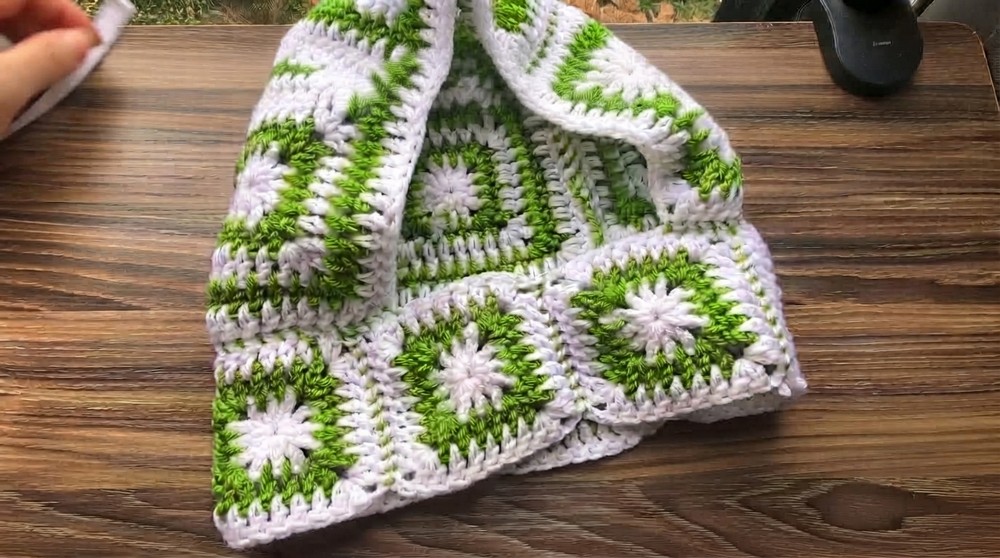
- Position three large squares edge to edge to form a strip. The fourth square will cap the top of the hat.
- Sew the edges together, starting at the corners, using the same single loop technique for neatness. Leave the outer loops of chains untouched for a clean look.
- Once joined, center the prepared small square base on the large squares and sew them together to form the main structure of the hat.
Adding a Border:
- Use SC stitches along the edges of the hat to form a neat border. Use contrasting colored yarn as desired.
- Work one SC into each stitch around the edges to ensure evenness.
Finished Size:
The final hat should measure approximately 52–54 cm in circumference, suitable for most adult heads. Adjust the hook size if creating larger or smaller hats (e.g., 5.5 mm or 6 mm for larger sizes).
Customization Tips:
- Color Variety: Experiment with different yarn colors to achieve unique designs. Use subtle shades for a minimal look or bold colors for festive vibes.
- Yarn Texture: Play with textures like metallic threads or variegated yarns to add depth to the squares.
- Pattern Variations: Add more rounds to the squares for bigger motifs, or work different stitch combinations for creative designs.
Conclusion:
Congratulations on completing this stunning square based hat. The elegant contrasts in stitching and colors make it versatile for everyday use or as a wonderful gift. Take your time to perfect each square, and enjoy the meditative process of assembling them. With this design, you’ll have a handmade creation that combines both form and function elegantly.