
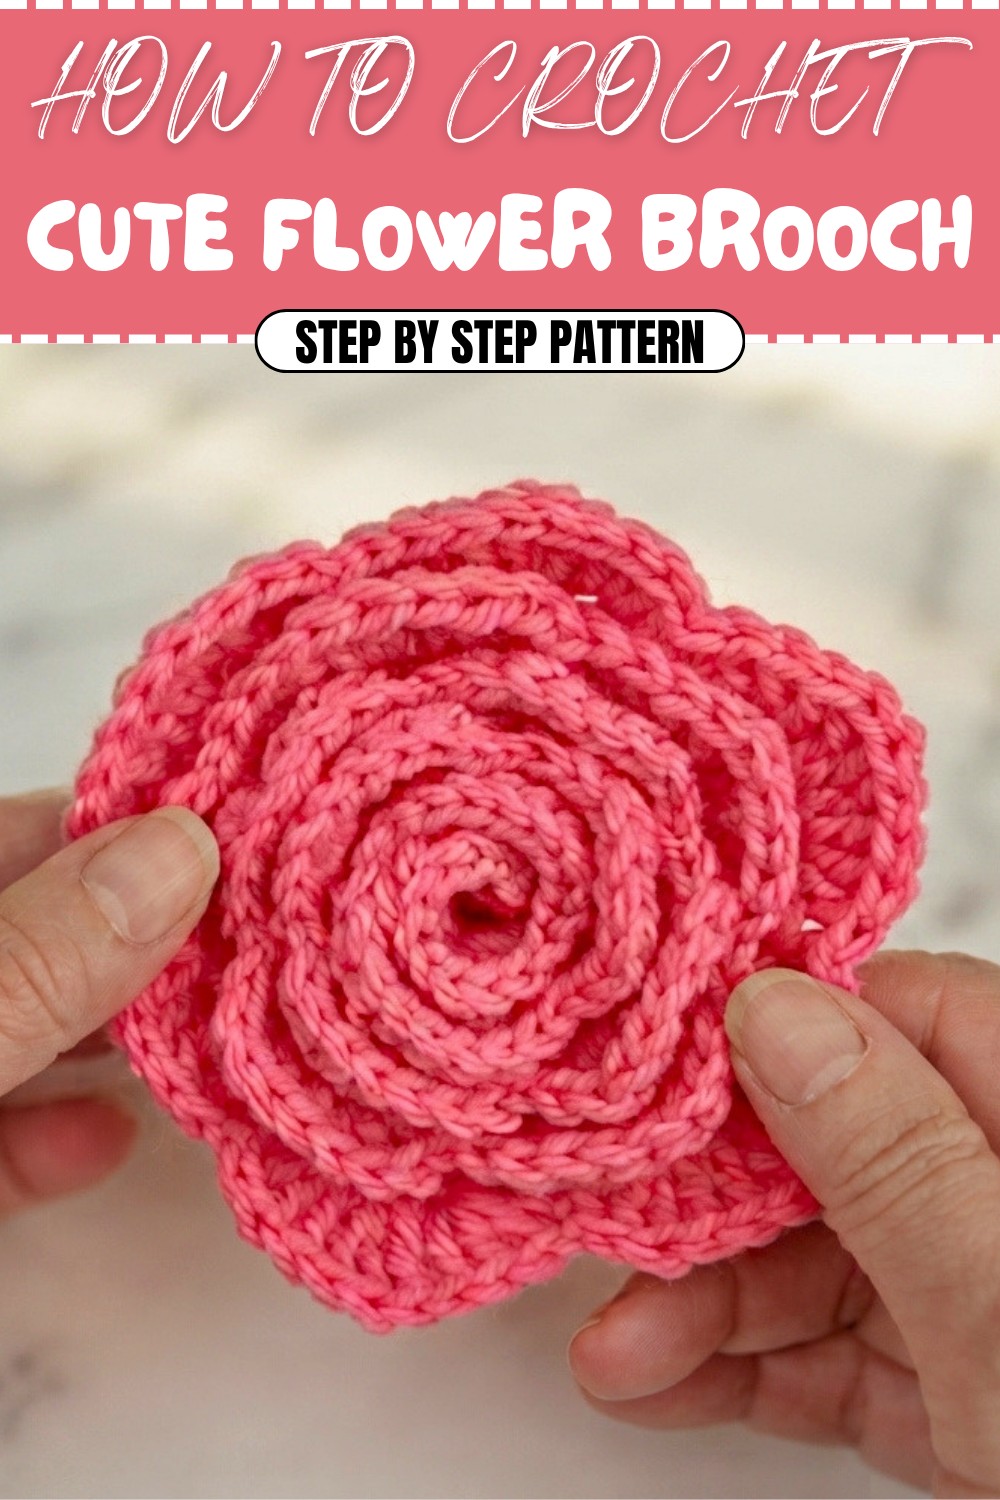
Effortlessly Crochet Flower Brooch Pattern for Chic Looks
Add a pop of style using the Free Crochet Flower Brooch Pattern and wear pretty petals on your jackets, hats, or bags every day.
There is something really fun about turning yarn into pretty things you can wear or use. This flower brooch pattern is a great way to make a lovely flower with soft, curved petals. You will use simple stitches like half double crochet, double crochet, and extended double crochet. These stitches help create petals that look full and textured, just like a real flower.
Learn Easy Crochet Flower Brooch Pattern for Handmade Accessories
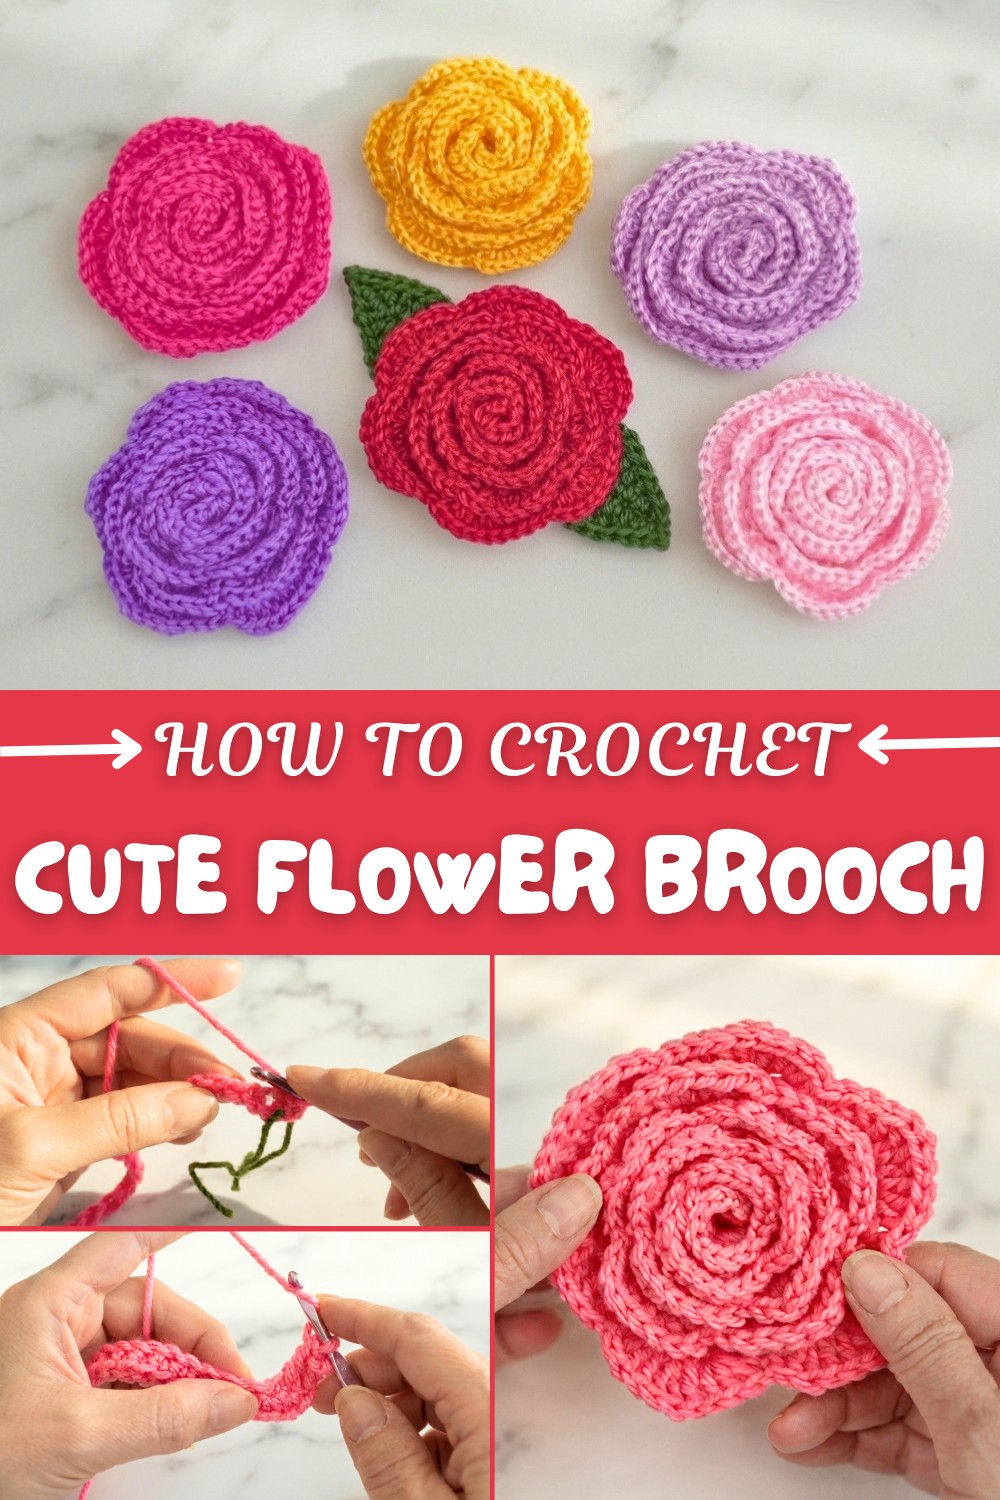
What makes this flower pattern special is how you start with a curved piece. As you crochet, the work naturally rolls up into a beautiful spiral, making the flower look very natural and unique. You will also learn how to add extra stitches and skip some stitches to make the petals stand out. Single crochet stitches help hold everything neatly in place.
Besides making brooches, these stitches can help you make many other pretty things. You can use the same petal shapes for blankets, edges of scarves, or decorations on bags and hats. You can even make flowers in different sizes and join them to decorate your home or gifts. This pattern is an easy and creative way to learn new crochet skills and make beautiful flowers that everyone will love.
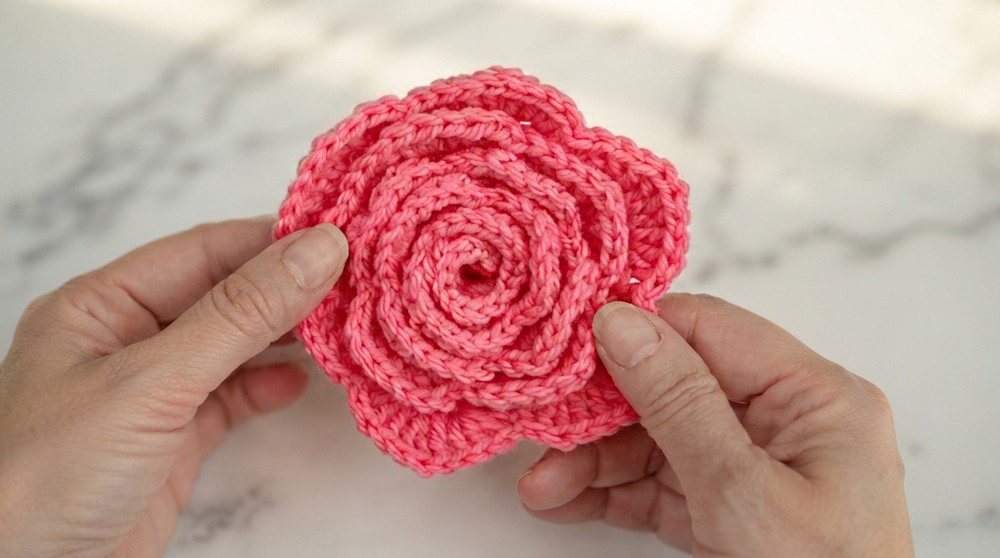
Crochet Rose Pattern
This crochet rose pattern creates an elegant, versatile piece that can be used as a brooch, bag embellishment, or as part of decorative arrangements. Employing simple stitches such as chains, single crochets, double crochets, half double crochets, and extended double crochets, this project is beginner-friendly but offers rewarding results. The rose is formed by crocheting a base strip, working petals in a shell motif, and assembling the strip into a 3D flower.
Skill Level & Terminology
Skill Level: Beginner.
Terminology: US Crochet Terms.
Materials & Tools
- Yarn: Any yarn of your choice (medium weight recommended for structured petals).
- Hook: Use a hook size suitable to your yarn weight (e.g., 4 mm or 5 mm hook).
- Other Supplies:
- Scissors.
- Tapestry needle for sewing.
- Pins for securing layers during assembly.
Gauge
Gauge is not essential for this pattern since the size and appearance of the rose will depend on the yarn weight and hook size chosen.
Abbreviations List
- ch: Chain.
- sl st: Slip Stitch.
- sc: Single Crochet.
- hdc: Half Double Crochet.
- dc: Double Crochet.
- edc: Extended Double Crochet.
- st(s): Stitch(es).
Special Stitch Instructions
Extended Double Crochet (edc)
The edc adds extra height to your stitches:
- Yarn over, insert your hook into the stitch, and pull up a loop. You’ll have 3 loops on the hook.
- Yarn over, pull through 1 loop (creating the extended part).
- Yarn over, pull through remaining 2 loops as you would in a regular dc.
This technique creates taller stitches that give the outer rose petals height and shape.
Finished Size
The completed rose measures approximately:
- Diameter: 2–4 inches (depending on yarn and hook size).
- Height: 1 inch when rolled.
What You'll Learn
- Shell Motif Petals: Create realistic rose petals using crochet techniques.
- Stitch Sequencing: Learn how to switch stitch heights from hdc to dc and edc for layering effects.
- Assembly Skills: Roll and sew the strip into a 3D rose shape.
- Finishing Details: Add structured edges and learn weaving techniques for a clean result.
Crochet roses like this can be used as embellishments, turned into hairpieces, or added to bouquets—you’ll love the creative possibilities!
The Pattern
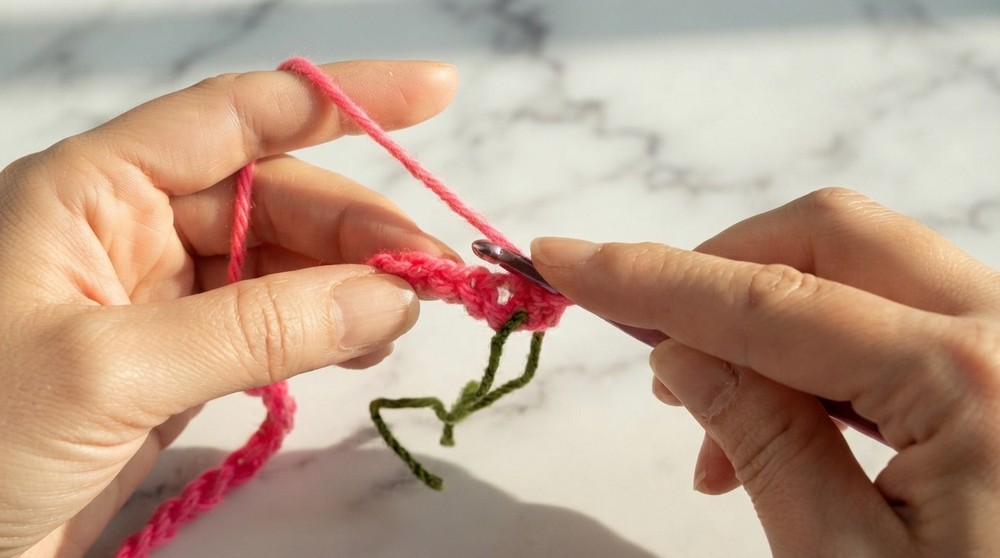
Step 1: Base Strip (Rows 1–2)
- Start with a slip knot.
- Ch 81 (or adjust length as desired; the rose's fullness depends on the number of chains).
At the end of Row 1: You’ll have 81 chains as the base length.
Row 1:
- Ch 1, then skip the first chain.
- Work 1 sc in the next chain.
- Continue working 1 sc in each chain across the row.
At the end of Row 2: You’ll have 80 sc.
This row stabilizes the base strip for petal creation.
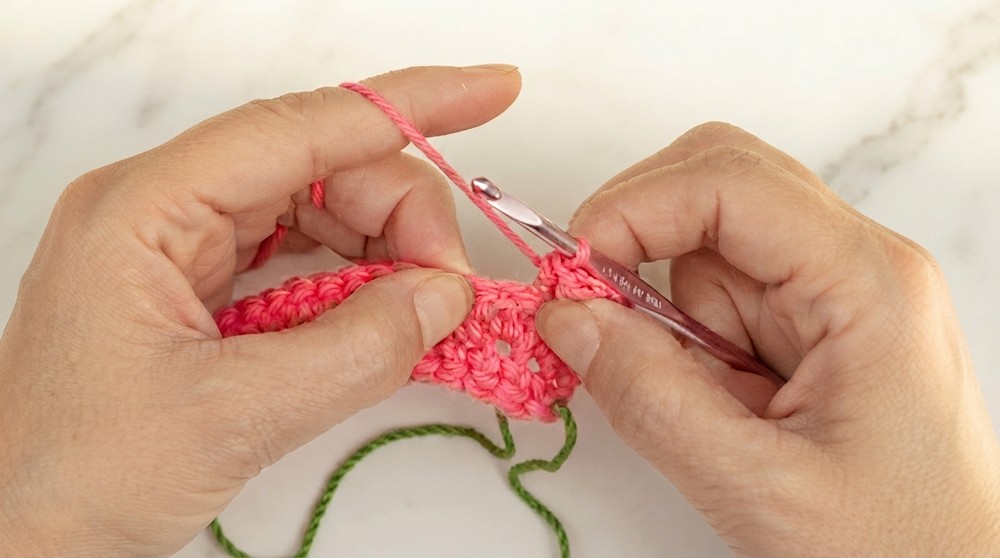
Step 2: Petal Formation (Rows 3–4)
Row 2:
- Turn your work.
- Ch 1, sl st into the first stitch.
- Ch 3 (counts as 1 dc).
- Work 1 dc into the next stitch.
- For the next stitch, work 2 dc into the same stitch (increase).
Petal sequence:
- 1 dc.
- 1 dc.
- 2 dc into the next stitch (increase).
- Repeat (1 dc, 1 dc, 2 dc) across the row.
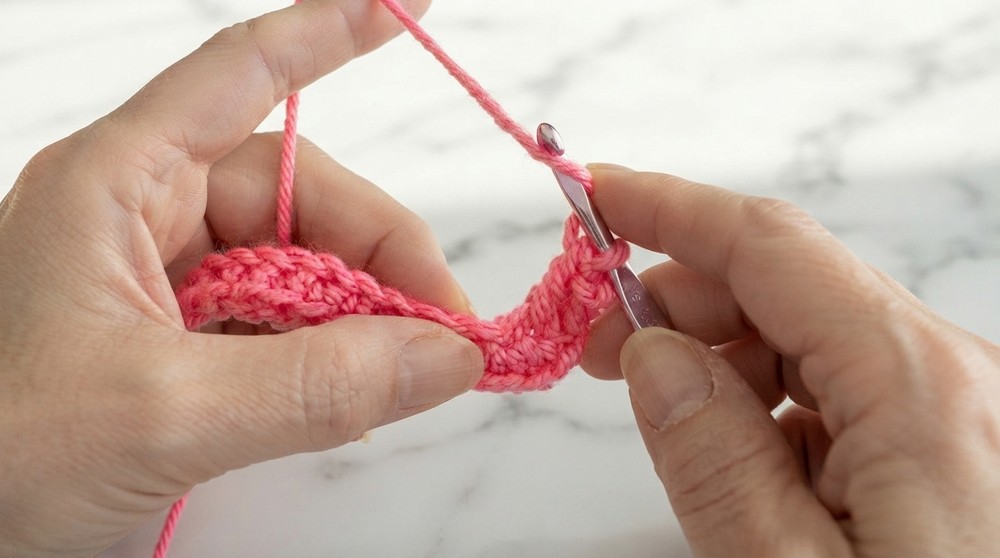
At the end of Row 3: The strip should curve into a semicircle naturally due to the stitch increases.
Row 3:
- Turn your work.
- Ch 1, skip the first stitch and work 4 hdc into the next stitch.
- Work 4 hdc into the following stitch.
Petal sequence:
- Skip 1 stitch, then 4 hdc into the next stitch.
- Skip 1 stitch, secure petals with 1 sc into the next stitch.
- Repeat the sequence across to form small petals.
Midpoint Shift:
- Once you complete a few smaller petals, begin increasing the height of stitches:
- Work 4 dc instead of 4 hdc for the next set of petals.
- Alternate 4 dc petals and sc to secure them, skipping 1 stitch between each.
At the end of Row 4: You’ll have smaller petals transitioning into taller double crochet petals.
Step 3: Outer Petals (Elements of Row 5)
Increasing Petal Heights:
- Skip 1 stitch, work 3 dc into the next stitch.
- Work 3 edc into the next stitch (for extra height).
- Complete the sequence with 3 dc into the following stitch.
- Secure the petal with 1 sc, skipping 1 stitch after completing the pattern.
Repeat this sequence to form larger, taller petals that give the rose fullness and structure.
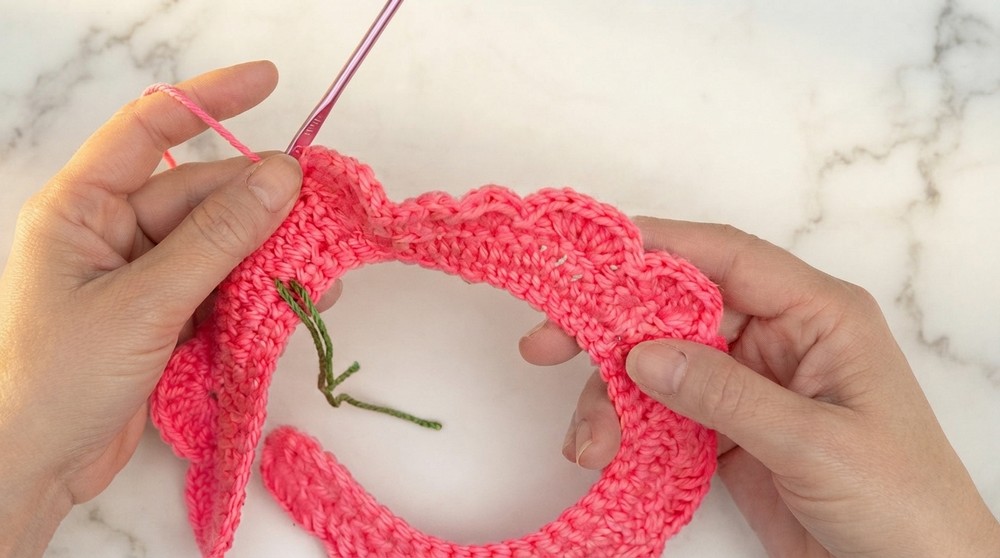
Step 4: Finishing Off
Slip Stitches:
- When you finish the last petal, sl st along the edges of the strip to create a neat transition to the bottom of the rose.
- Leave a 20-inch yarn tail for sewing.
The slip stitches give the strip a clean and tidy edge for easy assembly.
Step 5: Rolling and Assembly
Rolling the Rose:
- Start rolling the rose from the beginning of the strip, forming the center.
- As you roll, keep the layers tight to create the 3D effect.
Securing Layers:
- Use pins to hold the layers together temporarily.
- Sew through the bottom of the rose and into the middle layer with the tapestry needle.
- Stitch outward toward the edge. Repeat the process to reinforce all layers.
Step 6: Weaving in Yarn Tails
- Hide remaining tails by using the needle to weave them into the base of the rose.
Custom Finishing Tips
- Add a Brooch: Sew or glue a brooch pin to the back to create a wearable accessory.
- Decorative Additions: Attach ribbon, beads, or leaves for a personalized touch.
- Make a Bouquet: Crochet several roses and stitch them together for home decor.
Why You'll Love This Pattern
This rose pattern teaches foundational crochet techniques while allowing endless customization. You'll master the shell motif for petals, learn how to increase stitch heights for layering effects, and gain confidence in assembling intricate shapes. Whether making one or a dozen, these roses add beauty and charm to any project.