
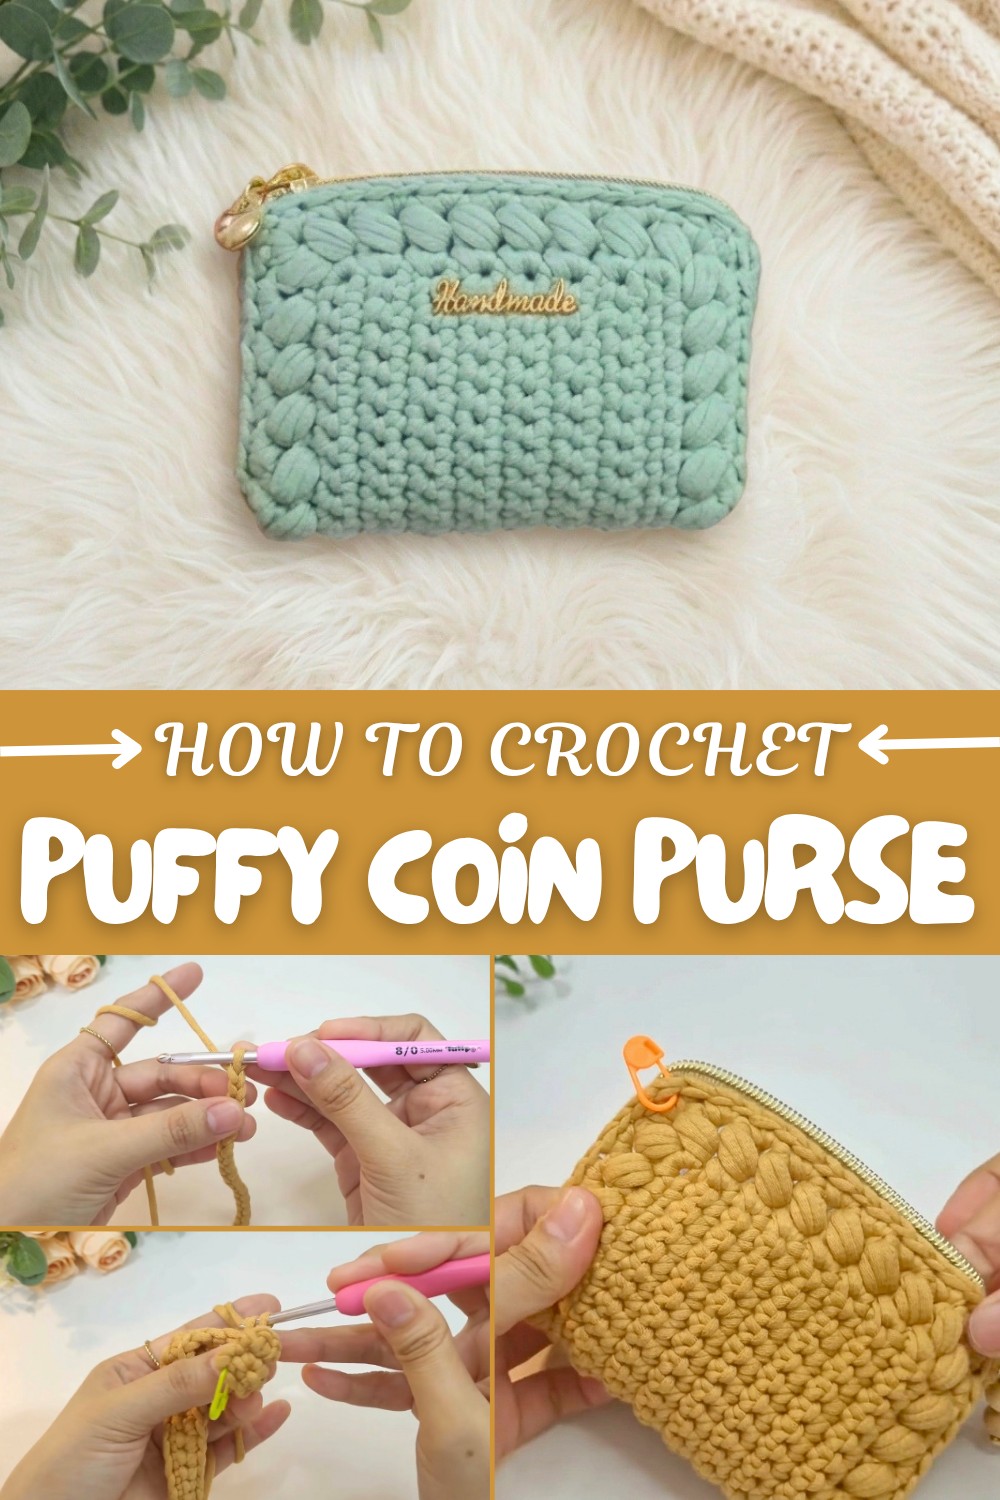
Easy Free Crochet Puffy Coin Purse Pattern to Brighten Your Day
Come along and see how something as simple as yarn can turn into a cozy little treasure pouch. The Free Crochet Puffy Coin Purse Pattern uses a special puff stitch that gives the coin purse a bumpy, cloud-like feel. This squishy look isn’t just pretty—it helps keep coins safe inside the purse, and even small hands will find it fun to hold.
Crochet Puffy Coin Purse Pattern for Beginners
With a round shape and a clasp that snaps neatly shut, this purse is helpful for carrying not only coins but also small treats, earrings, or secret notes. The surface shines with a bubbly texture made by repeating puff stitches in every round, making the purse soft and thick. There’s no need to struggle with zippers, thanks to the handy metal clasp—beads or a swingy charm can hang from it for a little extra sparkle.
Any favorite color—cheerful pinks, bright blues, soft yellows, or even stripes—will look sweet in this coin holder. Adjusting the size is simple: more rounds mean a slightly bigger purse, or you can make fewer for a tiny holder just right for a lucky coin or two.
This idea can turn into things like coin purses, earring pouches, gift wallets, pocket treats, or mini travel cases—each one useful and cute for keeping treasures safe and close by.

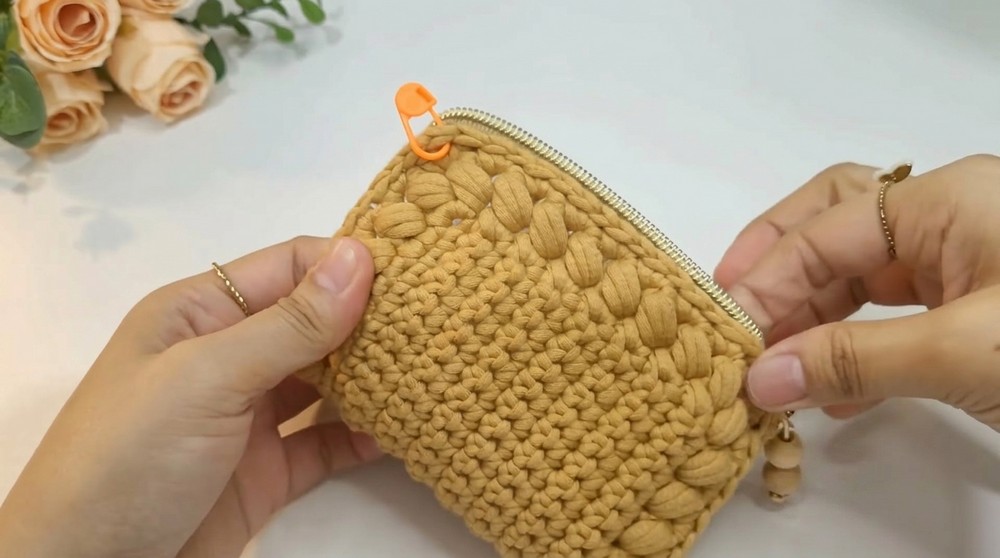
Crossed Puff Stitch Coin Purse – Crochet Pattern
Create a chic coin purse featuring bold puff stitch borders, a sturdy zip, and designer finishing touches! This beginner-friendly pattern builds confidence with basic and decorative stitches, and includes clear step-by-step directions for assembly. The purse is perfect for gifting or everyday use, combining style with practical learning (including zipper install!).
Skill Level & Terminology
- Skill Level: Confident Beginner
- Terminology: US Crochet Terms
You'll use single crochets, puff stitches, and basic seaming—plus learn beginner zipper installation.
Materials & Tools
- Yarn: 50g Cotton tube yarn (Medium/Size 4; 68% cotton, 32% nylon), soft and slightly stretchy
- Hook: 5 mm for foundation chain, 4 mm for rest
- Notions:
- Continuous zipper tape (#5), at least 16 cm
- #5 zipper slider
- Ball-head pins
- Metal “handmade” tag embellishment (optional)
- Sewing thread, sewing needle
- Darning/yarn needle
- Scissors, stitch markers, lighter (zip end sealing)
Gauge
Gauge is not strictly essential but approximate as follows:
22 sc x 14 rows (4 mm hook) = 11 x 8 cm rectangle
Abbreviations List
| Abbr. | Meaning |
|---|---|
| ch | Chain |
| sc | Single Crochet |
| puff | Puff Stitch |
| sl st | Slip Stitch |
| BL | Back Loop |
| rep | Repeat |
| st(s) | Stitch(es) |
| inc | Increase (2–3 sc in same st) |
Special Stitch Instructions
Single Crochet (sc): Insert hook, yarn over, pull up loop, yarn over, pull through 2 loops.
Puff Stitch: Yarn over, insert hook into stitch, yarn over, pull up a loop (repeat twice more—3 times total), yarn over, pull through all 7 loops on hook, ch 1 to close.
Crossed Puff Stitch:
- Skip indicated stitch, sc in next, puff stitch into the skipped stitch (crosses under the previous sc), ch 1.
Increase (inc): 2 or 3 sc in same stitch, as noted.
Finished Size
- Center panel: approx. 11 x 8 cm
- Coin purse (finished): approx. 12 x 10 cm (after borders)
How to Start & Stitches Used
You start with a rectangle in single crochet. Then work a single crochet border, decorative crossed puff stitches, and a final double/single crochet round for structure. Side panels join everything, and a zipper/metal tag finish the look.
Pattern
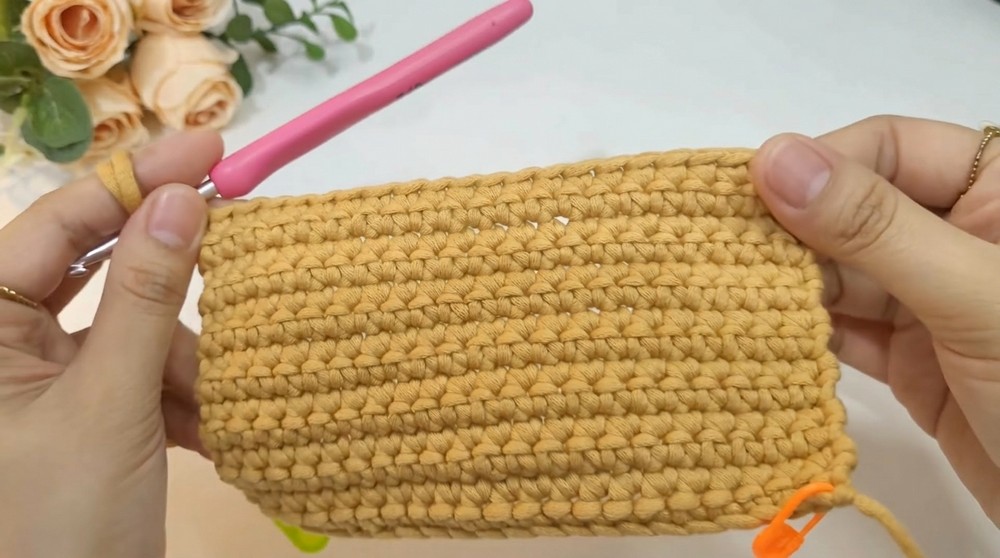
PART 1: CENTER PANEL
With 5mm hook:
- Ch 23

Switch to 4mm hook.
- Row 1: Skip first ch, sc in back ridge (back bump) of 2nd ch from hook, sc in each ch across (22 sc total).
- Mark first and last st.
- Rows 2–14: Turn, sc in each st across (22 sc).
- Always pull up loop slightly before turning to help tension.
After 14 rows, your rectangle is complete. Mark both bottom corners.
For pattern beginners:
Start with a chain and single crochet evenly across for a sturdy, dense rectangle—this forms the purse’s center.
PART 2: EDGING & BORDERS
Round 1 – Edging
- Turn work. Sc (21 sc) evenly across long edge.
- 3 sc inc (3 sc in same st) in the corner, mark the second as your corner st.
- Work 2 sc over each ridgeline (the dotted side bump every other row) up short end.
Continue:
- 3 sc inc in the next corner, mark 2nd st (corner).
- Sc in each st across next long edge.
- 3 sc inc in next corner, mark 2nd st (corner).
- 2 sc in each ridgeline across final short edge, making sure to finish with 2 sc in last bump, which is also your first corner.
- Move the marker for the final corner.
Your rectangle now has a sc border.
For beginners:
Make sure to add increases (3 sc) at each corner so the edging lies flat and doesn’t curl.
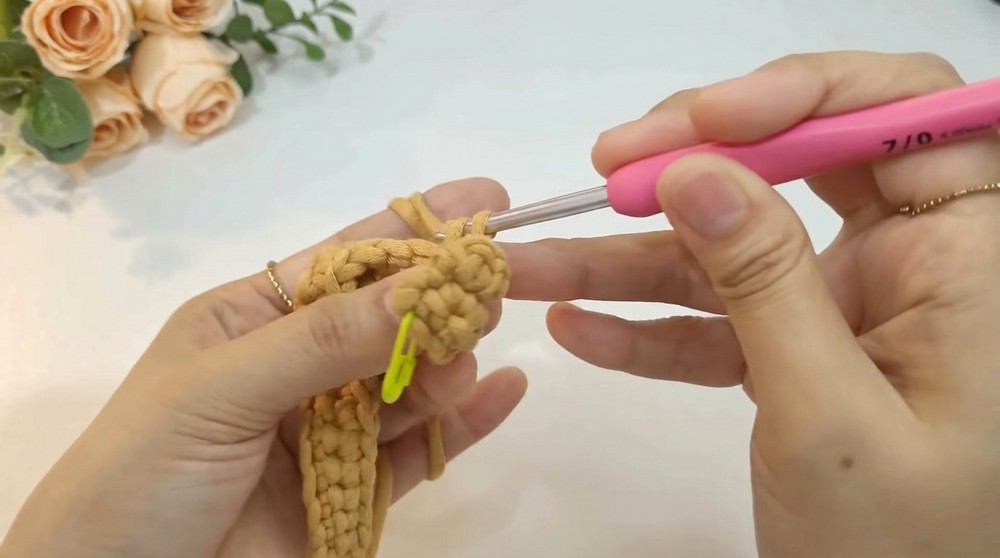
Round 2 – Crossed Puff Stitch Border
- Work 1 sc in next st of any side.
- First Crossed Puff: puff st into marked corner st (do not remove marker), ch 1.
- Skip 1 st, sc in next st; puff into skipped st, ch 1 (crossed puff made).
- Rep: skip next st, sc in following st, puff into skipped st, ch 1.
- Continue to last st before corner; remove marker, skip 1 st, make crossed puff in corner.
- Long sides have 12 crossed puffs, short sides 8 crossed puffs.
Repeat this pattern for each side, rotating at corners (sometimes do not skip the very first st after the corner to keep pattern aligned).
For beginners:
Always work crossed puffs in pairs, crossing over a skipped stitch, and make sure to ch 1 after every puff for spacing.
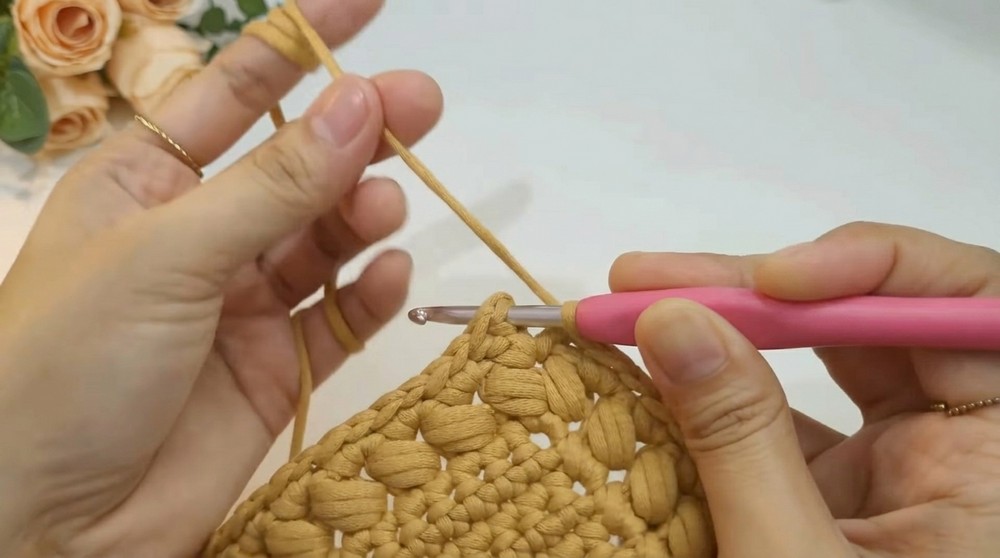
Round 3 – Final Border
- At a corner space, make a “stacked double crochet”:
- Sc in corner, insert hook into sc just made, pull up loop and make another sc. Then dc in same space.
- Mark this as your new corner.
- Along sides: 2 sc into each crossed puff “space.”
- At corners: 3 dc in each corner space, mark the second dc as the new corner.
- Join with sl st to first st at end.
For beginners:
This tidy round locks the puff stitches and creates a firmer edge for assembly.
PART 3: ZIPPER INSTALLATION
- Turn panel WS up. Flip zipper tape to wrong side, align along edge, center zipper so allowance is even.
- Pin zipper with ball-head pins through fabric and tape; curve it around corners by folding fabric.
- Ensure zipper teeth face outward, not hidden by seam.
- Pin the other side, adjusting to align.
- With thread and sewing needle, hand sew close to teeth using a running stitch.
- Sew up side, turn at corners, sew across top, then down.
- Repeat for other zipper half.
- Use a lighter to gently melt/seal zipper tape ends.
For beginners:
Pinning first helps keep zipper straight and smooth. Don’t catch the working yarn loop with sewing stitches!
PART 4: SIDE PANELS
- At side edge, remove marker, ch 1.
- Sc in first st (mark this).
- Work 9 sc-BL (back loop only) for panel stretch.
- Decrease (sc3tog) over next three stitches at corner.
- Repeat previous 2 steps once (9 sc-BL, then sc3tog).
- Sc in last st, remove marker.
- Fold side piece WS together, sl st join both sides to form the side wall, finish at corner, fasten off and weave in ends.
- Attach zipper slider as desired, then repeat for opposite side panel.
For beginners:
This makes the purse’s side depth. Working in back loop only helps the panel flex and fit.
ASSEMBLY & FINISHING
- Attach zipper slider (if not yet done).
- Optional: For extra security, sew both zipper tape ends together from the inside.
- Position metal tag on front, poke prongs through fabric, and secure with back plate inside.
- Turn everything RS out. Weave in any stray ends neatly.
For beginners:
Add your finishing details carefully so your purse has a professional look.
Conclusion
Congratulations! You’ve completed a stylish, practical crossed puff stitch coin purse. Review your neat corners, tested zipper, and enjoy the plush texture. This project is a fantastic introduction to borders, special stitches, and basic sewing skills—ideal for gifts or daily use.
Pattern Start & Stitches Used:
Begin with a simple rectangle in single crochet, add decorative borders (single crochet, puff stitch, double crochet), assemble with basic single, and finish with beginner-friendly zipper sewing. Most stitches are single crochet, with occasional puff, double crochet, and slip stitch for borders and assembly.