
Easy Crochet Daisy Flower Keychain Pattern to Personalize Your Zipper
Bring a little sunshine into your day with this free crochet daisy flower keychain pattern, an easy way to create a charming handmade keepsake to treasure or gift.
If you love creating small, handmade treasures, you’ll adore making a daisy flower keychain. It’s a fun and easy project that transforms simple crochet stitches into a charming little bloom. These beautiful keychains are not only practical but also add an artistic touch to your everyday accessories. They’re perfect for decorating your keys, bags, or even giving as thoughtful handmade gifts to friends and family.
The step by step instructions for this design are available in the helpful video tutorial by CrochetLilWeaves, a YouTube channel known for its warm, clear, and beginner friendly crochet guidance. In the tutorial, you’ll learn how to create a 3D daisy effect by working two rounded flower bases and joining them with a filling to give it a delightful puffy shape. The flower features eight delicate petals made using a combination of single crochet, double crochet, and treble crochet stitches. A small, leafy detail is added at one end, enhancing its natural and lifelike appearance.
Free Crochet Daisy Keychain Pattern to Add Cheer to Your Keys
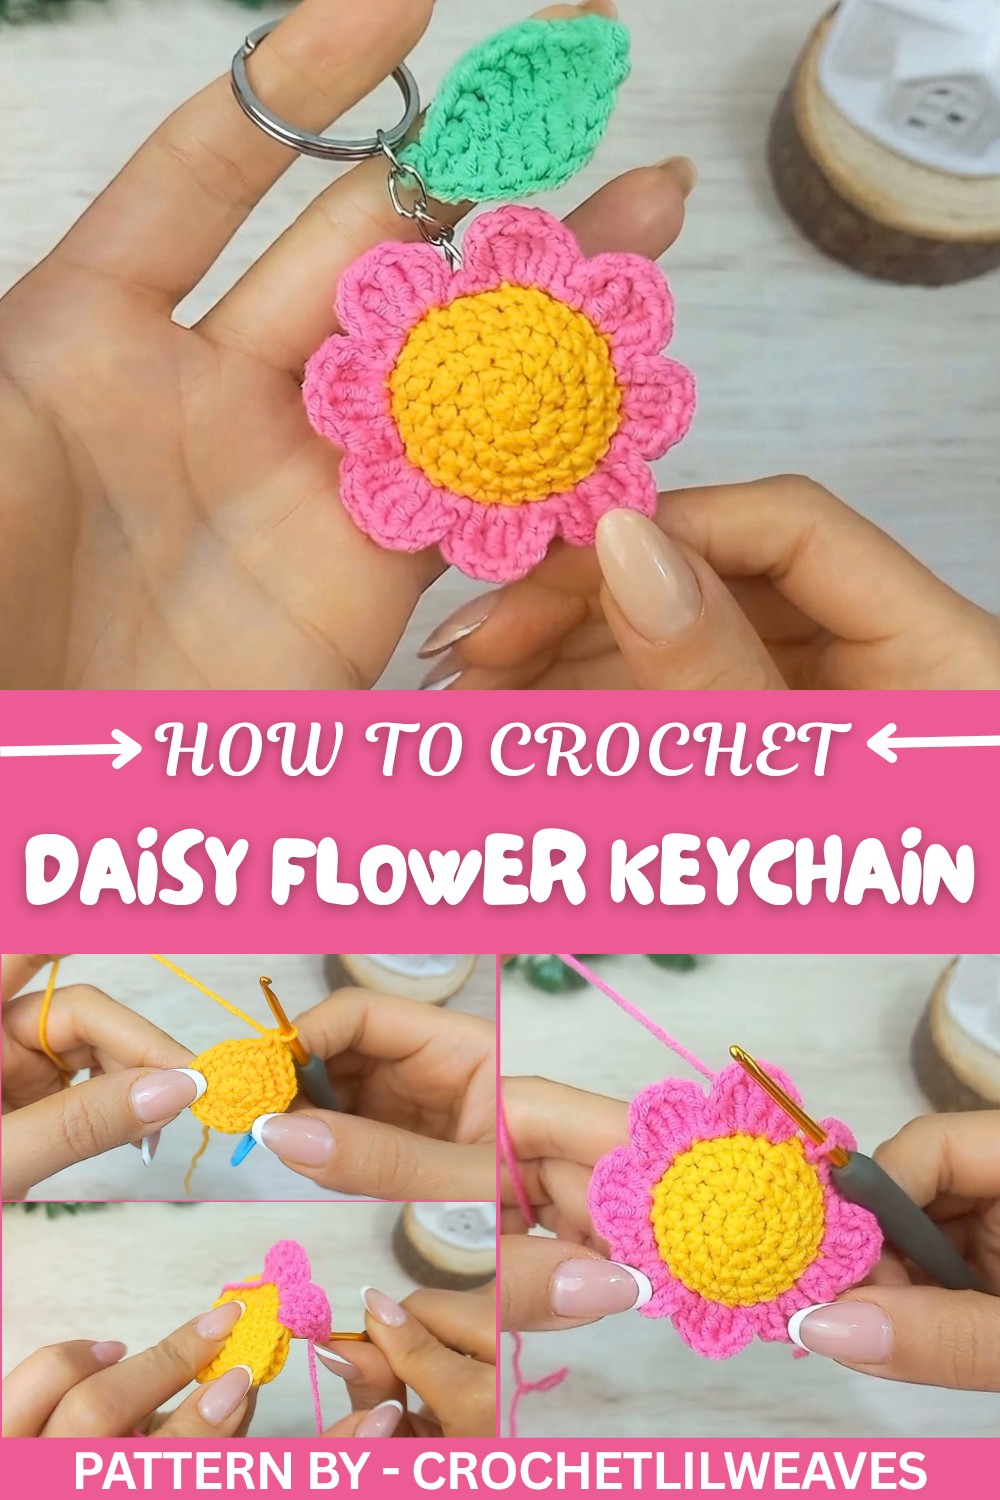
The most striking part of this keychain is its playful and vibrant design. You can personalize it further by mixing and matching yarn colors to suit your style. All you need are basic materials like a crochet hook, yarn, stuffing, and a keyring, which makes it a super budget friendly project for anyone.
This daisy keychain not only brightens up your personal items but also brings a little bit of joy to your day. It’s a simple yet rewarding project that anyone, even beginners, can create. Try it for yourself and let this lovely flower bloom into something special.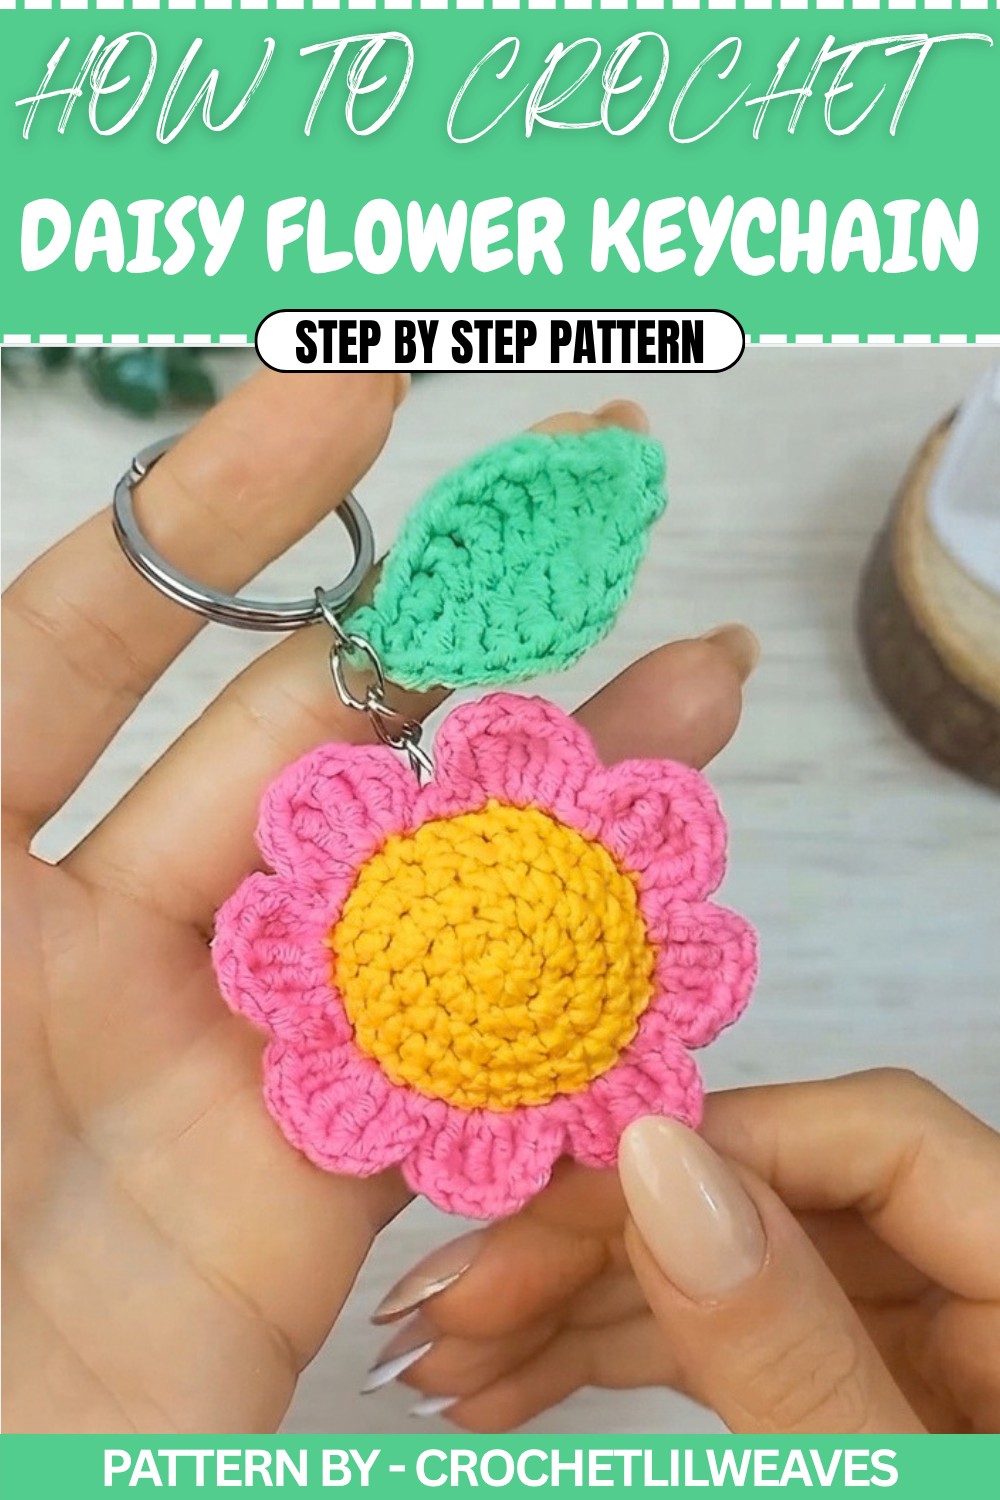
Crochet Daisy Keychain Pattern
Today, we will make this beautiful, cute, and easy crochet daisy keychain. This project consists of three parts: two circular flower pieces for the daisy, a lovely leaf for detailing, and assembly to create the final piece. It’s a fun and beginner friendly pattern, perfect for adding charm to your accessories.
Quick Overview Of The Pattern
- The project consists of three main parts: flower pieces, leaf piece, and assembly.
- The flower is constructed through successive rounds of single crochets.
- The daisy petals are created while joining the two circular pieces together.
- The leaf incorporates basic crochet stitches for shaping.
- Assembly completes with stuffing and attaching the keyring to finish the keychain.
Notes
- Ensure you use consistent tension throughout the project.
- This pattern is written in U.S. crochet terminology.
- When working on petals, maintain symmetry by making stitches evenly spaced.
Skill Level
Beginner to Intermediate. The pattern incorporates basic stitches (single crochet, double crochet) and increases, but assembly requires attention to detail.
Materials
- Category 2 yarn (three colors): white (for petals), yellow (center), green (leaf).
- Crochet hook: 2.5 mm.
- Tools: scissors, yarn needle, stitch marker, keyring.
- Stuffing: polyester fiberfill or cotton stuffing.
Gauge
Not essential for this pattern. Maintain even tension throughout.
Stitch Abbreviations
- ch – Chain
- sc – Single Crochet
- hdc – Half Double Crochet
- dc – Double Crochet
- tr – Treble Crochet
- sl st – Slip Stitch
- inc – Increase (work two single crochets in the same stitch)
Special Stitches
Magic Ring:
To create a tight circle at the center, the magic ring technique is used to begin the flower.
The Crochet Pattern
Part 1: Flower Pieces
Round 1:
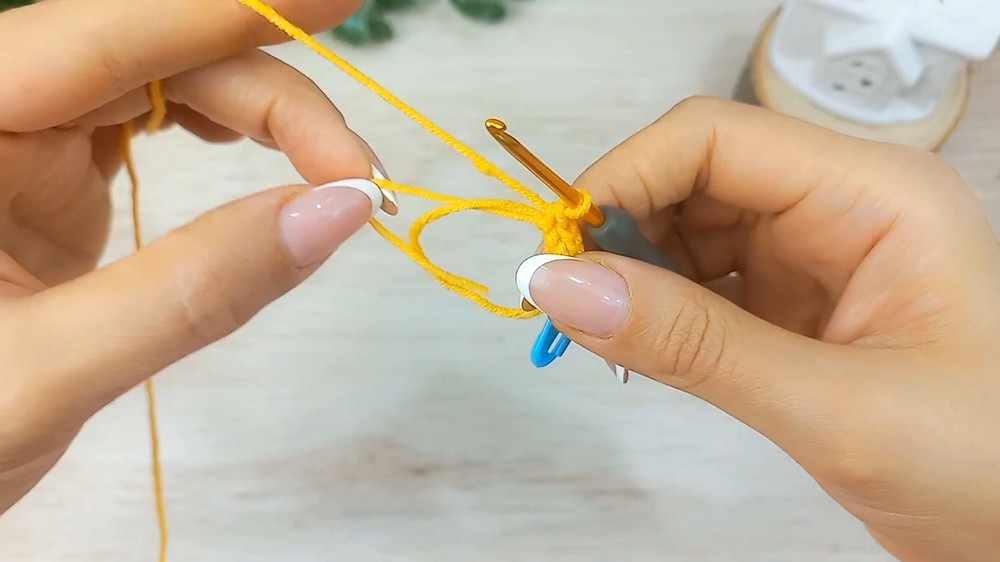
- Start with the yellow yarn and create a magic ring.
- Ch 1, then make 6 sc into the ring.
- Pull the tail tightly to close the ring.
- Sl st into the first sc to close the round.
Round 2:
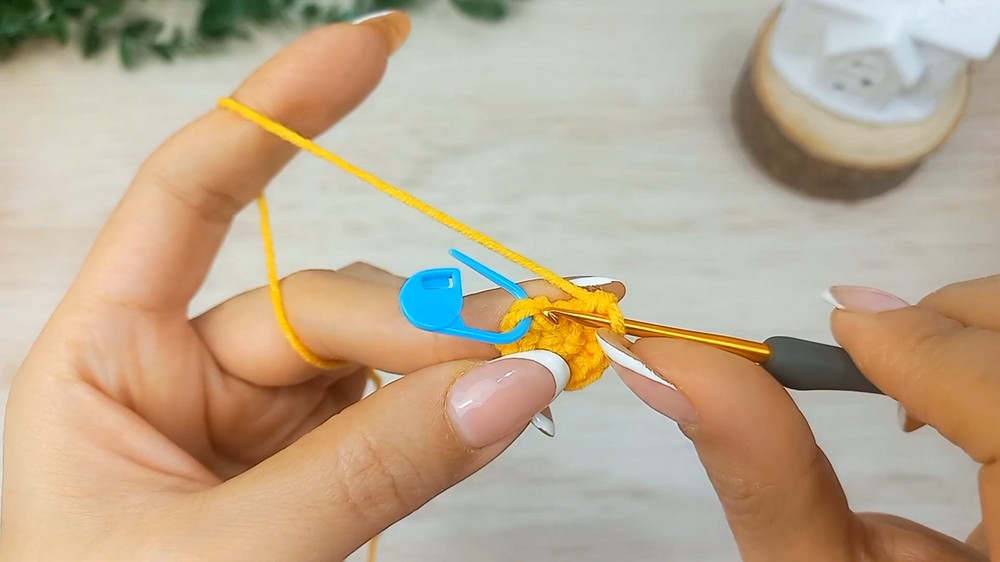
- Ch 1. Work 2 sc into each stitch around (increase in every stitch). You should have 12 sc.
- Sl st into the first sc and remove the stitch marker to finish this round.
Round 3:
- Ch 1. Begin with 1 sc in the first stitch, followed by an increase into the next stitch (2 sc in one stitch). Repeat this sequence (1 sc, inc) around the circle. You should end up with 18 sc.
- Sl st into the first sc of the round.
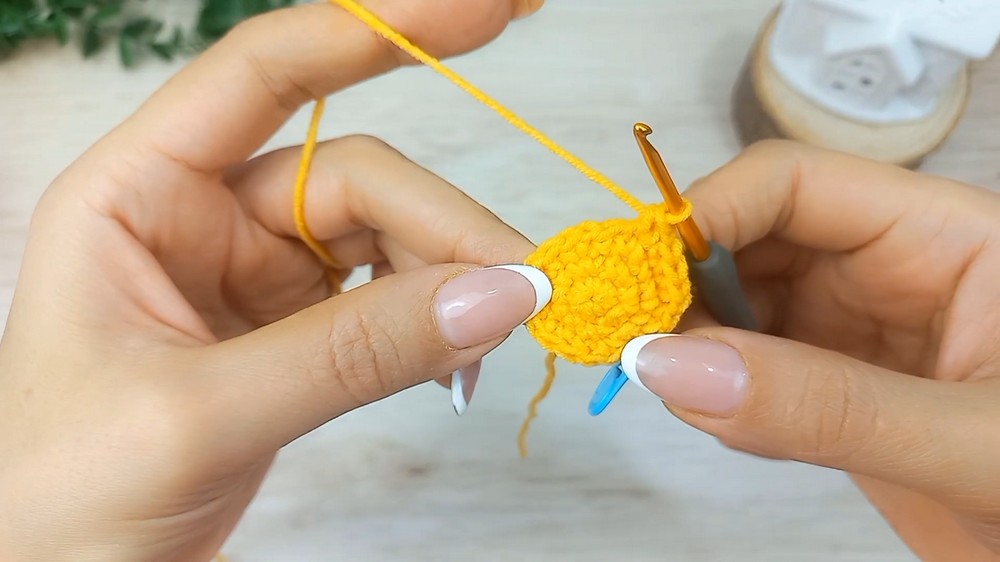
Round 4:
- Ch 1. Work 1 sc into the first two stitches, followed by 1 inc into the next stitch (2 sc in one stitch). Repeat this sequence (2 sc, inc) around the round. You should now have 24 sc.
- Sl st to finish this round, and fasten off the yarn.
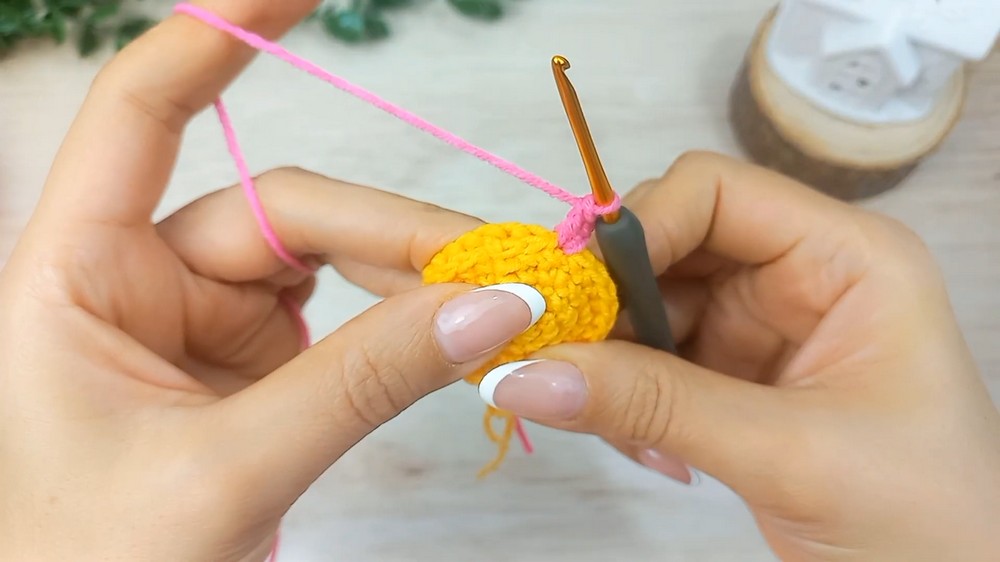
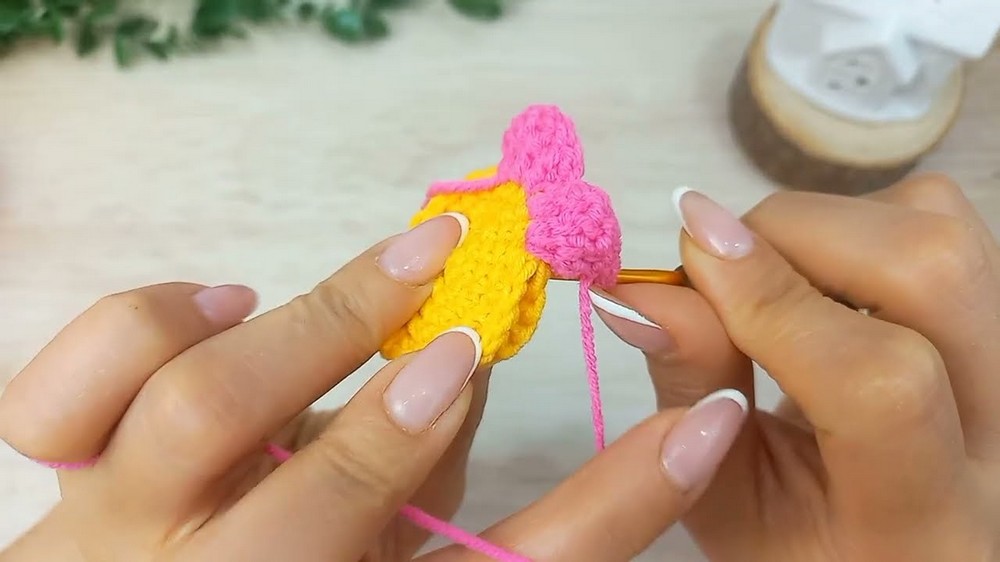
Repeat the above steps to create a second identical flower piece for the backside.
Part 2: Leaf Piece
Step 1: Start with green yarn and make a slip knot.
Step 2: Work 10 chains.
Step 3: Begin shaping the leaf:
- Skip the first chain and work 1 sc into the second chain.
- Work 1 hdc into the next chain.
- 1 dc into the next chain.
- Work 1 tr into each of the next three chains.
- 1 dc into the next chain.
- 1 hdc into the next chain.
- Work 3 sc into the final chain to form the rounded tip of your leaf.
Step 4: Mirror the stitches on the other side of the chain:
- Continuing around, work 1 hdc, 1 dc, and 1 tr into their corresponding chains on the reverse side.
- Finish with 1 sc and a sl st into the first sc.
Step 5: Fasten off and weave in ends with the yarn needle.
Part 3: Assembly and Petal Formation
Step 1: Place the two flower pieces back to back (wrong sides facing each other).
Step 2: Attach the yarn for petal creation and edging.
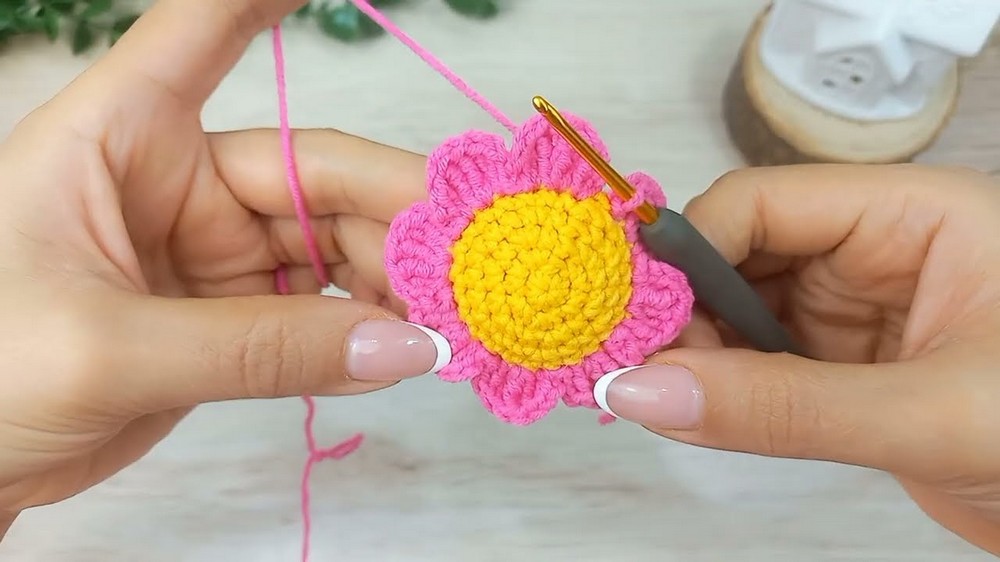
- Insert the hook into the first stitch of both flower pieces. Pull through the new yarn.
- Work 1 chain to secure the yarn.
Step 3: Begin the petals:
- Double Crochet: Insert the hook into the same stitches (one from each piece) and work 1 dc.
- Treble Crochet: In the next stitch, create 3 tr (work the treble stitches while securing both pieces together).
- Double Crochet: In the subsequent stitch, work 1 dc.
- Slip Stitch: Create a sl st in the same stitch to complete the petal.
Repeat this process around the edge of the flower, ensuring you make 8 petals total.
Step 4: Before completing the last few petals:
- Fill the inside of the circular flower pieces with stuffing evenly for a puffed look.
Step 5: Finish the petal details. Once all petals are done, fasten off the yarn and weave in all ends.
Keyring Attachment
- Use the yarn needle and a bit of excess green yarn to attach the leaf and flower pieces securely to the keyring.
- Ensure stitches are tight to avoid loosening.
Conclusion
Congratulations, Your beautiful daisy keychain is now ready to flaunt. This delightful pattern is a great handmade gift or a charming addition to your bag or keys. I hope you enjoyed creating this adorable project.