
Cute Crochet Elephant Keychain Pattern – Free Instructions
Have you ever wanted to create something adorable and handy with just a bit of yarn and a crochet hook? Let me tell you about the time I discovered the free crochet elephant keychain pattern. I was looking for a quick project that would let me practice my stitches and make a cute gift. As soon as I started, I realized how enjoyable the process was, each row came together to form a playful elephant shape, perfect for accessorizing your keys or gifting to someone special. Crocheting this elephant isn't just easy, it’s a wonderful way to unwind and add a little handmade charm to your day.
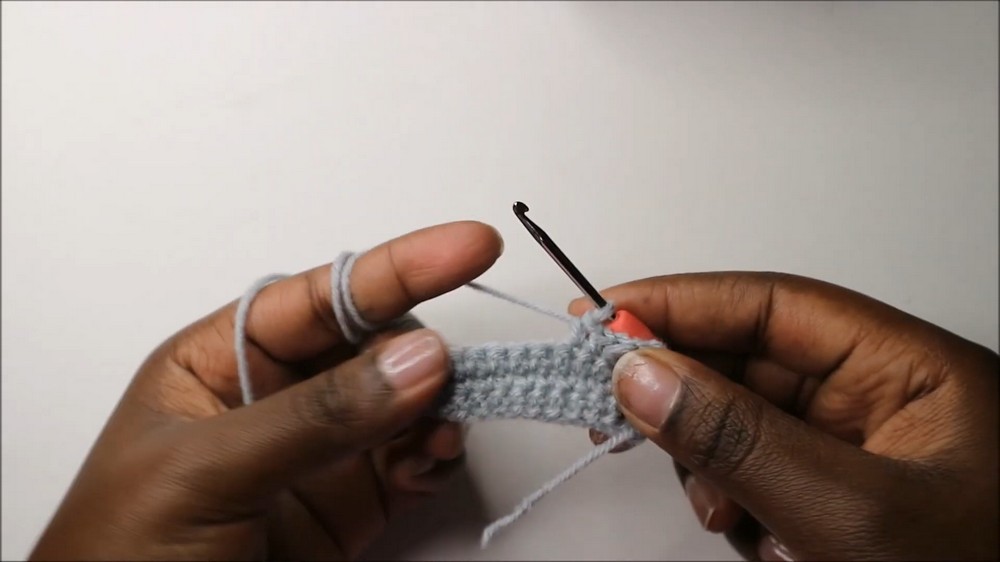
Step-by-Step Elephant Keychain – Crochet Free Pattern!
What I love about this pattern is its simplicity and the little creative touches that make each elephant unique. The pattern uses basic single crochets, chains, half double crochets, and simple increases—a great way for beginners to build confidence. You can choose any color you like, from classic gray to cheerful pastels, making each elephant as unique as the person who makes it. The adorable features include floppy ears, a cute trunk, and a little tail. With minor adjustments, you can modify the trunk or ears to make other animals like a mouse or a bear, or even create flat animal appliqués for bags or bookmarks.

Troubleshooting and Tips:
Some crafters may face issues like uneven edges, incorrect ear placement, or stuffing bulges. Make sure to count your stitches at the end of each row, mark the placement of ears before attaching, and stuff lightly to avoid lumps. If you lose your place, simply backtrack to your last chain-one turn.

The pattern is sized just right for a keychain—about the size of your palm once completed. If you want a slightly larger or smaller elephant, try using thicker or thinner yarn.

Cute crochet elephant keychain – Flat Plushie
This adorable crochet elephant keychain makes a sweet little toy or decorative piece. Inspired by the gentle wisdom of elephants, this pattern is perfect for gifts or learning basic shaping techniques! Add embroidered eyes and a cute tail, or personalize with your favorite colors. Beginners, don’t be afraid: this project walks you through every step.
Skill Level & Terminology
- Skill Level: Beginner
- Terminology: US crochet terms
Materials & Tools
- Worsted (Medium/Category #4) acrylic yarn, approx. 30g for main color and a bit for tail, ears, and eye embroidery
- 4 mm crochet hook
- Yarn needle
- Scissors
- Stitch marker (optional)
- Fiberfill stuffing (optional, for plush version)
Gauge
Gauge is not crucial for this project. For reference:
After Row 6, your main body should measure approx. 2" x 1" (5 x 2.5 cm).
Finished Size
- Approximately 4" x 4.5" (10 x 11.5 cm) when assembled
Abbreviations
| Abbreviation | Meaning |
|---|---|
| ch | chain |
| sc | single crochet |
| hdc | half double crochet |
| st(s) | stitch(es) |
| sl st | slip stitch |
| inc | increase (2 sc in 1 st) |
| dec | decrease (sc 2 sts together) |
Special Stitch Instructions
Increase (inc): Work 2 sc in the same stitch.
Decrease (dec): Insert hook in next st, yarn over, pull up a loop; insert hook in one more st, yarn over, pull up a loop (3 loops on hook); yarn over, pull through all loops.
Pattern Instructions
PART 1: Main Body (Flat Elephant)
Row 1:
- Ch 15.
- Starting in 2nd ch from hook, work 2 sc in same stitch.
- Sc in each remaining ch across. (14 sc)
- (At end: ch 1, turn)

You’ve just started the rectangle for the body! Your first stitch is the increase at the start. Don’t worry—just follow along, it will begin to take shape.
Row 2:
- Sc in each st across until last st.
- In last st, 2 sc (increase).
- Ch 1, turn.
Adding an increase at the end gives your rectangle a rounded edge. It’s a simple way to shape the body!
Row 3:
- In first st, 2 sc (increase).
- Sc in remaining stitches across.
- In last st: sc.
- Ch 1, turn.
You’re alternating increases at the starts and ends, slowly ‘rounding out’ your rectangle.
Row 4:
- Sc in each st until last st.
- In last st: 2 sc (increase).
- Ch 1, turn.
Keep going! This builds the body and gives it a gentle curve.
Row 5:
- In first st: 2 sc (increase).
- Sc in remaining stitches across.
- In last st: sc.
- Ch 1, turn.
Each increase alternates from one side to the other.
Row 6:
- Sc in each st until last st.
- In last st: 2 sc (increase).
- Ch 1, turn.
Your rectangle should now look wider and slightly rounded on one edge.
Row 7:
- Sc in next 15 sts, or until you have 5 sts left on row.
- Ch 1, turn.
You are now beginning to shape the legs. Only work partway across the row (stop when 5 stitches remain), then turn.
Rows 8–10:
- Sc in each st across.
- At end of each row: sc, ch 1, turn.
This makes the first leg. Just work back and forth across those 5 stitches.
Row 11:
- Sc in each st across to end.
- Sc in last st.
- After last st, chain 6 (for second leg).
- Turn.

The chain forms the start of the second leg. You’ll work into this chain in the next row.
Row 12:
- In 2nd ch from hook, sc in each of next 5 ch.
- Continue in main body: sc in each st to end.
- At end: ch 1, turn.
You’ve created the second ‘leg’ start. Now you’re working sc into the chain and then the body, combining them.
Row 13:
- Sc in each st across (including leg stitches).
- Ch 1, turn.
You now have two legs attached to the main body!
Rows 14–18:
- Sc in each st across.
- At end of each row: ch 1, turn.
Just keep going, making the body longer for a few more rows.
Row 19:
- Sc in next 14 sts across.
- Ch 1, turn.
Now you’re stopping a stitch before the end. This shapes the ear area.
Row 20:
- Sc in each st across.
- Ch 1, turn.
Continue straight across for this row.
Row 21:
- Sc in all stitches across.
- At end: chain 8 (for trunk).
- Turn.
The chain lays the foundation for the trunk!
Row 22:
- Starting in 2nd ch from hook, sc in each ch (total 7), then sc in main body to end.
- With 2 sts left at end, dec (sc 2 together).
- Ch 1, turn.
Working into the chain creates the trunk; decreasing at the end shapes the face.
Row 23:
- Dec in first 2 sts.
- Sc across to end.
- Sc in last st.
- Ch 1, turn.
Further shaping for the trunk and face.
Row 24:
- Skip first st, then sc in next 7 sts.
- Next, hdc in next 7 sts.
- In last 2 sts: dec.
- Next st: sl st.

Chains here finish the trunk, and increases/decreases shape the tip.
PART 2: Finishing Main Body
- Use a stitch marker (optional) to mark starting place.
- Sc evenly around the edge until reach trunk area.
- For trunk: sl st around its edge until you meet the marker.
- When finished, sl st, then fasten off and cut yarn.
You are now edging your elephant for a crisp finish, using single crochets and slip stitches. This step also helps make the body stronger and cleaner!
PART 3: Ears (Make 2)
Row 1:
- Ch 2.
- In 2nd ch from hook: 3 sc in same st.
You’re forming the base circle for the ear.
Row 2:
- Ch 1, turn.
- In each st: 2 sc (increase) across (total 6).
Row 3:
- Ch 1, turn.
- [Sc in 1 st, inc in next]—repeat (total 9).
Row 4:
- Ch 1, turn.
- [Sc in next 2 sts, inc in next]—repeat (total 12).
Row 5 (Final):
- Ch 1, turn.
- [Sc in next 3 sts, inc in next]—repeat (total 15).
- Fasten off and cut yarn.
Your ear is now a rounded oval. Make two!
PART 4: Assembly & Finishing
- Position ears about 7 rows down from top, or 2 rows up from front legs.
- Using yarn needle and matching yarn, sew ears in place.
- With embroidery thread or yarn, sew an eye for your elephant.
- Make a second body, attach ears and eye identically.
You’re adding character! Ears and eyes bring your elephant to life.
Joining Both Sides and Stuffing
- Place both body pieces together, making sure legs, head, and trunk align.
- With yarn needle, sew edges together using whip stitch or running stitch.
- Stuff with fiberfill before sewing shut.
This step gives you a 3D plushie—soft and huggable, or just flat for a simple decoration.
Tail
- Ch 6, fasten off.
- Sew tail to back of elephant.
Add the tail last, for a cute finishing touch.
Congratulations!
You’ve created your own crochet elephant keychain, step by step. The parts fit together just by following the row instructions. Take your time, check your work as you go, and remember—each row builds on the last! If you have questions, comment below or reach out for help.
Visual learners:
If you’re new to reading patterns, after each step, check your progress with a photo or diagram if available. Counting stitches and careful placement are the most important parts—don’t worry if the shape isn’t perfect! Every elephant is unique.