
Crochet Strawberry Earrings Pattern for Sweet & Simple Fashion
Shine up your style and skip plain earrings with a Free Crochet Strawberry Earrings Pattern that brings fun and sweetness to your day.
One of the sweetest moments in my crochet journey was making tiny strawberries that looked so real and adorable they almost felt good enough to eat! These little strawberry earrings pattern brings a pop of color and charm to any outfit, instantly brightening your day with their cheerful red and green hues. What makes this pattern truly special is the use of magic rings and precise increases, which give the strawberries their perfect rounded shape and cute little leaf detail. They are lightweight and comfy to wear, making them a wonderful choice for gifts, parties, or simply adding a touch of handmade cuteness to your jewelry collection.
Explore More Crochet Fun With This Pattern
The skills you develop making these strawberries open up a world of possibilities. You can try making brooches, keychains, or even small decorative accents for bags and hats. Changing colors or adding beads can personalize your creations even more. This strawberry pattern is a delightful way to practice shaping and detailing in crochet while creating pieces that bring joy and a bit of whimsy to your everyday style.
Easy Crochet Strawberry Earrings Pattern for Everyday Charm
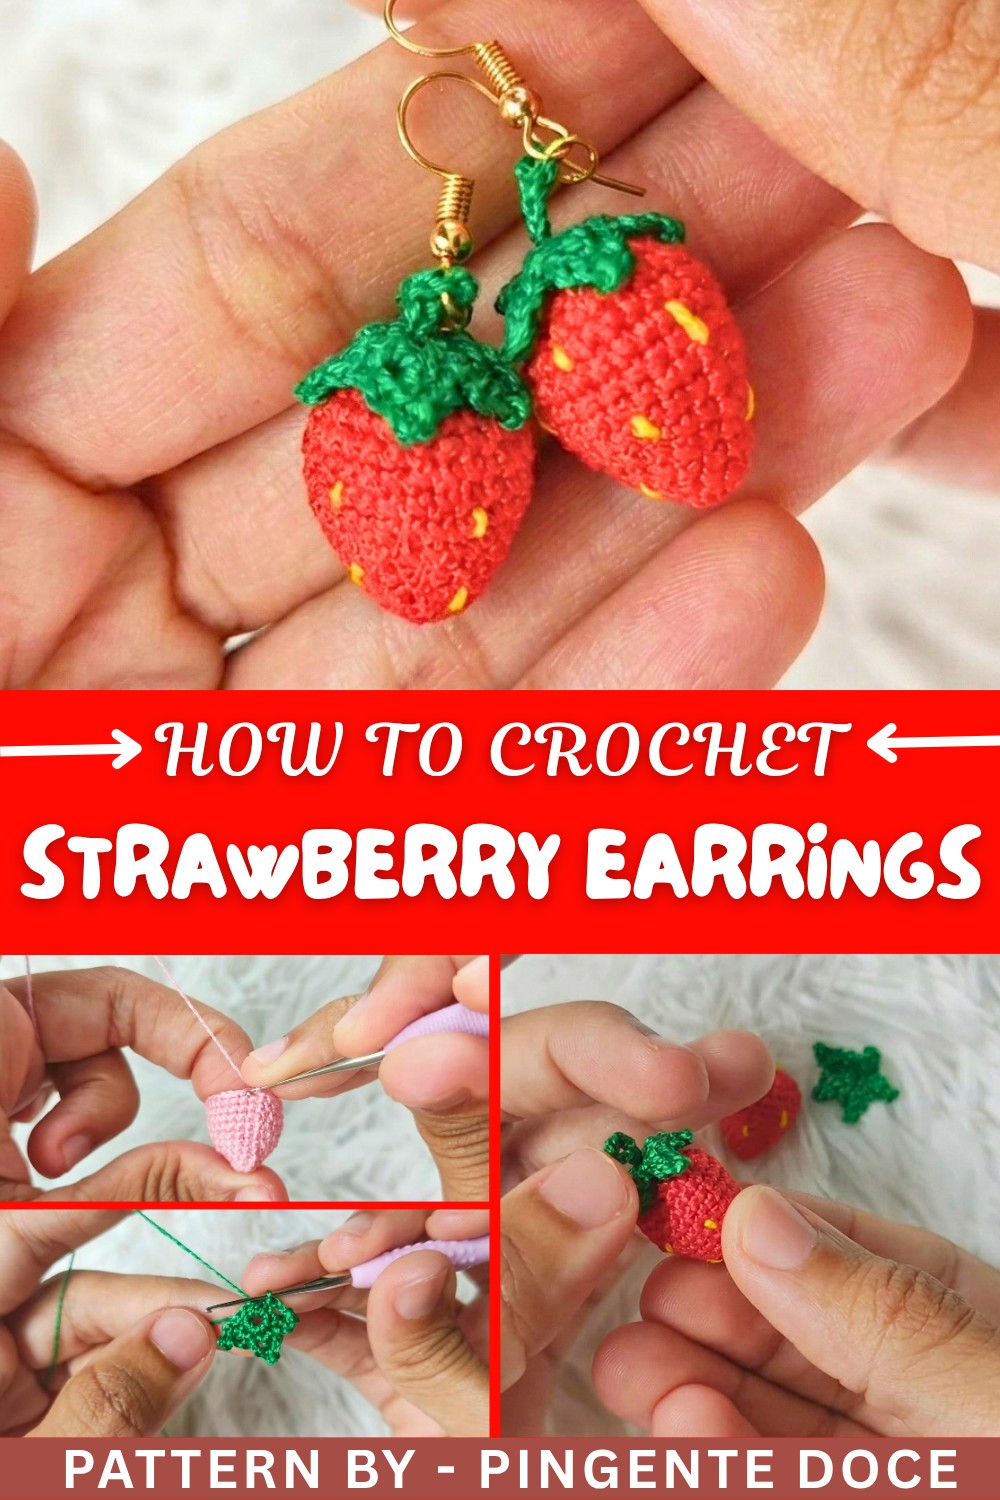
This pattern is great for beginners because it breaks down each step clearly, taking you through making the magic ring, working single and double crochets, and gradually shaping the fruit with simple stitch increases and decreases. You’ll also learn how to finish off your piece neatly by embroidering little seed dots and adding the delicate leaves using chains and slip stitches. The finishing touches like stuffing the strawberry gently with fiberfill and securing the parts together make the process super satisfying and easy to follow. Before you know it, you’ll have your own pair of charming strawberry earrings ready to wear or share.
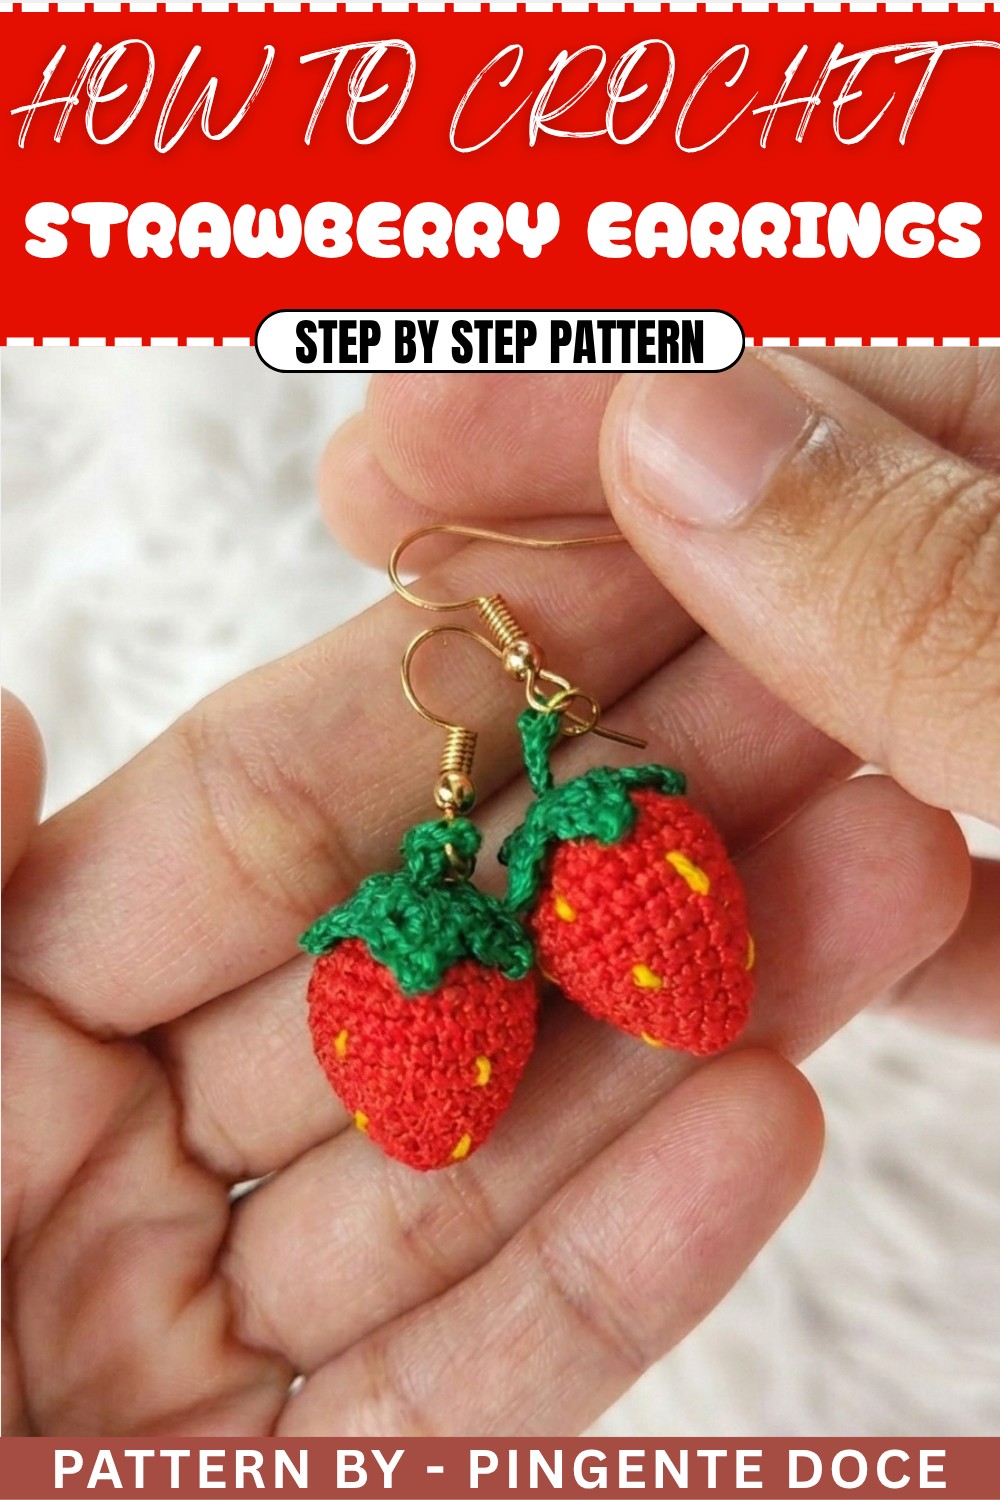
Crochet Strawberry Earrings Pattern
Add a splash of charm to your accessories collection with these crochet strawberry earrings. This fun and creative pattern lets you design delicate earrings resembling cute strawberries with leaves, perfect for any season. Whether as a gift or a unique addition to your jewelry collection, this pattern is beginner-friendly and packed with opportunities to practice essential crochet techniques.
Introduction
The crochet strawberry earring pattern allows you to make an adorable fashion accessory that's lightweight, eco-friendly, and customizable. This pattern teaches you how to build three-dimensional pieces step by step, focusing on the strawberry body, the leafy top, and assembling all parts to create functional earrings.
Uses of This Pattern
- Fashionable Wearable: Perfect to pair with casual summer outfits or as a cute accessory for various events.
- Thoughtful Gifts: A handcrafted treasure for a loved one.
- Creative Expression: With options to customize colors, this pattern provides the perfect canvas for your creativity.
Skill Level & Terminology
- Skill Level: Beginner to Intermediate
- Terminology: U.S. Crochet Terms
Materials & Tools
- Thread:
- Red Thread: For the strawberry body.
- Green Thread: For the leaf topper.
- Yellow Thread: For the embroidered strawberry seeds.
- Crochet Hook: 1 mm crochet hook.
- Accessories and Tools:
- Scissors for trimming excess thread.
- Earring hooks and jewelry pins if available.
- Pliers for earring assembly.
- Synthetic fiberfill for stuffing the strawberries.
- Fabric or silicone glue for securing parts (optional).
Gauge
Gauge is not critical for this project, as earrings are small and decorative. Focus on maintaining uniform tension to ensure neat, consistent results.
Abbreviations List
- MR: Magic Ring
- ch: Chain
- sc: Single Crochet
- dc: Double Crochet
- sl st: Slip Stitch
- inc: Increase (2 stitches in the same stitch)
- dec: Decrease (crochet two stitches together)
Special Stitch Instructions
Magic Ring (MR):
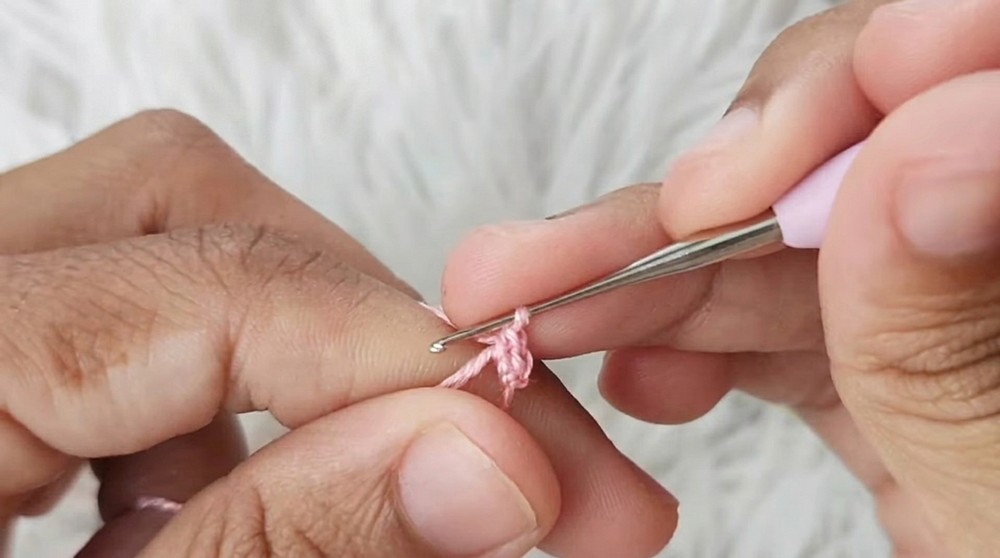
- Form a loop with the thread, leaving an 8 cm/3-inch tail. Insert hook through the loop, yarn over, and pull the loop through. Chain 1 to secure the loop. Work further stitches into this loop. Pull the tail to close the ring.
Finished Size
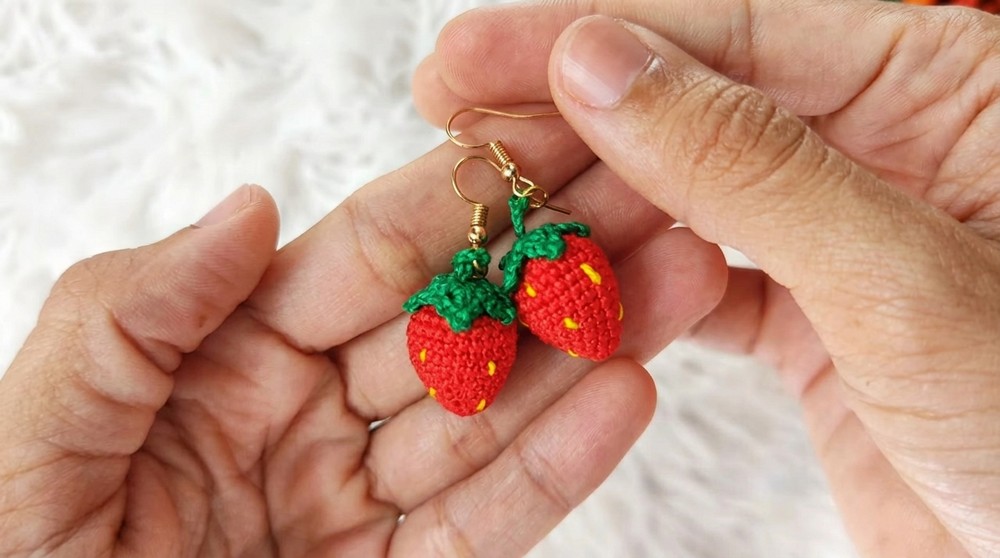
Each finished earring measures approximately 1.5–2 inches in height, with a base diameter of about 1.25 inches.
Pattern Overview
This pattern is broken into three core components: the strawberry body, the leafy top, and assembly. The strawberry gets its shape through steady increases and decreases, while the leaves are quick and simple to create. You’ll finish with a polished look by applying glue and assembling the hardware.
Step-by-Step Pattern
Part 1: Crochet Strawberry Body
- Foundation (Magic Ring)
- Start with a Magic Ring (MR) using red thread.
- Inside the ring, crochet 6 single crochet (sc) stitches.
- Row 2:
- Work an increase in every stitch (2 sc per stitch). At the end of this row, you'll have 12 stitches.
- Row 3:
- Crochet 1 sc in the first stitch, then inc (2 sc in the same stitch). Continue this sequence (1 sc, 1 inc) for the row.
- By the end of the row, you'll have 18 stitches.
- Row 4:
- Crochet 2 sc in the first two stitches, followed by an increase in the next stitch. Continue the sequence (2 sc, 1 inc) for the row.
- At the end of this row, you’ll have 24 stitches.
- Row 5:
- Work 3 sc in the next three stitches, then an increase into the next stitch. Continue this sequence (3 sc, 1 inc) around the row.
- End this row with 30 stitches.
- Rows 6–8:
- Crochet 1 sc in each of the 30 stitches in these rows.
- Rows 9–10 (Decreasing):
- Row 9: Work 3 sc, 1 dec repeatedly around to reduce. By the end, you’ll have 24 stitches.
- Row 10: Work 2 sc, 1 dec for the entire row, ending with 18 stitches.
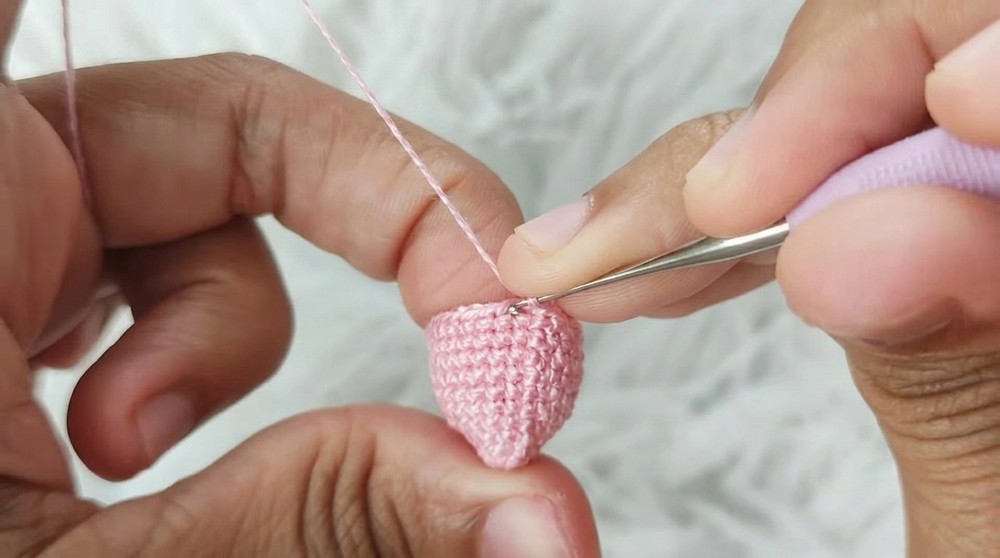
- Stuff the Strawberry:
- Use synthetic fiberfill or another suitable alternative to stuff the strawberry into a plump shape.
- Decreasing to Finish the Strawberry:
- Row 11: Work 1 sc, 1 dec around, leaving 10 stitches at the end.
- Row 12: Crochet only decrease stitches around until only 5 stitches remain.
- Close the Top:
- Cut a long yarn tail and feed it through a sewing needle. Weave the needle through the front loops of the remaining stitches, pull tight to close, and weave in the excess thread securely.
→ Congratulations! Your strawberry body is complete.
Part 2: Crochet the Leaf Topper
- Foundation (Magic Ring)
- Using green thread, create a magic ring (MR) and crochet 10 dc inside the ring.
- Row 2:
- Chain 2 ch, then crochet the following sequence to form the leaf tips:
- In every second stitch: 1 dc, 2 ch, sl st into the top loops of the dc.
- Chain 2 ch, then sl st into the next stitch. Repeat this sequence around for all stitches.
- Chain 2 ch, then crochet the following sequence to form the leaf tips:
- Finish the Leaf Topper:
- Once all the leaf tips are complete (you’ll have 5 tips), sl st into the first dc and secure. Leave a long yarn tail for assembly.
→ Now your leaves are ready to crown the strawberry.

Part 3: Assemble the Earrings
- Attach the Leaf Topper:
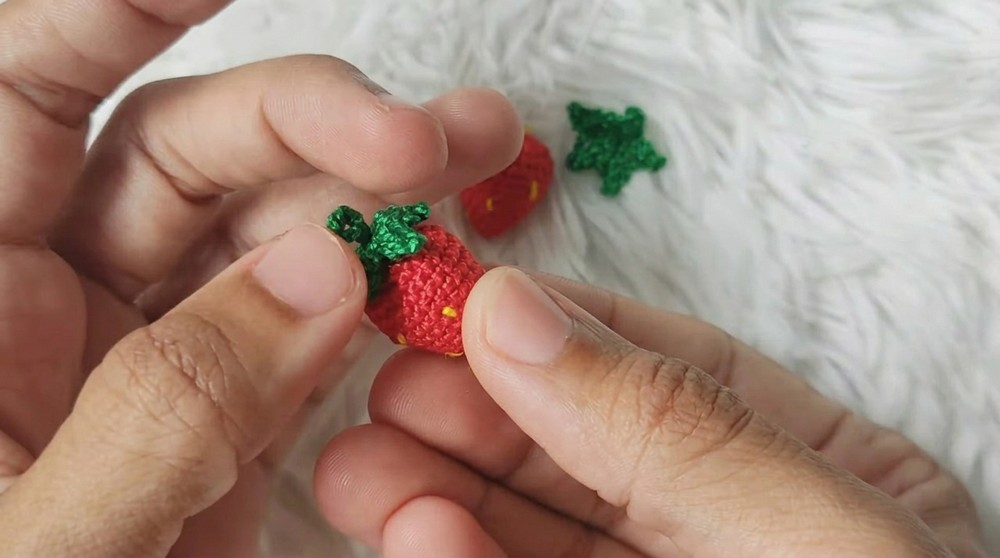
- Using the leftover tail from the leaf piece, sew the piece securely onto the top of the strawberry. Pass the thread through multiple stitches for a durable attachment, then weave in the excess.
- Add Detailing:
- Using yellow embroidery thread and a sewing needle, add tiny stitched dots around the strawberry to imitate seeds. Knot the thread at the beginning and end of your work, hiding all surplus thread neatly inside the strawberry body.
- Add Earring Findings:
- Attach a small jewelry pin or a loop into the top of the strawberry. If you don’t have a jewelry pin, create a hanging loop with yarn by chaining 6 ch. Slide the loop through the magic ring at the top of the strawberry.
- Optional Hardening:
- For extra durability, apply a mix of fabric glue and water or use crochet resin to harden the piece, especially the leaf tips. Allow it to dry completely before wearing your earrings.
→ Your crochet strawberry earrings are now assembled and ready to add a fun, fruity flair to any outfit!
What You’ll Learn
- Basic Crochet Shapes: Learn foundational techniques to create circular shapes and three-dimensional objects.
- Decorative Stitching: Practice increasing, decreasing, and adding embroidered details for visual impact.
- Jewelry Assembly: Understand how to turn small crocheted pieces into elegant accessories.
Difficulties and Solutions
Common Challenges
- Loose Thread on the Strawberry Magic Ring
- The magic ring may not close tightly, leaving a gap at the base of the strawberry.
- Solution: Pull the yarn tail firmly while keeping a finger on the base of the ring to ensure a secure closure.
- Uneven Leaf Tips
- Inconsistent tension may cause uneven leaf tips.
- Solution: Keep your tension consistent during each tip's dc-ch-st sequence. Blocking may help even out the tips.
- Challenges Securing Earring Pieces
- Attaching the components can be tricky without proper tools.
- Solution: Use jewelry pliers for precision. Alternatively, opt for thread-based loops if hardware is unavailable.
Why You’ll Love This Pattern
This crochet strawberry earring pattern is ideal for adding a playful touch to your outfit or creating heartfelt gifts. It combines precision and artistry while remaining beginner-friendly. The blend of lush green leaves and a vibrant red strawberry creates a visually stunning design that can be customized with your favorite colors.