
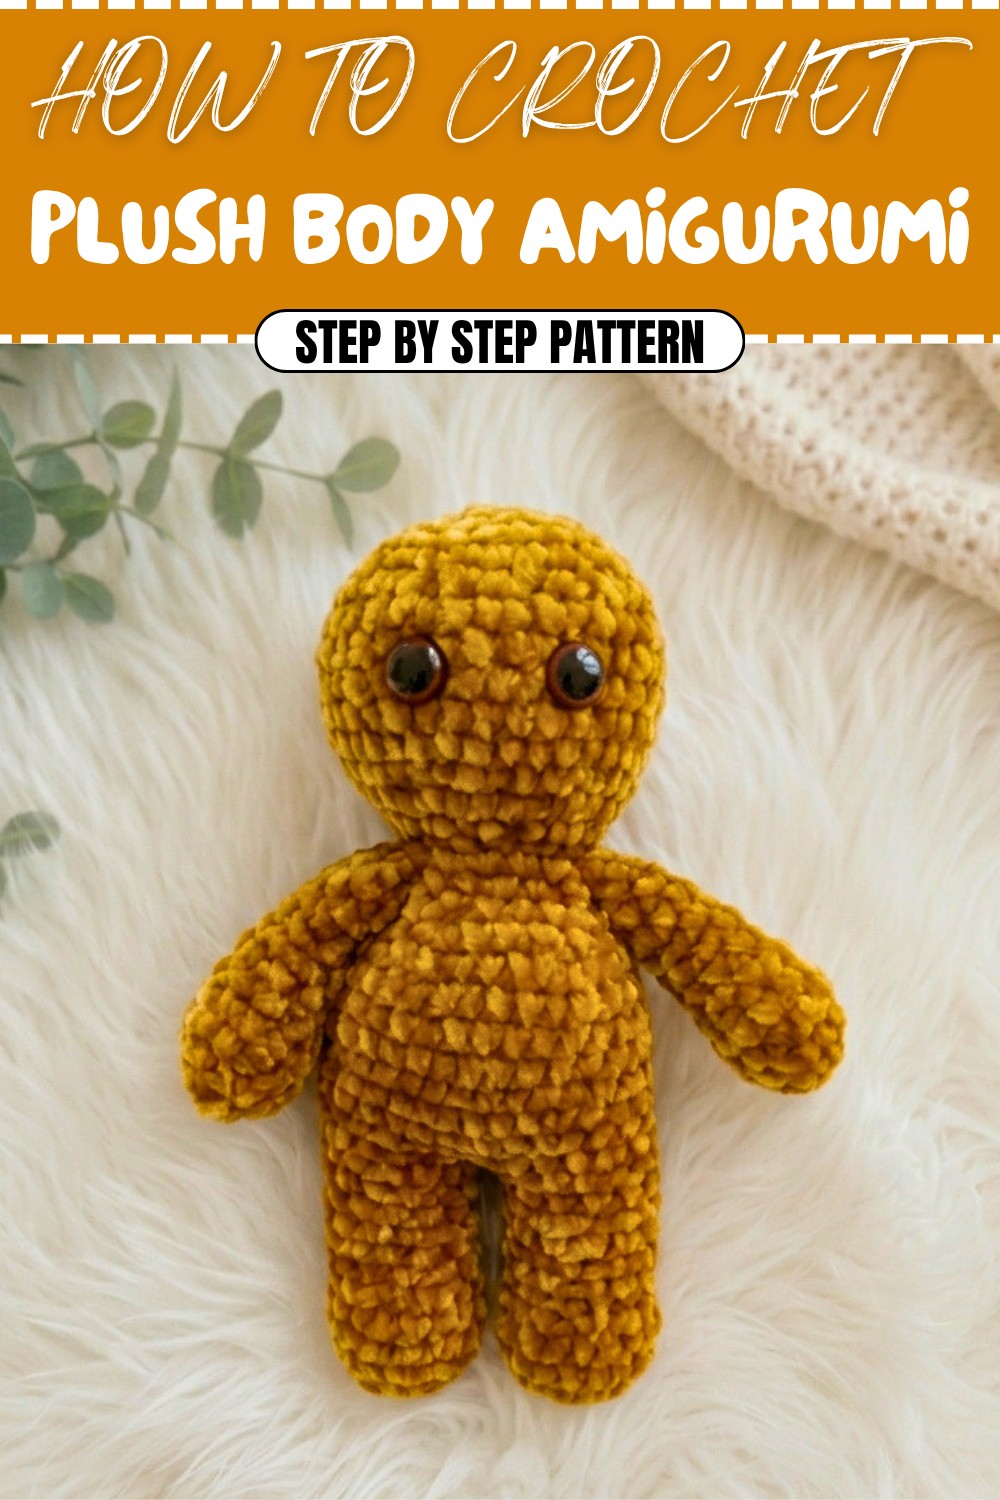
Crochet Plush Body Amigurumi Free Pattern for Soft Dolls
Master this Free Crochet Plush Body Amigurumi Pattern to create versatile stuffed animal bases with ease that's for beginners seeking step-by-step guidance.
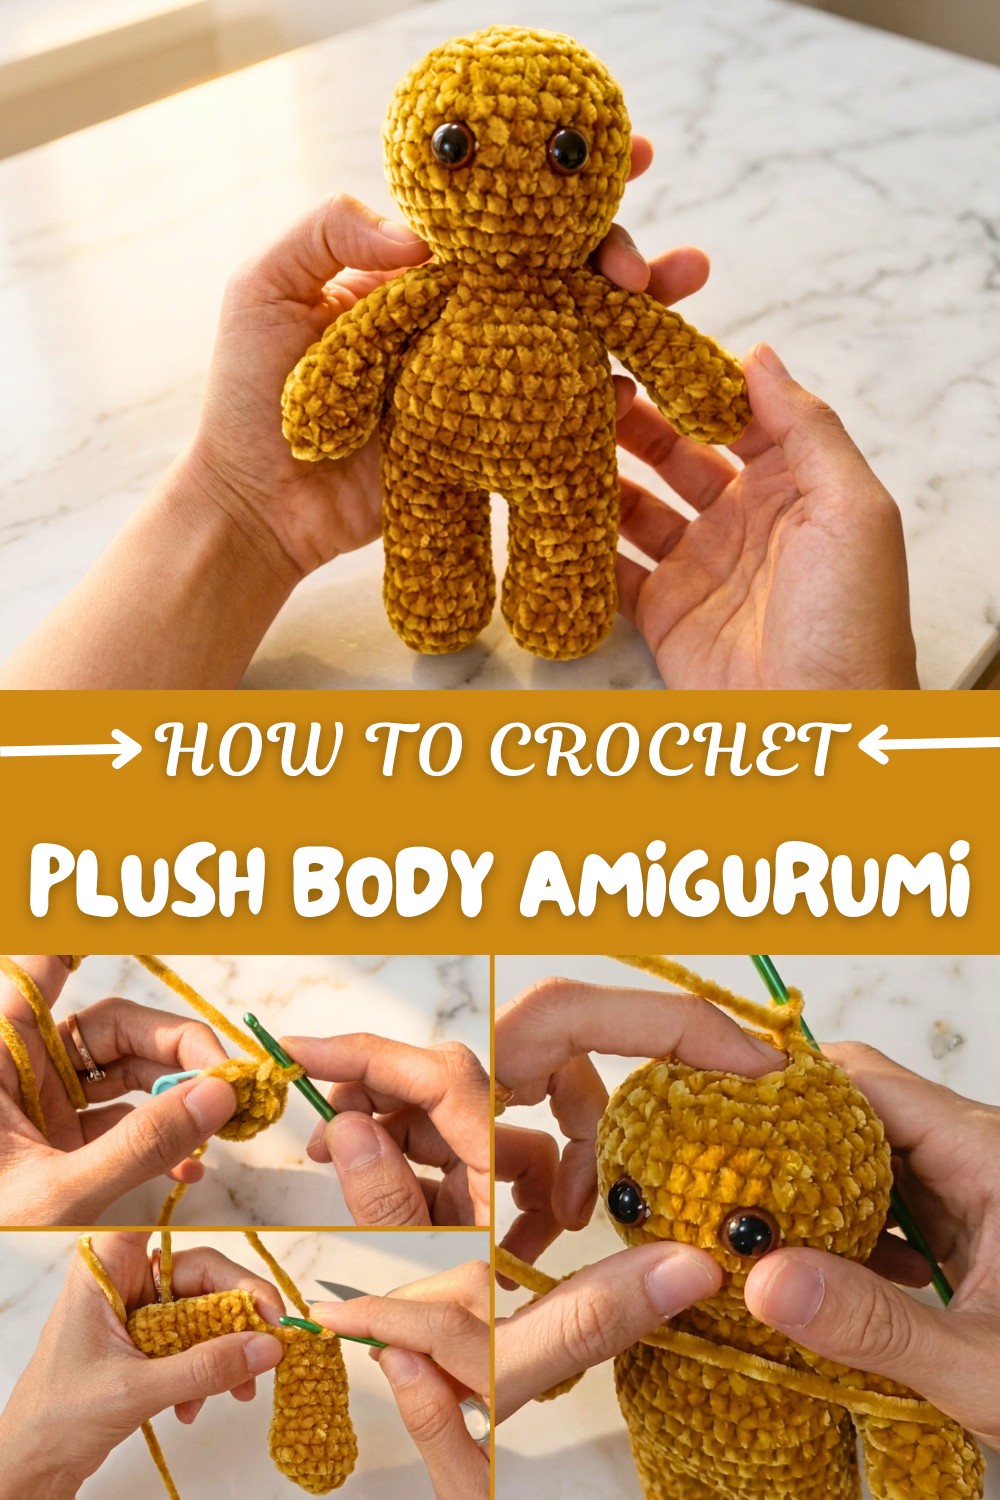
Bringing softness and versatility to your crochet collection, this plush creation forms the foundation for countless cuddly characters. The Free Crochet Plush Body Amigurumi Pattern offers step-by-step guidance on crafting a basic amigurumi body—perfect for making stuffed animals, plush dolls, or personalized toys tailored to any idea or special occasion. The finished plush body measures approximately 18 centimeters in height and features a rounded shape, gently curved arms and legs, a domed head, and securely attached safety eyes for a polished, professional finish. Made with plush Chanel velvet yarn in a classic neutral color, the final result is irresistibly soft, squishy, and perfect for hugs or display.
Free Crochet Plush Body Amigurumi Pattern Step by Step
One of the most appealing aspects of this pattern is its adaptability. The simple, streamlined silhouette serves as a blank canvas, inviting endless customization with your choice of color, accessories, or animal details. The design combines single crochet stitches worked in the round with clear, easy-to-follow shaping instructions. Increases and invisible decreases sculpt smooth curves and contours, while seamless assembly and clean joining methods assure a neat appearance throughout. Attaching the arms, legs, and securely closing the head are all demonstrated for durable long-lasting plushies, with colorwork and safety eye placement clearly explained.
Ideal for beginners yet still rewarding for experienced crocheters, this project builds essential amigurumi skills such as working with the magic ring, stuffing for structure and softness, assembling multi-part bodies, and neatly closing remaining gaps with a tapestry needle. Its modular structure means you can reuse the base body for new animal or character designs.
Whether you want to gift a lovable toy, create a custom mascot, or start your own collection of plushies, the Free Crochet Plush Body Amigurumi Pattern is a wonderful foundation project. It’s the perfect launching point for anyone eager to master plush shaping and assembly while letting their imagination guide the finishing touches.

Basic Plush Animal Body Crochet Pattern
Introduction
Welcome to this easy, beginner-friendly pattern for crafting a Basic Plush Animal Body! This versatile body base is perfect for creating a variety of plush animals or dolls. Worked from the arms and legs up, it includes simple shaping, sturdy construction, and smooth transitions for seamless finishing. Whether you're planning a bear, bunny, cat, or another favorite friend, this plush body will be your foundation. Stitches are kept minimal and straightforward—making this an ideal project for both new and experienced crocheters.
Skill Level & Terminology
- Skill Level: Beginner
- Terminology: Uses US crochet terms
- Core Techniques: Crochet in continuous rounds (spiral); basic increases and decreases; color changes are not used but can be added for custom features.
Materials & Tools
- Super bulky plush yarn (Chanel velvet recommended, or another that fits a 4mm hook)
- 4 mm crochet hook
- Scissors
- Yarn or tapestry needle
- Stitch marker
- Polyester fiberfill stuffing
- Safety eyes (12 mm diameter recommended)
Gauge
Gauge is not critical for stuffed toys, but your stitches should be tight enough so stuffing does not show through the fabric. For reference, 8 sc x 8 rounds ≈ 5 cm x 5 cm (2" x 2").
Abbreviations List
- st: stitch
- sc: single crochet
- inc: increase (2 sc in one stitch)
- dec: decrease (crochet 2 stitches together)
- sl st: slip stitch
- ch: chain
- MR: magic ring
Special Stitch Instructions
- Magic Ring (MR): Wrap yarn in a circle, insert hook, pull up a loop, and crochet required stitches into the center. Pull tail to close.
- Increase (inc): Work 2 sc in the same stitch.
- Decrease (dec): Work 2 sc together invisibly for a neater finish.
- Slip Stitch (sl st): Insert hook, yarn over, pull through both loops on hook.
- Invisible Decrease: Insert hook into front loops only of next 2 stitches, yarn over, pull through those 2 loops, yarn over, pull through both remaining loops.
The Pattern Itself
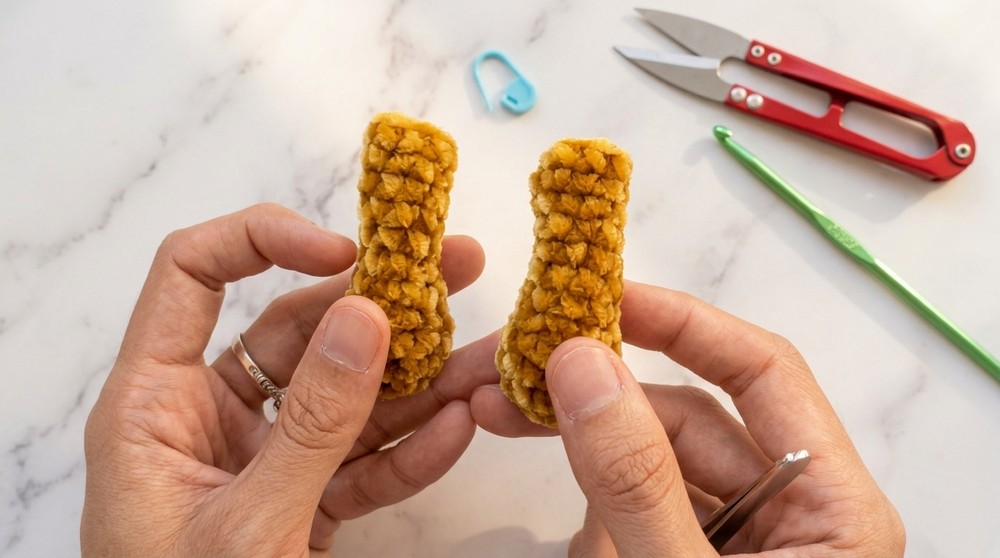
Arms (Make 2)
- With magic ring: MR, 6 sc (6 sts)
- Round 2: 6 inc (12 sts)
- Rounds 3–4: 12 sc (one sc in each st)
- Round 5: [sc, dec] repeat 4x (8 sts)
- Round 6: 8 sc
- Rounds 7–12: 8 sc in each round (6 rounds)
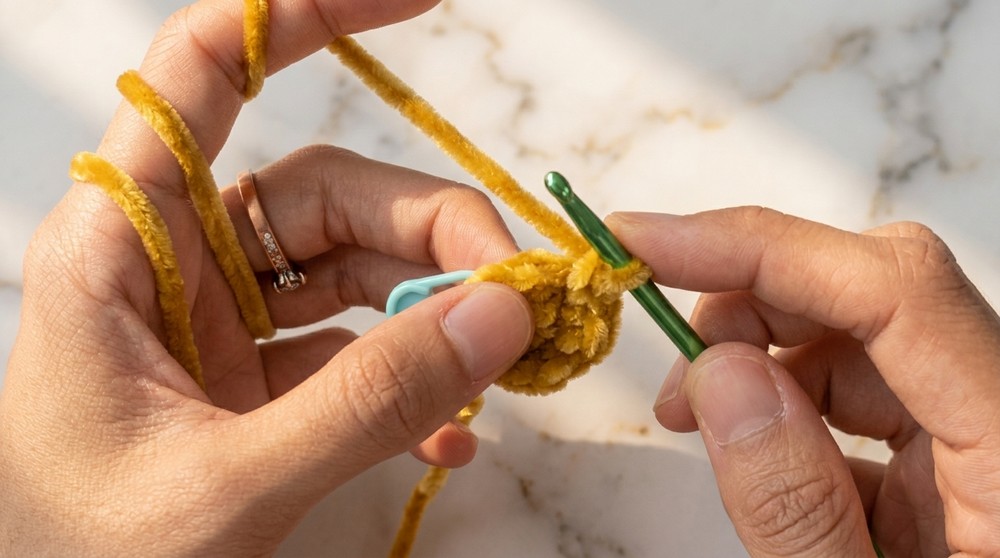
- Finish off: Sl st, ch 1, cut yarn, leaving a tail.
- Stuff lightly — only the "hand" part should be stuffed.
Note for non-pattern readers:
You begin the arm at the hand, making a small ball. The arm shaft is made by simple single crochet. Stuff only the lower part for a soft, flexible arm. Make two arms, then set aside.
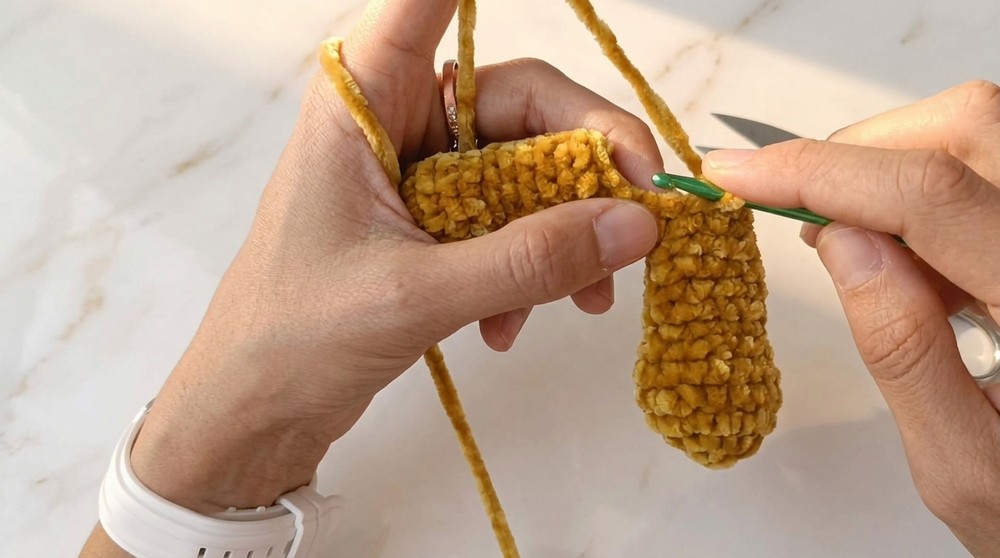
Legs (Make 2)
- With magic ring: MR, 6 sc (6 sts)
- Round 2: 6 inc (12 sts)
- Round 3: [sc, inc] repeat 6x (18 sts)
- Rounds 4–5: 18 sc in each round
- Round 6: [sc, dec] repeat 6x (12 sts)
- Rounds 7–12: 12 sc in each round (6 rounds)
- Finish off first leg as you did the arms (sl st, ch 1, cut yarn).
- On second leg, DO NOT finish off—continue to join the legs for the body.
These chunky legs start at the bottom, then taper before you join them together. Pause the pattern for leg one after the final row and continue making leg two without fastening off.
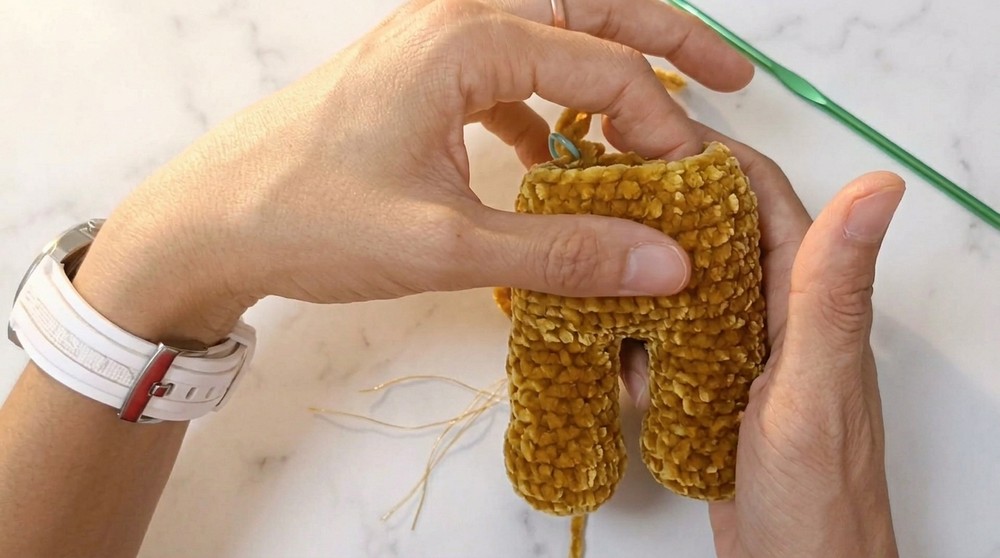
Joining Legs & Working the Body
- On 2nd leg (continuing directly):
- Ch 2.
- Join to first leg with a sc (insert hook in any st of first leg).
- Work 12 sc around leg 1, then 2 sc in the ch-space, 12 sc around leg 2, and 2 sc in ch-space. (28 sts)
- Next round: Work 28 sc (one in each st) for a full round, skipping over the join gaps.
- Rounds 14–20: 30 sc — work 7 full rounds.
You created the groin/body join by chaining between the legs and then crocheted around both legs and chain space. Now you have a round body base to build upwards.
Lower Torso & Increases
- Round 21: [sc in next 3 sts, inc] repeat 6x (36 sts)
- Rounds 22–27: 36 sc (work 6 rounds)
You strengthened and shaped the belly section with gentle increases. Work evenly for six more rounds to raise the body to shoulder height.
Decreasing for Shoulders
- Round 28: [sc in next 3 sts, dec] repeat 6x (30 sts)
- Round 29: [sc in next 2 sts, dec] repeat 6x (24 sts)
- Round 30: 24 sc
Now the body gently curves inwards toward the neck. Stuff the body and both legs at this point with fiberfill, distributing stuffing evenly to avoid lumps.
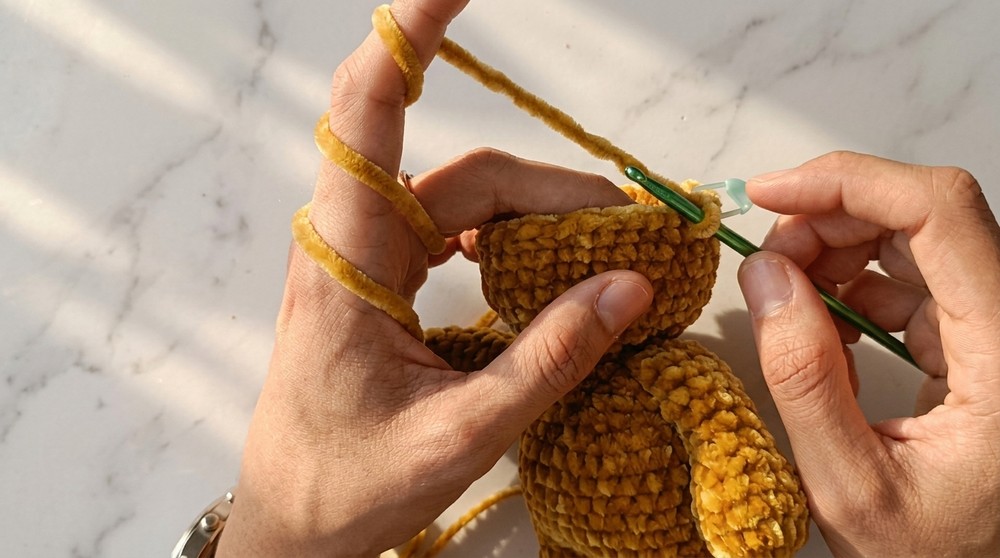
Adding Arms & Closing Upper Torso
- Hold an arm aligned at each side.
- Round 31: [sc in next 4 sts, sc through arm and body (4 arm joins each side)] repeat for both arms.
- Round 32: [sc, dec] repeat 6x (18 sts)
In this round, you join each arm by working through both arm and body stitches for 4 stitches each, then sc around the rest. You’ll have 18 sts when finished.
Head
- Round 33: [inc in each st] 18 incs (36 sts)
- Rounds 34–39: 36 sc for 6 rounds
You increased to make a sphere for the head, working evenly up to the widest point.
Head Shaping & Tapering
- Round 40: [sc in next 4 sts, dec] repeat 6x (30 sts)
- Round 41: [sc in next 3 sts, dec] repeat 6x (24 sts)
- Round 42: [sc in next 2 sts, dec] repeat 6x (18 sts)
- *Insert safety eyes between Rounds 4 and 5 of the head, evenly spaced.
- Stuff head firmly.
- Round 43: [sc, dec] repeat 6x (12 sts)
- Round 44: 6 dec (6 sts)
- Finish off: Sl st, ch 1, cut yarn, thread yarn through last 6 sts, and pull tight to cinch closed.
The head is a seamless ball, formed by initial increases, then plain rows, then decreases. Insert the safety eyes as indicated, stuff well, and finish closing securely.
Finished Size
- About 18 cm tall (7") using the recommended yarn and hook.
- Width about 9–10 cm.
Assembly & Finishing
- Weave in and hide all yarn tails with the tapestry needle.
- Use the leftover closing yarn tail to stitch closed any small gaps.
- Adjust stuffing for symmetry and firmness.
- To add a head seam: Thread needle through front loops only of last round, pull tight.
- Position and secure safety eyes before you close the head (optional: embroider or add nose, mouth, etc.).
- Your body base is ready for customization! Add ears, tails, or other features as desired.
Conclusion
You’ve completed a versatile and plush amigurumi body, ideal for creating countless animals and characters! This basic structure uses only single crochet, increases, and decreases—all worked in a neat spiral. Customize with different colors, features, or clothing. With a few modifications, you can use this body as the foundation for nearly any cute plush! Happy crocheting and enjoy your new handmade creation!
You start with the arms, make two, then the legs and join them, work upwards for the body and shape the head last. The increases and decreases give the soft plush shape. Attach eyes, stuff, and close for a perfect base for your favorite stuffed friends!